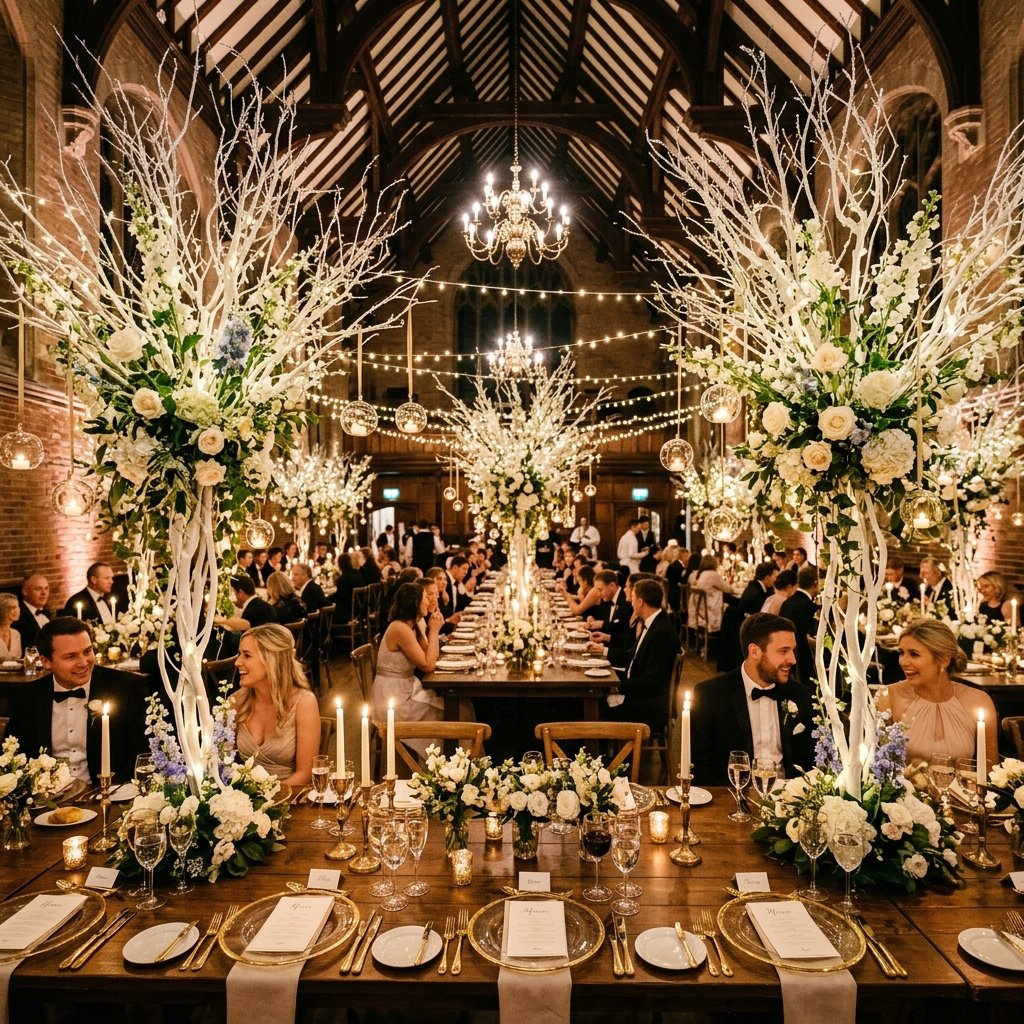

Welcome to the ultimate masterclass in high-impact, low-cost wedding design. If you have ever flipped through a luxury bridal magazine and felt your heart sink at the $300-per-table price tag for floral arrangements, this guide is your salvation. We are going to channel our inner resourcefulness to create something even more breathtaking than a standard bouquet: towering, sculptural tree branch centerpieces that command attention and define a space.
As a frugal DIYer, you know that the best materials aren’t found in a warehouse—they are found in your backyard, local parks, or after a storm. By using foraged branches, you aren’t just saving hundreds of dollars; you are creating a rugged, masculine-elegant aesthetic that feels organic and sophisticated. Whether you are aiming for a ‘Winter Wonderland’ vibe with stark white limbs or a ‘Rustic Woodland’ look with natural bark and moss, the process remains the same: hunt, prep, anchor, and embellish. Let’s get our hands dirty and turn literal yard waste into the talk of the reception.
The Hunt: Sourcing High-Quality Branches for Zero Dollars
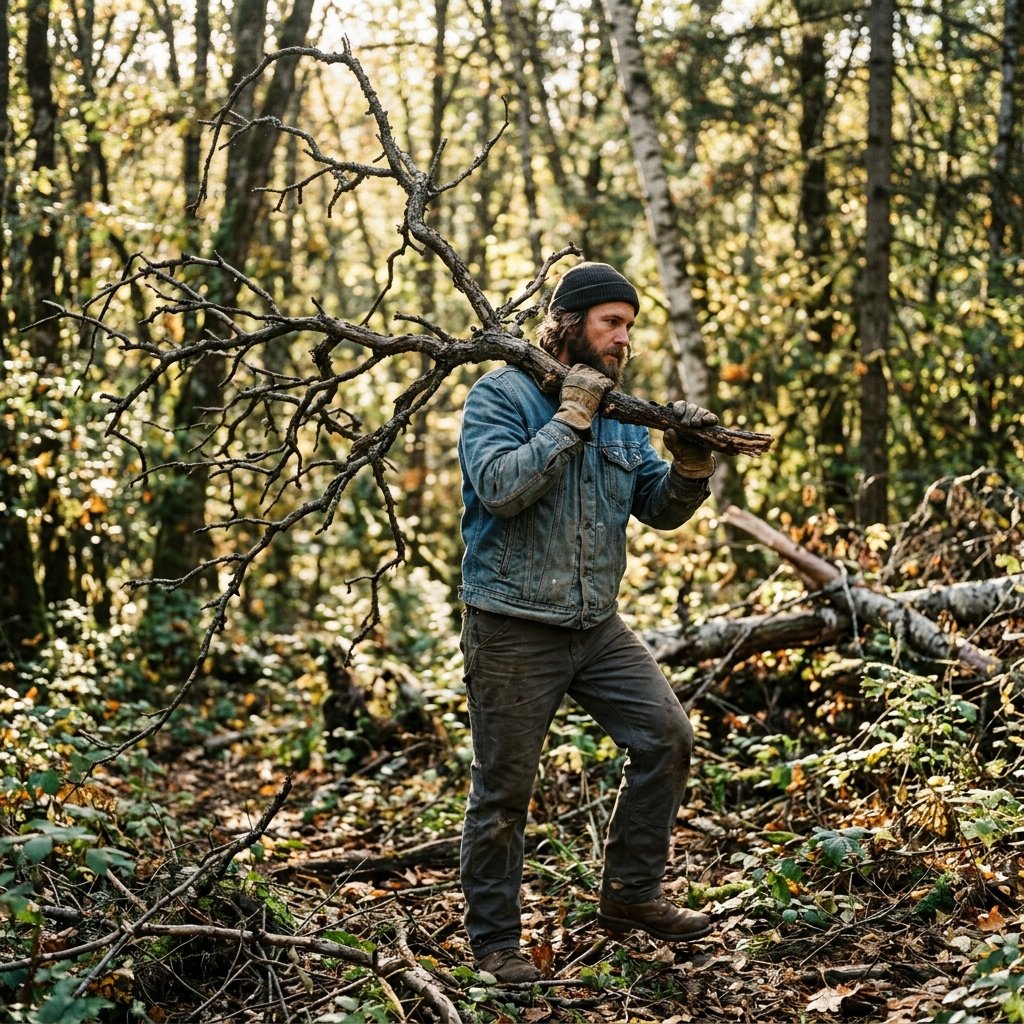
The foundation of a ‘jaw-dropping’ centerpiece is the branch itself. You aren’t looking for twigs; you are looking for architectural bones. The goal is to find branches with multiple ‘fingers’ or offshoots that create a wide, airy canopy. This provides the height needed to draw the eye upward without blocking the view of guests sitting across from each other.
Top Tree Species for Centerpieces
- Manzanita: The gold standard for weddings due to its smooth bark and intricate, twisting shape. While often expensive online, look for similar ‘gnarled’ structures in local scrub brush.
- Birch: Naturally white and peeling, perfect for a clean, modern, or rustic look.
- Willow: Curly willow provides a whimsical, flowing movement that looks incredible when draped with crystals.
- Oak or Maple: Sturdy and widely available; these provide a more ‘rugged’ and traditional forest feel.
When foraging, always look for ‘dead-fall’—branches that have already fallen to the ground. This ensures the wood is somewhat seasoned and you aren’t damaging live trees. If you are pruning from your own property, try to do so at least 4 weeks before the wedding to allow the wood to dry out. Wet wood is heavy, prone to mold, and won’t take paint or glue well.
“The best time to forage is immediately after a windstorm. Nature does the pruning for you; your job is simply to be the first one there with a pair of loppers and a trunk ready for loading.”
Preparation and Preservation: From Backyard Debris to Bridal Beauty
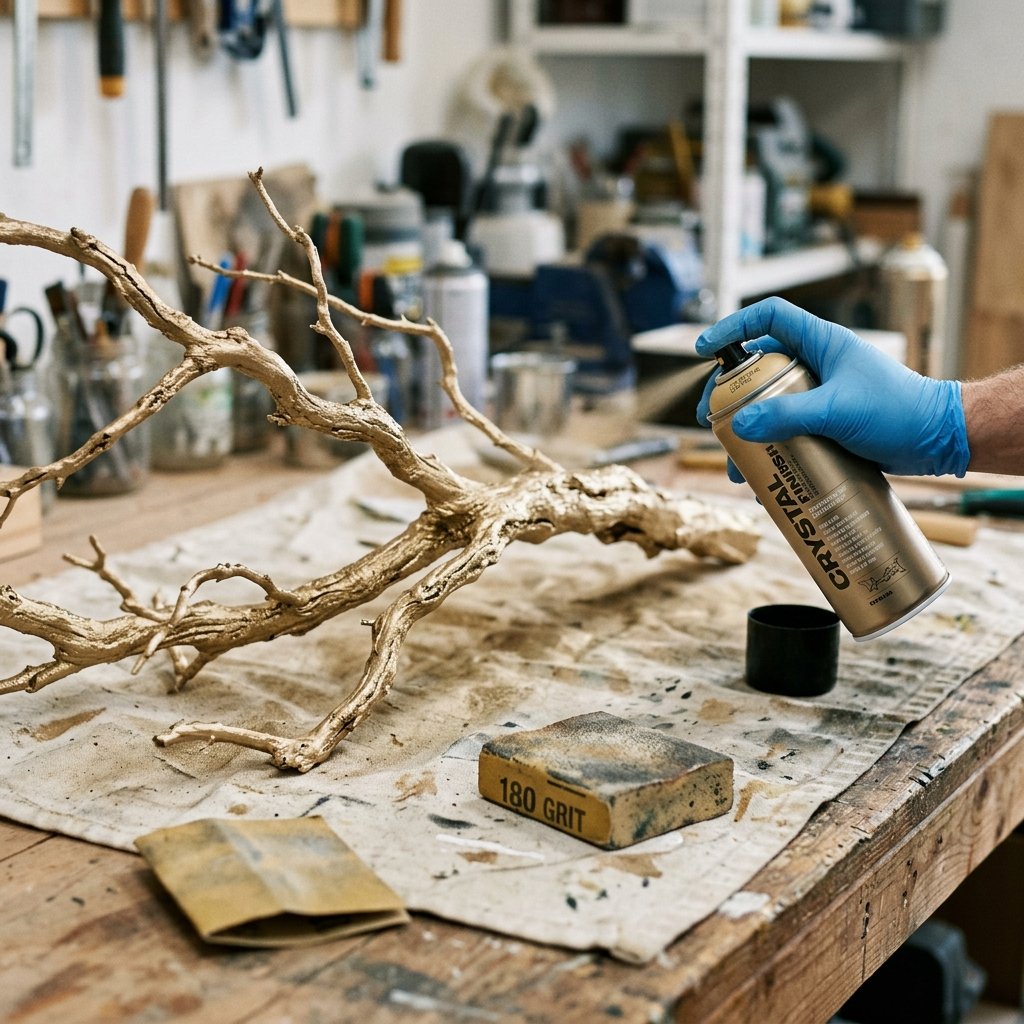
Raw branches are messy. To make them wedding-ready, you must strip away the ‘yard’ and keep the ‘art.’ This stage is where your resourcefulness pays off, turning a free stick into a polished decor element. Start by scrubbing each branch with a stiff brush and a mild bleach-water solution (1 part bleach to 10 parts water). This kills any lingering insects and prevents the wood from smelling like damp earth inside a ballroom.
The Finishing Touch: Natural vs. Painted
Depending on your wedding theme, you have two primary paths for finishing your wood:
- The Natural Look: Sand down any rough patches or sharp points. Apply a light coat of clear matte sealant to preserve the bark’s color without making it look ‘plastic.’
- The High-End Metallic: Use a metallic spray paint (Gold, Silver, or Champagne). The trick is to apply 3 thin coats rather than one thick one to avoid drips and ensure even coverage in the nooks and crannies.
| Material Source | Retail Price (Per Branch) | DIY Cost | Savings (15 Tables) |
|---|---|---|---|
| Professional Floral Supply | $35.00 – $65.00 | $0.00 | $525 – $975 |
| High-End Boutique | $80.00+ | $0.00 | $1,200+ |
The Secret to Stability: Anchoring Your Masterpiece
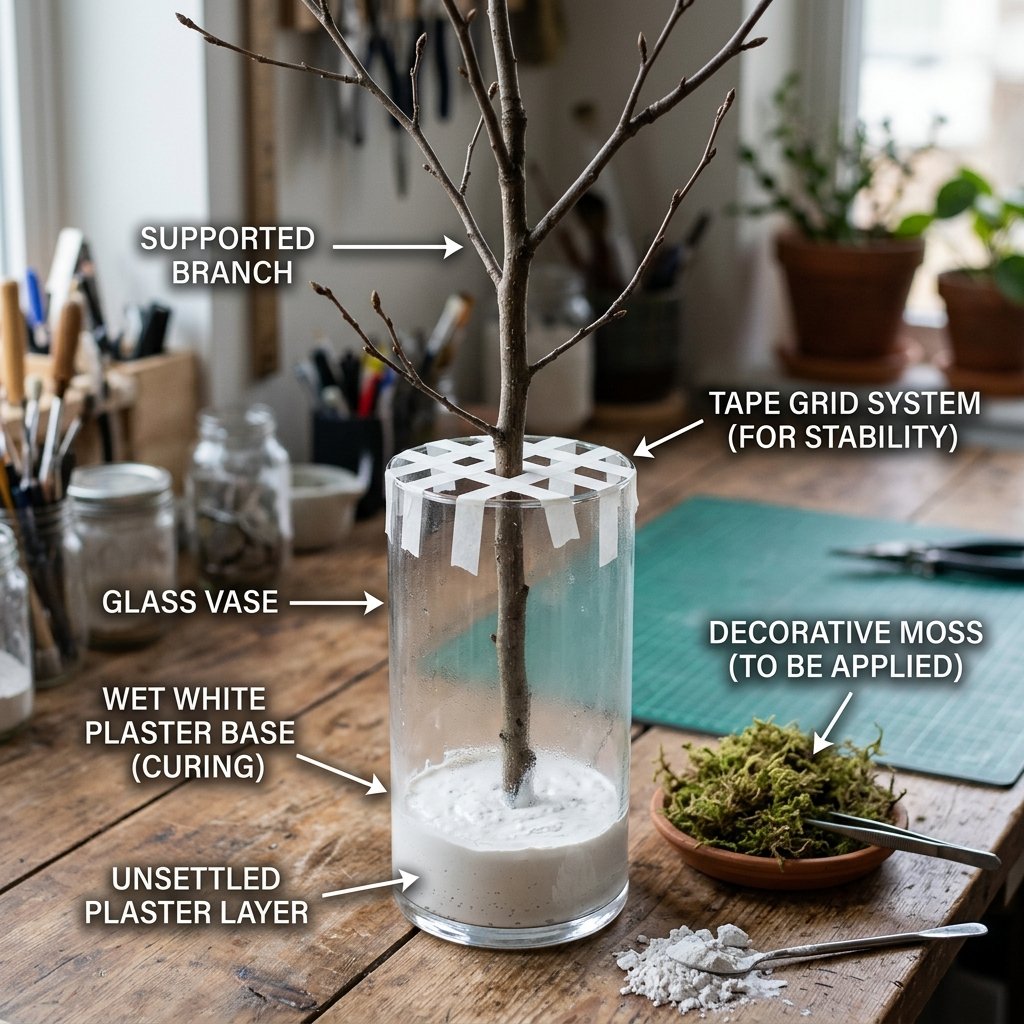
A 4-foot branch is a giant lever. If it isn’t anchored properly, a slight bump of the table will send it crashing into a guest’s dinner. To achieve a professional, ‘straight-up’ look, you need a heavy, reliable base. Forget flimsy floral foam; we are going for the Plaster of Paris method.
Step-by-Step Anchoring Process
- Choose your vessel: Thrifted glass vases, wooden crates, or even large tin cans (wrapped in fabric) work perfectly.
- Mix the Plaster: Mix your Plaster of Paris to a thick, pancake-batter consistency.
- Set the Branch: Hold the branch in the center of your vessel. Pour the plaster in, leaving about 2 inches of space at the top for decorative filler.
- The Brace: Use painter’s tape to create a ‘grid’ across the top of the vase to hold the branch perfectly vertical while the plaster sets (usually 20-30 minutes).
- Hide the Base: Once dry, cover the hard plaster with Spanish moss, river rocks, or faux rose petals.
“Weight is your friend. A stable centerpiece is a safe centerpiece. Ensure your base weighs at least 2-3 pounds for every 3 feet of branch height.”
The Glow-Up: Embellishing for Maximum Impact

Now that you have a stable, beautiful structure, it’s time to add the ‘jaw-dropping’ elements. Because the branches provide the volume, you only need a few high-quality accents to make the arrangement look like it cost thousands of dollars. This is where you can tailor the look to your specific wedding style.
Budget-Friendly Embellishment Ideas
- Hanging Glass Orbs: Use fishing line to hang small glass tea light holders. The ‘floating’ light effect is magical at night.
- Crystal Garlands: Draping acrylic crystals (much cheaper than glass) catches the light and adds a touch of ‘glam.’
- Paper Flowers: For a crafty, whimsical look, use old book pages or sheet music to fold small origami flowers and hot glue them to the tips of the branches.
- Fairy Lights: Use copper-wire LED strings. Wrap them tightly around the main trunk and let them sprawl out into the smaller twigs for a 100% ethereal glow.
| Embellishment Type | Quantity per Table | Est. Cost (Dollar Store) |
|---|---|---|
| Glass Tea Light Orbs | 3 – 5 | $3.75 |
| LED Fairy Lights | 1 String | $1.25 |
| Spanish Moss Filler | 1 Handful | $0.50 |
Logistics and Setup: Moving Mountains (of Wood)
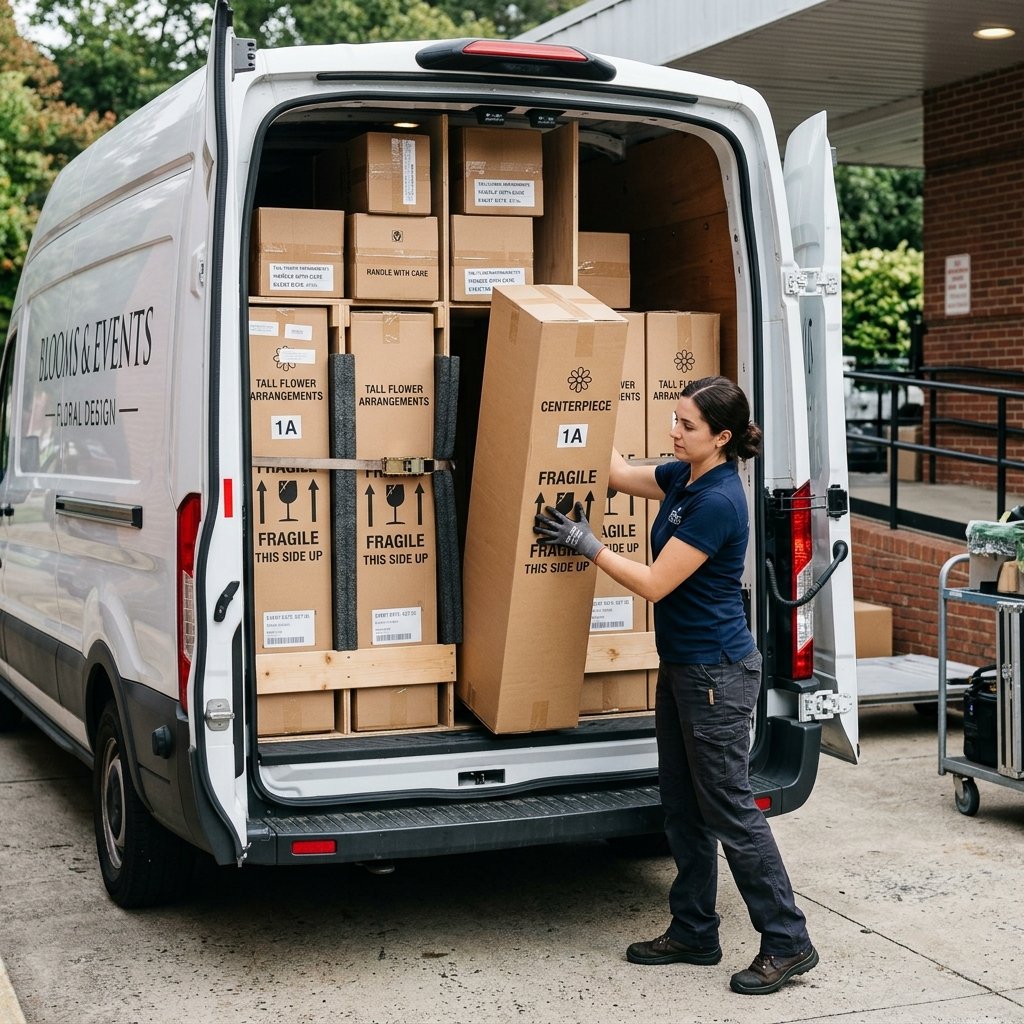
One challenge with tall centerpieces is transport. You cannot simply throw these in the back of a sedan. Planning your logistics is the final hurdle in your DIY journey. If your branches are over 3 feet tall, consider a multi-stage assembly.
Transport Tips for the Savvy Bride/Groom
- The Box Method: Use tall wardrobe boxes from a moving company to stand the centerpieces upright during transport. Secure the bases with sandbags or heavy weights so they don’t slide.
- On-Site Embellishment: Never hang your glass orbs or crystals before transport. Pack the ‘naked’ branches and add the delicate hanging elements once the tables are in their final position at the venue.
- Height Check: Ensure your branches don’t interfere with the venue’s ceiling fans or low-hanging chandeliers. A quick 5-minute walk-through of the venue with a measuring tape is a lifesaver.
By handling the assembly yourself, you avoid the ‘setup fees’ that florists typically charge, which can range from $200 to $500 depending on the complexity of the installation.
Conclusion
Creating your own tall wedding centerpieces from tree branches is more than just a budget-saving tactic—it is a statement of creativity and resourcefulness. You have taken something discarded by nature and transformed it into a focal point of one of the most important days of your life. By following the hunt, prep, anchor, and embellish method, you’ve achieved a high-end, masculine-elegant aesthetic for nearly zero cost.
Remember, the beauty of this project lies in its imperfection. No two branches are the same, and that organic variety is exactly what makes your wedding decor feel curated and expensive. Now, take that $1,000 you just saved and put it toward your honeymoon or your first home. You’ve earned it!

Makenzie is the founder and lead writer at MoneyHackTips.com — a personal finance blog dedicated to delivering street-smart financial wisdom for real people on real budgets. With 300+ published articles covering everything from debt management to investing fundamentals, Makenzie’s mission is to make every dollar work harder. When not writing about money hacks, Makenzie is testing frugal living strategies, optimizing side hustles, and helping readers build financial freedom from scratch.