Let’s be real for a second. You love your dog more than anything, but that monthly trip to the groomer? It feels like you’re setting a pile of cash on fire. A cute haircut, a nail trim, and a bath can easily run you $80, $100, or even more, depending on your dog’s size and floof-level. If you’re trying to get your financial life in order, that’s a massive expense that adds up fast.
But the thought of taking clippers and scissors to your beloved furball is, well, terrifying. What if you mess up? What if you hurt them? What if they look like a half-plucked chicken? I get it. That’s why this isn’t just another grooming guide. This is the Scaredy-Cat’s Guide. It’s for every person who has ever stood in the pet aisle, stared at the grooming tools, and walked away in fear. We’re going to break it down, step-by-step, to show you how you can confidently groom your dog at home, save a boatload of money (we’re talking over $1,200 a year), and actually turn it into a positive bonding experience. Ready to fire your groomer and pocket the cash? Let’s do this.
The Real Cost of ‘Cute’: Why Professional Grooming Breaks the Bank
Before we dive into the ‘how,’ let’s talk about the ‘why.’ Understanding just how much money is flying out of your wallet is the ultimate motivation to learn a new skill. A single professional grooming session isn’t just a one-time cost; it’s a recurring subscription for your dog’s haircut. And the price can be shocking.
For a small-to-medium-sized dog, a basic groom (bath, haircut, nail trim, ear cleaning) typically starts around $70-$90. For larger or long-haired breeds, you’re easily looking at $100-$150 per visit. If your dog needs grooming every 6-8 weeks, the annual cost becomes staggering. Let’s do some quick, painful math: $100 per visit x 6 times a year = $600. If your dog needs more frequent trims, say every 6 weeks, that’s almost 9 times a year, pushing your total to $900! And that’s a conservative estimate.
Now, let’s compare that to a one-time investment in a home grooming kit. You can get all the essential, beginner-friendly tools for less than the cost of two professional grooms. The savings aren’t just a few bucks; they are massive and immediate. Check out this breakdown:
| Item / Service | Professional Grooming (Annual Cost) | DIY Home Grooming (Annual Cost) |
|---|---|---|
| Grooming Sessions (8x per year @ $100 avg.) | $800.00 | $0.00 |
| One-Time Tool Investment (Clippers, Brushes, etc.) | N/A | $150.00 (First year only) |
| Supplies (Shampoo, etc.) | Included in price | $30.00 |
| Total Year 1 Cost | $800.00 | $180.00 |
| Total Year 1 Savings | – | $620.00 |
| Total Year 2 Cost (No new tools) | $800.00 | $30.00 |
| Total Year 2 Savings | – | $770.00 |
Looking at the numbers, it’s a no-brainer. The initial investment pays for itself after just two missed appointments. From there on out, you’re practically getting paid to spend quality time with your dog. That $600-$800 you save every year can go toward debt, an emergency fund, or a well-deserved vacation. That’s the power of frugal hacking.
Gearing Up: Your Frugal Dog Grooming Starter Kit
Okay, you’re convinced. But what do you actually need? Walking into a pet store can be overwhelming, with a million different gadgets promising a show-dog finish. Forget all that. We’re building a practical, budget-friendly starter kit. Your goal is a clean, comfortable dog, not a Westminster champion.
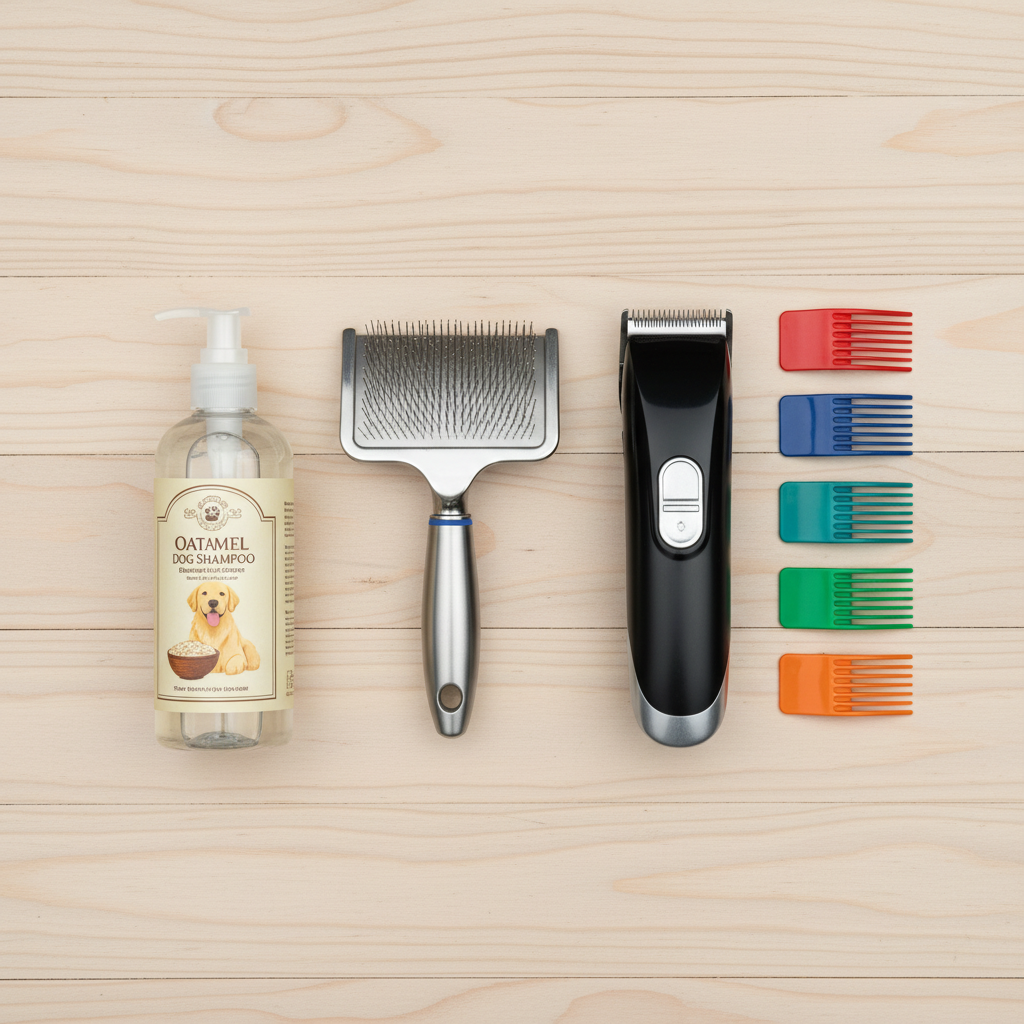
The Must-Haves:
- A Good Brush and Comb: This is your #1 tool. The type depends on your dog’s coat. A slicker brush works for most fluffy or long-haired dogs to remove tangles. A de-shedding tool (like a Furminator, or a cheaper generic version) is a lifesaver for heavy shedders. A simple metal greyhound comb is great for finding hidden knots.
- Dog-Specific Shampoo: Don’t use human shampoo! A dog’s skin has a different pH balance. A simple oatmeal-based shampoo is gentle, effective, and won’t break the bank.
- Nail Clippers or a Grinder: This is a major source of anxiety for most owners. There are two main types: scissor-style clippers (great for larger dogs) and guillotine-style (better for smaller dogs). A nail grinder is an amazing alternative for nervous beginners. It files the nail down slowly, making it much harder to hit the sensitive ‘quick’. They cost a bit more upfront (around $30) but the peace of mind is priceless.
- Beginner-Friendly Electric Clippers: This is your biggest investment, so choose wisely. You don’t need a $300 professional set. Look for a cordless, quiet model designed for home use. Brands like Wahl or Andis make reliable home-use kits that come with different guard combs for around $50-$70. The most important feature for a scaredy-cat (and a scaredy-dog) is a quiet motor.
- Styptic Powder: This is your safety net for nail trimming. If you accidentally clip the quick and it starts to bleed, a little dab of this powder will stop it instantly. Keep it nearby, and you’ll feel ten times more confident.
- Lots of High-Value Treats: This is a non-negotiable part of your kit. The goal is to make grooming a positive experience. Peanut butter, small pieces of cheese, or their favorite training treats will help your dog associate grooming with good things.
That’s it. You can get this entire kit for around $150, maybe less if you find a good deal online. Remember, you’re replacing an $800+ annual expense. This gear will pay for itself in two months.
The Main Event: Your Step-by-Step Grooming Guide for Scaredy-Cats
Alright, deep breath. You have your tools, you have your treats, and you have your dog. It’s time. The key here is to break the process into small, manageable chunks. Don’t try to do everything perfectly on your first go. The goal is progress, not perfection.
-
Step 1: The Prep Sesh – Brush, De-tangle, and Chill.
Never, ever try to bathe or clip a matted dog. Water tightens mats and makes them impossible to remove without shaving. Before anyone gets wet, give your dog a thorough brushing. Use the comb to find any hidden knots. Work on them gently. If you find a serious mat, your best bet is to carefully shave it out with the clippers (without a guard). Make this session short and positive, with lots of praise and treats.
-
Step 2: Bath Time without the Battle.
Put a non-slip mat in the tub to make your dog feel more secure. Use lukewarm water—not too hot, not too cold. Keep the mood light and fun. Lather them up with the dog shampoo, avoiding their eyes and ears. A great hack is to put a big smear of peanut butter on the tub wall for them to lick while you scrub. It’s a fantastic distraction! Rinse thoroughly, as leftover soap can irritate their skin. Squeeze out excess water and towel dry as much as possible.
-
Step 3: The Nail Trim – You Can Do This!
This is peak fear territory, but you’re prepared. If you’re using a grinder, just turn it on and let your dog get used to the sound first. Gently touch it to their nail for a second, then treat. Repeat. Slowly work your way up to grinding a tiny bit off each nail. If using clippers, only take off the very tip. It’s better to take too little than too much. Have your styptic powder open and ready just in case. Your confidence (or lack thereof) travels right down the leash. Stay calm, and your dog will be calmer too.
-
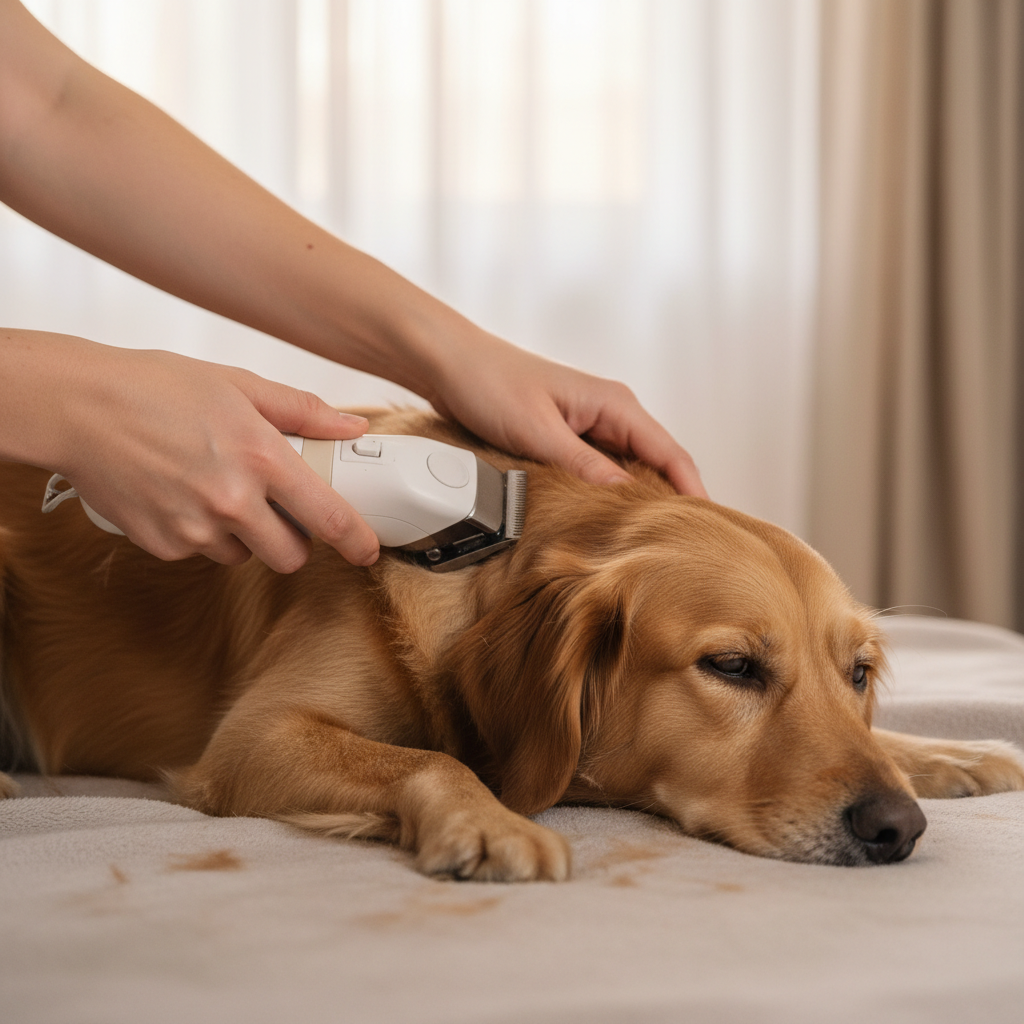
Step 4: The Haircut – Start Slow, Stay Safe.
If your dog is still damp, use a hairdryer on a low, cool setting to finish drying them before clipping. Make sure the clippers have the longest guard comb on them to start. You can always go shorter, but you can’t put hair back on. Let your dog sniff and investigate the clippers while they are off, then on. Start clipping on a large, easy area like their back, always moving in the direction the hair grows. Use your other hand to pull the skin taut to prevent nicks. For sensitive areas like the face, paws, and sanitary areas, use blunt-nosed scissors or just the corner of your clippers very, very carefully. On your first try, just aim for a simple ‘puppy cut’—one length all over. Don’t worry about perfection.
Key Rule: Your dog’s safety and comfort come before a perfect haircut. A slightly uneven trim is better than a stressed-out pup or an accidental injury. Take lots of breaks and hand out treats liberally.
-
Step 5: Finishing Touches & The Victory Lap.
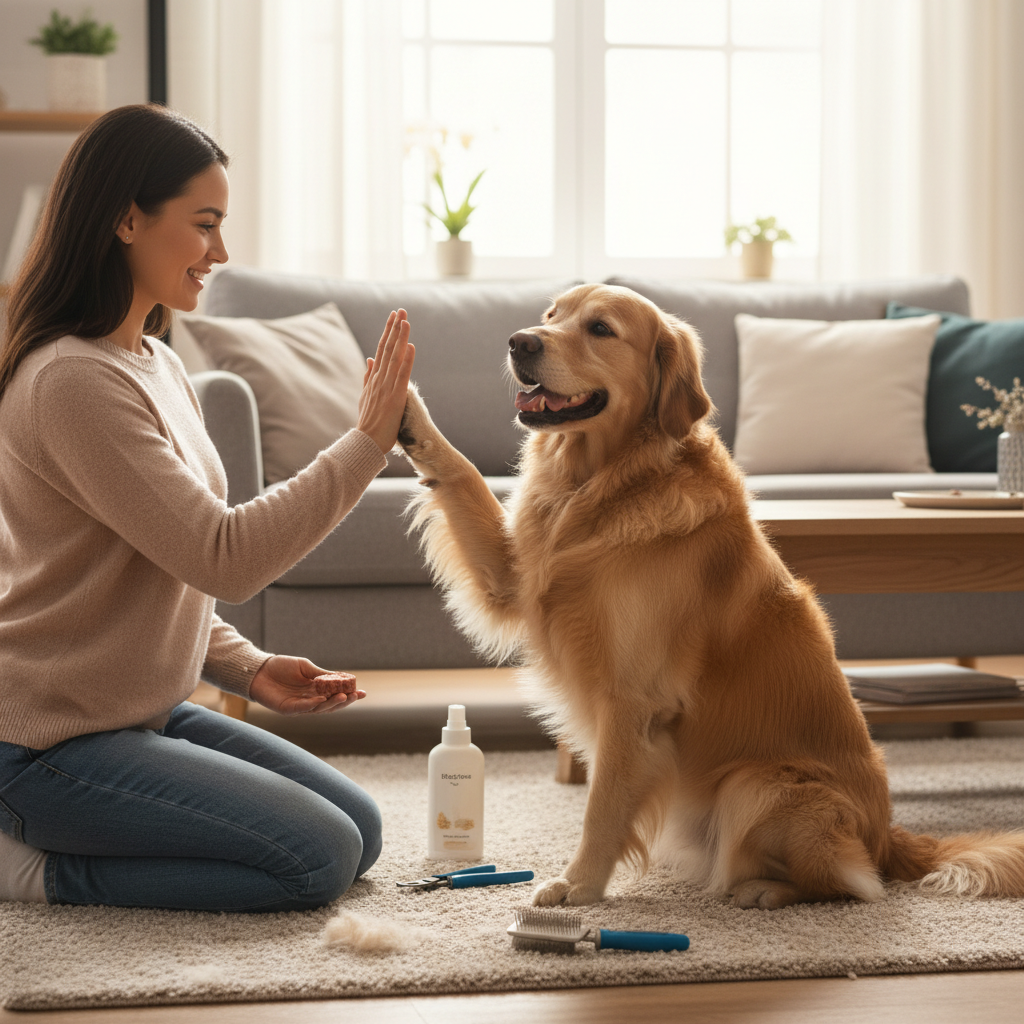
Gently wipe their ears with a cotton ball (never go deep into the canal). Give them one final brush-through to get rid of any loose hair. Then, the most important part: throw a party! Give them tons of praise, their favorite toy, and a jackpot treat. You both survived! The grooming session needs to end on the highest possible note. This is what they’ll remember for next time.
Pro Tips to Avoid a Doggie Disaster and Build Confidence
Your first few grooming sessions might be a little clumsy, and that’s 100% okay. Every pro was once a beginner. Here are some street-smart tips to keep in your back pocket to make the process smoother and safer for everyone involved.
- Watch and Learn: Before you even turn on the clippers, go to YouTube. Search for ‘grooming [your dog’s breed] at home’. Watching a video of someone grooming a dog that looks like yours is invaluable. You’ll see the techniques for their specific coat type and body shape.
- Tire Them Out First: A long walk or a vigorous game of fetch before a grooming session can make a world of difference. A tired dog is a calmer, more compliant dog. Don’t try to groom a dog that’s bursting with energy.
- Know Thy Blade: Clipper blades can get hot! Every few minutes, turn the clippers off and touch the metal blade to the inside of your wrist. If it feels hot to you, it’s definitely too hot for your dog’s skin. Let it cool down before you continue.
- The Two-Person Job: For your first few attempts, enlist a helper if you can. Having one person to gently hold and reassure the dog while the other person clips or trims can make the process go much faster and feel much safer.
- Don’t Push It: If your dog is getting really stressed out, stop. It’s better to end on a positive note and finish the haircut tomorrow than to push them past their limit and create a lifelong fear of grooming. You can always split the groom into two smaller sessions.
- Consistency is Queen: The more regularly you handle your dog’s paws, brush their fur, and touch their ears (even when you’re not grooming), the more comfortable they will be with the process. Make gentle handling a normal part of your daily interaction.
Remember, you’re not just saving money; you’re building trust. Each successful, positive grooming session strengthens your bond. It’s a skill that grows with you, and before you know it, you’ll be a confident groomer wondering why you ever paid someone else to do it.
Conclusion
Look at you! You made it through the guide, and you’re ready to take control of your dog’s grooming and your budget. The idea that once seemed terrifying is now a clear, actionable plan. It’s not about achieving a show-ring perfect cut on day one. It’s about saving a very real $100 (or more!) every single month. That’s over $1,200 a year back in your pocket—money that can crush a credit card balance, build your savings, or fund a new side hustle.
By investing a small amount upfront and dedicating a little time every month, you’re not just cutting hair; you’re cutting a major expense from your life. You’re also building an incredible bond of trust with your best friend. So go ahead, be the ‘scaredy-cat’ who tries anyway. You’ve got the knowledge, you’ve got the plan, and you’ve absolutely got this.

Makenzie is the founder and lead writer at MoneyHackTips.com — a personal finance blog dedicated to delivering street-smart financial wisdom for real people on real budgets. With 300+ published articles covering everything from debt management to investing fundamentals, Makenzie’s mission is to make every dollar work harder. When not writing about money hacks, Makenzie is testing frugal living strategies, optimizing side hustles, and helping readers build financial freedom from scratch.