The Frugal Math: DIY vs. Pet Store Prices
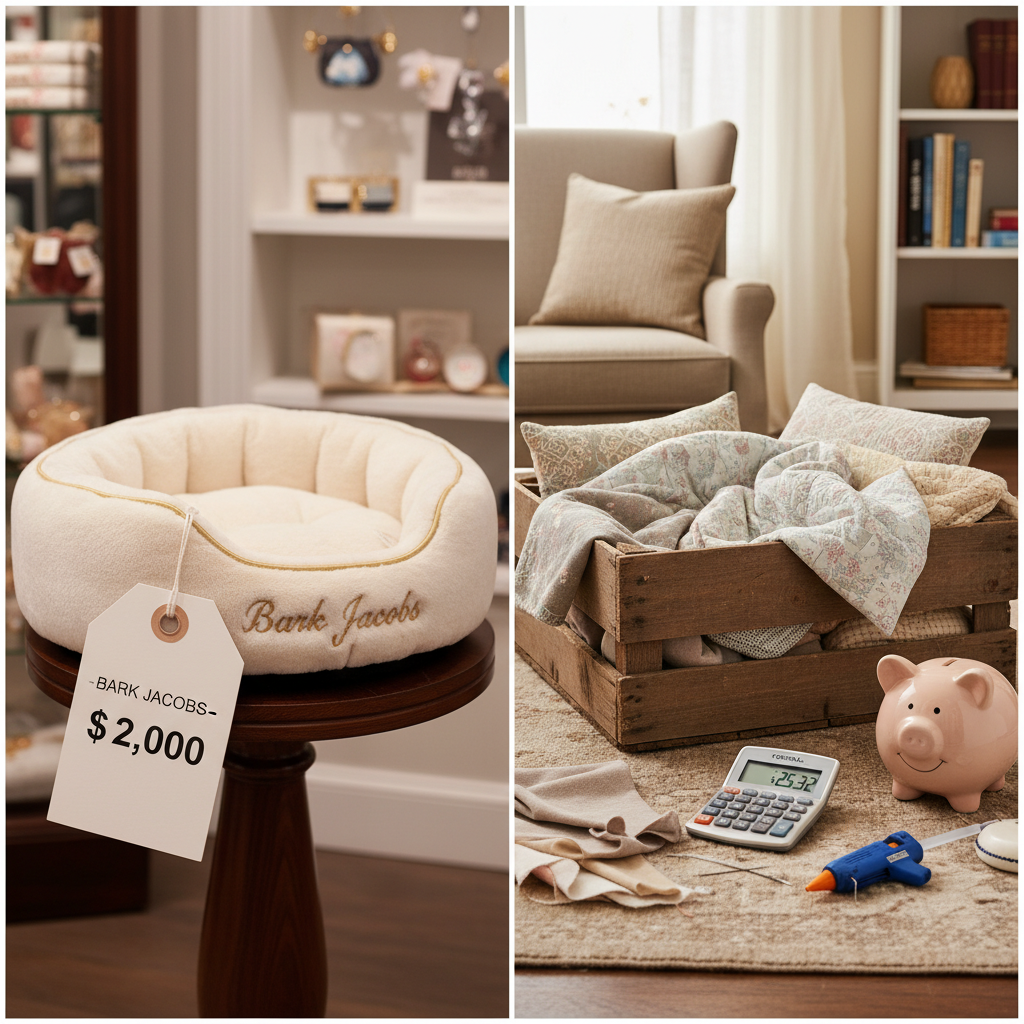
The Golden Frugal Rule of Pet Care: Never pay retail for something you can easily make from clearance materials or upcycled household goods. Protect your wallet from the emotional ‘pet parent’ tax.
Let us look at the real numbers. When you buy a store-bought bed, you are paying for manufacturing, international shipping, branding, and a massive retail markup. When you build this no-sew dog bed, you are paying exclusively for raw, discounted materials and using your own two hands to create the value. Here is the cost breakdown that proves why this DIY hack is a total game-changer for your monthly budget.
| Bed Type | Average Cost | Lifespan & Washability |
|---|---|---|
| Big Box Pet Store Bed | $60.00 | Hard to wash, stuffing clumps easily after a few months |
| Boutique Designer Bed | $120.00 | Removable cover, but expensive to replace when torn |
| Our DIY No-Sew Bed | $8.50 | 100% Machine washable, endlessly customizable, lasts years |
As you can see, the savings are massive. By choosing the DIY route, you are keeping over $50 to $110 in your pocket. That is real money. If you have multiple dogs, those savings multiply instantly. Imagine saving $200 just by spending an afternoon doing a fun craft project. That is the kind of street-smart financial hacking that accelerates your path to financial freedom.
The Supply List: Securing Your Materials for Under $10

1. Two Pieces of Fleece Fabric
You will need two pieces of fleece. For a medium-sized dog, a yard and a half of each pattern is usually plenty. Frugal Hack: Go to your local craft store and head straight to the clearance section. Better yet, check out thrift stores for large fleece blankets that you can cut up. If you buy new, always use a digital coupon on your phone—most major craft stores offer 40% to 50% off a single item every single day. You should be able to get both pieces of fleece for around $6.00 to $8.00 total.
2. A Good Pair of Fabric Scissors
Do not try to use the dull scissors from your kitchen junk drawer. You need a sharp pair to cut clean lines in the fleece. If you do not have fabric scissors, do not go buy a new pair for $20! Borrow some from a friend, a neighbor, or check your local Buy Nothing group on Facebook.
3. The Secret Stuffing (Cost: $0)
Here is where the real street-smart upcycling comes in. Do not buy expensive poly-fill stuffing from the craft store.
Scam Warning: Craft stores sell bags of ‘premium pet bed stuffing’ for $15 or more. It is literally the exact same material found in cheap pillows. Avoid this trap and keep your money!
Instead, we are going to use upcycled materials from your own house. Old pillows that have gone flat, worn-out towels, or even your old t-shirts and hoodies. This is the ultimate zero-cost hack that makes this project incredibly budget-friendly.
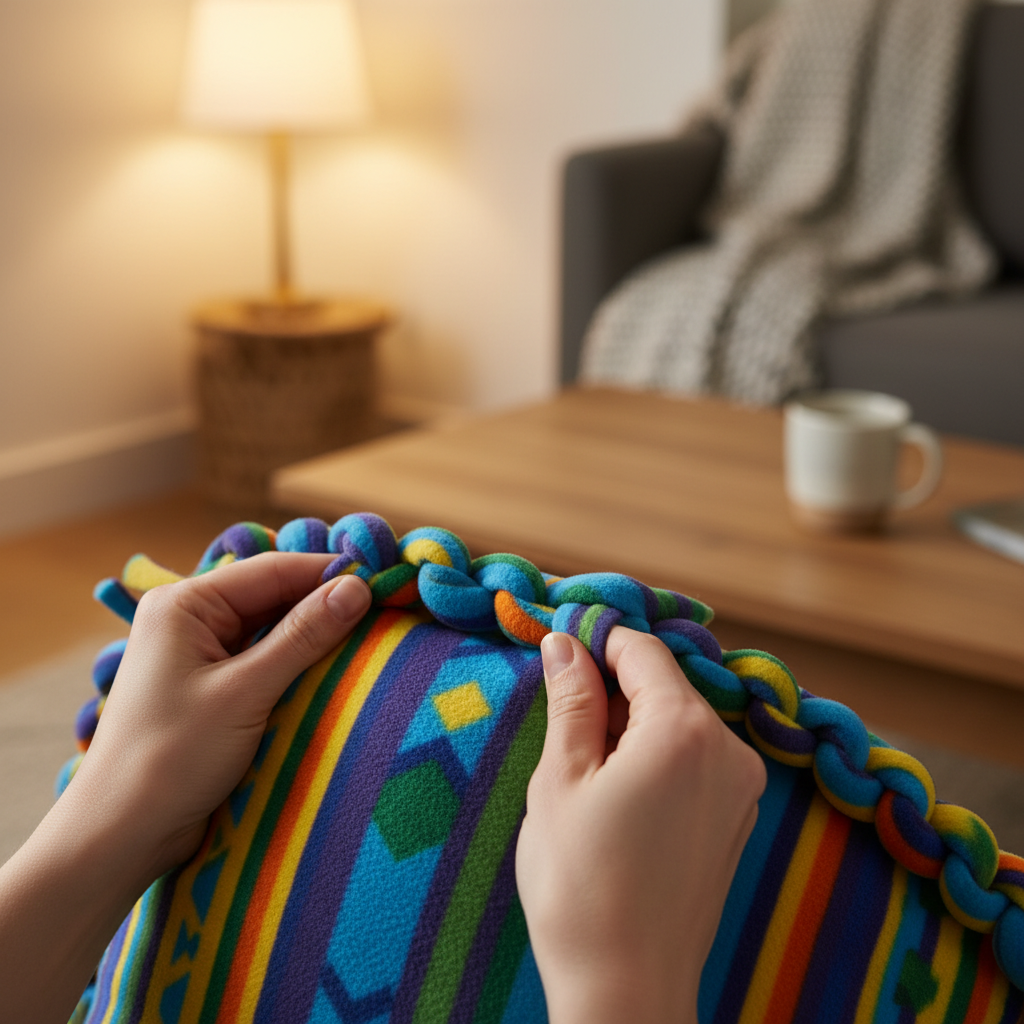
Step-by-Step Frugal Tutorial: Building the Bed
- Measure and Cut Your Fabric: Lay your two pieces of fleece flat on the ground, one directly on top of the other. The right sides (the most colorful or softest sides) should be facing outward. Place your dog’s old bed, or a folded blanket, in the center to gauge the size you need. You want to leave about 5 to 6 inches of extra fabric around the entire perimeter. Trim off any excess so you have two identical rectangles or squares.
- Cut Out the Corners: To make the tying process work seamlessly, you need to remove the corners. Cut a 5-inch by 5-inch square out of all four corners of your layered fabric. This prevents the corners from bunching up into an uncomfortable lump and makes the bed lay perfectly flat on the floor.
- Cut the Fringe: Now, go around the entire edge of the fabric and cut strips that are about 5 inches deep and 1 inch wide. Make sure you are cutting through both the top and bottom layers of fleece at the exact same time so the strips match up perfectly. It does not have to be mathematically perfect—just eyeball it!
- Start Tying the Knots: This is the fun part. Take a top strip and its matching bottom strip, and tie them together in a tight double knot. Go all the way around the bed, but STOP when you have tied about three-quarters of the way around. You must leave a large opening to stuff the bed!
- Stuff the Bed: Take your zero-cost stuffing—those old pillows, towels, and t-shirts—and push them into the opening. Make sure to push the stuffing all the way deep into the corners so the bed is evenly plush. Do not overstuff it, or the knots might pull too tightly, but make it comfortable enough to cushion your pup’s joints.
- Seal It Up: Once you are happy with the fluffiness, tie the remaining strips together to close the gap. Fluff the bed a few times with your hands to distribute the upcycled materials evenly, and boom! You are completely done.
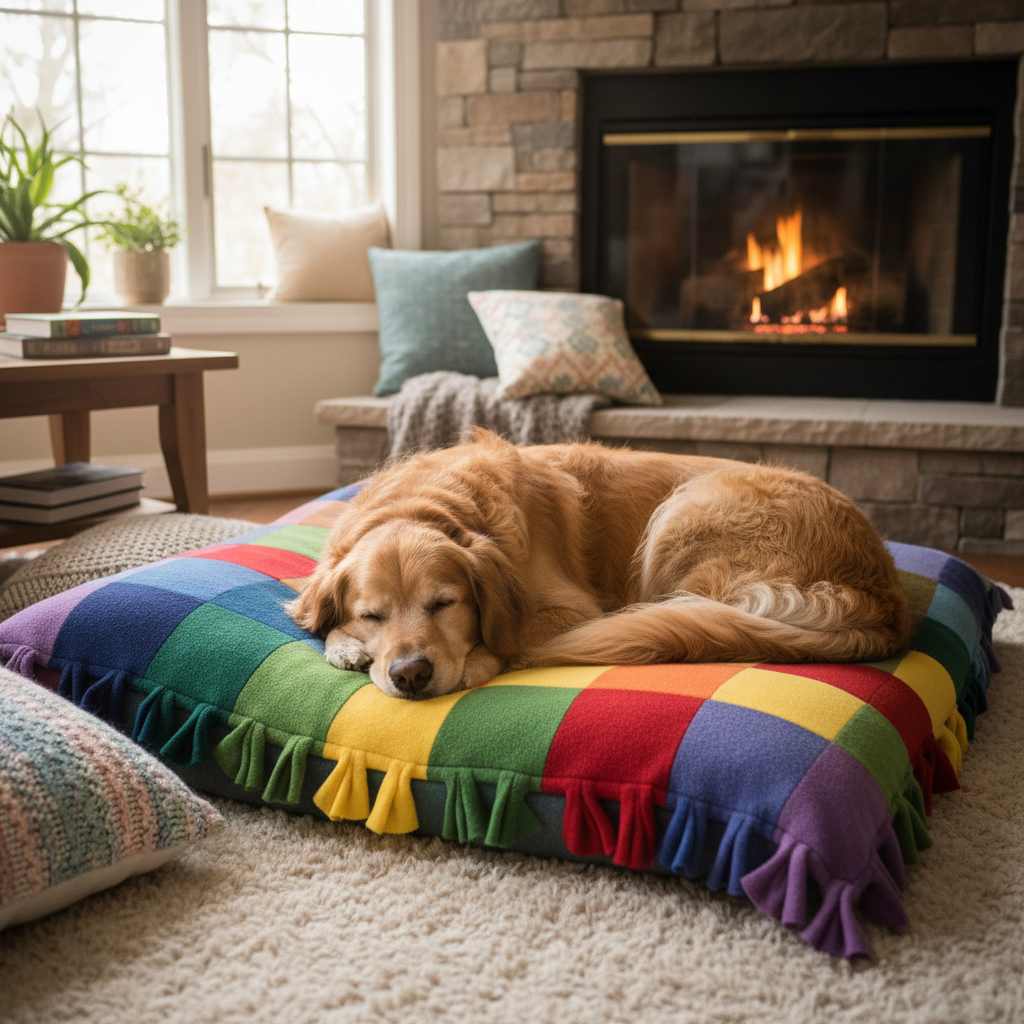
You have just created a custom, durable, and incredibly cozy bed for your dog, all while keeping your budget perfectly intact. No sewing machine, no stress, and no retail markup.
The Psychology of Scent: Why Dogs Prefer Upcycled Stuffing
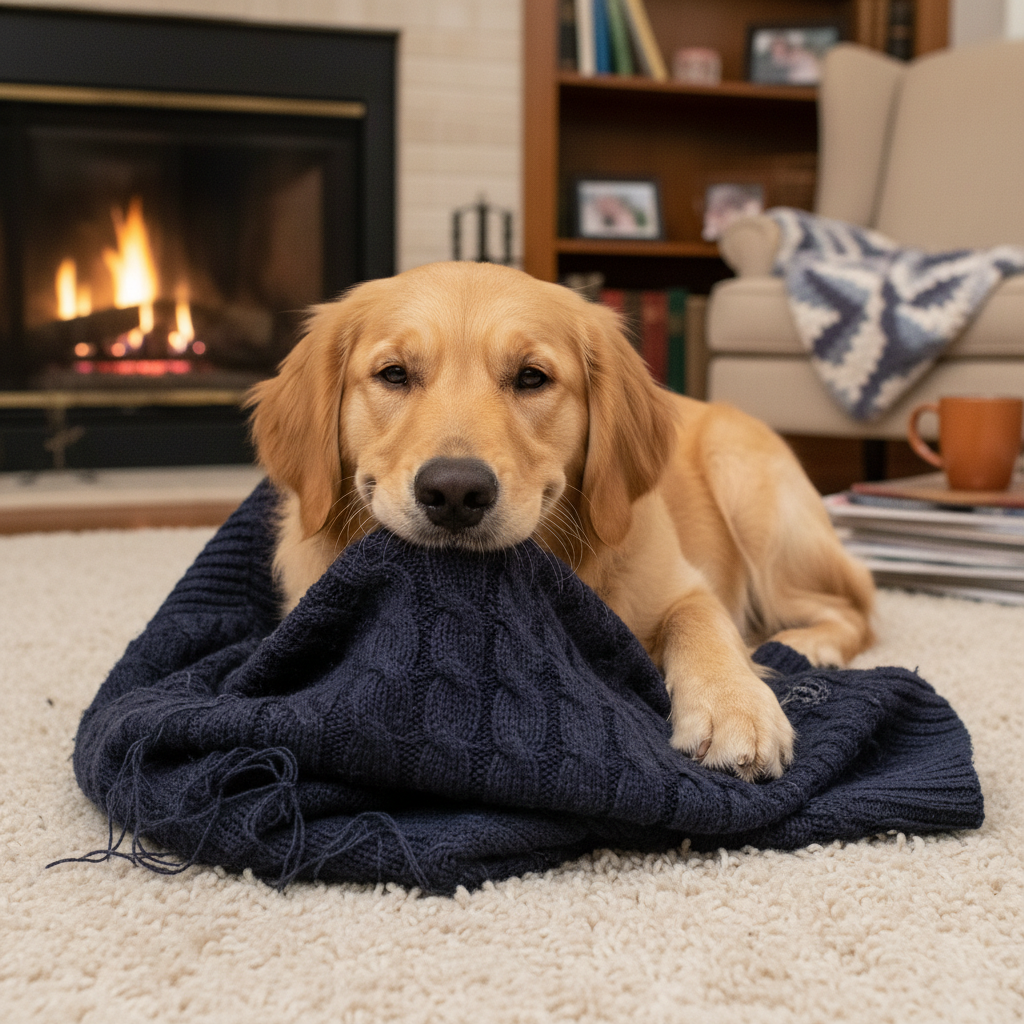
Pro-Tip: If you are crate-training a new puppy, use the t-shirt you slept in last night as the top layer of stuffing inside the fleece bed. The concentrated scent will help soothe them to sleep much faster!
This is the beautiful intersection of frugal living and empathetic pet care. You are not just saving $50 to $100; you are actually providing a superior, custom-tailored product that caters to your dog’s natural instincts. You are outsmarting the pet industry marketing machine that tells you that you need to spend big money to be a good pet parent. The truth is, your dog does not care about brand names or orthopedic memory foam—they care about being close to you. Upcycling your old textiles is the ultimate way to deliver that comfort for free.
Pro-Tips for Maintenance and Easy Cleaning
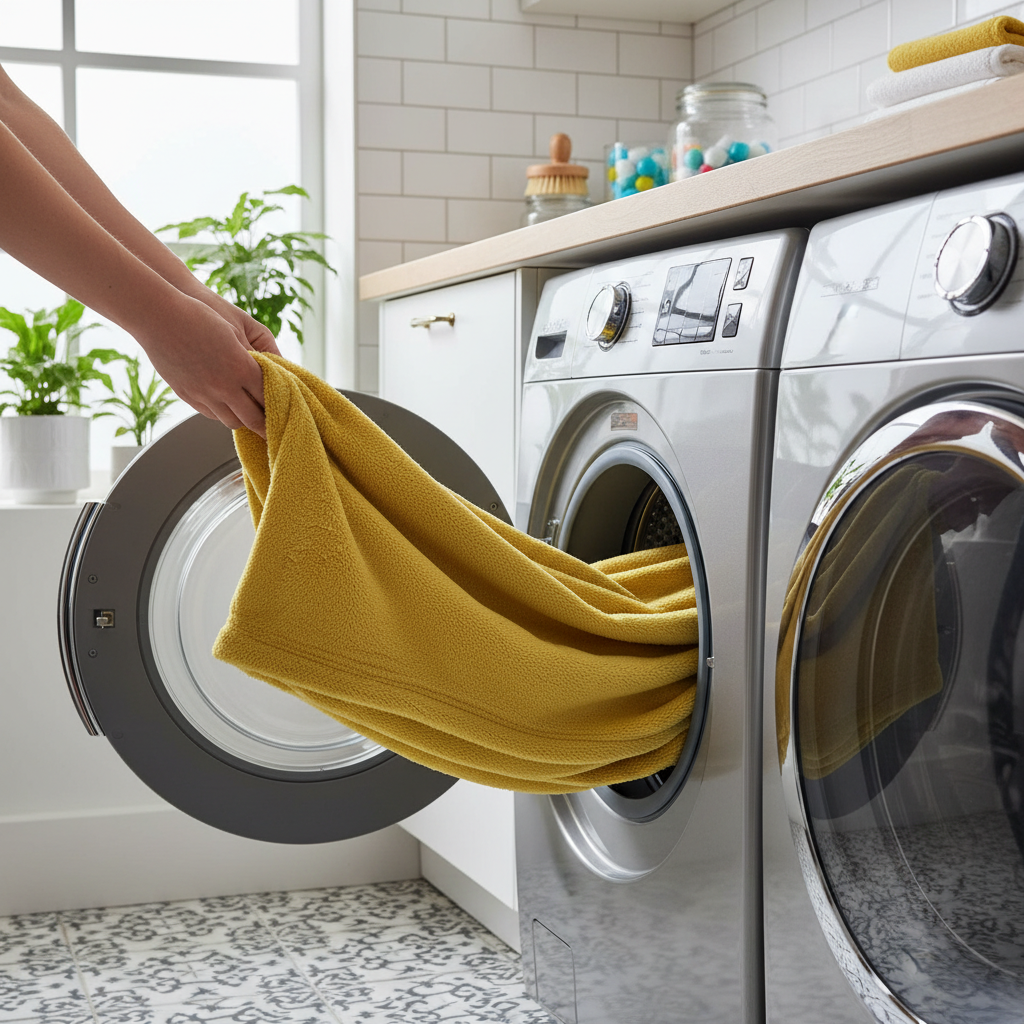
The Washability Hack
When this bed inevitably gets dirty, covered in dog hair, or muddy from a trip to the park, cleaning it is an absolute breeze. Simply untie one side of the bed (just pull the double knots apart on one end), pull out the upcycled stuffing, and toss the fleece shell straight into the washing machine. Wash it on a cold cycle to prevent the fleece from shrinking or pilling, and tumble dry on low. If you used old towels or clothes for the stuffing, you can wash those separately too! Try doing that with a massive $100 foam bed that does not fit in your machine.
Seasonal Customization
Because fleece is so incredibly cheap in the clearance bins, you can easily swap out the design whenever you want. Make a festive plaid shell for the holidays and a bright, sunny pattern for the summer months. You just reuse the exact same stuffing every single time, meaning your seasonal updates will only cost you about $5.
Street-Smart Tip: If your dog is a heavy chewer, fleece is actually a great material because it does not fray into long, dangerous strings like woven cotton does. However, always supervise your pup with a new bed to ensure they are not chewing off and swallowing any of the tied fabric strips.
By utilizing these simple maintenance tips, your initial under $10 investment will easily last you for years, proving once again that frugal living is about outsmarting the system, buying smart, and finding clever, sustainable workarounds.
Conclusion

Makenzie is the founder and lead writer at MoneyHackTips.com — a personal finance blog dedicated to delivering street-smart financial wisdom for real people on real budgets. With 300+ published articles covering everything from debt management to investing fundamentals, Makenzie’s mission is to make every dollar work harder. When not writing about money hacks, Makenzie is testing frugal living strategies, optimizing side hustles, and helping readers build financial freedom from scratch.