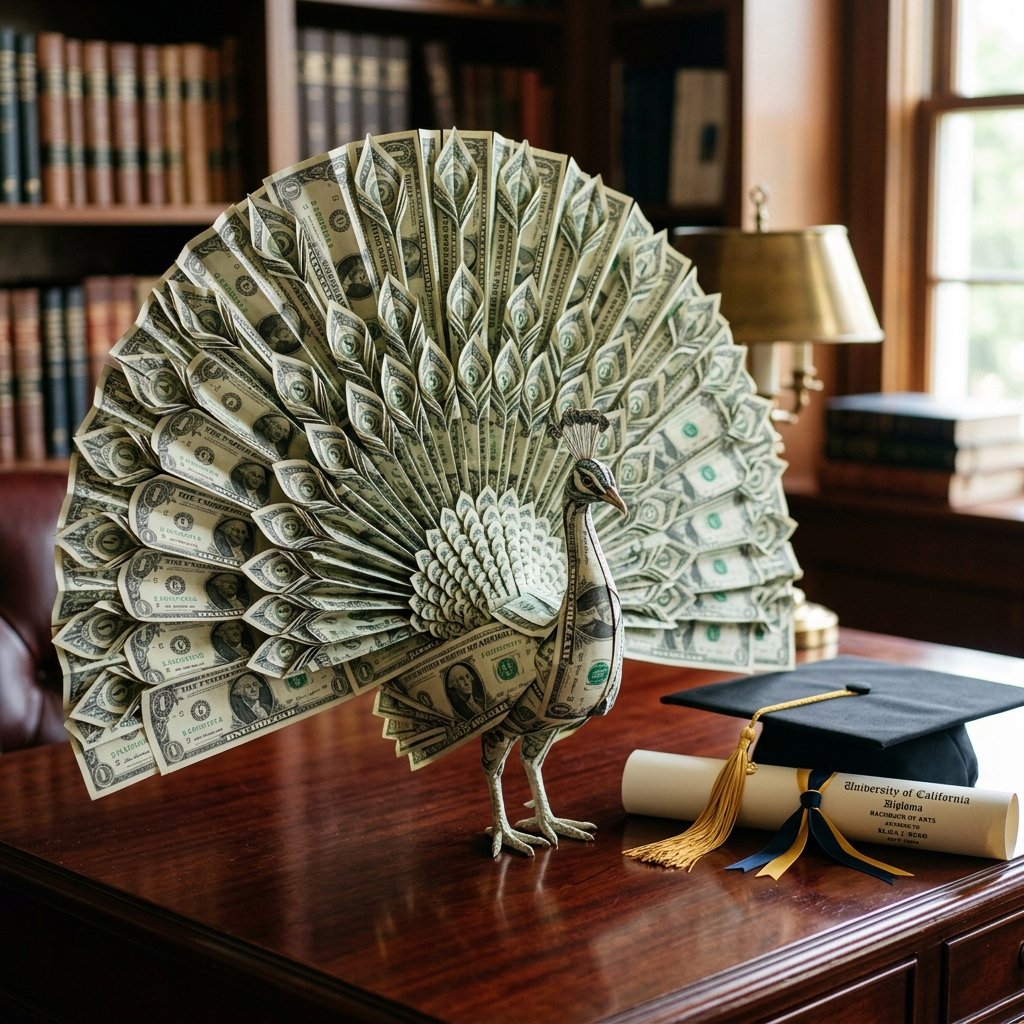

Let’s be honest: every graduate wants cash. Whether they are heading off to college, starting their first real-world job, or taking a gap year to find themselves, money is the fuel for their next chapter. But handing over a plain white envelope with a few twenties inside feels a bit… uninspired. You’re a resourceful crafter, a DIY guru, and someone who believes that a gift should have character. That is where the Money Origami Peacock comes in. This isn’t just a gift; it is a showstopper. By taking the time to fold currency into a complex, elegant bird, you are telling the graduate that their success is worth the extra effort. In this guide, we will transform $20, $50, or even $100 into a stunning piece of art that they will almost—almost—be too afraid to spend.
The Symbolism and Strategy of the Origami Peacock

Before we dive into the folds, it is important to understand why the peacock is the ultimate choice for a graduation gift. In many cultures, the peacock represents integrity, vision, and a bright future. It is a bird that isn’t afraid to show its true colors, much like a new graduate stepping into the world. From a practical standpoint, the peacock design allows you to use multiple bills of different denominations to create a tiered, colorful effect in the tail. This is where your clever, budget-savvy nature shines. You can make a $30 gift look like a $100 masterpiece simply through the architecture of the fold.
| Bill Denomination | Visual Impact | Best Use in Peacock |
|---|---|---|
| $1 Bills | High Volume | The inner layers of the tail fan |
| $2 Bills | Rarity/Novelty | The main body or focal point |
| $5 Bills | Color Contrast | The middle tier of the tail |
| $20+ Bills | High Value | The outer edge of the fan for maximum ‘wow’ |
Choosing the right bills is the first step. You want crisp, uncirculated currency. If you go to the bank, specifically ask the teller for ‘new’ bills. Old, wrinkled money won’t hold a crease, and for an origami peacock, sharp edges are everything. If you’re stuck with limp bills, a quick tip from the pros: a very light mist of hairspray and a low-heat iron (with a cloth buffer) can restore some ‘snap’ to the paper.
Phase One: Crafting the Peacock’s Body
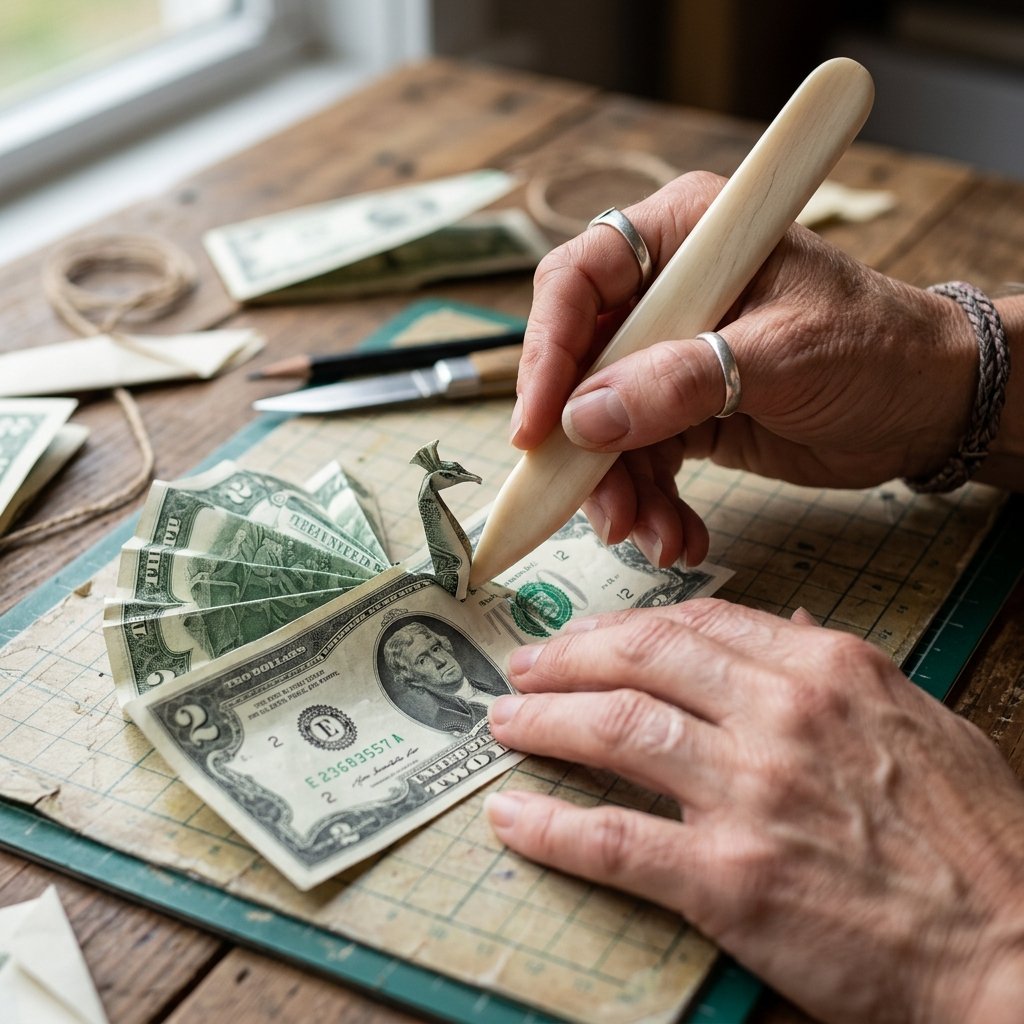
The body of the peacock requires precision to ensure it can support the weight of the massive tail. This part of the build uses a single bill. We recommend using a $2 bill if you can find one, as it adds an element of luck and rarity to the gift. Follow these steps carefully to ensure your bird has a proud, upright posture.
- The Center Crease: Lay the bill horizontally. Fold it in half lengthwise to create a sharp center crease, then unfold.
- The Corner Tucks: Fold all four corners inward so the edges meet at the center crease, forming a long hexagon shape.
- The Narrowing: Fold the slanted edges toward the center again. This creates a very thin, pointed shape—this will be the neck and head of your peacock.
- The Neck Bend: About 2 inches from the tip, fold the narrow end upward at a 90-degree angle.
- The Beak: Fold the very tip of that point downward to create a small, sharp beak.
“Pro-Tip: Use a clean credit card or a bone folder to press down on every fold. In the world of money origami, a soft fold is a failing fold. You want these lines to be as sharp as a fresh suit.”
Phase Two: Engineering the Magnificent Fan Tail
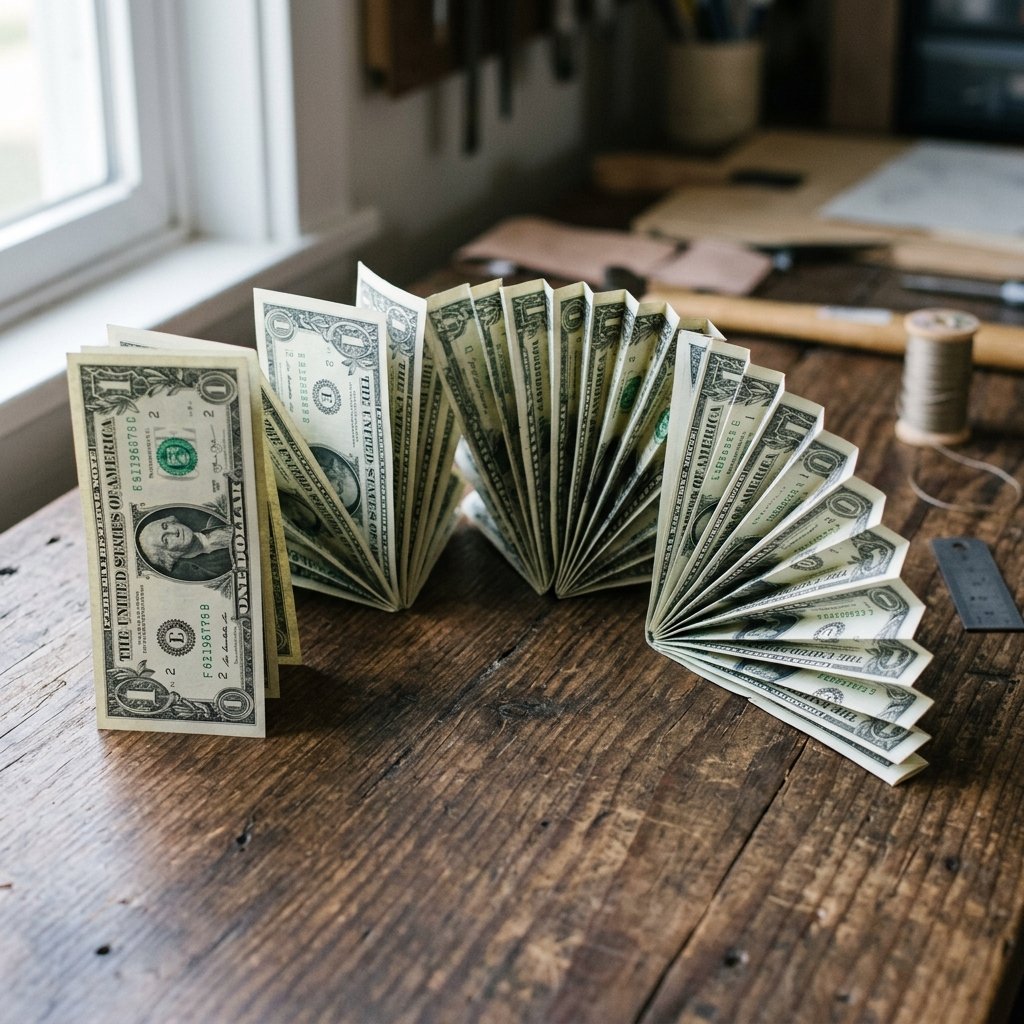
The tail is where the ‘wow’ factor happens. For a truly stunning peacock, you will want to use 3 to 5 bills for the tail section. This creates a lush, full appearance. We are going to use an accordion-style fold, which is simple but effective when multiplied. Here is the breakdown of the tail assembly:
| Material | Quantity | Estimated Time |
|---|---|---|
| Crisp Bills | 3-5 | 15 minutes |
| Small Paperclips | 2-3 | 1 minute |
| Clear Tape (Removable) | 1 Small Roll | 2 minutes |
To create the fan segments:
- Take one bill and lay it vertically. Fold the bottom edge up about 1/2 inch.
- Flip the bill over and fold it back 1/2 inch. Continue this ‘fan fold’ until the entire bill is a thin, pleated strip.
- Repeat this process for all the bills you’ve designated for the tail.
- Fold each pleated strip in half to create a ‘V’ shape.
- Connect the ‘V’ shapes side-by-side using a tiny piece of double-sided removable tape or a small paperclip at the base. This expands the fan into a semi-circle.
“Safety Note: Never use permanent glue or staples on currency. Not only is it technically illegal to deface money, but the graduate will eventually want to spend this! Use only removable adhesive dots or paperclips.”
Phase Three: The Master Assembly
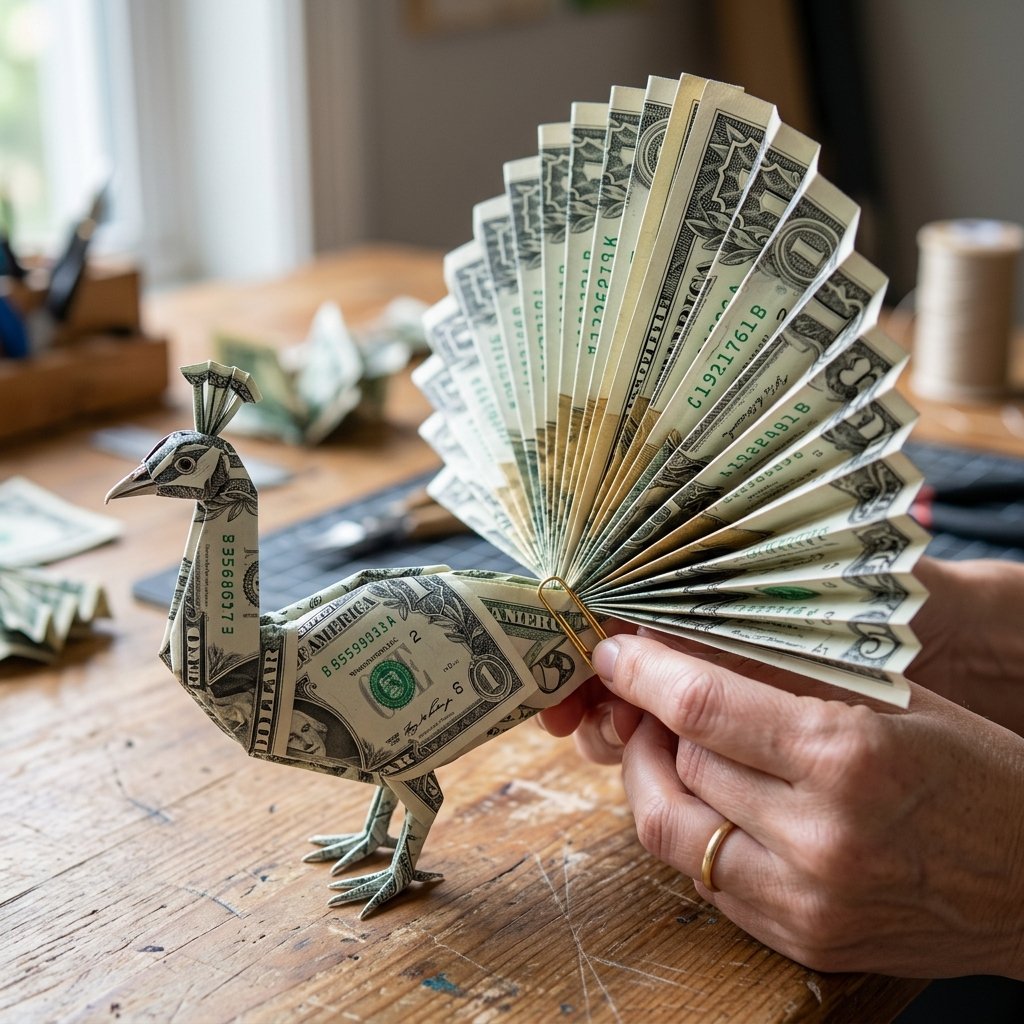
Now that you have the body and the fan tail, it is time to marry the two components. This is the part where your resourceful, clever engineering comes into play. You need the tail to stand upright behind the body without sagging. To do this, we will create a ‘support spine’ using the back end of the body bill.
- Slotting: Take the tail fan and place the center point of the fan against the back ‘tail’ of the body bill.
- Securing: Use a single mini gold paperclip to join the base of the fan to the body. The gold adds a touch of ‘masculine elegance’ and looks like a decorative choice rather than a functional one.
- Spreading the Feathers: Gently pull the outer edges of the fan bills outward. If you have used multiple bills, they should overlap slightly, hiding any gaps.
- Weighting: If the peacock is top-heavy, you can hide a shiny new quarter inside the base of the body to act as a ballast. This keeps the bird from tipping over when displayed on a desk.
By the time you finish this step, you should have a freestanding, three-dimensional bird that looks like it belongs in a museum gallery rather than a bank vault.
Presentation: The ‘Boutique’ Finish
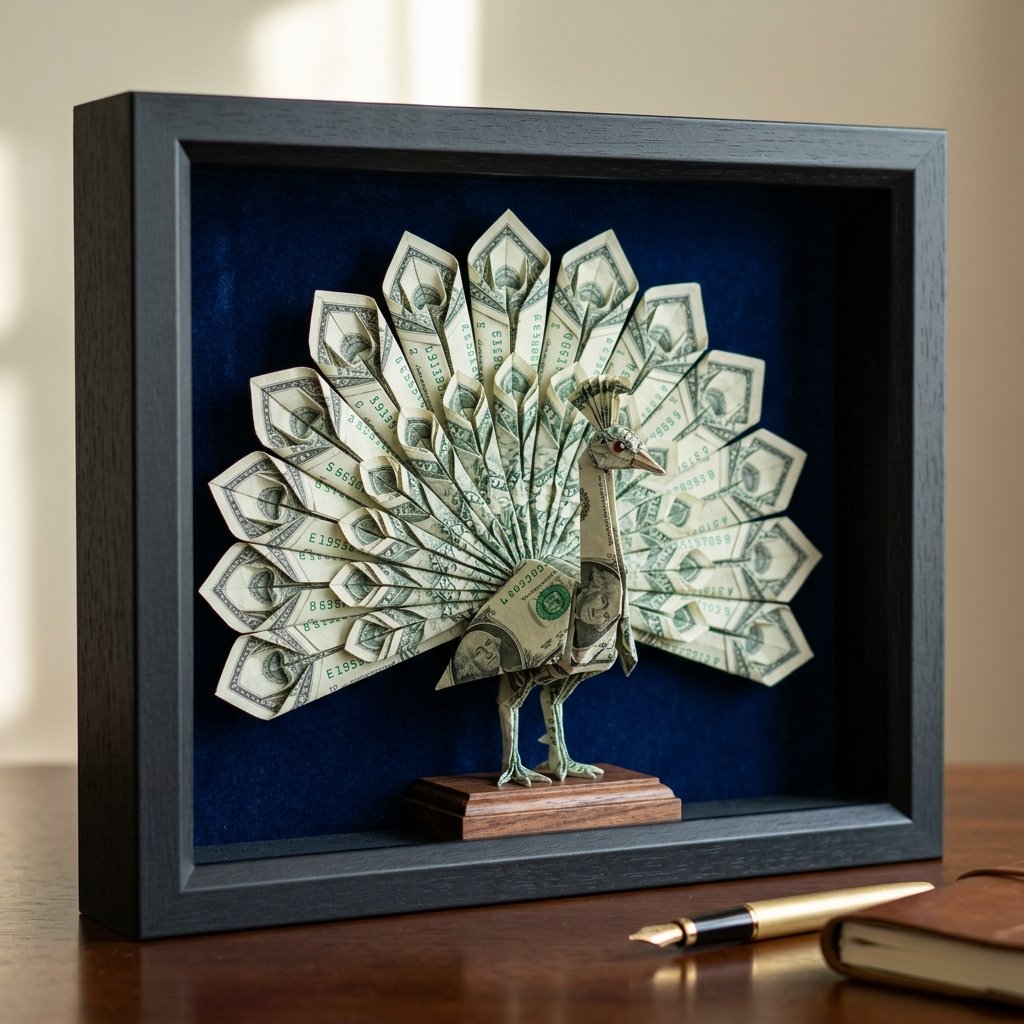
A masterpiece deserves a proper gallery. Don’t just toss your peacock into a card. To truly wow everyone at the graduation party, you need a presentation that matches the effort of the fold. Think like an event stylist on a dime. You can find high-end looking boxes at the Dollar Tree and elevate them with a few simple tricks.
| Presentation Item | DIY Cost | Store Price Equivalent |
|---|---|---|
| Shadow Box Frame | $1.25 | $15.00 |
| Velvet Lining (Scrap Fabric) | $0.00 | $5.00 |
| Clear Acrylic Display Cube | $2.00 | $12.00 |
Consider mounting the peacock inside a small shadow box. Use a tiny dab of removable mounting putty on the bottom of the bird to keep it centered. Line the back of the box with a piece of navy blue or hunter green cardstock—these colors make the green and gray of the US currency pop beautifully. Add a small printed label at the bottom that says: ‘In Case of Adventure, Break Glass (Or Just Open the Back).’
Conclusion
You have just turned a standard cash gift into an unforgettable experience. The Money Origami Peacock is more than just the sum of its denominations; it is a testament to your creativity and your support for the graduate’s journey. While others are handing over cards that will be tossed in the bin by Monday, your gift will likely sit on their new desk as a symbol of pride and potential for months to come. Remember, the best gifts aren’t always the ones that cost the most—they are the ones that show you took the time to create something beautiful. Now, go forth and fold; your graduate’s jaw is waiting to drop!

Makenzie is the founder and lead writer at MoneyHackTips.com — a personal finance blog dedicated to delivering street-smart financial wisdom for real people on real budgets. With 300+ published articles covering everything from debt management to investing fundamentals, Makenzie’s mission is to make every dollar work harder. When not writing about money hacks, Makenzie is testing frugal living strategies, optimizing side hustles, and helping readers build financial freedom from scratch.