The Short Person’s Denim Dilemma
We have all been there: you find the absolute perfect pair of flared or bell-bottom jeans. They fit like a glove at the waist, the wash is exactly what you wanted, and the flare is magnificent—but they are four inches too long. Traditionally, hemming flared jeans is a heartbreak. If you simply cut them and sew a new hem, you lose that beautiful, wide silhouette, and the bottom edge looks amateur and flat. But what if I told you that you could keep that original factory hem and the exact flare width while shortening the length yourself? This isn’t just a craft; it’s a rugged, practical skill that saves you a trip to an expensive tailor and keeps your wardrobe looking high-end on a zero-dollar budget. As a frugal DIYer, you don’t need a fancy sewing machine to achieve professional results; you just need a bit of cleverness and a steady hand.
The Flare Dilemma: Why Traditional Hemming Ruins Your Silhouette

When you take a pair of flared jeans to a standard dry cleaner for a hem, they often perform a ‘cut and fold’ technique. Because flared jeans widen toward the bottom, cutting into that flare means you are essentially removing the widest part of the garment. This results in a ‘stunted’ look where the flare doesn’t have enough room to breathe. Furthermore, you lose the original distressed edge that makes denim look authentic.
The Geometry of the Flare
The secret lies in understanding that we aren’t just shortening fabric; we are managing volume. To keep the flare perfect, we must use the original hem method (also known as the ‘Tricky Hem’). This involves folding the excess fabric inside the leg and reattaching the original bottom edge so that, from the outside, the jeans look untouched.
| Method | Cost | Result | Skill Level |
|---|---|---|---|
| Professional Tailor | $25 – $45 | Professional but expensive | None |
| Basic Cut & Hem | $0 | Loss of flare and original edge | Beginner |
| The Original Hem Secret | $0 | Perfect flare, factory finish | Resourceful DIYer |
The Tailor’s Arsenal: Budget-Friendly Tools for Professional Results
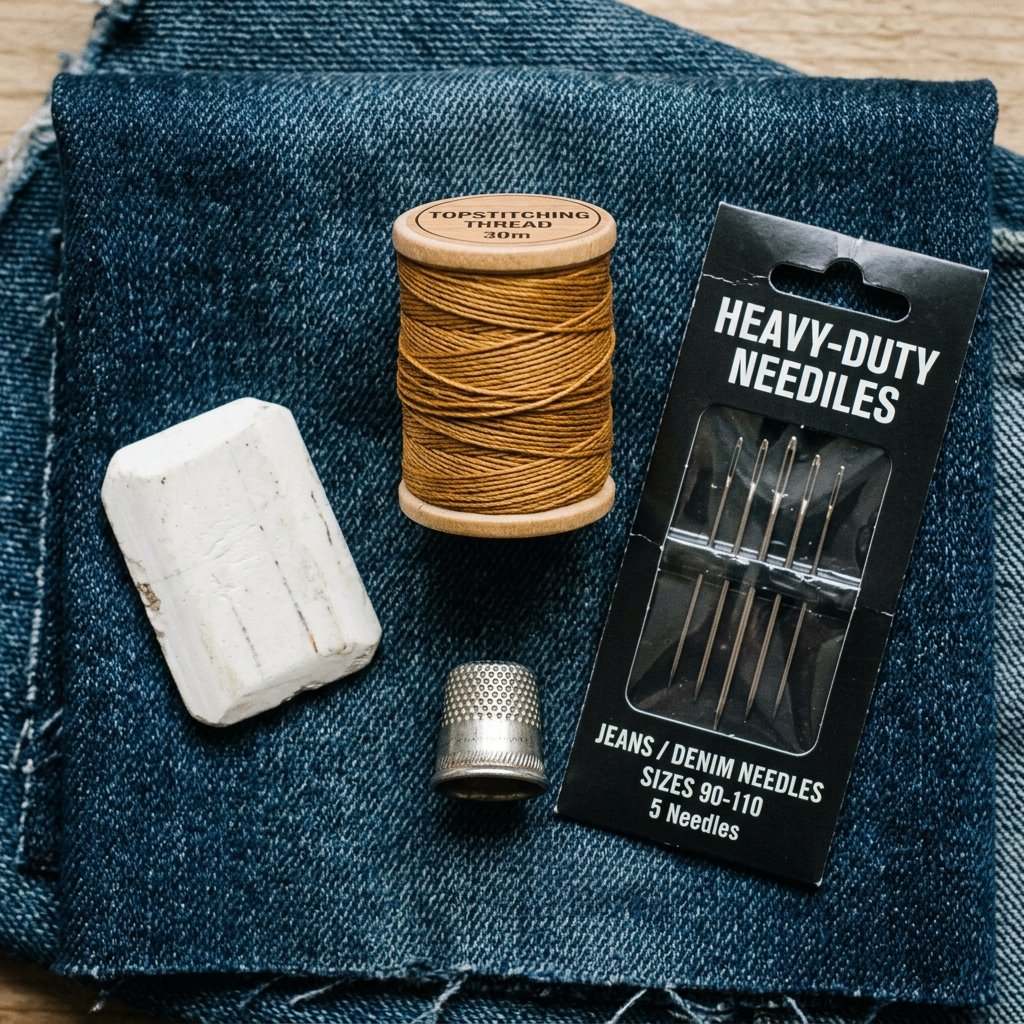
You don’t need a $500 sewing machine to master your wardrobe. In fact, for denim, hand-sewing often provides more control over thick seams. However, you do need the right rugged materials to handle the weight of the fabric.
- Heavy-Duty Denim Thread: Look for ‘top-stitching’ thread or extra-strong polyester. It needs to withstand the tension of the flare.
- Size 14 or 16 Hand-Sewing Needles: Standard needles will snap. You need a sharp, thick needle to pierce multiple layers of denim.
- Tailor’s Chalk or a Sliver of Soap: To mark your measurements without staining.
- Heavy-Duty Pins or Wonder Clips: Denim is slippery and thick; you need to secure it tightly.
- A Metal Thimble: Your fingers will thank you when pushing through those side seams.
Budget Guru Tip: If you don’t have tailor’s chalk, a dry sliver of leftover bar soap works perfectly to mark fabric and washes right out!
The Master Technique: Mapping Your New Inseam
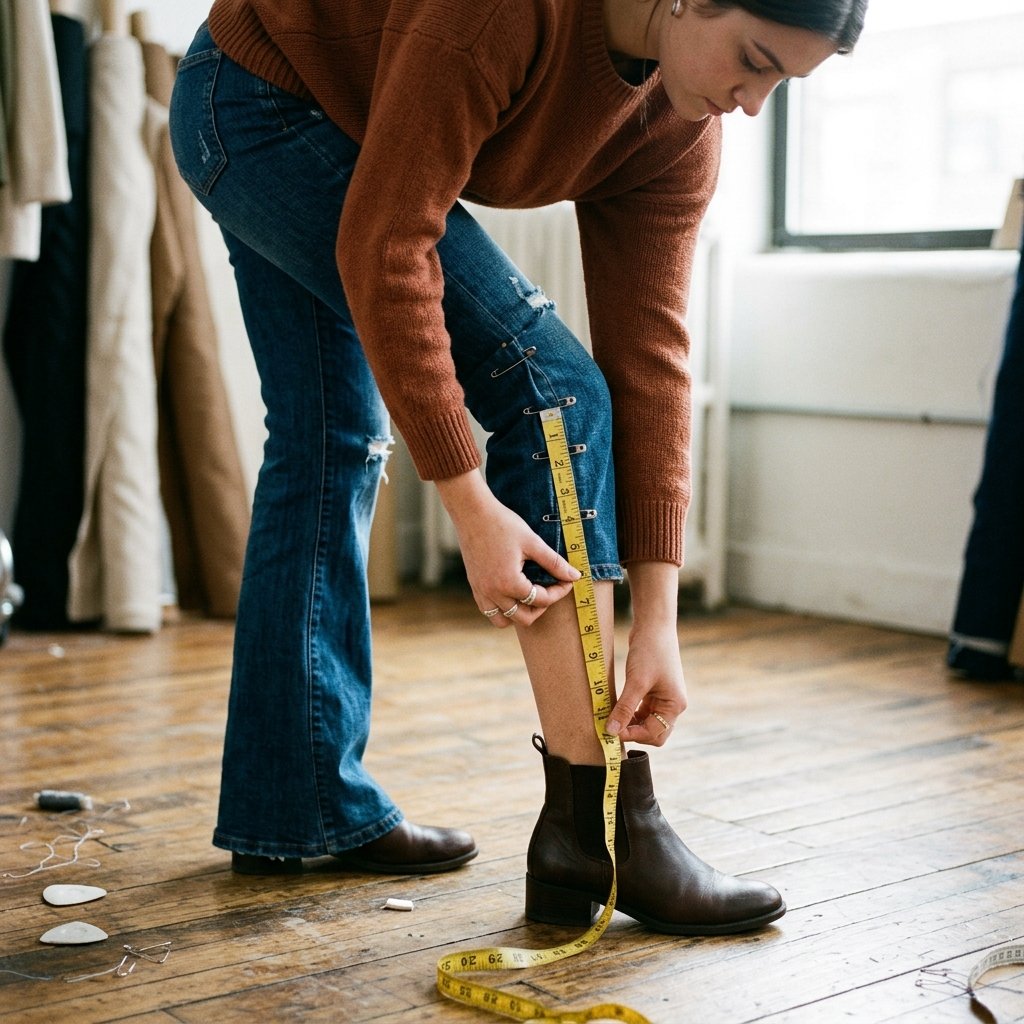
Before you even touch a needle, you must measure with surgical precision. Flared jeans are sensitive to length; even a half-inch can be the difference between ‘effortlessly chic’ and ‘tripping hazard.’
How to Measure for the Flare
- Put on the shoes you intend to wear most often with these jeans. The flare should ideally sit 1/4 inch off the ground.
- Fold the jeans upward (to the outside) until you reach the desired length. Pin this in place.
- Measure the distance from the original hem to the fold. Let’s say it’s 3 inches.
- You will be sewing at half that distance (1.5 inches) because the fabric is doubled over inside.
| Desired Shortening Amount | Sewing Line Distance from Hem |
|---|---|
| 2 Inches | 1 Inch |
| 3 Inches | 1.5 Inches |
| 4 Inches | 2 Inches |
Step-by-Step Execution: Hand-Sewing the ‘Invisible’ Joint
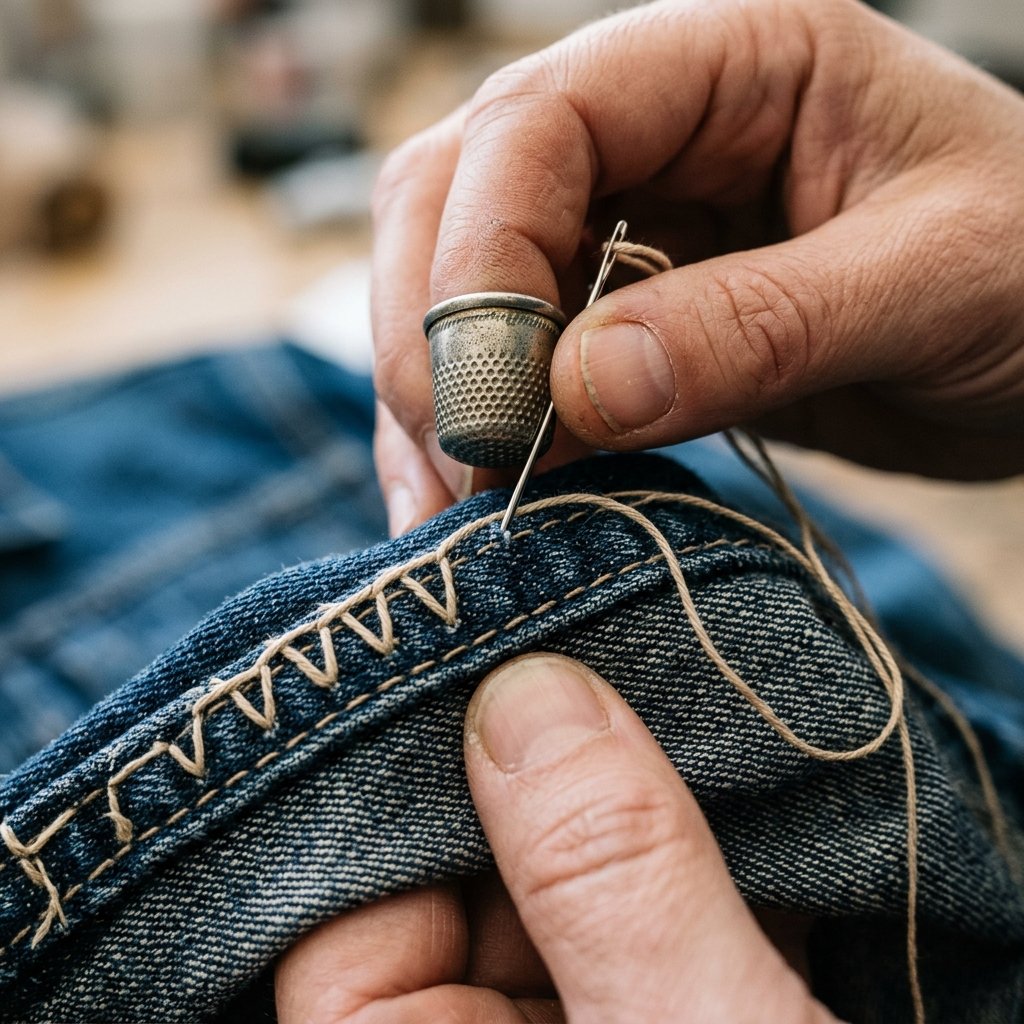
Now we get to the crafty part. We are going to create a ‘tuck’ just above the original hem. This keeps the weight and the look of the bottom edge intact.
The Process
- Pin the Fold: Fold the jeans up so the right sides of the fabric are touching. The original hem should be facing you, but it should be sitting just above the new ‘fold line.’
- The Backstitch: Use a Backstitch for maximum strength. This is the king of hand-stitches for denim. Insert the needle, go back a stitch length, and come out ahead. This creates a continuous line of thread that mimics a machine.
- Navigate the Side Seams: This is the hardest part. The side seams are thick. Use your thimble and take slow, deliberate stitches. If it’s too thick, you can use a pair of pliers to gently pull the needle through.
- Check the Alignment: Ensure the side seams of the leg and the side seams of the hem align perfectly. If they don’t, the flare will twist.
The Mending Mantra: Slow is smooth, and smooth is fast. Don’t rush the side seams; they are the anchors of your flare.
Advanced Finishing: The Iron and the ‘Hide’
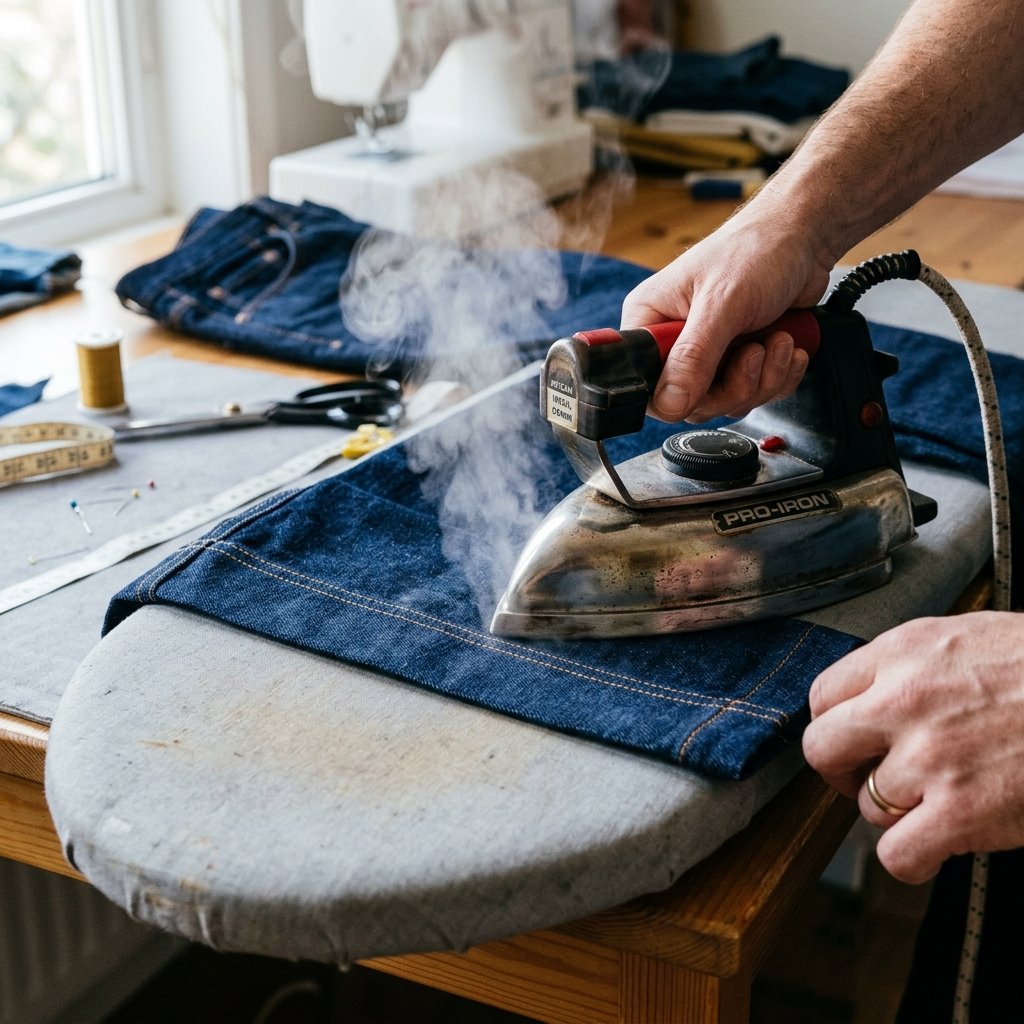
Once you have sewn all the way around, you will have a loop of excess fabric on the inside. Most people make the mistake of cutting this off immediately. Don’t!
The ‘No-Cut’ Advantage
If you keep the fabric inside, you can let the jeans down later if you sell them or if they shrink in the wash. However, if the fabric is too bulky, you can trim it to 1/2 inch and overcast the edge to prevent fraying.
The Secret Weapon: Steam
The real secret to a professional hem is the press. Flip the original hem down so it covers your stitches. Use a steam iron on the highest setting and press the seam downward. The goal is to make the new seam disappear into the shadow of the original hem’s top-stitching. From two feet away, it will be completely invisible.
Conclusion
Confidence in Every Step
By using the original hem method, you’ve not only saved $30 at the tailor, but you’ve also mastered a skill that keeps your wardrobe looking authentic and rugged. You’ve preserved the perfect flare silhouette and the factory-distressed edge that gives denim its character. This resourceful approach to mending is what separates the average consumer from the crafty expert. Next time you see a pair of ‘too long’ jeans at the thrift store, don’t pass them by—see them as your next successful project. Wear them with pride, knowing that the secret to your perfect fit was hidden in your own hands all along.

Makenzie is the founder and lead writer at MoneyHackTips.com — a personal finance blog dedicated to delivering street-smart financial wisdom for real people on real budgets. With 300+ published articles covering everything from debt management to investing fundamentals, Makenzie’s mission is to make every dollar work harder. When not writing about money hacks, Makenzie is testing frugal living strategies, optimizing side hustles, and helping readers build financial freedom from scratch.