
The Geometry of Elegance: Conquering the Curve
There is a specific kind of frustration reserved for the frugal DIYer who has perfectly tailored a garment, only to reach the final hurdle: the curved hem. Whether it is a circle skirt, a peplum top, or a flared dress, the physics of a curve are working against you. When you fold a larger circumference (the raw edge) into a smaller circumference (the fold line), the fabric naturally wants to bunch, ripple, and pucker. Most beginners reach for the sewing machine, only to end up with a twisted, bulky mess that screams ‘homemade’ rather than ‘handmade.’
But here is the secret: the most expensive couture gowns in the world are never hemmed by a machine. They are finished by hand, using techniques that date back centuries. By using a few clever, budget-savvy tricks—like the ease-stitch and the catch-stitch—you can achieve a crisp, professional finish for the cost of a single spool of thread. This guide is for the crafty expert and the handy parent alike, designed to turn your ‘trash-to-treasure’ upcycling projects into high-end wardrobe staples. We are going to dive deep into the mechanics of fabric, the rugged practicality of hand-mending, and the sophisticated finish that only a needle and thread can provide.
The Geometry of the Curve: Why Traditional Hemming Fails
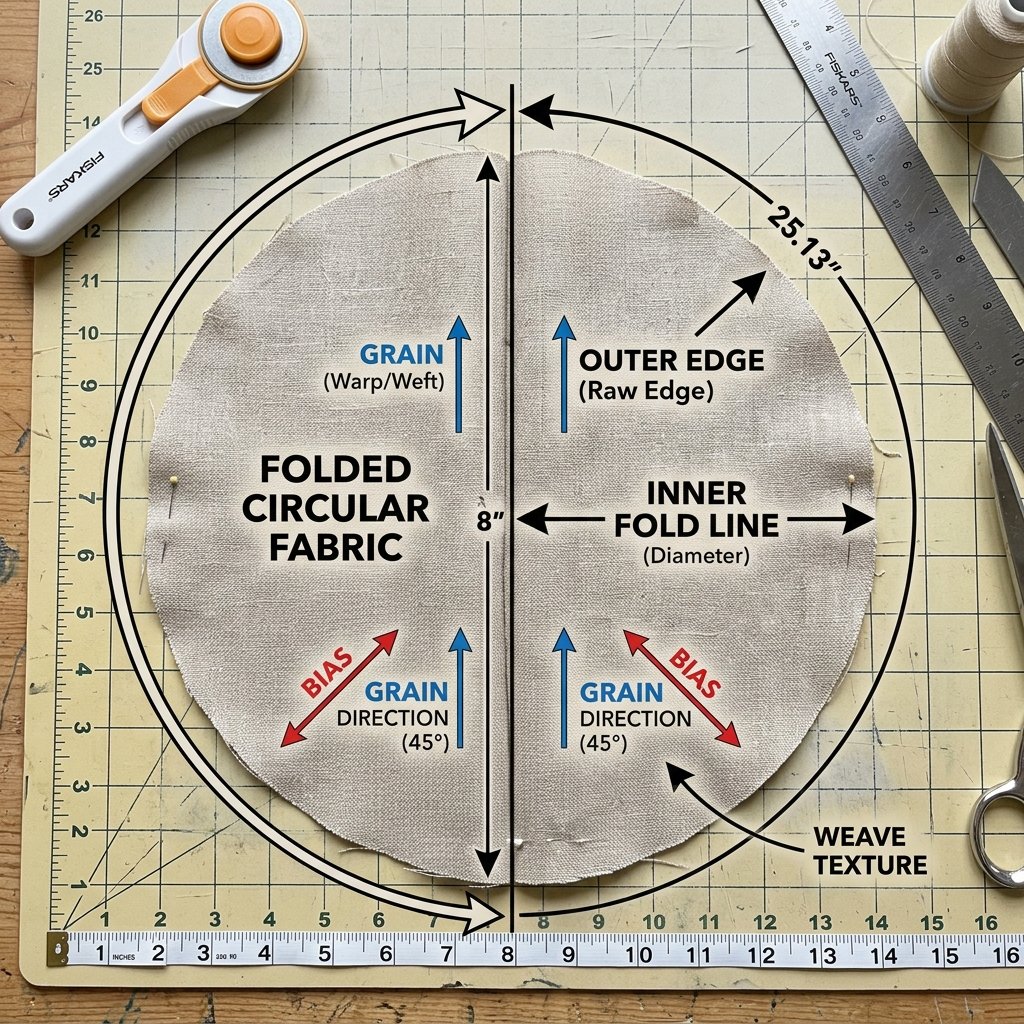
To solve the problem of puckering, we must first understand why it happens. In a straight hem, the fabric you fold up is the same width as the fabric it is being sewn to. In a curved hem, the raw edge is physically longer than the area where it will be anchored. If you simply fold it and sew, that extra fabric has nowhere to go, resulting in those dreaded little pleats or ‘bubbles.’
As a resourceful crafter, you don’t need a fancy serger or a specialized hemming foot. You need to understand fabric bias. Fabric has more stretch on the diagonal (the bias) than it does on the grain. Curved hems are almost always cut on the bias, meaning they are prone to stretching out of shape if handled roughly. Our goal is to stabilize that curve while neatly tucking away the excess circumference.
| Fabric Type | Stretch Level | Recommended Hem Width |
|---|---|---|
| Heavy Wool/Denim | Low | 1/2 inch |
| Cotton/Linen | Medium | 1/4 to 1/2 inch |
| Silk/Rayon | High | 1/8 inch (Baby Hem) |
“The narrower the hem on a curve, the less fabric you have to ‘ease’ in. When in doubt, go small to keep it smooth.”
The Thrifty Tailor’s Arsenal: Pro Tools for Pennies
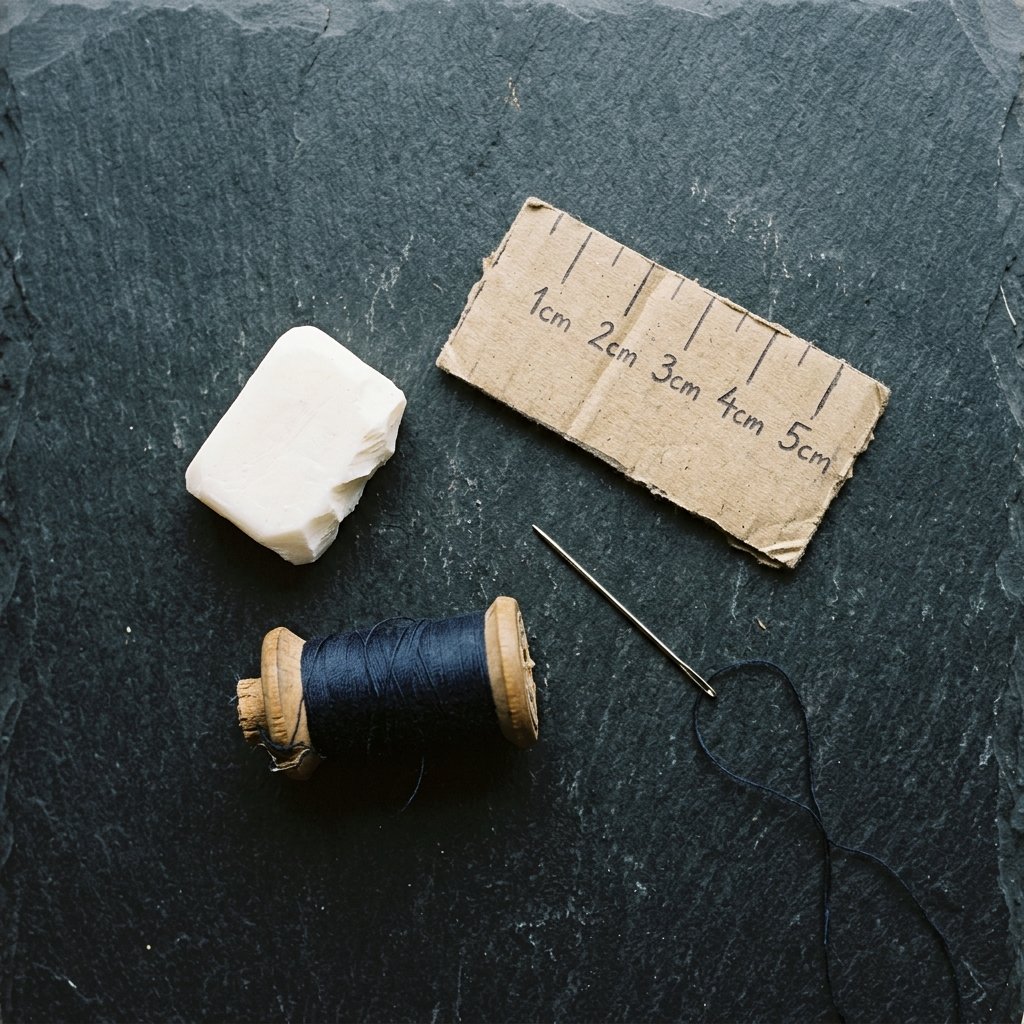
You don’t need a studio full of equipment to achieve a master-level hem. In fact, most of these items are already in your junk drawer or can be found at a local thrift store for under $5. A clever DIYer knows that the tool is only as good as the hand wielding it.
- Fine Hand-Sewing Needles: Look for ‘betweens’ or ‘sharps.’ A smaller needle creates smaller holes and more invisible stitches.
- Cotton-Wrapped Polyester Thread: This provides the strength of polyester with the ‘grip’ of cotton.
- Tailor’s Chalk or a Sliver of Soap: A dried-out piece of bar soap is a 100% free way to mark fabric that washes out instantly.
- A Metal Hem Gauge: Or a simple piece of cardstock marked with your desired hem depth.
- Beeswax: Run your thread through beeswax to prevent tangling and to strengthen the fiber for a rugged, long-lasting finish.
| Item | Store-Bought Price | Frugal DIY Alternative |
|---|---|---|
| Marking Pen | $7.00 | Dried Soap Sliver ($0.00) |
| Hemming Clips | $12.00 | Standard Paperclips ($0.50) |
| Thread Conditioner | $5.00 | Birthday Candle Wax ($0.00) |
Mapping the Path: Marking and Trimming for Success
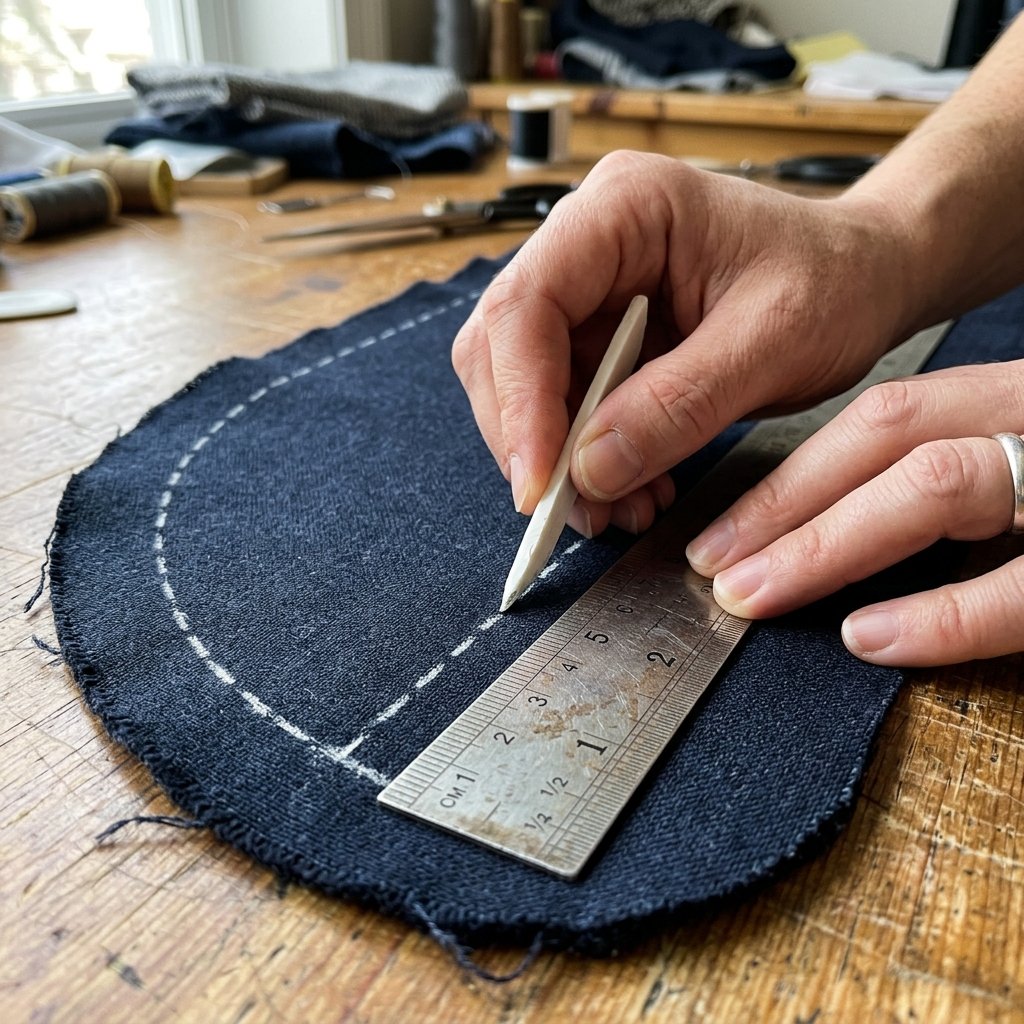
Precision starts before the needle ever touches the cloth. First, ensure your garment has ‘settled.’ If you are upcycling a skirt or dress, let it hang on a mannequin or hanger for 24 hours. This allows the bias sections to stretch out naturally. If you hem it immediately, the hem will become uneven over time.
- Try it on: Wear the garment and have a partner mark the desired length using your soap sliver.
- The Constant Measurement: Lay the garment flat. Use your gauge to mark a second line exactly 1 inch below your hemline. This is your cutting line.
- The Trim: Use sharp shears to cut along the outer line. Pro Tip: Never lift the fabric off the table while cutting; keep the bottom blade touching the surface for maximum control.
“Measure twice, cut once, and always let the fabric breathe before you commit to the stitch.”
Taming the Bulk: The Ease-Stitch Technique
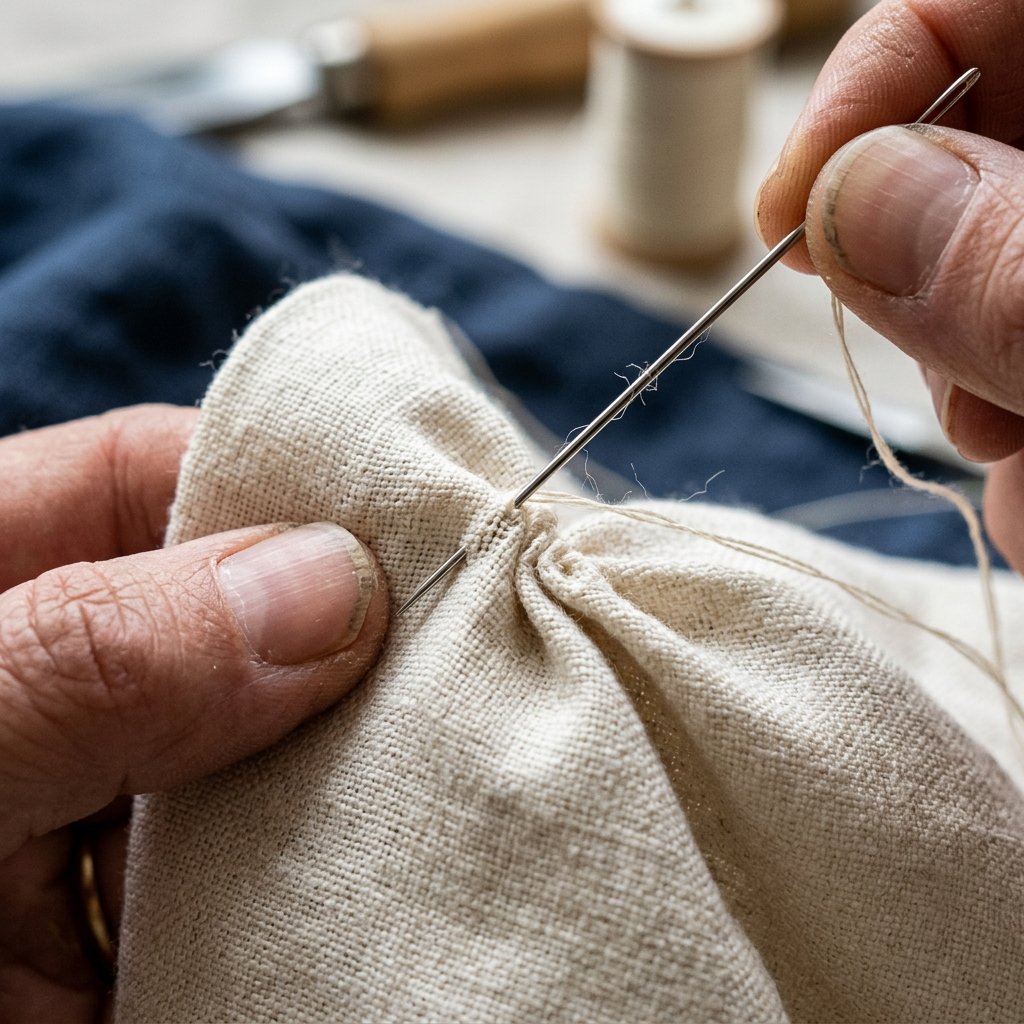
This is the ‘Grandma’s Secret’ of tailoring. To prevent puckering, we must ‘shrink’ the raw edge so it matches the circumference of the fold line. We do this with an ease-stitch, also known as a gathering stitch.
Thread your needle and tie a knot. Sew a long, loose running stitch exactly 1/8 inch from the raw edge of the fabric. Do not backstitch. Once you have gone all the way around the curve, leave long thread tails. Gently pull the tail—you will see the fabric start to curve inward, creating a tiny ‘cup’ shape. This effectively shortens the edge. Use your thumb to smooth out the gathers so the fabric lies flat against the garment. This is the ‘crafty expert’ way to eliminate bulk before you even start the final hem.
| Step | Action | Purpose |
|---|---|---|
| 1 | Sew Running Stitch | Create a drawstring effect |
| 2 | Pull Thread Tail | Reduce circumference of raw edge |
| 3 | Steam Press | Flatten the ‘ease’ into the fabric |
The Master’s Stitch: Executing the Invisible Finish
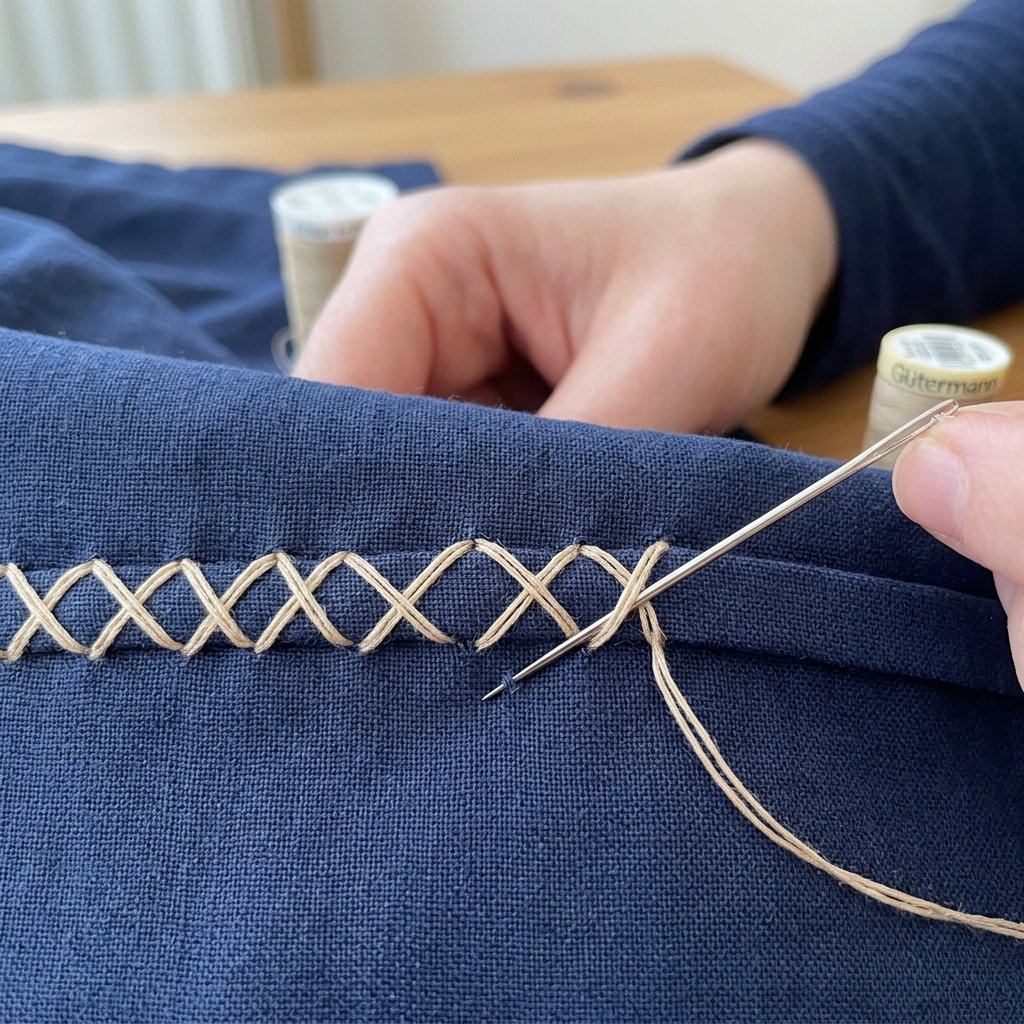
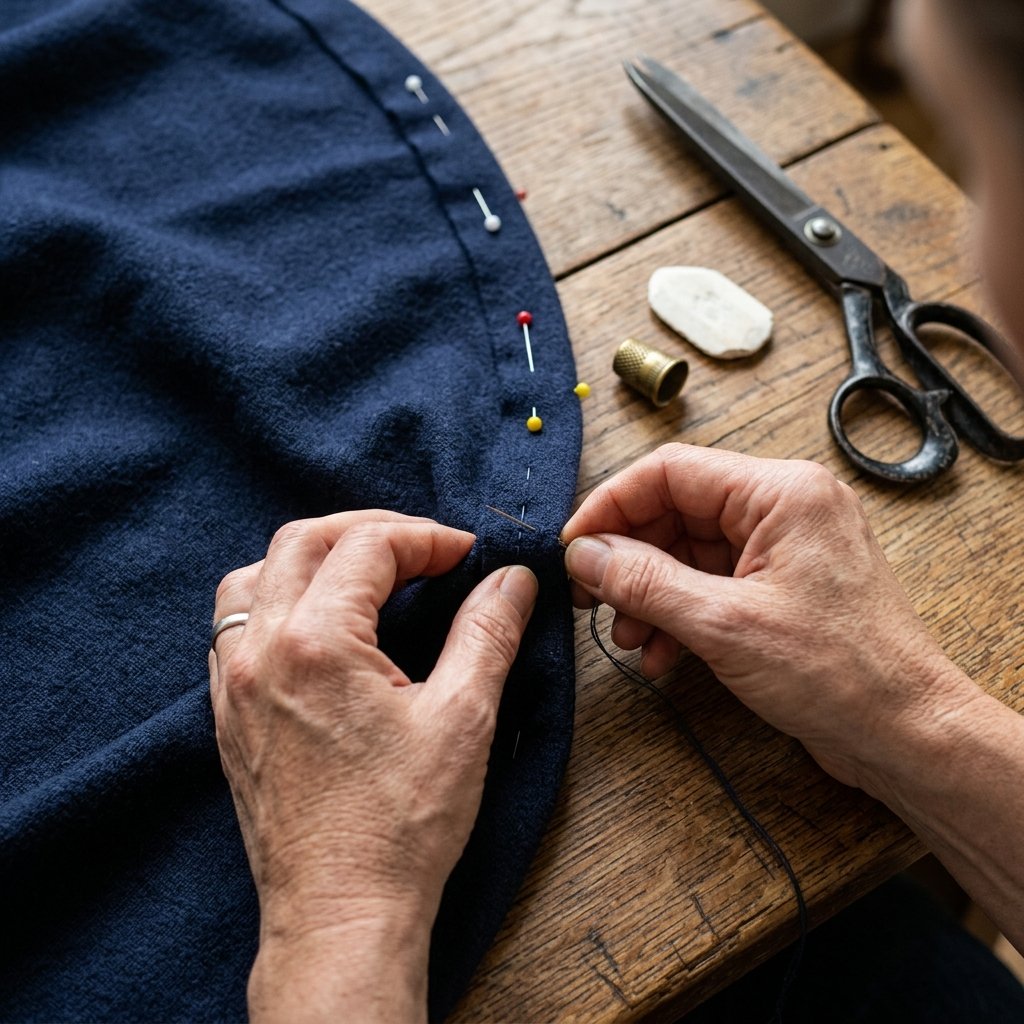
Now that the fabric is prepped and eased, it is time for the final stitch. For a curved hem, the Blind Catch-Stitch is king. It provides flexibility, allowing the hem to move with the drape of the dress without snapping the thread.
- The Setup: Fold the hem up along your marked line. Pin it in place with the pins perpendicular to the edge.
- The Motion: Working from left to right (if right-handed), take a tiny ‘bite’ of the garment fabric—only 1 or 2 threads. Then, move diagonally and take a bite of the hem allowance.
- The ‘X’ Factor: This creates a series of interlocking ‘X’ shapes on the inside. Because the stitch is zigzagged, it has natural elasticity.
- The Tension: Keep your stitches loose. If you pull too tight, you will see dimples on the right side of the dress.
“A perfect hand-stitch should be like a whisper—felt in the structure, but never heard by the eye.”
The Steam Secret: Professional Finishing at Home
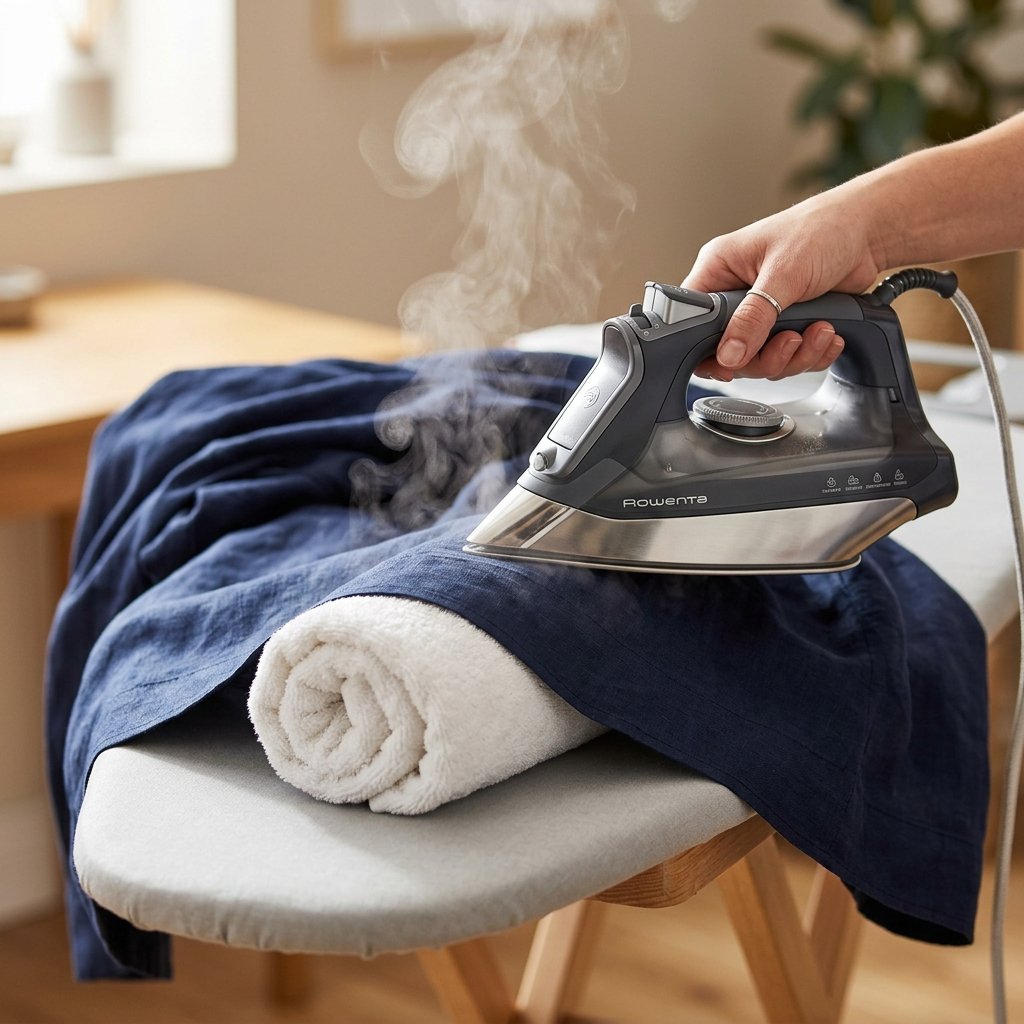
The difference between a DIY project and a high-end garment often comes down to the final press. Heat and steam ‘set’ the stitches and flatten the eased fabric into its new shape. However, pressing a curve on a flat ironing board can cause new wrinkles.
Resourceful Hack: If you don’t own a tailor’s ham, tightly roll up a heavy bath towel into a firm cylinder. Place the curved hem over the rounded end of the towel. Press with a steam iron, using a ‘lifting and lowering’ motion rather than sliding the iron. Sliding can stretch the bias. The steam will shrink the eased fibers, making the extra fabric disappear into a crisp, flat edge. This 5-minute step adds $100 of perceived value to your work.
| Pressing Rule | Why it Matters |
|---|---|
| Use a Press Cloth | Prevents ‘shining’ the fabric |
| Steam, Don’t Slide | Prevents stretching the bias |
| Let it Cool | Sets the shape permanently |
Conclusion
The Mark of a True Maker
Hemming a curve by hand is more than just a repair; it is a meditative practice in precision and resourcefulness. By choosing to spend an hour with a needle and thread rather than fighting a machine, you have ensured that your garment will drape beautifully and last for years. You’ve saved money on professional tailoring—typically $20 to $40 per dress—and gained a skill that elevates every piece in your wardrobe. Whether you are mending a thrift store find or finishing a handmade gift, these ‘perfect curves’ are a testament to your craft. Now, go forth and hem with confidence, knowing that the most sophisticated finishes are always within reach of a clever hand and a sharp needle.

Makenzie is the founder and lead writer at MoneyHackTips.com — a personal finance blog dedicated to delivering street-smart financial wisdom for real people on real budgets. With 300+ published articles covering everything from debt management to investing fundamentals, Makenzie’s mission is to make every dollar work harder. When not writing about money hacks, Makenzie is testing frugal living strategies, optimizing side hustles, and helping readers build financial freedom from scratch.