
The Art of the High-End Hustle: Why We Love the Dollar Tree Hack
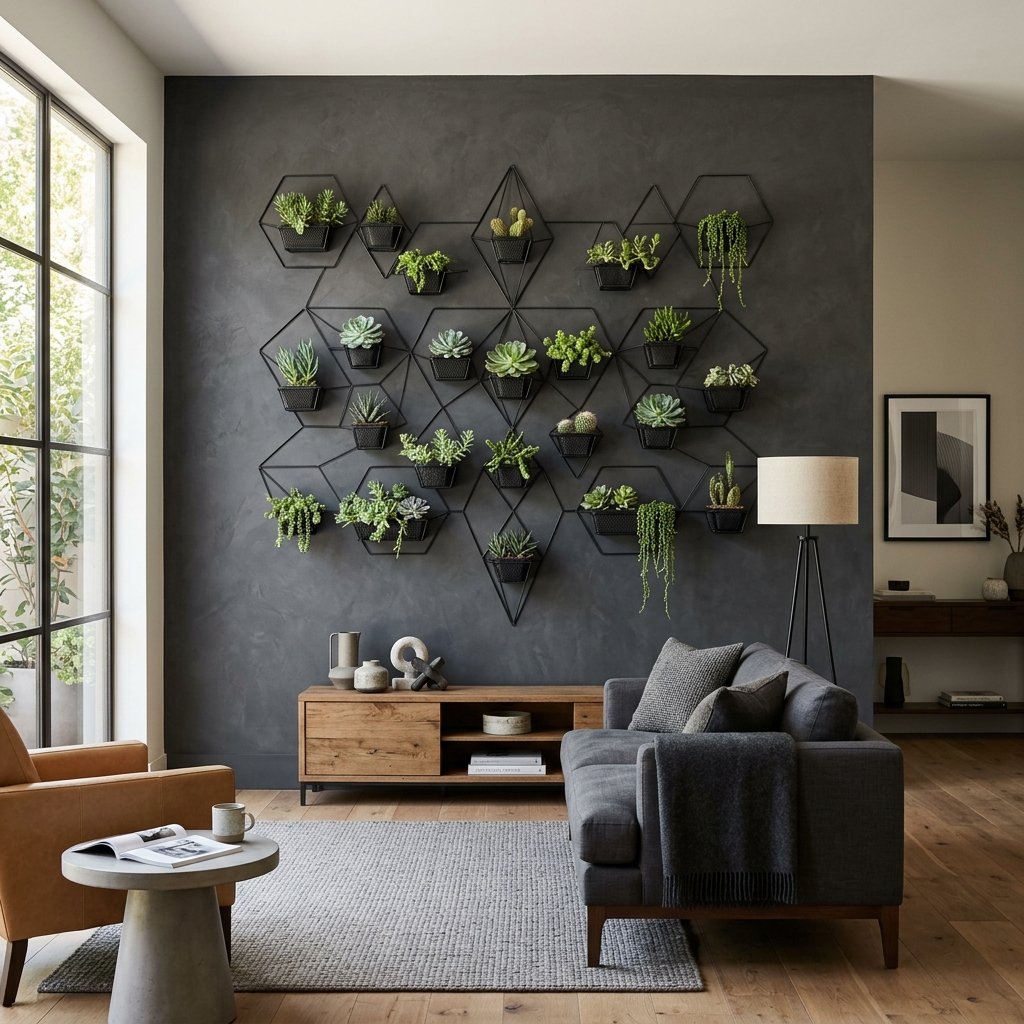
Let’s be honest: that blank wall in your living room or office is screaming for a bit of character. You’ve seen those stunning geometric wire installations in high-end design boutiques like West Elm or Anthropologie, but the price tag—often soaring north of $150—is enough to make any budget-conscious maker cringe. As a resourceful crafter, you know that style isn’t about how much you spend; it’s about how cleverly you can manipulate materials. Today, we are diving deep into the ultimate ‘Trash-to-Treasure’ transformation. We are taking humble wire baskets from the Dollar Tree and turning them into a ruggedly elegant, geometric wall planter system that will have your guests asking which designer showroom you visited.
This project is the epitome of the masculine-elegant aesthetic. It combines raw industrial lines with the soft, organic textures of greenery. Whether you are a handy parent looking to spruce up the family room or a frugal DIYer aiming for a magazine-worthy apartment, this guide is your blueprint for success. We aren’t just gluing things together; we are engineering a piece of art.
Budget Mantra: Your creativity is the only currency that never devalues. A dollar spent with a vision is worth a hundred spent without one.
The Hunt: Sourcing Your Diamond-in-the-Rough Materials
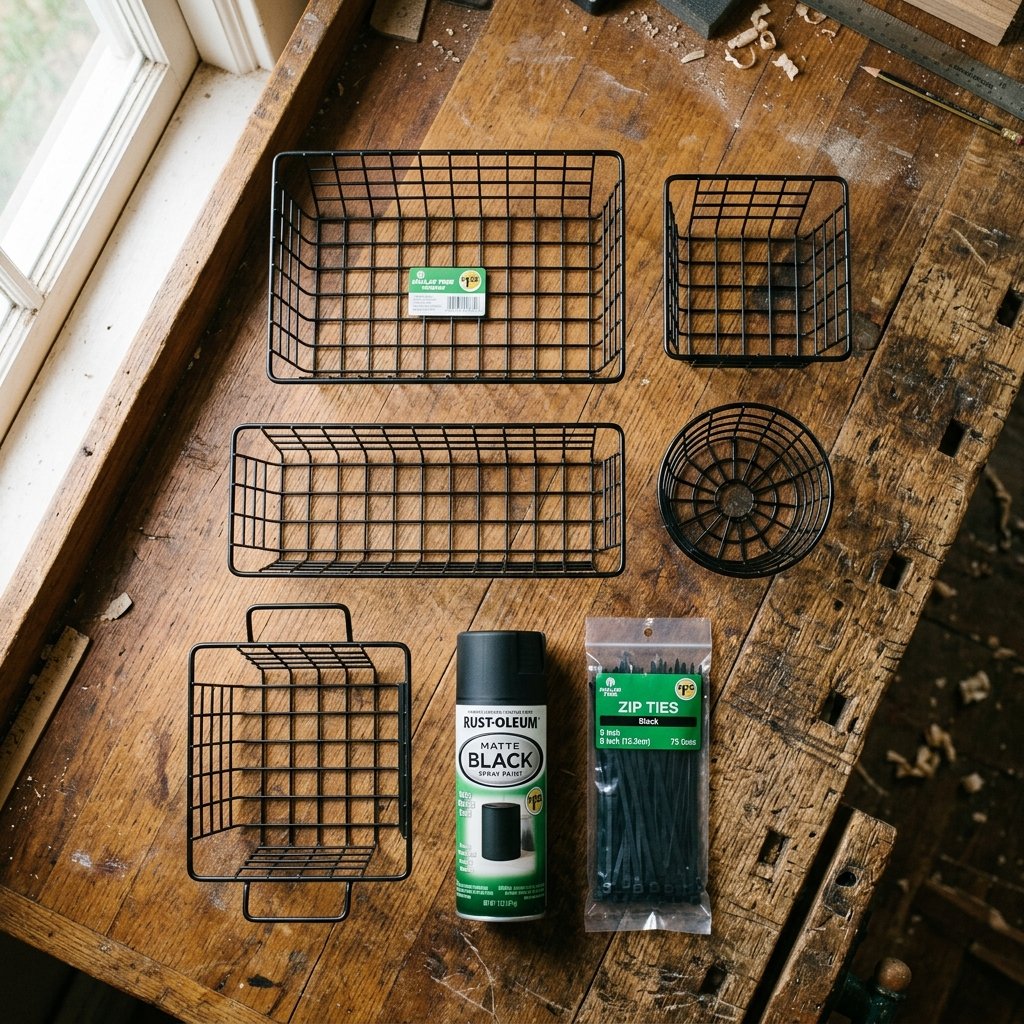
Success in any DIY project begins at the source. For this geometric hack, we are looking for wire items that have clean, structural lines. At Dollar Tree, the ‘Gold Mine’ is usually in the kitchen organization or office supply aisles. You are looking for wire trash bins, wire letter sorters, or wire fruit bowls. The key is to see past the neon colors or the cheap finishes and focus entirely on the geometric skeleton.
Essential Supply List
Before you start your engine, check your inventory. We want to keep this project under a $15 total budget for maximum satisfaction.
| Item | Purpose | Estimated Cost |
|---|---|---|
| Dollar Tree Wire Baskets (4-6) | The main structural frames | $5.00 – $7.50 |
| Matte Black or Copper Spray Paint | Providing the high-end industrial finish | $4.00 |
| Zip Ties (Small/Black) | Securing the frames together | $1.25 |
| Faux Succulents or Air Plants | Low-maintenance greenery | $3.00 |
| Command Hooks or Small Nails | Damage-free mounting | $2.00 |
When choosing your baskets, look for symmetry. If the wire is bent or the welds look weak, put it back. We want crisp angles to ensure the final installation looks intentional and professional. If you can find the hexagonal or pentagonal wire baskets often stocked in the seasonal section, grab them immediately—they are the holy grail for this hack.
The Industrial Finish: Mastering the Faux-Metal Patina
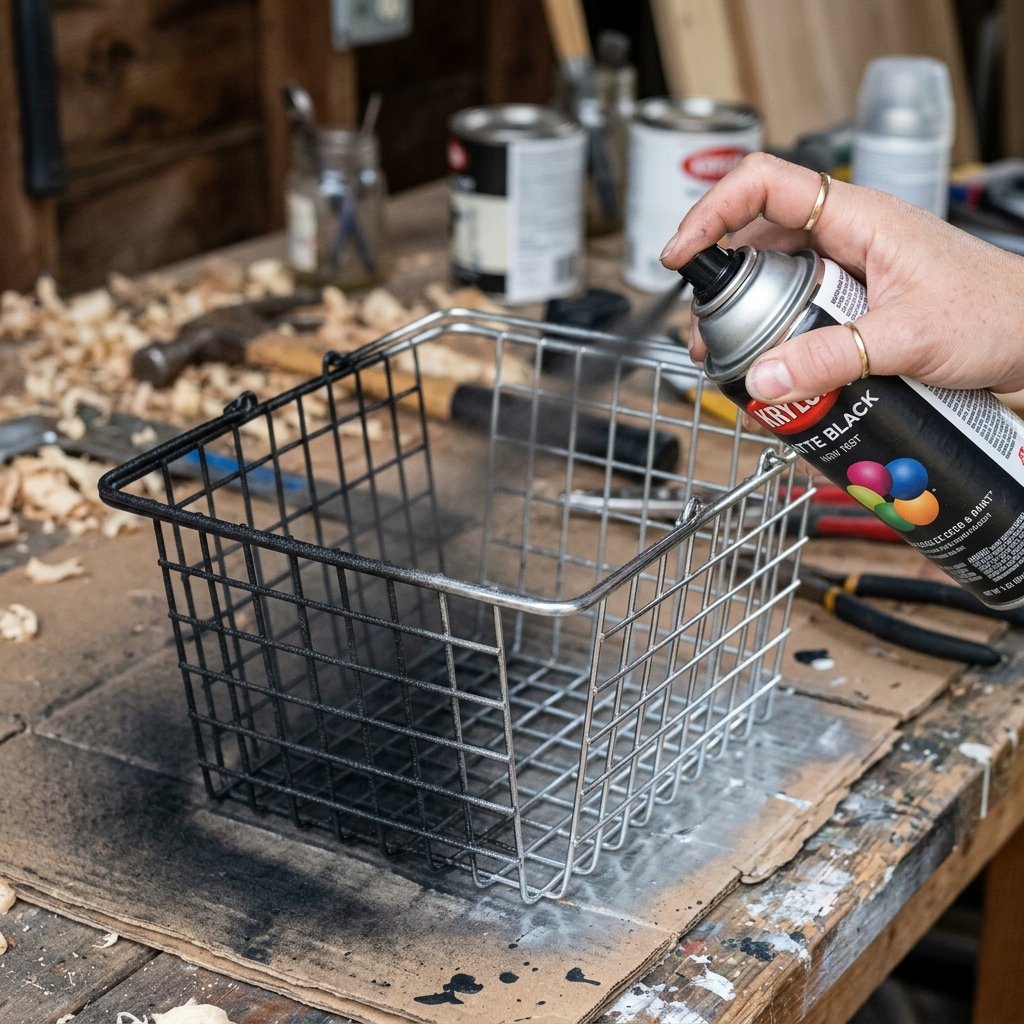
The biggest giveaway of a ‘cheap’ DIY is the finish. If it looks like plastic-coated wire, it will look like a dollar store project. To achieve that Pottery Barn look, we need to strip away the shine and add texture. This is where the ‘Baking Soda Paint Trick’ comes into play, or a high-quality matte spray paint for a more rugged, forged-iron feel.
Step-by-Step Refinishing
- Preparation: Lightly sand the wire frames with a high-grit sandpaper. This creates ‘tooth’ for the paint to grip, preventing peeling later.
- The First Coat: Apply a thin, even coat of primer. Do not rush this; multiple thin coats are better than one thick, drippy coat.
- The Texture Hack: If you want a stone or cast-iron look, mix a tablespoon of baking soda into your acrylic paint. Brush it on in a dabbing motion to create a slightly gritty, organic surface.
- The Metallic Touch: For a more modern vibe, use a metallic copper or ‘Oil Rubbed Bronze’ spray paint. Pro-Tip: Hold the can 12 inches away and move in a steady sweeping motion to avoid ‘pooling’ at the wire joints.
Safety Note: Always perform spray painting in a well-ventilated outdoor area. Wear a mask to avoid inhaling fumes, and use a drop cloth to protect your workspace from overspray.
By investing 20 minutes in a proper paint job, you increase the perceived value of the item by at least 10x. We are aiming for a finish that looks heavy, cold, and metallic.
Architectural Assembly: Building Your Geometric Masterpiece
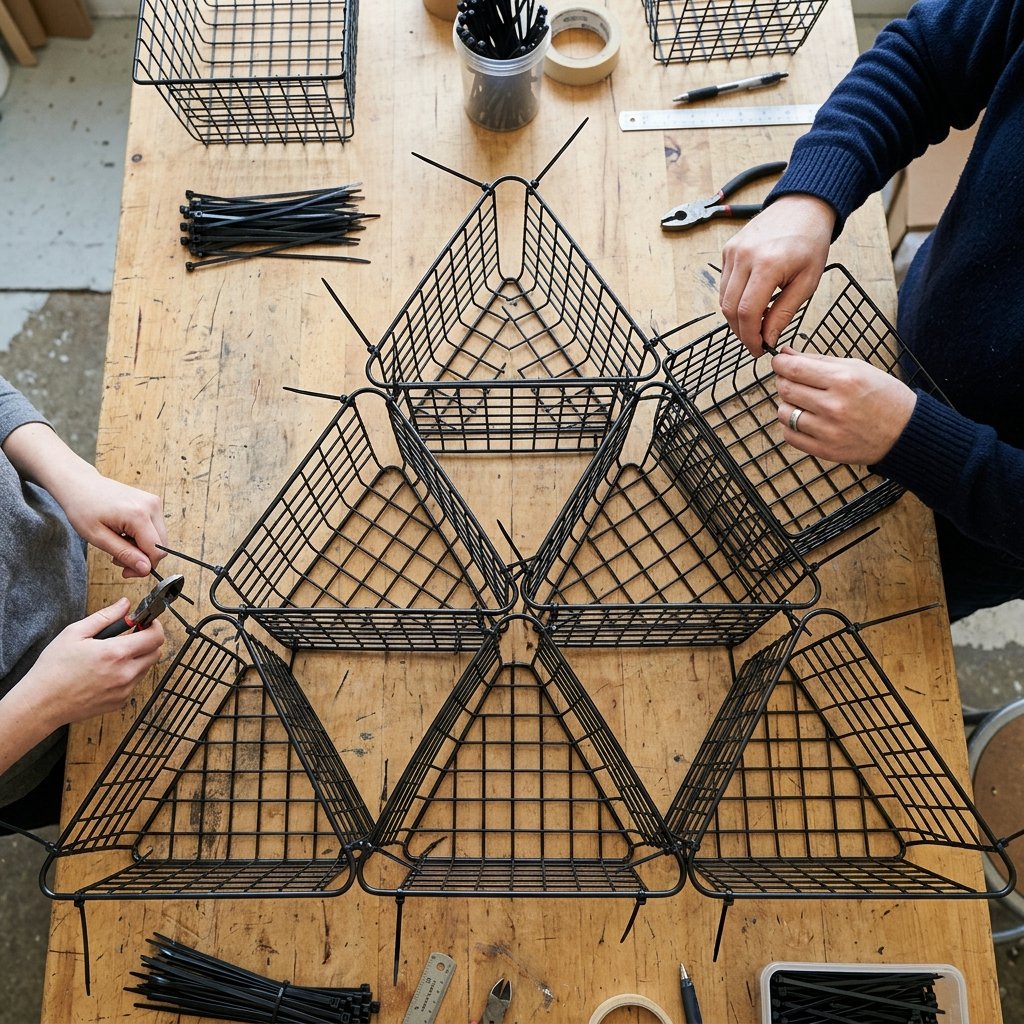
Now comes the creative part. We aren’t just hanging baskets; we are creating a modular wall sculpture. This requires a bit of planning and ‘dry-fitting’ before you commit to the wall. This is where your inner engineer takes the lead.
Design Layout Strategies
- The Linear Grid: Align three baskets horizontally and three vertically for a clean, symmetrical look.
- The Honeycomb: If using hexagonal frames, nestle them together so they share ‘walls,’ creating a continuous hive pattern.
- The Random Offset: For a more artistic, ‘designer’ feel, stagger the heights and depths of the baskets.
Once you’ve decided on a layout on your floor or table, use small black zip ties to join the wire frames at their contact points. Tighten them until the structure feels rigid, then snip the excess tail of the zip tie as close to the locking mechanism as possible. Rotate the ‘nub’ of the zip tie so it faces the wall, making it completely invisible to the eye.
| Layout Style | Best For | Difficulty Level |
|---|---|---|
| Symmetrical Grid | Modern Offices | Easy |
| Staggered Cluster | Living Room Focal Point | Medium |
| Vertical Column | Narrow Entryways | Easy |
Curating the Greenery: Selecting Plants for Rugged Elegance

A wire frame is just a skeleton; the plants are the soul of the piece. Since these are wire baskets, they don’t hold soil traditionally. You have two savvy options: Air Plants (Tillandsia) or Faux Succulents with moss inserts.
The ‘Zero-Maintenance’ Approach
If you have a ‘black thumb’ or simply don’t want to worry about watering a wall, high-quality faux succulents are your best friend. To make them look real, don’t just toss them in. Use a small piece of floral foam or a handful of dried Spanish moss at the base of the wire basket to ‘ground’ the plant. This adds a layer of organic texture that contrasts beautifully with the cold wire.
The ‘Living Wall’ Approach
For those who want real oxygen-producing greenery, air plants are the ultimate hack. They don’t require soil—only a soak in water once a week. Simply nestle the air plant into the wire crevices. The wire provides the perfect airflow that these plants crave.
Styling Tip: Vary the heights and types of greenery. Use ‘string of pearls’ for a cascading effect on the bottom baskets and ‘aloe-style’ upright succulents for the top baskets to create visual movement.
The Final Reveal: Mounting and Gallery Wall Secrets
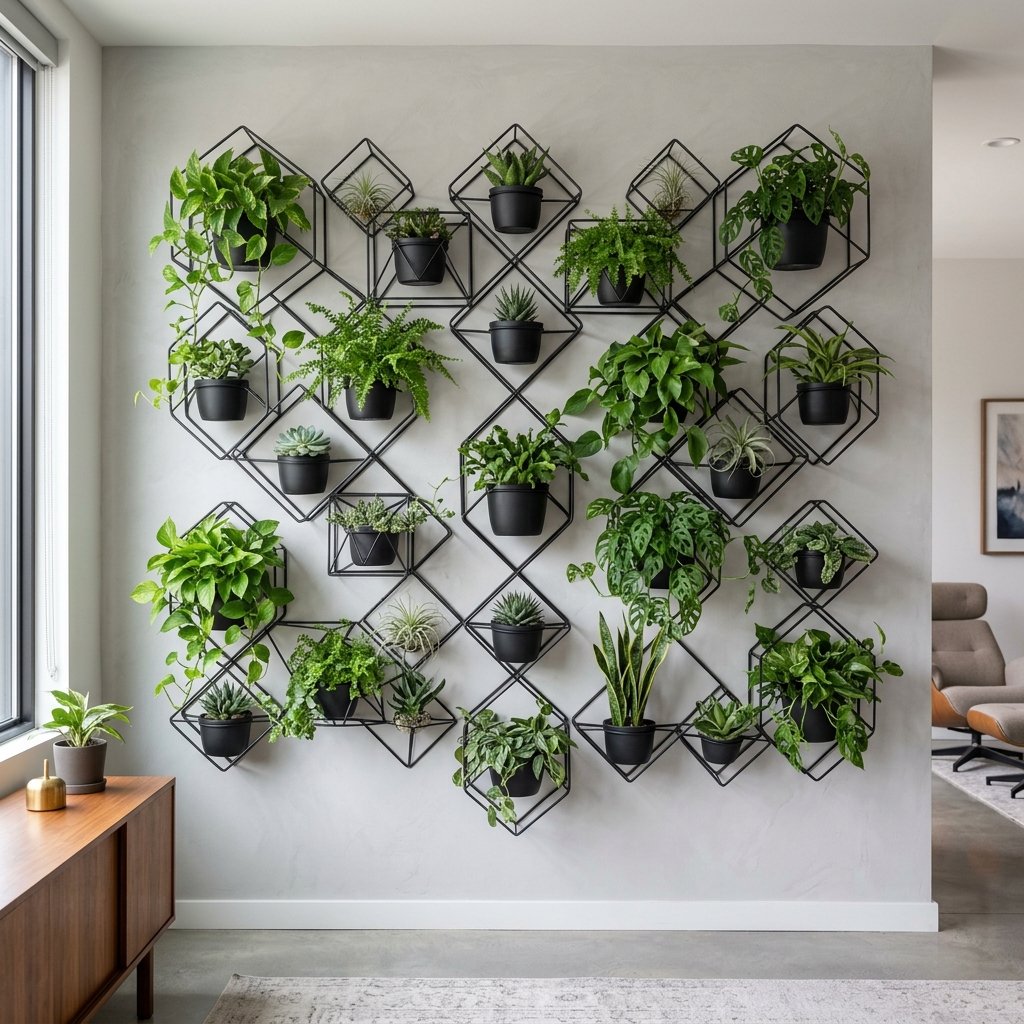
You’ve built it, painted it, and planted it. Now, let’s get it on the wall. Because these wire frames are incredibly lightweight (one of the perks of Dollar Tree materials!), you don’t need heavy-duty anchors or a drill. This makes it a perfect renter-friendly hack.
Mounting Instructions
- The Level Check: Use a bubble level (or a level app on your phone) to ensure your first ‘anchor’ basket is perfectly straight.
- Command Hook Magic: Place small, clear Command Hooks on the wall where the top corners of your frames will sit. The wire will hook right over them.
- The Shadow Effect: If you want to add depth, use small spacers (like a stack of washers or a small piece of wood) behind the center of the installation to make it ‘pop’ off the wall, creating beautiful shadows.
| Store-Bought Version | DIY Version Cost | Total Savings |
|---|---|---|
| $120.00 (West Elm Style) | $12.50 | $107.50 (89% Saved) |
The result is a custom, high-end installation that looks like it cost a fortune but only required a few hours of your time and the price of a takeout lunch. It’s rugged, it’s practical, and it’s a testament to your resourceful creativity.
Conclusion
Your Wall, Reimagined
Transforming your home doesn’t require a massive renovation budget or a degree in interior design. It requires the ability to look at a $1.25 wire basket and see a piece of architectural art. This geometric wire planter hack is more than just a decor project; it’s a masterclass in the ‘Trash-to-Treasure’ philosophy. You’ve saved over $100, kept materials out of the landfill, and created a focal point that reflects your clever, budget-savvy personality.
Now that you’ve mastered the wire frame, what’s next? Perhaps a matching set of industrial bookends or a tiered fruit stand using the same refinishing techniques? The skills you used today—sanding, texturizing, and spatial planning—are the building blocks of a truly handy and creative life. Go ahead, take a photo of your new wall, and share it with the world. You’ve earned the bragging rights!

Makenzie is the founder and lead writer at MoneyHackTips.com — a personal finance blog dedicated to delivering street-smart financial wisdom for real people on real budgets. With 300+ published articles covering everything from debt management to investing fundamentals, Makenzie’s mission is to make every dollar work harder. When not writing about money hacks, Makenzie is testing frugal living strategies, optimizing side hustles, and helping readers build financial freedom from scratch.