Let’s be honest: every guy has—or had—that one skateboard deck that’s just too sentimental to toss but too ‘thrashed’ to ride. Maybe the tail is chipped, the pop is gone, or the graphic is a shredded mosaic of concrete encounters. Instead of letting that piece of your history gather dust in the garage, it’s time to give it a second life. We’re talking about the ultimate upcycling project: the Skateboard Wall Shelf. This isn’t some flimsy plastic unit from a big-box store; this is a rugged, industrial, and insanely cool piece of functional art that screams personality.
As a frugal DIYer, you know that the best decor isn’t bought—it’s built. By repurposing a deck and using smart, budget-friendly hardware, you can create a high-end ‘industrial-modern’ look for a fraction of the price of designer furniture. Whether you’re styling a man cave, a home office, or a kid’s bedroom, this project is the perfect blend of masculine elegance and resourceful creativity. In this guide, we’ll walk through the entire process, from stripping the old grip tape to securing the final bolt into the wall. Grab your tools, find your old deck, and let’s turn some trash into a functional masterpiece.
The Scavenger’s Guide to Sourcing and Prepping Your Deck
Before we pick up a drill, we need the foundation. If you don’t have an old deck lying around, don’t sweat it. The world is full of ‘retired’ boards waiting for a new home. Check local thrift stores, Facebook Marketplace, or even your local skate shop—many shops have a ‘take a deck, leave a deck’ bin or a pile of cracked boards they might give you for free if you ask nicely.
Evaluating the Deck
When sourcing, look for 7-ply Canadian Maple decks. Even if the graphic is ruined, the wood itself is incredibly strong and has a beautiful layered edge profile. Don’t worry about ‘razor tail’ (worn down ends) or minor chips; these add rugged character to the finished shelf. However, avoid decks that are severely water-logged or delaminating, as they won’t hold screws well.
The Great Grip Tape Removal
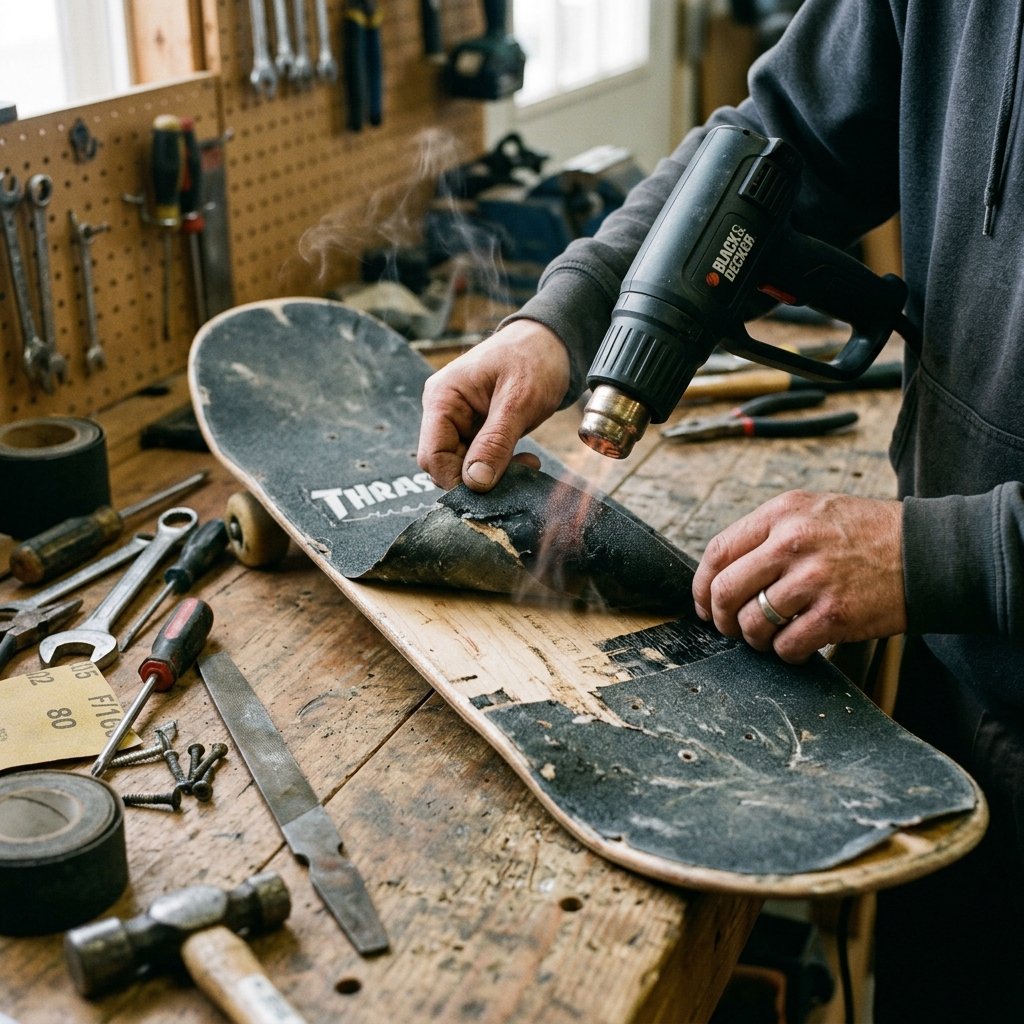
If your deck still has grip tape, you’ll need to remove it to reveal the wood grain on the top side (which will become the top of your shelf). This is the most labor-intensive part, but with a clever trick, it’s a breeze.
Pro Tip: Use a hairdryer or a heat gun on a low setting to warm the adhesive. Once the glue is soft, use a putty knife to peel the grip tape back slowly. It should come off in large chunks rather than tiny, frustrating shreds.
Once the tape is off, use a bit of Goo Gone or rubbing alcohol to remove any sticky residue. Finish with a light sanding using 120-grit sandpaper to smooth out the surface and prep it for a fresh coat of finish.
| Material | Source | Estimated Cost |
|---|---|---|
| Used Skateboard Deck | Garage Sale / Attic | $0 – $5 |
| Sandpaper (120/220 Grit) | Hardware Store | $2 |
| Adhesive Remover | Pantry / Dollar Store | $1.25 |
| Total Prep Cost | – | $3.25 – $8.25 |
Engineering the Build: Choosing Your Mounting Style
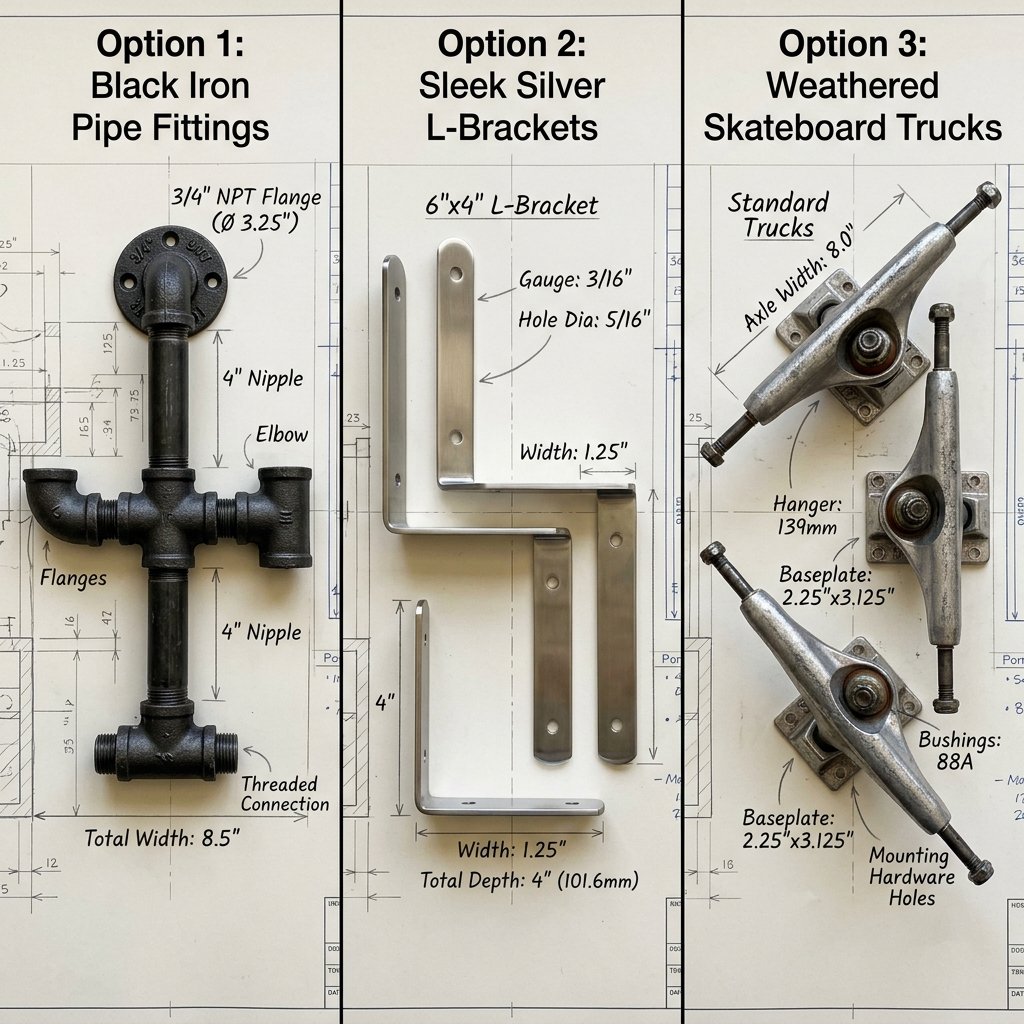
The beauty of this project lies in its versatility. Depending on your aesthetic, you can choose between three main mounting styles. Each has a different cost profile and difficulty level, but all are budget-savvy if you know where to shop.
1. The Industrial Pipe Method (Our Top Pick)
This uses black iron gas pipes and flanges. It is incredibly sturdy and gives the shelf a heavy, masculine feel. It looks like something you’d find in a high-end loft in Brooklyn but costs very little if you buy the parts at a wholesale hardware center.
2. The Invisible Floating Look
By using standard L-brackets tucked hidden underneath the deck’s ‘truck’ holes, you can make the board look like it’s hovering on the wall. This is the cheapest option and puts all the focus on the deck itself.
3. The Repurposed Truck Mount
If you still have the old trucks (the metal axle parts), you can actually bolt the trucks to the wall and then attach the board to the trucks. This is the most ‘authentic’ skate look, though it requires longer lag bolts and a bit more precision to ensure the board stays level.
| Mounting Style | Difficulty | Avg. Cost | Vibe |
|---|---|---|---|
| Industrial Pipe | Medium | $15 | Rugged / Modern |
| L-Bracket | Easy | $4 | Minimalist |
| Original Trucks | Hard | $0 | Authentic / Raw |
Step-by-Step Construction: The Industrial Pipe Method
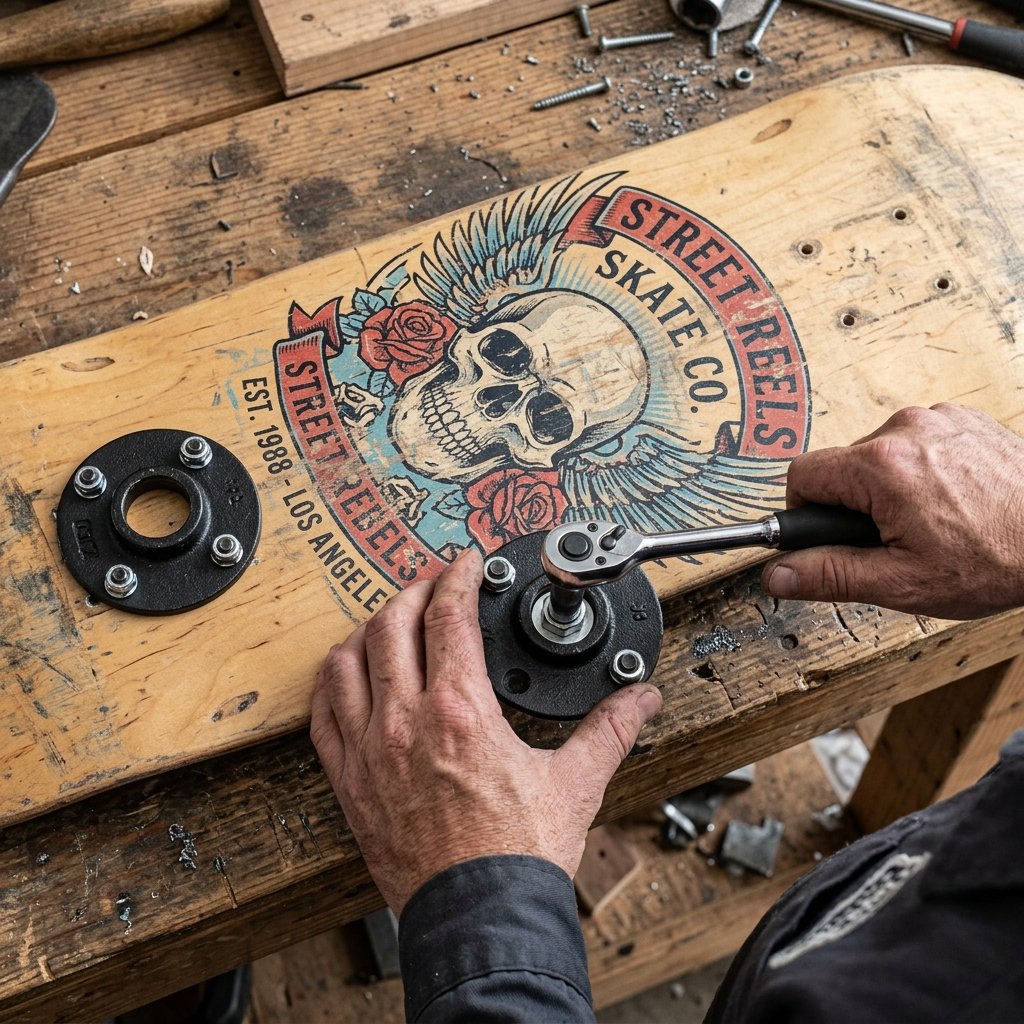
For this guide, we will focus on the Industrial Pipe Method because it offers the most stability for heavier items like books or speakers. Here is exactly how to assemble it.
Step 1: Mark Your Drill Points
Most skateboards have a standard hole pattern for the trucks. We are going to use these existing holes so we don’t have to drill new ones into the deck. Line up your 1/2-inch floor flanges with the inner truck holes. You’ll likely find that two of the holes in the flange align perfectly with the holes in the board.
Step 2: Secure the Flanges to the Deck
Using 1/2-inch bolts and matching nuts, secure the floor flanges to the ‘bottom’ side of the deck (the side with the graphic). Make sure the flat part of the flange is flush against the wood. Tighten firmly using a wrench.
Step 3: Assemble the ‘Arms’
Screw a 4-inch or 6-inch black iron nipple (the short pipe) into the flange already attached to the board. On the other end of the pipe, screw on another floor flange. This second flange will be the part that actually touches the wall.
Safety Note: Black iron pipes often come coated in a greasy oil to prevent rust. Before mounting, wipe them down with a rag soaked in degreaser or soapy water to keep your walls clean!
Step 4: Find the Studs
This shelf is heavy. You must mount at least one side into a wall stud. Use a stud finder to locate your mounting points. If you can’t hit a stud, use heavy-duty toggle bolts (rated for at least 50 lbs) to ensure your shelf doesn’t come crashing down in the middle of the night.
Step 5: Level and Mount
Hold the shelf against the wall and place a level across the top. Once it’s perfectly horizontal, mark the holes in the wall flanges with a pencil. Drill your pilot holes, insert your anchors, and drive in your screws.
Customization and Finishing Touches
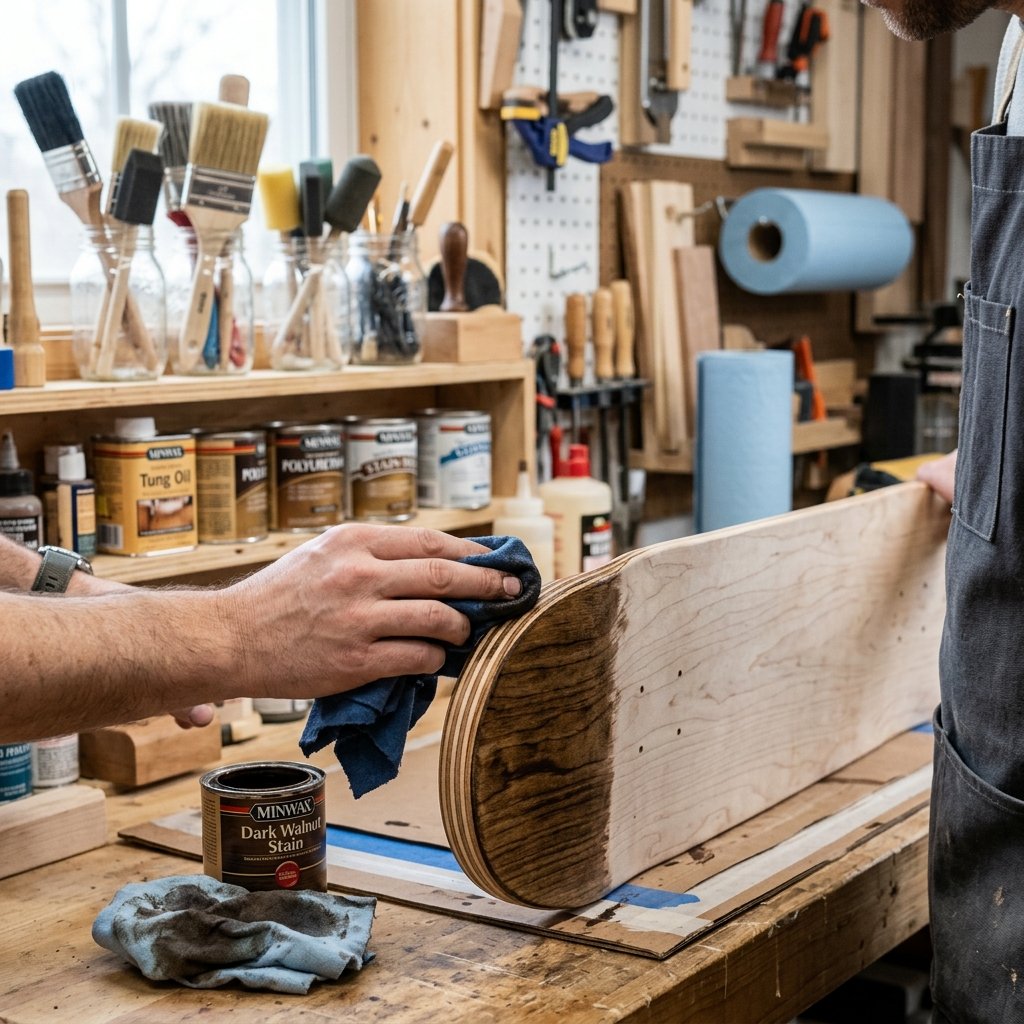
Now that the structure is solid, it’s time for the crafty-expert flourishes. You want this to look like a piece of custom furniture, not a science project. Here is how to elevate the aesthetic.
Staining vs. Painting
If you stripped the grip tape and revealed a beautiful maple grain, consider a dark walnut stain. It provides a sophisticated contrast to the industrial pipes. If the wood is a bit stained or ugly, a matte black spray paint or a deep navy blue can give it a sleek, modern finish. Two light coats are always better than one thick, drippy coat.
The ‘Grown-Up’ Edge
The edges of a skateboard deck are composed of several layers of dyed wood (usually 7 plies). Use a fine-grit sandpaper (220 grit) to polish these edges until they are smooth as glass. Apply a bit of linseed oil or beeswax to the edges to make those colors pop. It’s a subtle detail that screams quality.
Weathering the Hardware
If the black iron pipes look too ‘new,’ you can lightly scuff them with steel wool and spray them with a matte clear coat. This prevents rust while maintaining that rugged, masculine-elegant patina. For a more ‘steampunk’ look, you can even use copper pipes, though they require more support as copper is softer than iron.
| Finish Type | Pros | Best For |
|---|---|---|
| Clear Polyurethane | Shows grain, very durable | Natural Maple Decks |
| Matte Black Paint | Hides imperfections | Thrashed/Chipped Decks |
| Beeswax / Oil | Eco-friendly, soft feel | Minimalist Offices |
Styling Your Masterpiece: What Goes on a Skateboard Shelf?
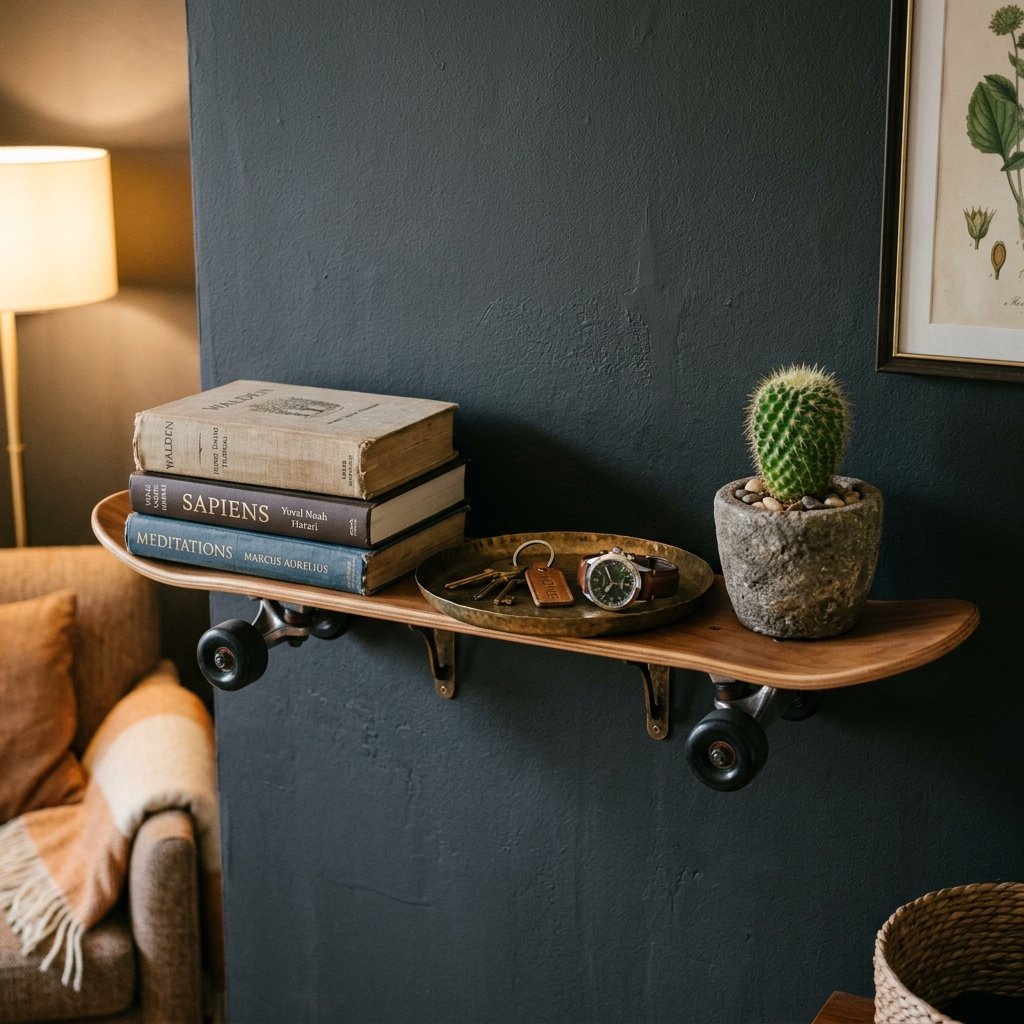
You’ve built it, you’ve mounted it, and it looks incredible. But a shelf is only as good as what’s on it. To maintain that resourceful and clever vibe, you want to curate the items you display. This isn’t the place for clutter; it’s a place for your ‘Everyday Carry’ (EDC) or your favorite collectibles.
The ‘Man-Crate’ Aesthetic
Because the shelf has a natural curve (the kicktail and nose), it creates a ‘valley’ in the middle. This is perfect for holding items that might otherwise roll off a flat shelf. Think about placing your watch collection, a leather valet tray for your keys, or even a vintage glass whiskey decanter in the center.
Adding Greenery
To soften the ruggedness of the wood and metal, add a small plant. A succulent in a concrete pot or a ‘Snake Plant’ (which is nearly impossible to kill) adds a touch of life and color that balances the masculine materials perfectly.
The Visual Weight Rule
Since the skateboard is long and thin, don’t overcrowd it. Place your heaviest visual item (like a stack of books) over one of the pipe supports. Use the curved ends to frame smaller items like a favorite action figure, a trophy, or a GoPro camera.
Budget Mantra: “The best decor tells a story. Use items you already own that reflect your journey, and they will always look better than store-bought trinkets.”
Conclusion
Building a DIY upcycled skateboard shelf is more than just a weekend project; it’s a way to honor your past while creating something functional for your future. For the frugal DIYer, it’s a massive win—you’ve taken a piece of equipment destined for the landfill and transformed it into a piece of furniture that would easily retail for $100 or more in a boutique home store. You did it for less than the cost of a pizza.
Remember, the beauty of DIY is in the imperfections. That scratch on the tail from your first successful kickflip? That’s not a flaw; it’s a conversation starter. Whether you went with the industrial pipe look or the minimalist floating mount, you now have a rugged, practical, and insanely cool addition to your space. So, what are you waiting for? Go find that old deck and start building. Your walls—and your wallet—will thank you.

Makenzie is the founder and lead writer at MoneyHackTips.com — a personal finance blog dedicated to delivering street-smart financial wisdom for real people on real budgets. With 300+ published articles covering everything from debt management to investing fundamentals, Makenzie’s mission is to make every dollar work harder. When not writing about money hacks, Makenzie is testing frugal living strategies, optimizing side hustles, and helping readers build financial freedom from scratch.