
The Silent Wardrobe Killer: Why Your Hangers Are Ruining Your Style
We have all been there. You pull your favorite lightweight sweater or that perfectly broken-in vintage tee out of the closet, only to find the dreaded ‘shoulder bumps’—those unsightly, pointed protrusions caused by the harsh edges of cheap wire or plastic hangers. It is a frustrating reality for any frugal enthusiast who takes pride in their wardrobe. But what if the solution to this clothing catastrophe was sitting at the bottom of your rag bin? Enter the T-shirt yarn hanger hack. This isn’t just a craft project; it is a tactical upgrade for your closet that combines rugged utility with a bespoke, masculine-elegant aesthetic. By repurposing old, worn-out cotton shirts, you can create a high-friction, cushioned surface that preserves the structural integrity of your garments for $0. In this guide, we are going to master the art of the 5-minute wrap, ensuring your clothes look as sharp as the day you bought them.
The Anatomy of a Better Hanger: Why T-Shirt Yarn Wins
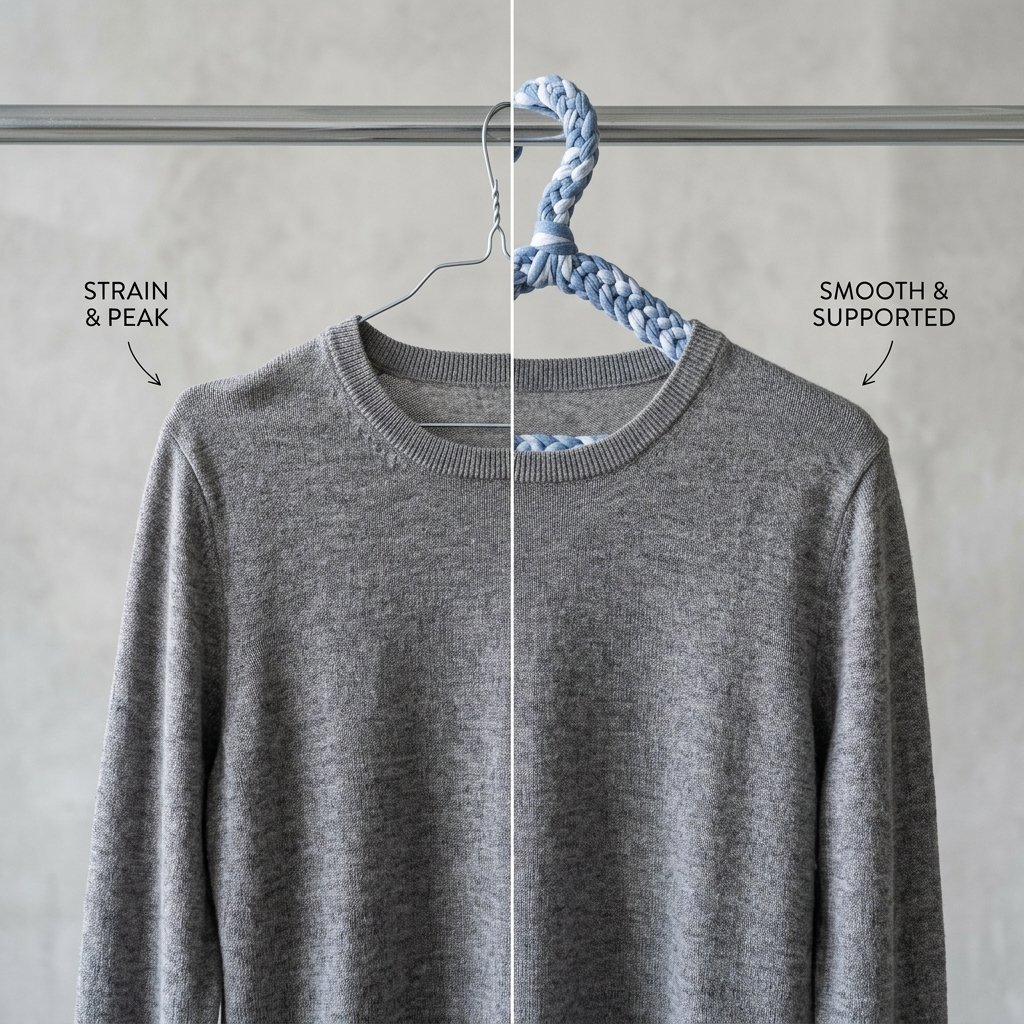
Standard hangers are designed for mass production, not for the longevity of your fabric. Wire hangers are too thin, slicing into delicate knits, while plastic hangers are often too slippery, leading to clothes piling up on the floor. To understand why t-shirt yarn is the superior choice, we need to look at the material properties of jersey cotton. It is breathable, slightly elastic, and provides the perfect amount of grip without being abrasive.
The Cost of Neglect vs. The DIY Solution
When you invest in quality clothing, the last thing you want is to spend more money on expensive velvet or cedar hangers. This hack allows you to achieve a premium ’boutique’ feel using items you already own. Below is a comparison of how this DIY solution stacks up against store-bought alternatives.
| Hanger Type | Cost Per Unit | Grip Level | Fabric Protection |
|---|---|---|---|
| Standard Wire | $0.10 | Low | Poor (Causes Bumps) |
| Basic Plastic | $0.25 | Medium-Low | Fair |
| Store-Bought Velvet | $1.50 – $3.00 | High | Good |
| DIY T-Shirt Yarn | $0.00 | Exceptional | Superior (Cushioned) |
The secret to a long-lasting wardrobe isn’t just how you wash your clothes; it’s how you store them. A cushioned hanger is a non-negotiable for anyone serious about garment care.
The 5-Minute T-Shirt Yarn Factory: Turning Rags into Resource
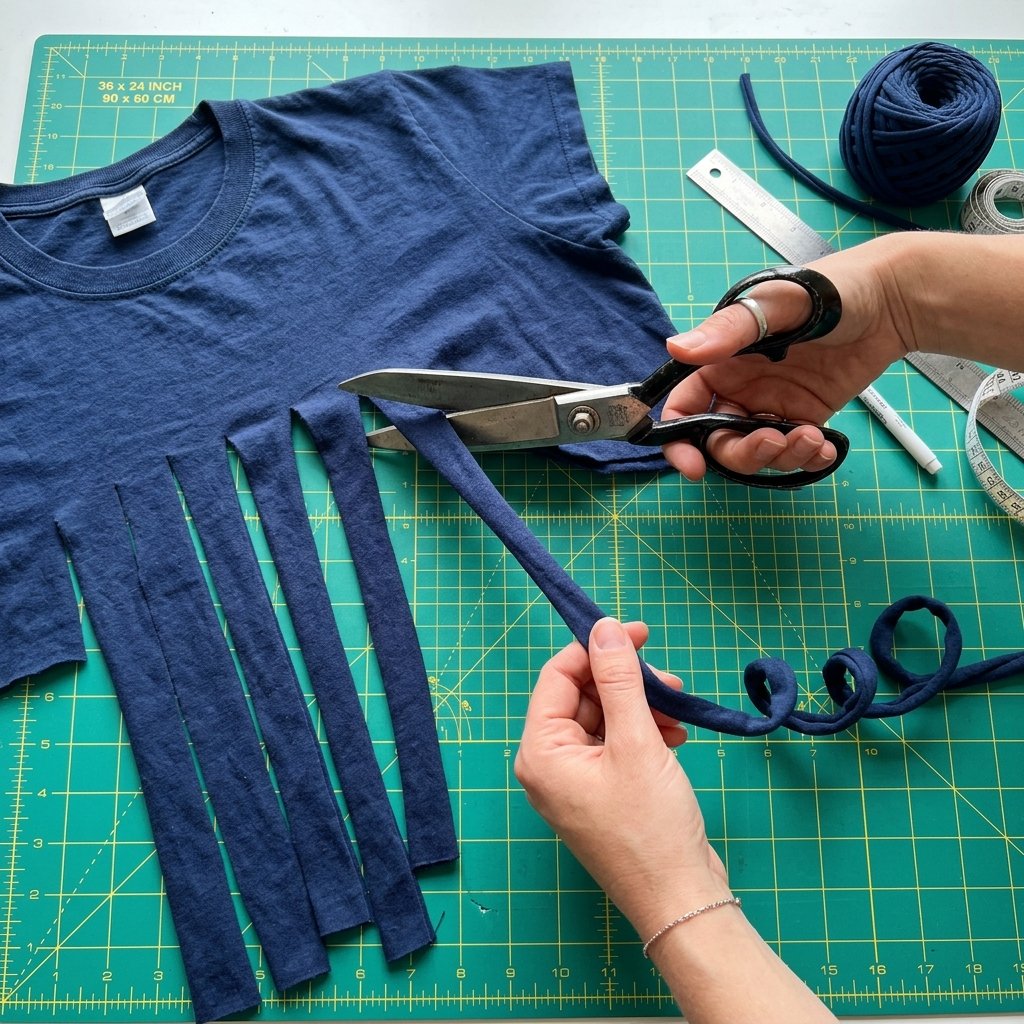
Before we can wrap, we need the yarn. This is where your resourcefulness shines. You don’t need to buy ‘Zpagetti’ or pre-made rolls. Any 100% cotton or cotton-blend shirt with no side seams is your best candidate. The lack of seams ensures a smooth, continuous strand that won’t knot up during the wrapping process.
Step-by-Step Strand Creation
- Lay the shirt flat: Smooth out any wrinkles on a hard surface.
- Remove the hem: Cut off the bottom hem of the shirt and discard it (or save it for heavy-duty tying).
- Cut the ‘Fringe’: Cut horizontal strips about 1 inch wide from the bottom up toward the armpits, but stop about 1 inch before you reach the opposite side.
- The Diagonal Cut: Open the shirt up so the uncut side is facing you. Cut diagonally from the first slit to the second, the second to the third, and so on. This creates one continuous loop of fabric.
- The Stretch: This is the most satisfying part. Pull the fabric strip firmly between your hands. The edges will curl inward, creating a rounded, durable cord known as t-shirt yarn.
Pro Tip: Use a shirt with a bit of spandex (3-5%) if you want a yarn that has extra ‘snap’ and clings tighter to the hanger frame.
The Tactical Wrap: Mastering the Friction Hitch
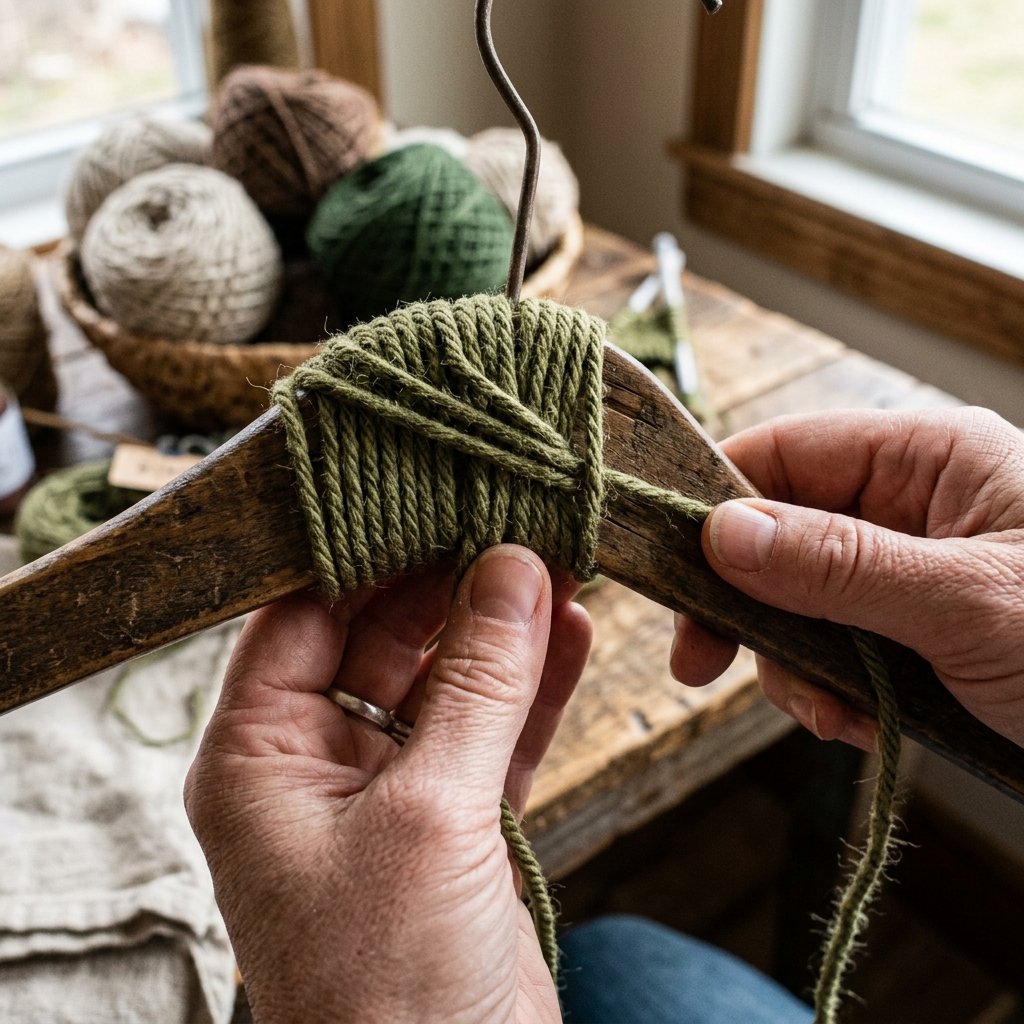
Now that you have your yarn, it is time to transform a basic hanger. Whether you are using old plastic hangers or salvaged wire ones, the technique remains the same. We are aiming for a tight, overlapping wrap that provides a non-slip surface and a cushioned edge.
The Wrapping Process
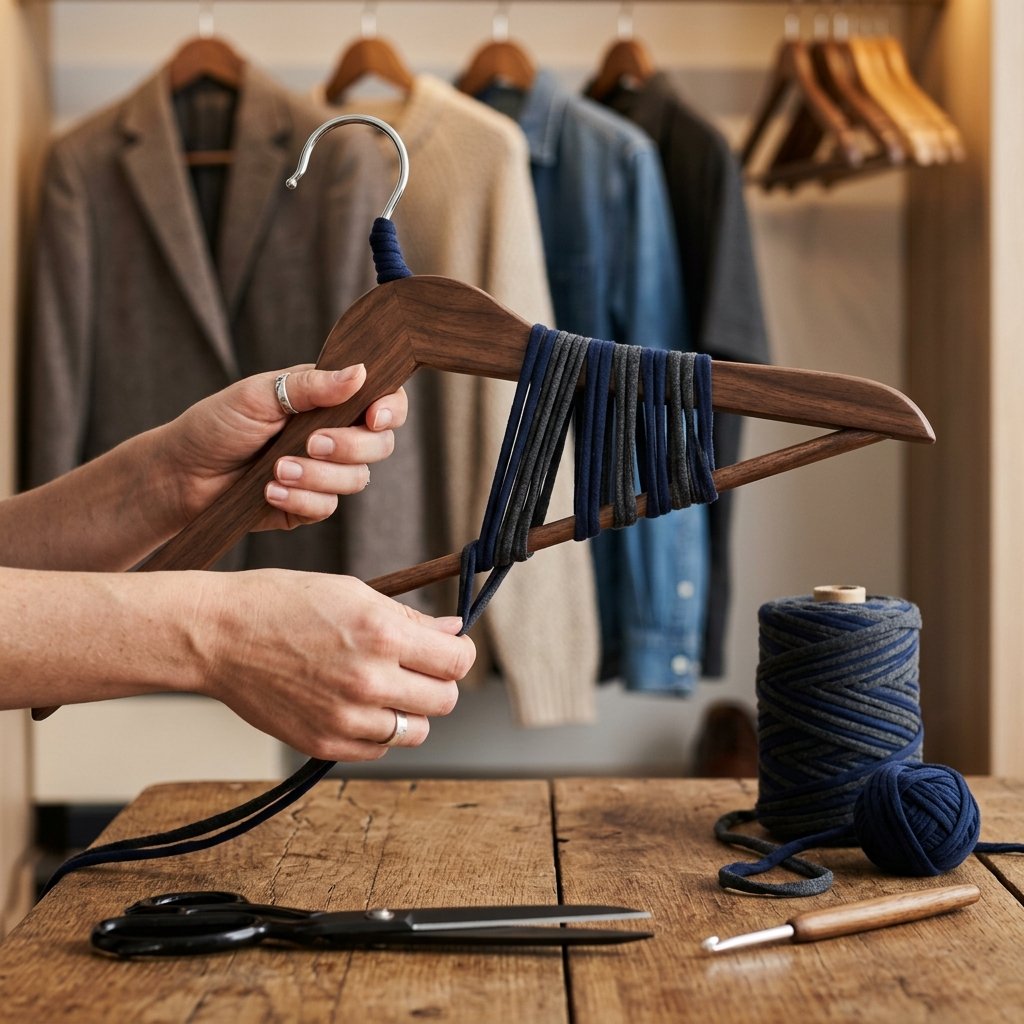
- The Anchor: Start at the base of the hanger hook. Apply a small dab of hot glue or simply tie a tight double knot with a 2-inch tail.
- The Overlap: Begin wrapping the yarn around the neck of the hanger. Ensure each pass overlaps the previous one by about 25%. This prevents the hanger underneath from peeking through.
- The Shoulder Cushion: When you reach the ‘shoulders’ of the hanger, wrap the yarn twice in the same spot before moving on. This extra padding is what prevents those dreaded bumps.
- The Finish: Once you’ve circled back to the hook, tuck the end of the yarn under the previous loop using a crochet hook or a small screwdriver, and secure with a final knot or a drop of adhesive.
Safety Note: When using hot glue or sharp scissors, always work on a stable surface and keep your fingers clear of the heat source. A small burn can ruin a good crafting session.
Style and Strategy: Color Coding Your Closet

A clever DIYer doesn’t just fix a problem; they optimize the system. This hack allows you to implement a visual organization system that would cost a fortune at a home goods store. By using different colored shirts for different categories of clothing, you can navigate your closet with tactical precision.
Suggested Color Coding Matrix
| Yarn Color | Garment Category | Reasoning |
|---|---|---|
| Charcoal / Black | Suits & Blazers | Provides a sophisticated, high-end look for structured items. |
| Heather Grey | Casual Knits | Soft texture matches the relaxed nature of sweaters. |
| Navy Blue | Button-Downs | Classic contrast for crisp whites and light blues. |
| White / Cream | Delicates / Linens | Ensures no color transfer on light-colored fabrics. |
Beyond aesthetics, the rugged durability of t-shirt yarn means these hangers will last for years. Unlike velvet hangers, which can shed fibers onto your clothes, cotton yarn stays intact and can even be spot-cleaned if necessary. It is the ultimate expression of masculine-elegant utility: functional, attractive, and built to last.
Conclusion
Level Up Your Wardrobe Maintenance
The 5-minute T-shirt yarn hanger hack is a testament to the power of resourceful creativity. By taking something destined for the landfill and turning it into a functional tool, you are not just saving money—you are taking control of your environment. No more ruined sweaters, no more shirts slipping onto the floor, and no more wasted cash on ‘premium’ organization products. You have the skills, you have the materials, and now you have the perfect closet. So, grab those old shirts and start wrapping; your wardrobe will thank you for it. Stay crafty, stay frugal, and keep your style sharp.

Makenzie is the founder and lead writer at MoneyHackTips.com — a personal finance blog dedicated to delivering street-smart financial wisdom for real people on real budgets. With 300+ published articles covering everything from debt management to investing fundamentals, Makenzie’s mission is to make every dollar work harder. When not writing about money hacks, Makenzie is testing frugal living strategies, optimizing side hustles, and helping readers build financial freedom from scratch.