
The Heirloom Gift You Can Make on a Dime
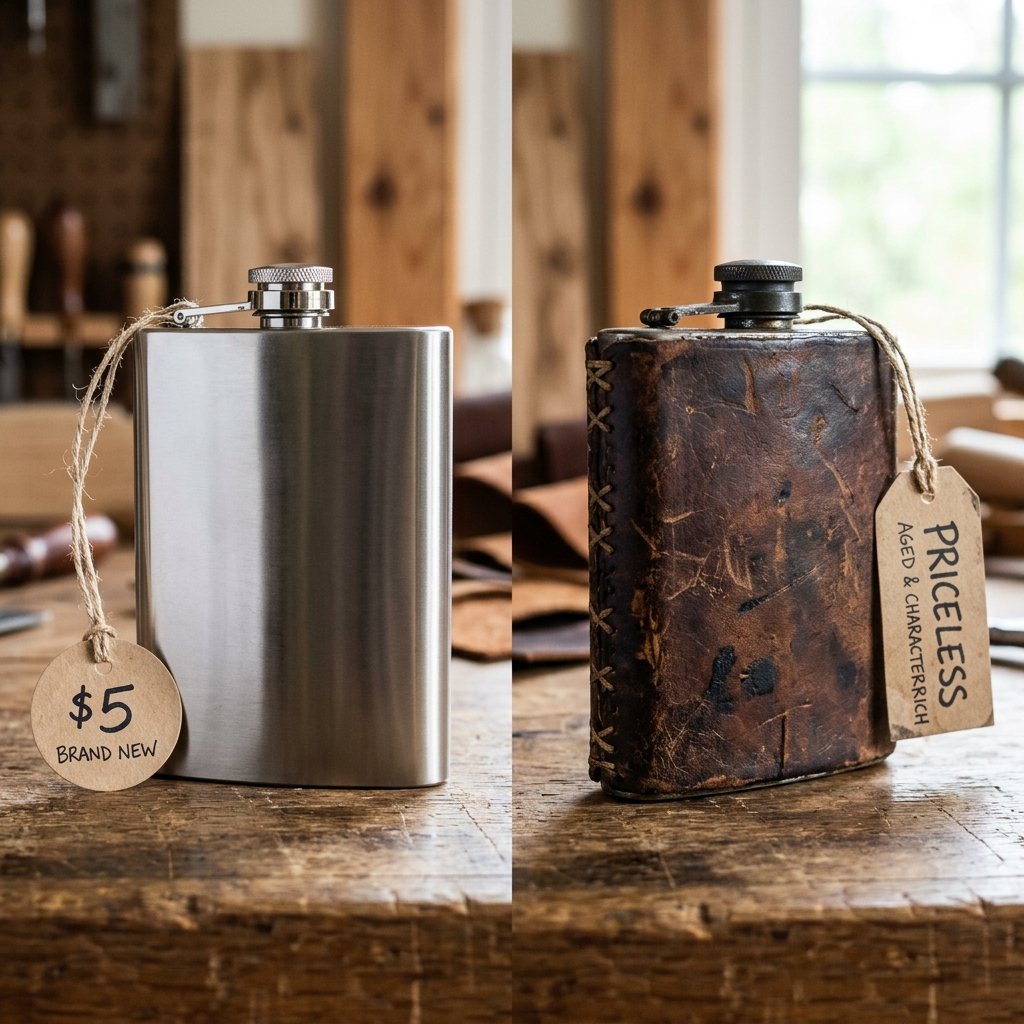
Let us face a harsh truth about gifting for men: the market is saturated with overpriced, generic junk. Whether you are hunting for the perfect groomsmen proposal, a thoughtful Father’s Day surprise, or a rugged birthday present for the outdoorsman in your life, you have likely stumbled across boutique leather-wrapped flasks. They look incredible, possessing that masculine, heritage-quality charm that screams roaring fireplaces and aged whiskey. The problem? They also come with a price tag that will make your wallet weep, often retailing for $80 to $150. But what if I told you that you could craft a bespoke, hand-stitched, premium leather flask for under $15?
Welcome to the ultimate frugal craftsman’s guide to creating a DIY leather-wrapped flask that completely outclasses anything you can buy in a big-box store. By combining the resourcefulness of upcycling with the timeless art of hand-sewing, we are going to transform a cheap, bare stainless steel flask into a rugged masterpiece. You do not need an expensive sewing machine, a dedicated leather workshop, or decades of experience. With a few budget-savvy tricks, some elbow grease, and a willingness to learn the legendary “saddle stitch,” you will be churning out heirloom-quality gifts that your friends and family will cherish for a lifetime.
This project is the perfect weekend endeavor for handy parents, budget brides crafting groomsmen boxes, and clever gift-givers who know that the most valuable gifts are built, not bought. Roll up your sleeves, clear off your workbench (or kitchen table), and let us dive into the satisfying, money-saving world of DIY leathercraft.
The Rugged Arsenal: Materials, Tools, and the Budget Breakdown
Gathering Your Supplies Without Breaking the Bank
The secret to high-end crafting on a shoestring budget is knowing exactly what you need and where to compromise. Traditional leathercraft can seem intimidating because of the highly specialized tools, but as a resourceful DIYer, you can bypass the expensive gear with clever household hacks.
The Essential Materials
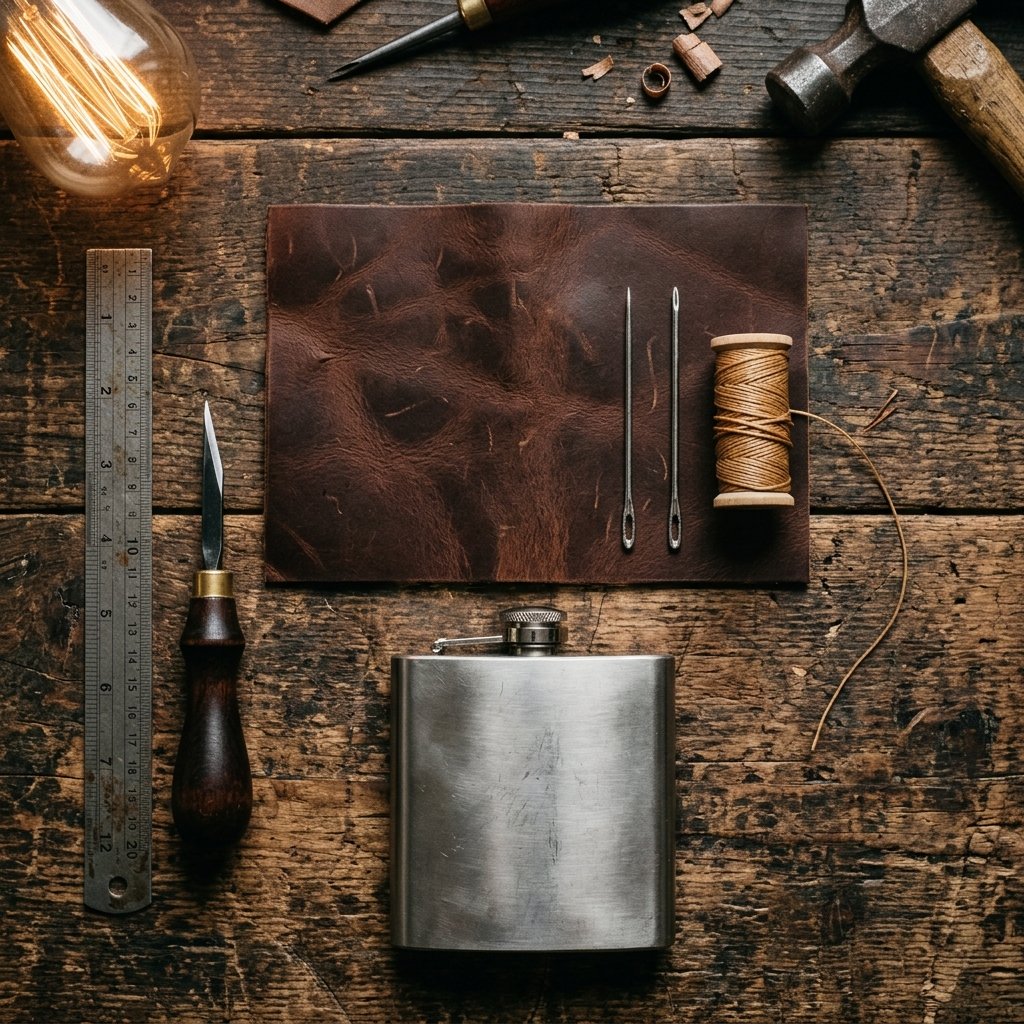
- Stainless Steel Flask Blank: You can buy a basic 8 oz stainless steel flask online or at a discount store for about $4 to $6. Look for ones with a captive top (the little arm that keeps the cap attached) so the recipient never loses it.
- Leather: You need a piece of leather large enough to wrap around the flask. A 6-inch by 10-inch scrap is usually plenty. We will discuss how to source this for pennies in the next section.
- Waxed Thread: Heavy-duty waxed thread (like 1mm flat waxed polyester) is non-negotiable. It provides that chunky, rugged look and resists rot and moisture. You can get a spool for $5 that will last you through dozens of projects.
- Two Harness Needles: Leather needles are blunt. You need two of them for the saddle stitch technique.
- Leather Adhesive: Contact cement or even a strong double-sided crafting tape to hold the leather in place while you stitch.
The Frugal Tool Kit
Instead of buying a $30 stitching chisel, you can use a simple awl, a small nail, or even a heavy-duty fork to mark your stitching holes. You will also need a sharp utility knife (a fresh box cutter blade works perfectly), a metal ruler, and a cutting mat or a piece of scrap cardboard.
The Cost Comparison
Let us look at the hard numbers. When you utilize upcycled materials and basic tools, the savings are astronomical.
| Item / Factor | High-End Store-Bought Flask | Your Resourceful DIY Flask |
|---|---|---|
| The Flask Blank | Included in markup | $5.00 |
| Premium Leather | $30.00 (Built into price) | $2.00 (Upcycled/Scrap) |
| Thread & Adhesives | Included in markup | $1.50 (Pro-rated) |
| Customization (Initials) | $15.00+ extra fee | 100% Free (DIY stamped) |
| Labor & Brand Markup | $50.00 – $100.00 | 1 to 2 hours of fun crafting |
| Total Estimated Cost | $85.00 – $150.00 | $8.50 – $10.00 |
The Frugal Crafter’s Mantra: Never pay a premium for a brand name when your own two hands can build a better story. A handmade flaw is a mark of authenticity, not a defect.
Sourcing the Hide: Upcycling and Scrap-Hunting Secrets
Where to Find Premium Leather for Pennies
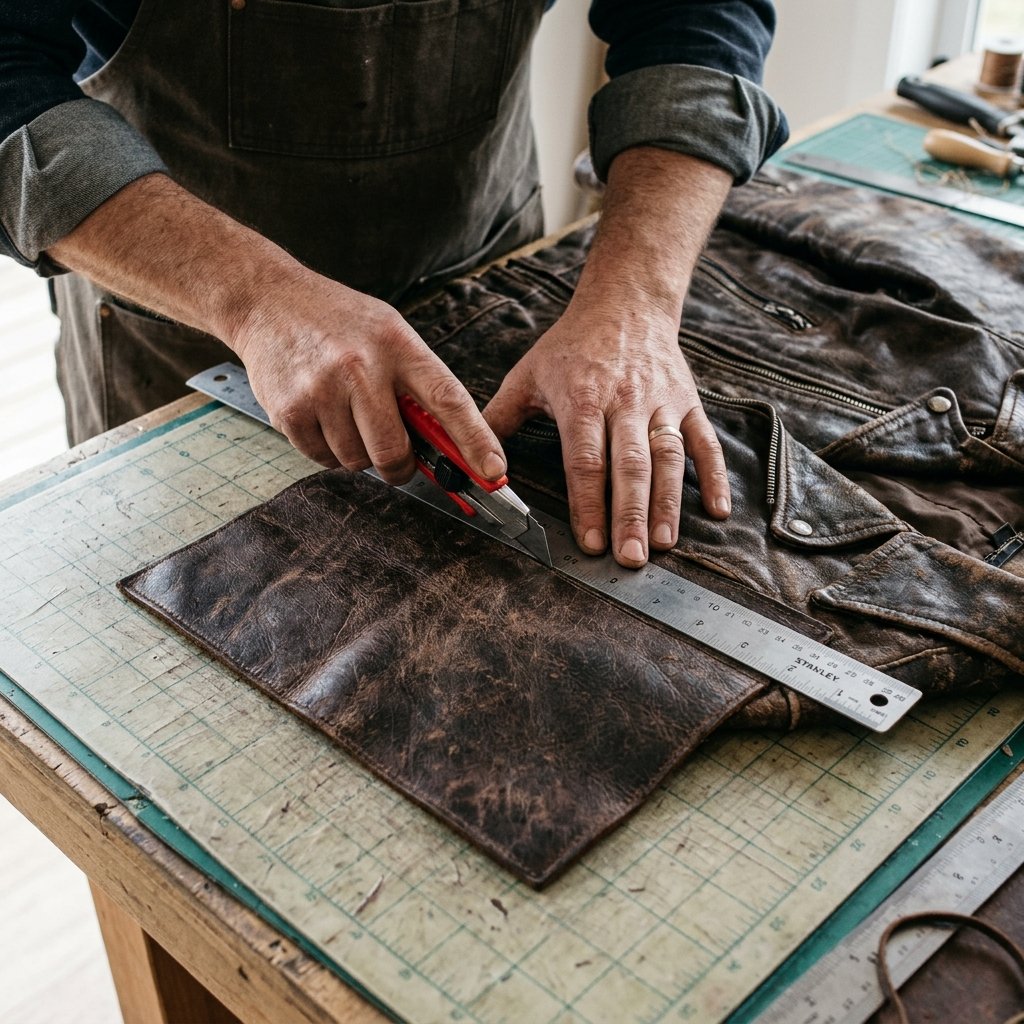
If you walk into a specialty leather supplier and buy a pristine side of vegetable-tanned leather, you are going to spend upwards of $100. That defeats the purpose of our budget-savvy mission. Instead, we are going to look for hidden treasures in plain sight.
The Thrift Store Goldmine
Your local thrift store is a treasure trove of high-quality leather just waiting to be harvested. Look for the following items in the clearance bins:
- Old Leather Jackets: A single XXL leather jacket from the 1990s can yield enough leather to wrap 20 to 30 flasks. Look for jackets with large, unblemished back panels.
- Discarded Briefcases and Messenger Bags: These often feature thicker, stiffer leather that is perfect for a rugged, structured flask wrap.
- Wide Belts: Vintage belts are usually made of thick, high-quality vegetable-tanned leather. While they might not be wide enough to wrap a whole flask, they can be used for decorative accents or straps.
- Leather Sofas on the Curb: Keep an eye out on trash day. A discarded leather couch can provide a lifetime supply of crafting leather. Just sanitize it thoroughly!
Understanding Leather Types
Before you cut into your sourced material, it is crucial to know what you are working with. Most thrifted garments are chrome-tanned leather. It is soft, supple, and water-resistant, making it excellent for a flask wrap. However, it cannot be stamped or “wet-molded” (shaped with water). If you want to stamp the recipient’s initials into the leather, you must use vegetable-tanned (veg-tan) leather.
If you prefer to buy new, search online for “veg-tan leather scrap bags.” Leatherworkers often sell their off-cuts by the pound for around $10 to $15, and these scraps are the perfect size for small projects like flasks and key fobs.
Safety & Crafting Note: Never attempt to burn or laser-cut chrome-tanned leather, as the chemicals used in the tanning process can release toxic fumes. Stick to cutting it with a sharp utility knife and hand-stitching.
The Blueprint: Measuring, Cutting, and Prepping the Wrap
Precision is the Key to a Professional Finish
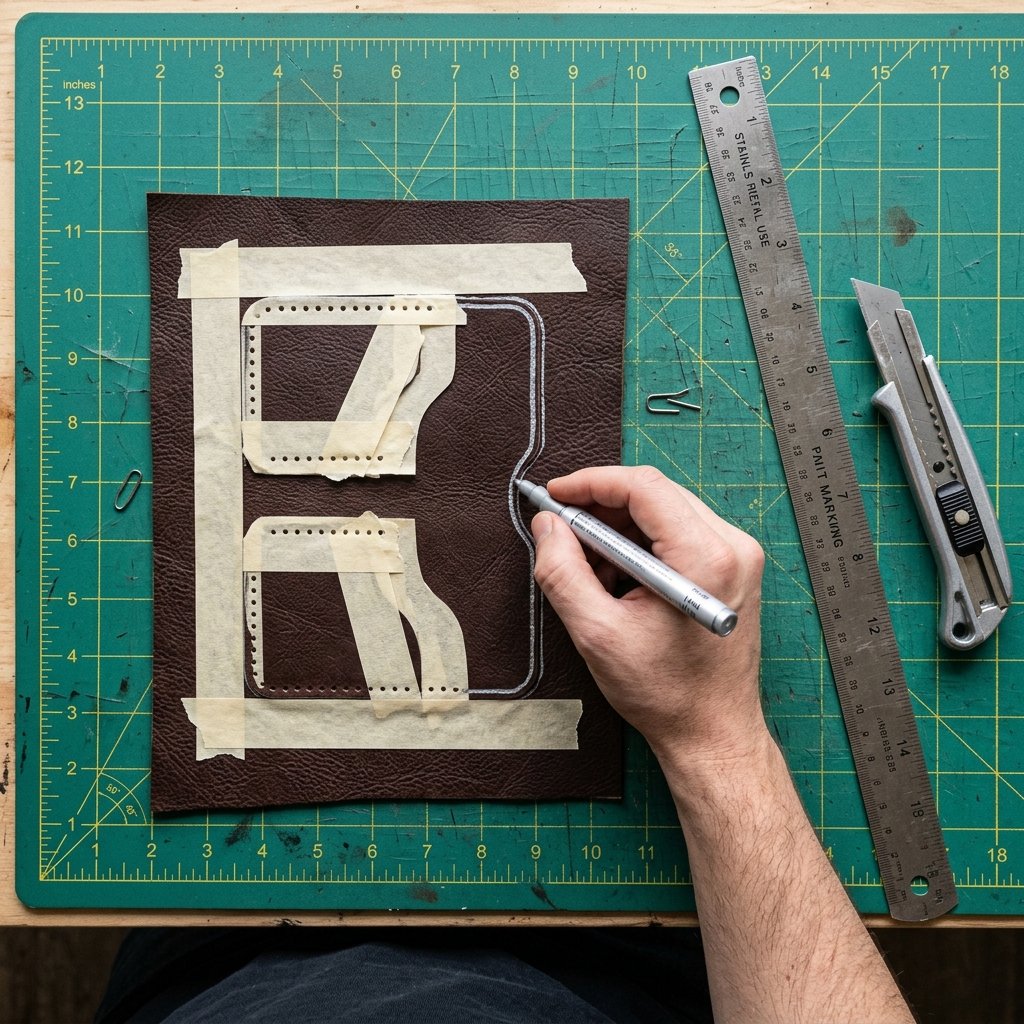
The difference between a flask that looks like a cheap arts-and-crafts project and one that looks like it belongs in a high-end men’s boutique comes down to measuring and cutting. You want the leather to fit the flask like a second skin.
The Masking Tape Measurement Trick
Flasks have complex curves, making them difficult to measure with a standard ruler. Here is a clever, foolproof method to get the perfect dimensions:
- Take a roll of standard masking tape or painter’s tape.
- Wrap the tape tightly around the entire body of the flask, overlapping slightly at the back.
- Use a pen to trace the exact top and bottom edges of the flask onto the tape. You want the leather to sit just below the curved shoulder of the flask and just above the bottom seam.
- Use a sharp blade to carefully slice the tape straight down the center of the back of the flask.
- Peel the tape off in one piece and lay it completely flat on your cutting mat. You now have an exact, 1:1 template of your flask’s surface area!
Cutting the Leather
Place your tape template onto the flesh side (the fuzzy back side) of your leather. Trace the outline with a scratch awl or a silver marking pen. When cutting, use a heavy metal ruler to keep your lines perfectly straight. Do not rush this step. Make multiple light passes with your utility knife rather than trying to hack through the leather in one go. A clean edge is a professional edge.
Skiving the Edges (Optional but Elegant)
If your leather is particularly thick (over 2mm), you might want to “skive” or thin down the edges where the two ends will meet at the back of the flask. You can use a dedicated skiving knife or very carefully shave away the fleshy underside with a fresh box cutter blade. This prevents a bulky, unsightly seam when you stitch it together.
Punching Holes and Prepping the Seam
Creating the Foundation for the Perfect Stitch
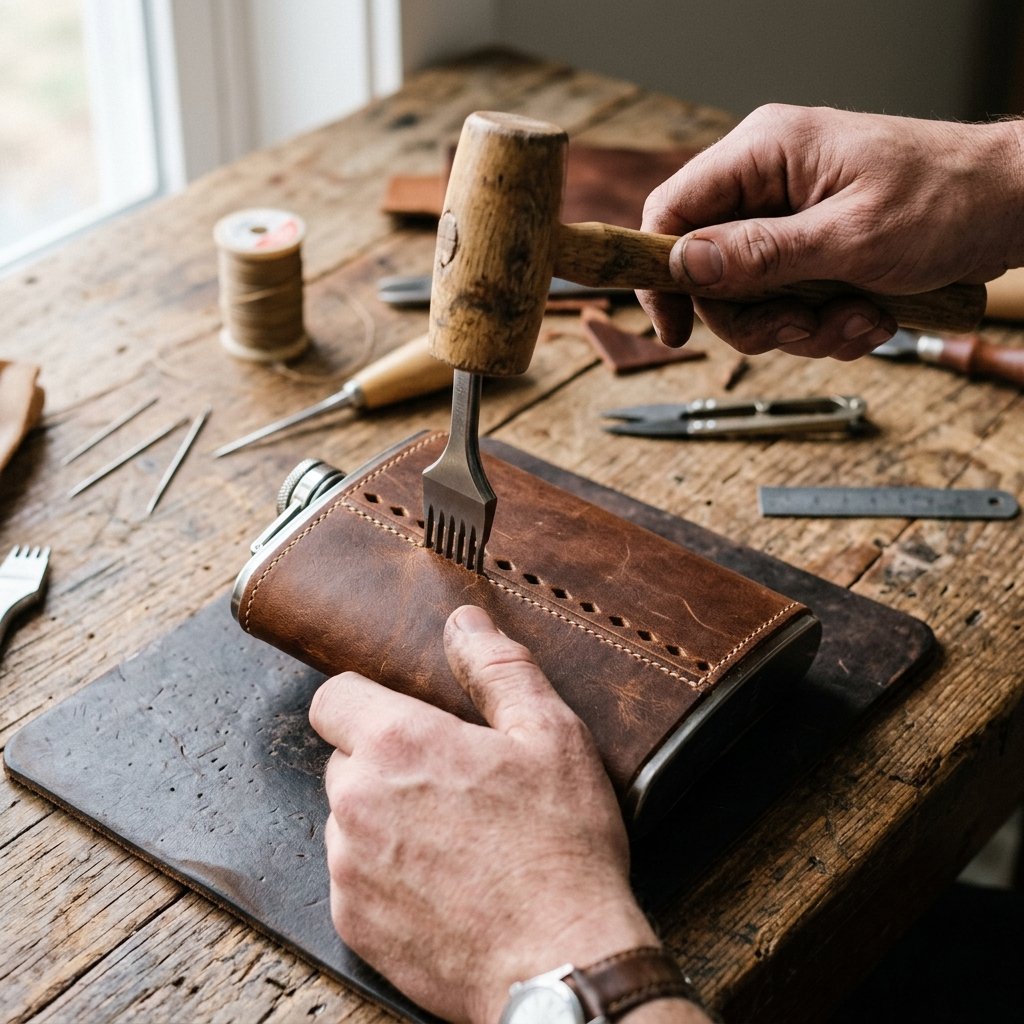
Unlike fabric, you cannot just push a needle through thick leather. You must pre-punch every single stitching hole. This step requires patience, but it is the secret to that gorgeous, even, diagonal stitch line that characterizes luxury leather goods.
Marking the Stitch Line
First, apply a thin layer of contact cement to the back of your leather and the front of the flask. Wait 5 to 10 minutes until the glue is tacky, then carefully wrap the leather around the flask, ensuring the seam meets perfectly in the center of the back. The glue holds the leather tight so it doesn’t shift while you work.
Next, you need to mark a straight line down both edges of the back seam, about 1/8 inch (3mm) from the edge. You can use a wing divider if you have one, or simply drag a pair of calipers or a slightly opened pair of scissors along the edge to score a light guideline.
Punching the Holes
If you have a leather stitching chisel (a tool that looks like a small fork with sharp, diamond-shaped prongs), place the prongs on your guideline and strike it with a mallet. This creates perfectly spaced, identical holes.
The Frugal Hack: If you do not have a stitching chisel, take a standard dinner fork. Press the tines firmly into the leather along your guideline to mark evenly spaced dots. Then, take a sharp awl or a small nail and hammer it through each dot. It takes a bit longer, but the result is beautifully consistent spacing that costs exactly $0.
Crafty Pro-Tip: Make sure you punch the exact same number of holes on the left side of the seam as you do on the right side. If you have 40 holes on the left and 39 on the right, your stitches will become misaligned, and the wrap will pucker.
Mastering the Saddle Stitch: A Tailor’s Secret for Leather
Hand-Sewing for Unbreakable Strength and Rugged Style
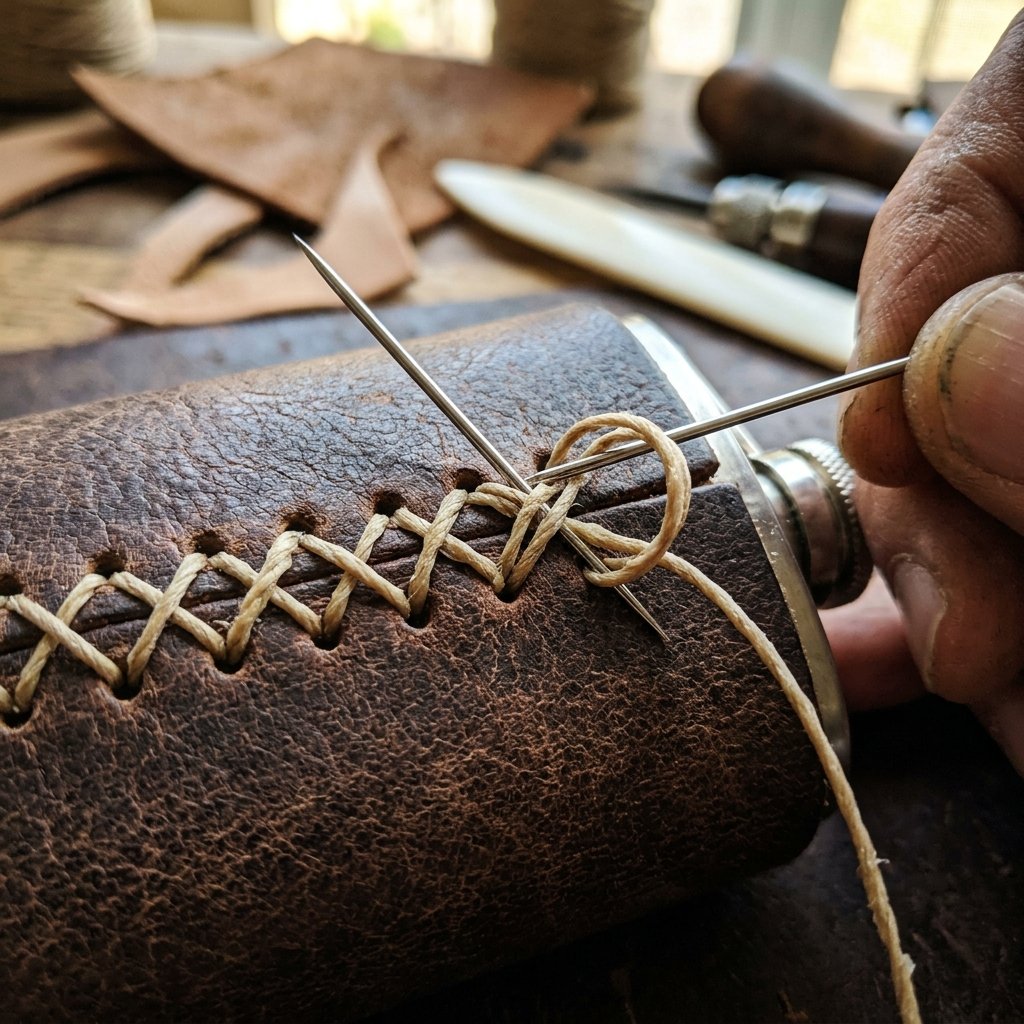
Now comes the most satisfying part of the project: the saddle stitch. Why do we saddle stitch instead of using a sewing machine? A sewing machine uses a “lock stitch,” where two threads loop around each other. If one thread breaks, the entire seam unravels. A saddle stitch, however, uses a single thread that passes back and forth through the leather. If one stitch breaks, the rest of the seam remains completely intact. It is the hallmark of true, rugged craftsmanship.
The Saddle Stitch Technique
- Measure Your Thread: Cut a piece of waxed thread that is roughly four times the length of your seam.
- Thread the Needles: Thread one needle onto each end of the waxed thread. Pierce the thread with the needle near the eye and pull it down to lock it in place (this is called locking the needle). You now have one long thread with a needle at both ends.
- Start the Stitch: Push one needle through the top hole of the left side of the seam, and out through the top hole of the right side. Pull the thread until there is an equal amount of thread on both sides of the seam.
- The Figure-Eight Motion: Take the left needle and push it through the second hole on the right side. Take the right needle and push it through the same second hole, going back to the left side. Pull both threads tight simultaneously.
- Maintain Consistency: Repeat this process down the entire seam. The trick to a beautiful stitch is consistency. Always put the left needle through first, always put the right needle through the bottom or top of the hole in the same way, and always pull with the same tension.
- Finishing Off: When you reach the bottom hole, backstitch (sew backwards) up two or three holes to lock the thread. Snip the threads close to the leather, and carefully melt the tiny frayed ends with a lighter. Press the melted wax flat into the hole to seal it permanently.
Troubleshooting Common Mistakes
If your stitches look zig-zagged in some places and straight in others, you are likely crossing your threads inconsistently inside the hole. Slow down. Think of it as a meditation. The rhythm of push, push, pull, tighten will soon become second nature.
Finishing Touches: Burnishing, Stamping, and Weatherproofing
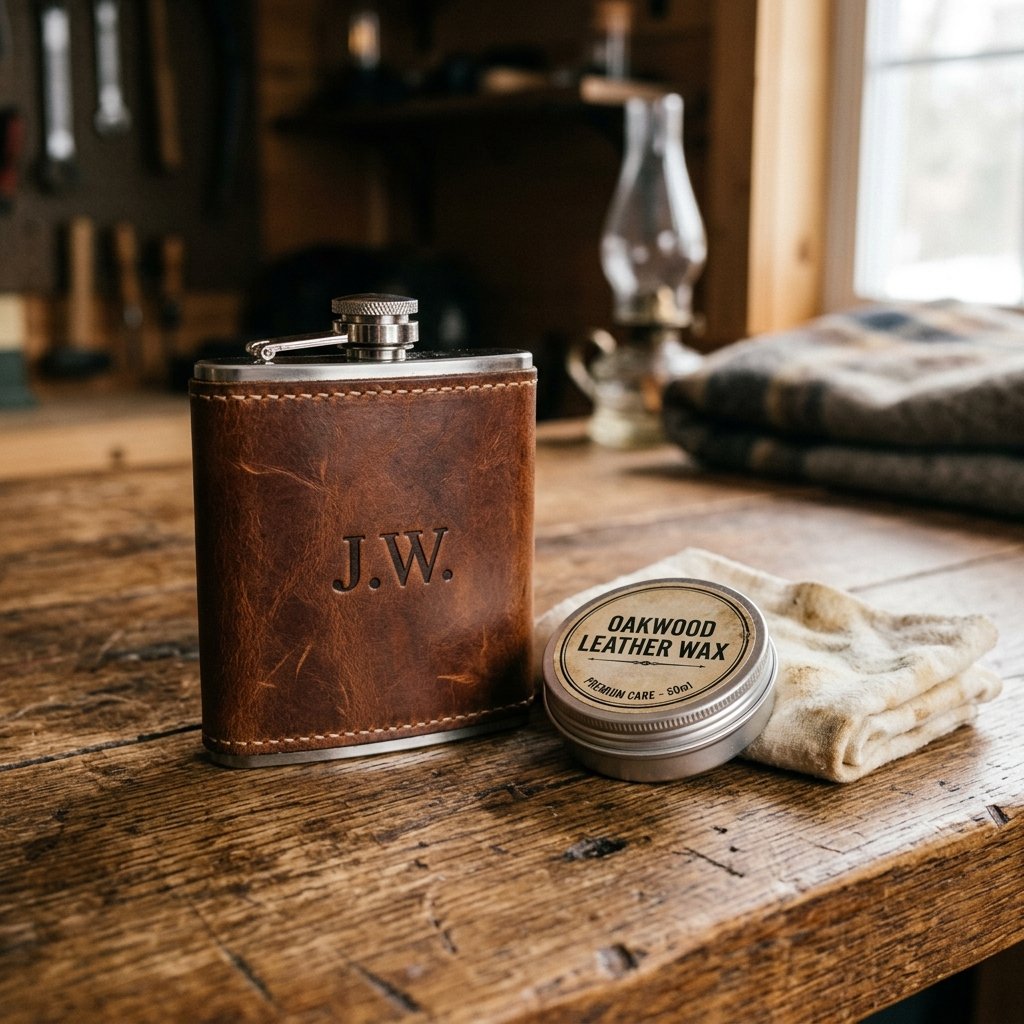
Elevating Your Flask from Homemade to Heirloom
You have successfully wrapped and stitched your flask. It looks good, but we want it to look spectacular. The finishing touches are what separate amateur crafts from professional-grade gifts. These final steps add that rugged, masculine-elegant flair.
Edge Finishing (Burnishing)
If you used vegetable-tanned leather, the raw edges at the top and bottom of the flask might look fuzzy or unfinished. To fix this, you need to burnish the edges. Dab a tiny bit of water or gum tragacanth onto the raw edge. Then, take a wooden slicker (or simply the smooth wooden handle of a tool, or even a piece of heavy canvas) and rub it briskly back and forth along the edge. The friction creates heat, which melts the natural fibers of the leather together, resulting in a smooth, glossy, professional edge.
Personalization and Monogramming
A gift becomes an heirloom when it carries a name. If you are using veg-tan leather, you can easily stamp initials into the hide before you wrap the flask.
- Use a damp sponge to lightly wet the area of the leather you want to stamp (this is called casing the leather).
- Wait a minute until the leather returns to its natural color but feels cool to the touch.
- Place a metal letter stamp onto the leather and strike it firmly once with a mallet.
- Repeat for each letter. The water allows the leather fibers to compress, leaving a deep, permanent, darkened impression.
Budget Hack: If you don’t own metal letter stamps, you can use a wood-burning tool (pyrography pen) to carefully burn initials or rustic designs into the leather. This works on both veg-tan and some chrome-tanned leathers, but always test on a scrap piece first!
Weatherproofing and Conditioning
Flasks are meant to be taken into the wild—on camping trips, fishing excursions, and hiking trails. To protect the leather from rain, spilled whiskey, and dirt, you must condition it. Rub a generous coat of natural leather balm, mink oil, or a DIY mixture of beeswax and olive oil into the leather. Use a clean rag to buff it out. This will slightly darken the leather, giving it a rich, rugged patina while creating a waterproof barrier.
Presentation and Gifting Ideas: The Final Polish
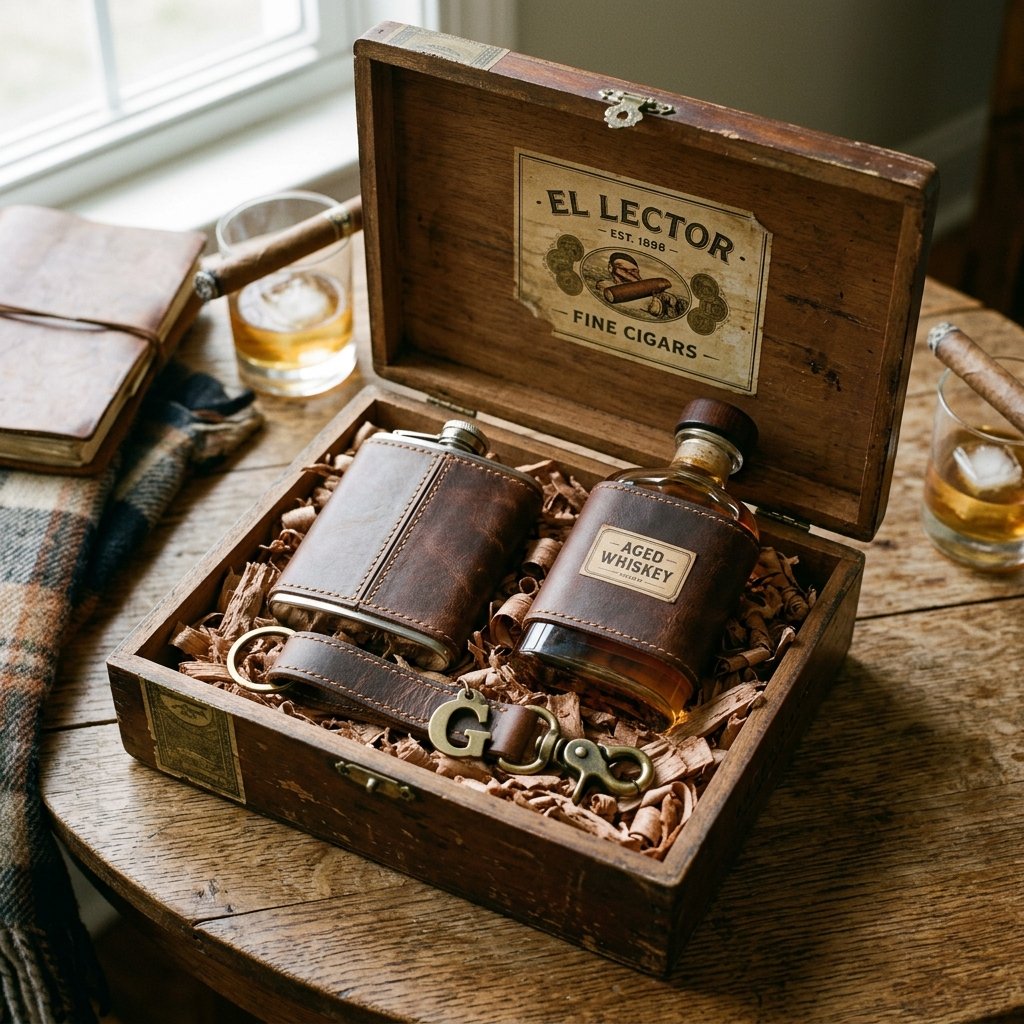
How to Package Your Masterpiece for Maximum Impact
You have just spent your valuable time crafting a stunning, budget-savvy masterpiece. Do not ruin the magic by handing it over in a plastic grocery bag. The presentation is the final step in ensuring your DIY gift outclasses any store-bought alternative.
The Upcycled Cigar Box
Visit your local cigar lounge or tobacco shop. They often sell empty wooden cigar boxes for $1 to $3, or sometimes give them away for free. These wooden boxes make incredible, masculine gift boxes. Line the inside with some shredded kraft paper, wood shavings, or even a piece of leftover scrap leather. Place the flask inside, and you instantly have a presentation that looks like it cost hundreds of dollars.
The Ultimate Groomsmen Bundle
If you are making these for a wedding party, consider pairing the flask with other frugal, handmade items to create a cohesive rugged aesthetic. A great bundle could include:
- Your handmade leather-wrapped flask (filled with their favorite bourbon, of course).
- A DIY leather keychain made from the scrap off-cuts of the flask project.
- A tin of homemade solid cologne or beard balm.
- A handwritten note on heavy cardstock.
The Value of Handmade
When you give this flask, you are not just giving a container for spirits. You are giving your time, your newly acquired skills, and a piece of functional art. The recipient will feel the texture of the hand-punched stitches, smell the rich scent of conditioned leather, and know that this item was built specifically for them. That is a level of thoughtfulness that no amount of money can buy at a retail store.
Conclusion
Raise a Glass to Frugal Craftsmanship
Congratulations! You have successfully navigated the world of budget leathercraft and transformed a basic, inexpensive piece of stainless steel into a rugged, masculine heirloom. By embracing upcycled materials, learning the time-honored saddle stitch, and applying a little bit of clever resourcefulness, you have created a DIY leather-wrapped flask that truly outclasses any store-bought gift.
The beauty of this project is that it is highly addictive and endlessly customizable. Once you master the basic wrap and stitch, you can experiment with different leather textures, contrasting thread colors, intricate stamping designs, and even adding functional hardware like belt loops or D-rings. You are no longer bound by the high markups of boutique gift shops; you are now the master of your own crafting domain.
Whether you are gifting this to a groomsman, a father, or keeping it for your own backcountry adventures, this flask will age beautifully, developing a unique patina that tells the story of every campfire, celebration, and quiet moment it accompanies. So pour yourself a celebratory measure of your favorite beverage, admire your handiwork, and start dreaming up your next frugal DIY masterpiece. Cheers to crafting smart, spending less, and giving the best!

Makenzie is the founder and lead writer at MoneyHackTips.com — a personal finance blog dedicated to delivering street-smart financial wisdom for real people on real budgets. With 300+ published articles covering everything from debt management to investing fundamentals, Makenzie’s mission is to make every dollar work harder. When not writing about money hacks, Makenzie is testing frugal living strategies, optimizing side hustles, and helping readers build financial freedom from scratch.