
The Soul of a Handmade Gift
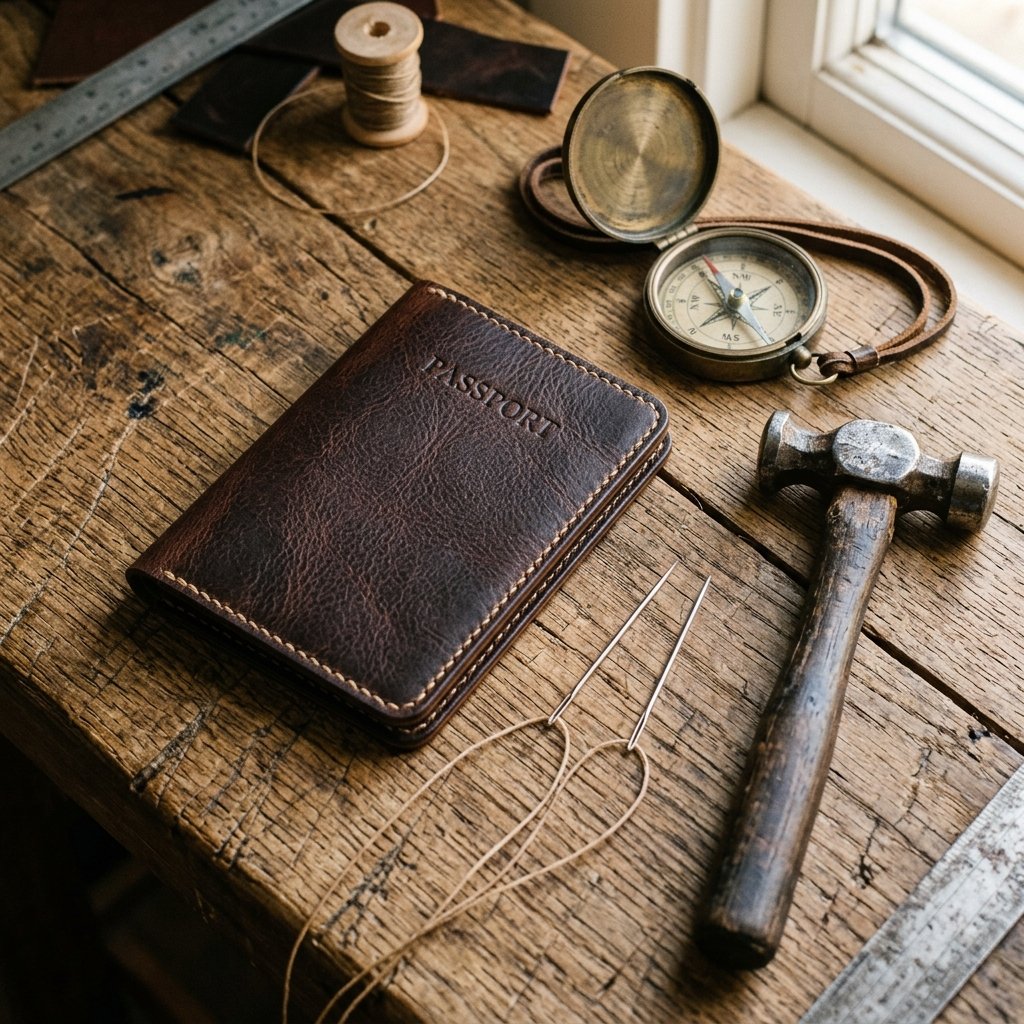
In a world of mass-produced, plastic-wrapped accessories, there is something profoundly grounding about the weight of a hand-stitched leather piece. Whether he is a frequent flyer, a rugged adventurer, or a man who simply appreciates the finer details of craftsmanship, a personalized leather passport holder is more than just a travel accessory—it is a legacy piece. As a frugal DIYer, you don’t need a specialized studio or hundreds of dollars in equipment to achieve that masculine-elegant aesthetic found in high-end boutiques like Saddleback Leather or Shinola. By sourcing leather resourcefully and mastering a few timeless hand-sewing techniques, you can create a $150-value gift for less than the price of a takeout lunch.
This guide is designed for the crafty expert and the budget-savvy beginner alike. We will explore how to find premium leather scraps, how to execute the invincible saddle stitch, and how to add those professional finishing touches that make people ask, ‘Where did you buy that?’ Let’s get our hands dirty and build something that will last a lifetime.
The Blueprint: Materials and Cost Comparison
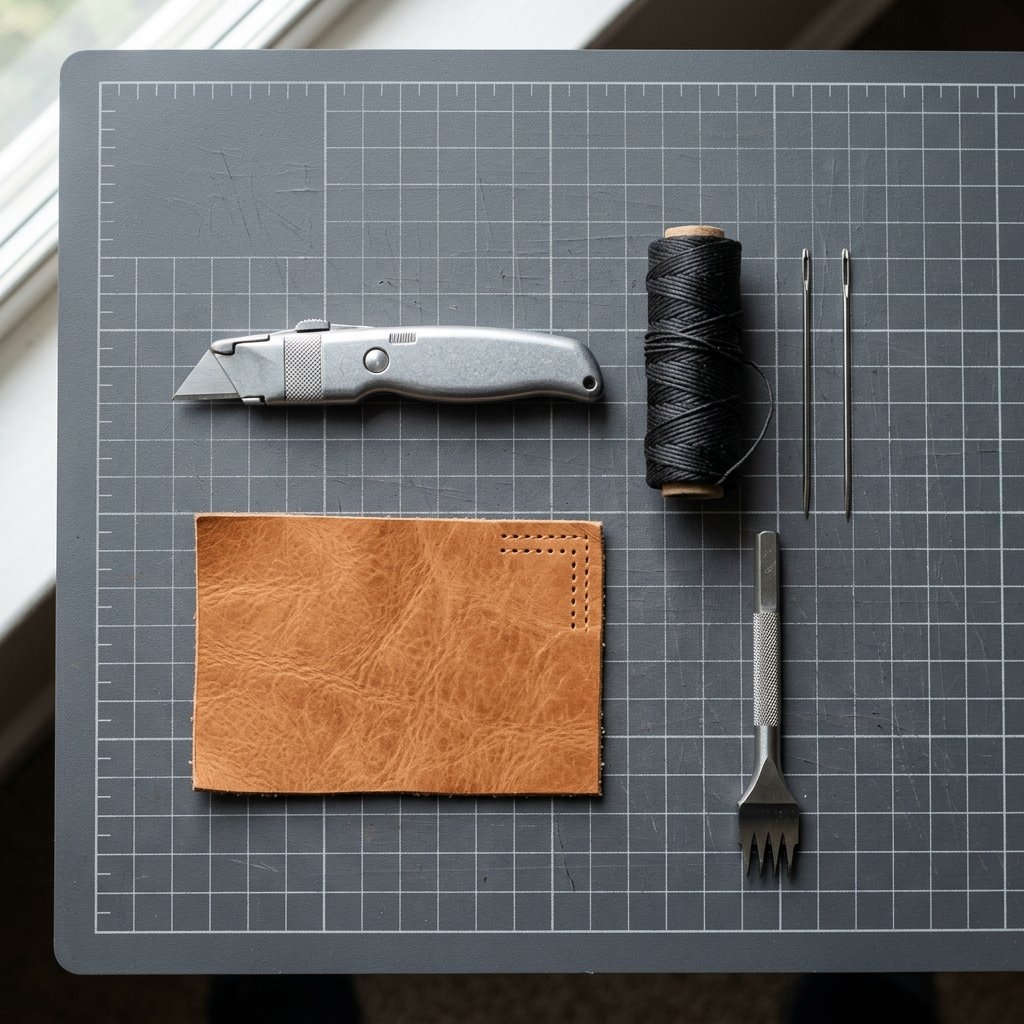
Before we strike the first punch, we must gather our supplies. The secret to a budget-friendly project is resourceful sourcing. Instead of buying a full hide, look for ‘leather remnants’ at craft stores or, better yet, upcycle a high-quality leather jacket from a thrift store. A single $10 thrifted coat can provide enough material for ten passport holders.
| Item | Store-Bought (Boutique) | DIY (Budget-Savvy) |
|---|---|---|
| Material Quality | Premium Full-Grain | Upcycled/Remnant Full-Grain |
| Personalization | Extra $15-$25 | FREE (Hand-stamped) |
| Construction | Machine Stitched | Hand-Stitched (Stronger) |
| Total Cost | $85.00 – $160.00 | $5.00 – $12.00 |
Essential Tool Kit
- Leather Scraps: Look for 3-4 oz weight (about 1.2mm to 1.6mm thick) for the perfect balance of flexibility and durability.
- Waxed Thread: 0.8mm polyester or linen thread provides that rugged, thick-stitch look.
- Harness Needles: You will need two blunt-tip needles for the saddle stitch.
- Pricking Irons or a Stitching Chisel: To create perfectly spaced holes.
- Utility Knife: A sharp blade is non-negotiable for clean edges.
- Contact Cement: For holding layers together before sewing.
Budget Mantra: The value isn’t in the price of the leather, but in the precision of the hands that shape it.
Patterning and Precision Cutting
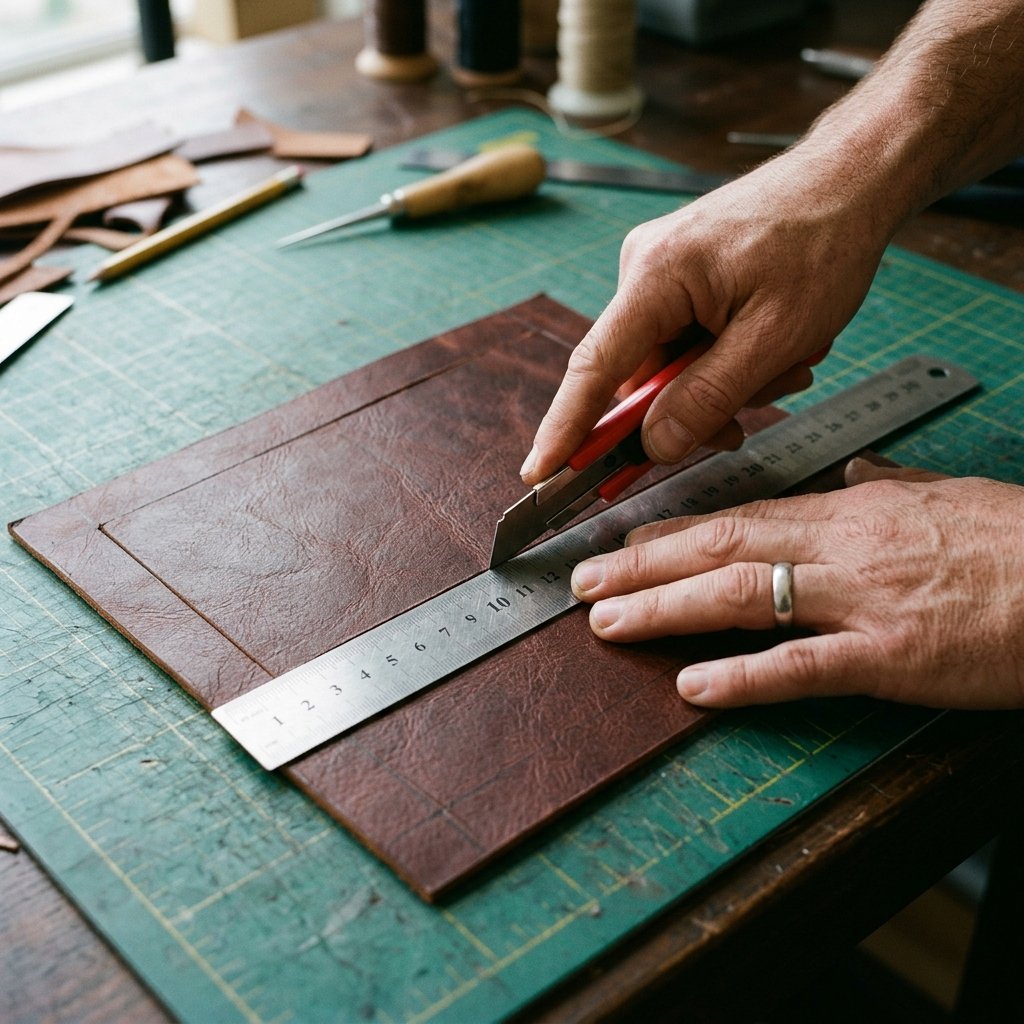
Designing the Dimensions
A standard passport measures 3.5 inches by 4.9 inches. To ensure a snug but comfortable fit, our holder will feature a main body and two interior pockets. Precision here is the difference between a ‘homemade’ look and a ‘handmade’ masterpiece.
The Cut List
- The Main Body: One piece measuring 8 inches by 5.5 inches.
- The Interior Pockets: Two pieces measuring 2.75 inches by 5.5 inches each.
Use a metal ruler and a fresh blade. Always cut on the ‘waste’ side of the line. If your blade is dull, you will drag the leather, causing jagged edges. If you are upcycling an old garment, avoid areas with heavy scarring or thin ‘belly’ leather; aim for the thick, consistent sections of the back or chest panels.
Pro-Tip: Use a coin (like a quarter) to trace rounded corners on your pieces. This prevents the corners from fraying over time and adds a sophisticated, finished silhouette.
The Art of the Saddle Stitch
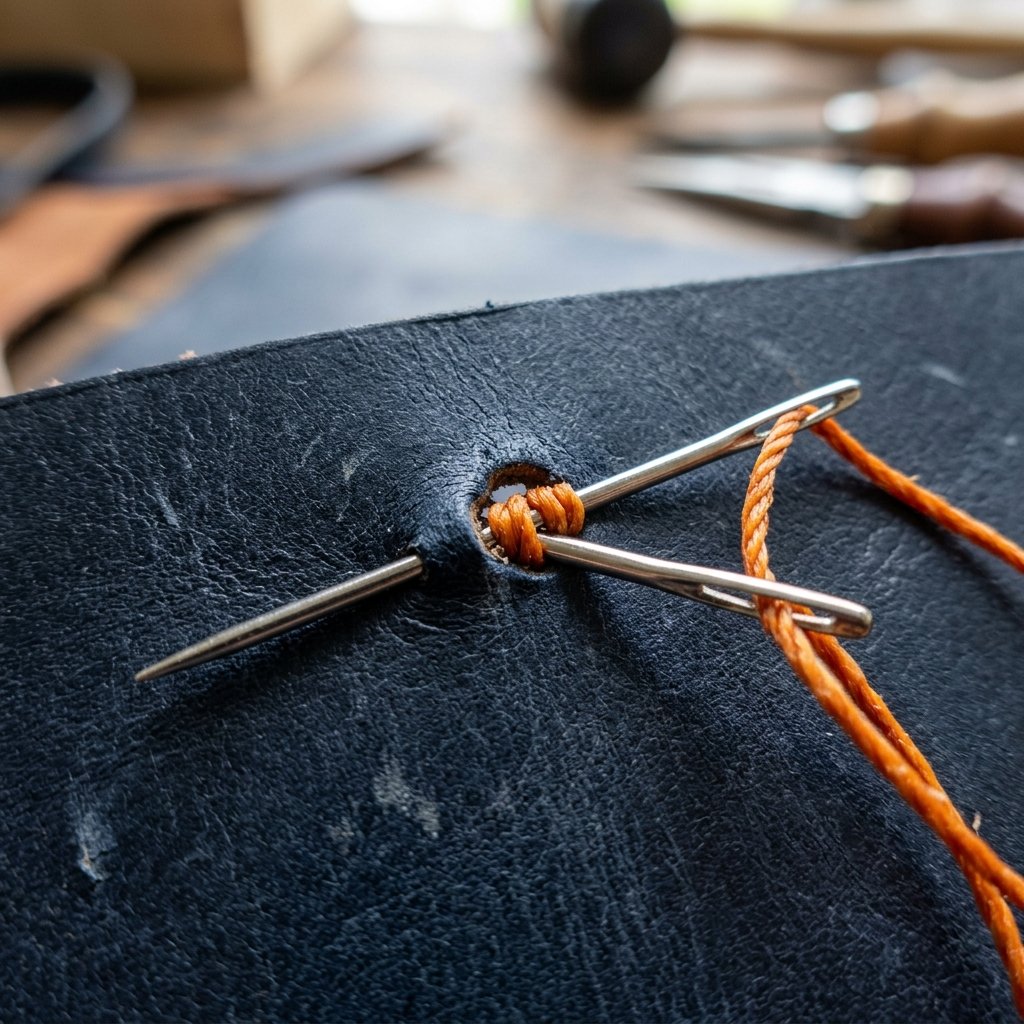
In leatherworking, the Saddle Stitch is king. Unlike a sewing machine, which uses two separate threads that can unravel if one breaks, a saddle stitch uses a single thread with a needle on each end. It is virtually indestructible.
Step-by-Step Stitching Guide
- Prep the Edges: Apply a thin layer of contact cement to the side edges of the pockets and the corresponding edges of the main body. Let it get ‘tacky’ (about 5 minutes) before pressing them together.
- Punch the Holes: Using your stitching chisel and a mallet, punch holes through all layers. Ensure your chisel is perfectly vertical to keep the exit holes on the back aligned.
- Measure the Thread: You need a length of thread roughly 4 times the length of the seam you are sewing.
- The Stitch: Pass one needle through the first hole until the thread is centered. Then, pass the left needle through the next hole, followed by the right needle through the same hole. Pull tight.
- The Lock: Repeat this process until the end. To finish, back-stitch two holes and cut the thread close. Use a lighter to carefully melt the tip of the synthetic thread to lock it in place.
| Stitch Type | Durability | Visual Appeal |
|---|---|---|
| Machine Lockstitch | Moderate (can unravel) | Uniform/Thin |
| Hand Saddle Stitch | Maximum (Heirloom) | Rugged/Bold |
Personalization and Professional Finishing

Making It His Own
This is where the gift becomes a treasure. Personalization can be achieved through heat-stamping or leather burning. For a budget-savvy approach, a set of $10 metal alphabet stamps from a hardware store works wonders on vegetable-tanned leather.
The Burnishing Secret
Raw, ‘furry’ edges are the mark of an amateur. To get that glass-like, professional edge, you need to burnish. You don’t need expensive gums; a little bit of water or even saliva (the old-school way!) and a smooth piece of wood (or the back of a plastic lighter) will work.
- Step 1: Sand the edges with 400-grit sandpaper until the layers feel like one solid piece.
- Step 2: Dampen the edge slightly.
- Step 3: Rub the edge vigorously with a wood slicker or a canvas cloth until it generates heat. The friction will collapse the fibers and create a shiny, dark, sealed edge.
Safety Note: When using a lighter to singe thread ends or heat stamps, always work in a well-ventilated area and keep a damp cloth nearby. Leather itself is fire-resistant, but finishes and glues can be flammable.
The Final Flourish: Conditioning and Gifting

The ‘New Car’ Smell of Success
Once the construction is complete, the leather may feel a bit stiff or dry. To bring it to life, apply a homemade leather balm. Mix two parts olive oil with one part melted beeswax for a natural, food-safe conditioner that smells incredible and protects the hide from moisture.
Gifting Presentation
Don’t just throw it in a gift bag. Elevate the experience:
- Wrap the holder in a piece of black tissue paper.
- Place it in a small cardboard box filled with wood shavings (great for that rugged, workshop aroma).
- Tie the box with jute twine and attach a small tag made from a leather scrap with his initials.
By following these steps, you’ve created a gift that rivals luxury brands while keeping your budget intact. You haven’t just given him a passport holder; you’ve given him a companion for his next great adventure.
Conclusion
The Mark of a Maker
Crafting a leather passport holder is a journey in patience, precision, and resourceful creativity. You have taken raw materials—perhaps even something destined for a landfill—and transformed them into a functional work of art. This project proves that you don’t need a massive budget to give a gift that feels expensive, thoughtful, and deeply personal. As he carries this holder across borders and through time, the leather will develop a patina—a unique map of his travels—and a constant reminder of the care you put into making it. Now, go forth and create; the world is waiting for your next masterpiece.

Makenzie is the founder and lead writer at MoneyHackTips.com — a personal finance blog dedicated to delivering street-smart financial wisdom for real people on real budgets. With 300+ published articles covering everything from debt management to investing fundamentals, Makenzie’s mission is to make every dollar work harder. When not writing about money hacks, Makenzie is testing frugal living strategies, optimizing side hustles, and helping readers build financial freedom from scratch.