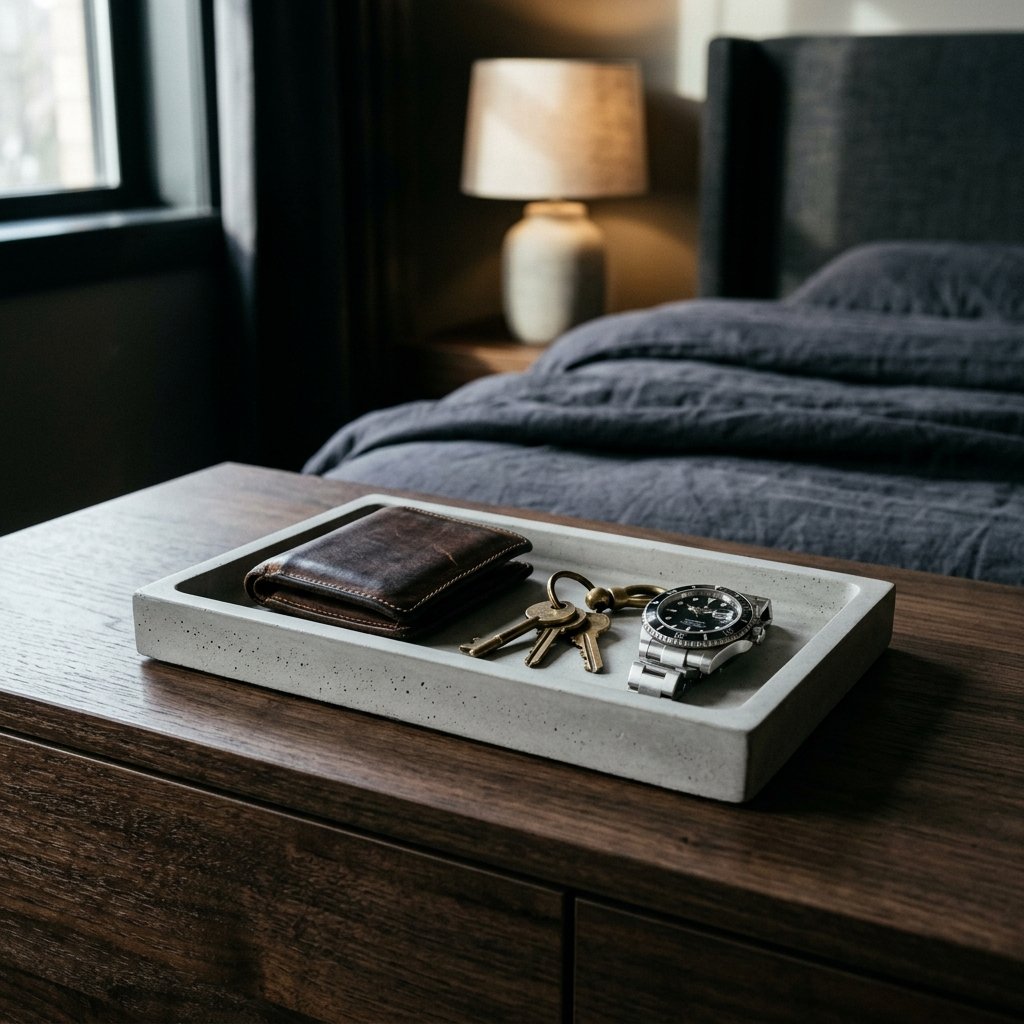

The Ultimate Masculine Catch-All on a Dime
Let us face a universal truth: men are notoriously difficult to shop for, and their nightstands are often a chaotic wasteland of loose change, rogue keys, pocket knives, and receipts. Enter the valet tray—a handsome, functional catch-all that brings order to the chaos. But if you have browsed high-end home goods stores or boutique men’s grooming shops lately, you have probably noticed that a minimalist, industrial-chic concrete valet tray can easily set you back $80 to $120. That is a steep price to pay for what is essentially a small slab of poured rock.
As resourceful crafters and budget-savvy gift-givers, we know better. Why pay a premium for a designer label when you can roll up your sleeves and craft an heirloom-quality, ruggedly elegant piece for under $10? Working with concrete might sound like a heavy-duty construction job, but on a micro-scale, it is incredibly accessible, immensely satisfying, and surprisingly artistic. It is the perfect blend of industrial grit and refined modern design.
In this comprehensive masterclass, we are going to demystify the art of small-batch concrete pouring. We will cover everything from sourcing the perfect budget-friendly molds (or upcycling items from your recycling bin) to achieving that buttery-smooth, bubble-free finish that screams “luxury boutique.” Whether you are crafting a thoughtful, handmade Father’s Day gift, looking for a unique groomsman present, or simply want to elevate your own entryway decor without blowing your budget, this tutorial is your blueprint to success. Grab your mixing bowl, and let us turn a bag of cheap dusty mix into a sleek, $100-looking masterpiece.
Gathering Your Arsenal: Materials and Cost Breakdown
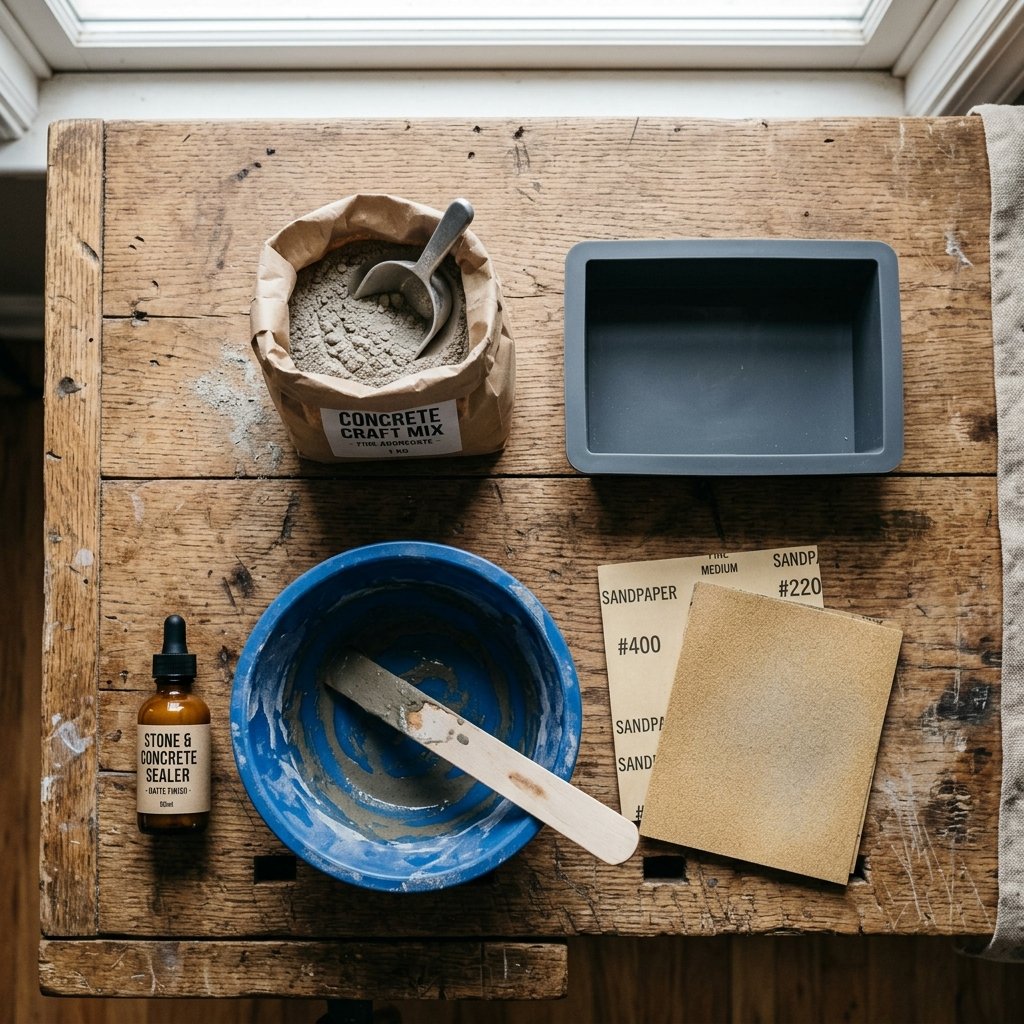
The Frugal Crafter’s Concrete Kit
The true beauty of concrete crafting lies in its astonishingly low barrier to entry. The materials are cheap, widely available, and yield multiple projects from a single purchase. To achieve that high-end, ultra-smooth designer look, you cannot just use any chunky driveway concrete. You need a fine-particulate mix, often labeled as “maker’s mix,” “countertop mix,” or “shapecrete.” These blends have the aggregate (the rocks and pebbles) sifted out, leaving a silky powder that captures the finest details of your mold.
Let us break down the exact materials you need. You likely already have several of these items hiding in your garage or kitchen, making this project even more budget-savvy.
| Material / Tool | Estimated Cost (DIY) | Purpose |
|---|---|---|
| Fine Concrete Mix (e.g., Cement All or Maker’s Mix) | $15.00 (Yields 10+ trays) | The structural base of your tray. |
| Silicone Mold (or upcycled plastic containers) | $0.00 – $12.00 | Shapes the tray. Upcycled nested Tupperware works perfectly! |
| Cooking Spray or WD-40 | $0.00 (Pantry item) | Acts as a mold release agent. |
| Mixing Bowl & Stirring Stick | $0.00 (Upcycled) | For blending the concrete and water. |
| Sandpaper (220 and 400 grit) | $3.00 | For smoothing the cured edges. |
| Concrete Sealer or Beeswax | $8.00 | Protects the tray from water and oil stains. |
| Adhesive Cork Shelf Liner or Felt | $4.00 | Protects your furniture from scratches. |
If we look at the cost per tray, you are spending roughly $3.00 to $5.00 in materials. Compare that to the boutique price tags, and the savings are astronomical.
| The Designer Route | The DIY Frugal Route |
|---|---|
| Boutique Concrete Tray: $95.00 | DIY Concrete Tray: $4.50 |
| Shipping/Taxes: $15.00 | Elbow Grease & Pride: Priceless |
| Total Cost: $110.00 | Total Cost: $4.50 (A 96% savings!) |
Safety First: Concrete dust is highly abrasive to the lungs. Always wear a well-fitting particulate mask (like an N95) and protective gloves when measuring and mixing dry concrete. Once water is added, the dust risk is gone, but wet concrete can dry out your skin, so keep those gloves on!
Prepping the Mold: The Secret to a Flawless Finish
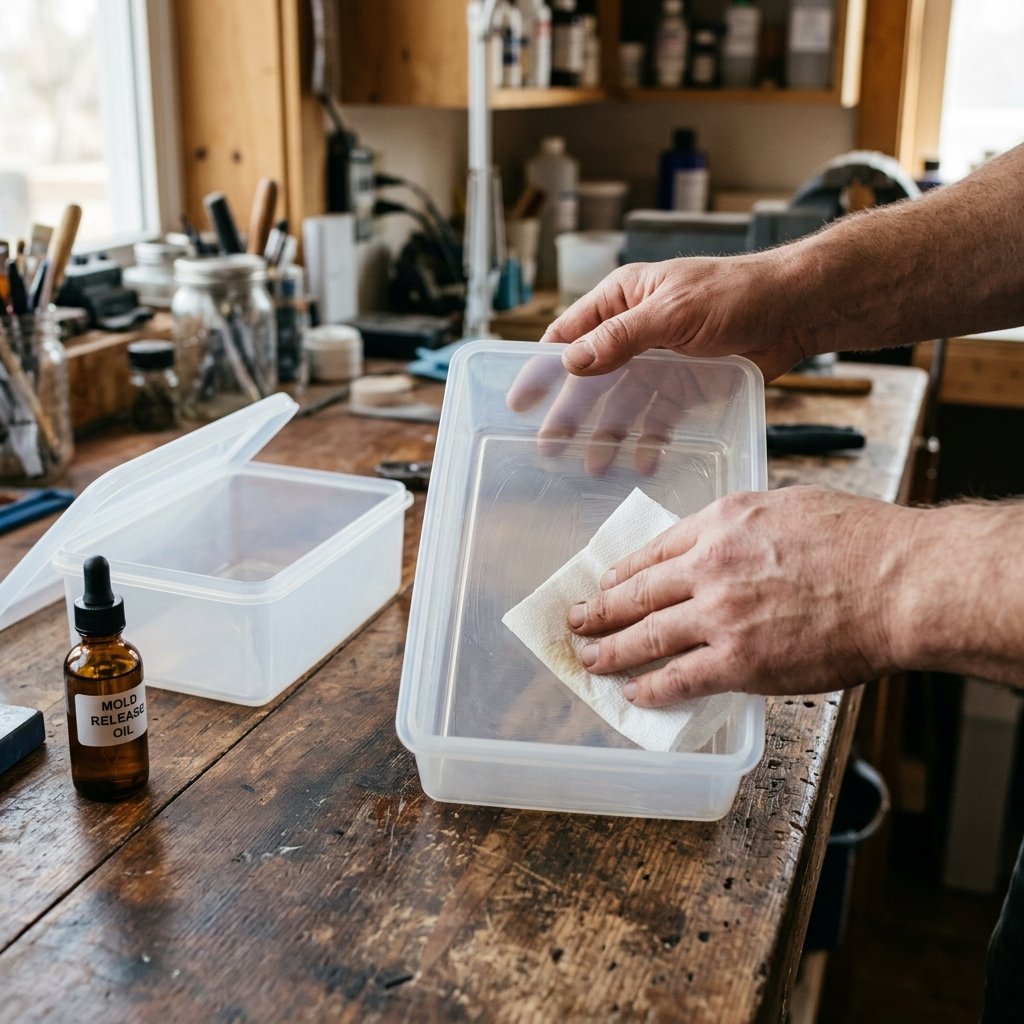
Choosing Your Mold Strategy
The shape and texture of your finished valet tray are entirely dependent on the mold you use. Concrete is an incredibly obedient material; it will perfectly mimic whatever surface it cures against. If your mold has a scratch, your tray will have a bump. If your mold is glossy, your tray will have a surprisingly polished sheen.
You have two distinct paths here: the Upcycler’s Route or the Investment Route.
- The Upcycler’s Route (Zero Budget): Look through your recycling bin. You need two plastic containers of similar shape but slightly different sizes—one to act as the outer wall, and one to press inside to create the hollow cavity. Rectangular takeout containers, cleanly cut milk cartons, or nested Tupperware are brilliant for this. The trick is ensuring the inner container leaves about a 1/2 inch gap on the sides and bottom for the concrete to form a sturdy wall.
- The Investment Route ($10-$15): If you want absolute perfection, sharp 90-degree angles, and the ability to make dozens of identical trays, purchase a dedicated silicone resin or concrete mold online. Silicone is flexible, naturally non-stick, and yields a flawless, professional finish every single time.
Applying the Release Agent
If you are using upcycled hard plastics, a mold release agent is non-negotiable. Without it, you will be chipping plastic off your beautiful concrete with a chisel. You do not need expensive commercial release sprays. Simply take standard kitchen cooking spray (canola or vegetable oil) or WD-40, give the inside of the outer mold and the outside of the inner mold a very light mist. Then, take a paper towel and wipe away the excess. You want a microscopic film of oil, not puddles. Puddles of oil will cause ugly craters and divots in your final concrete surface.
The Perfect Pour: Mixing, Pouring, and Vibrating
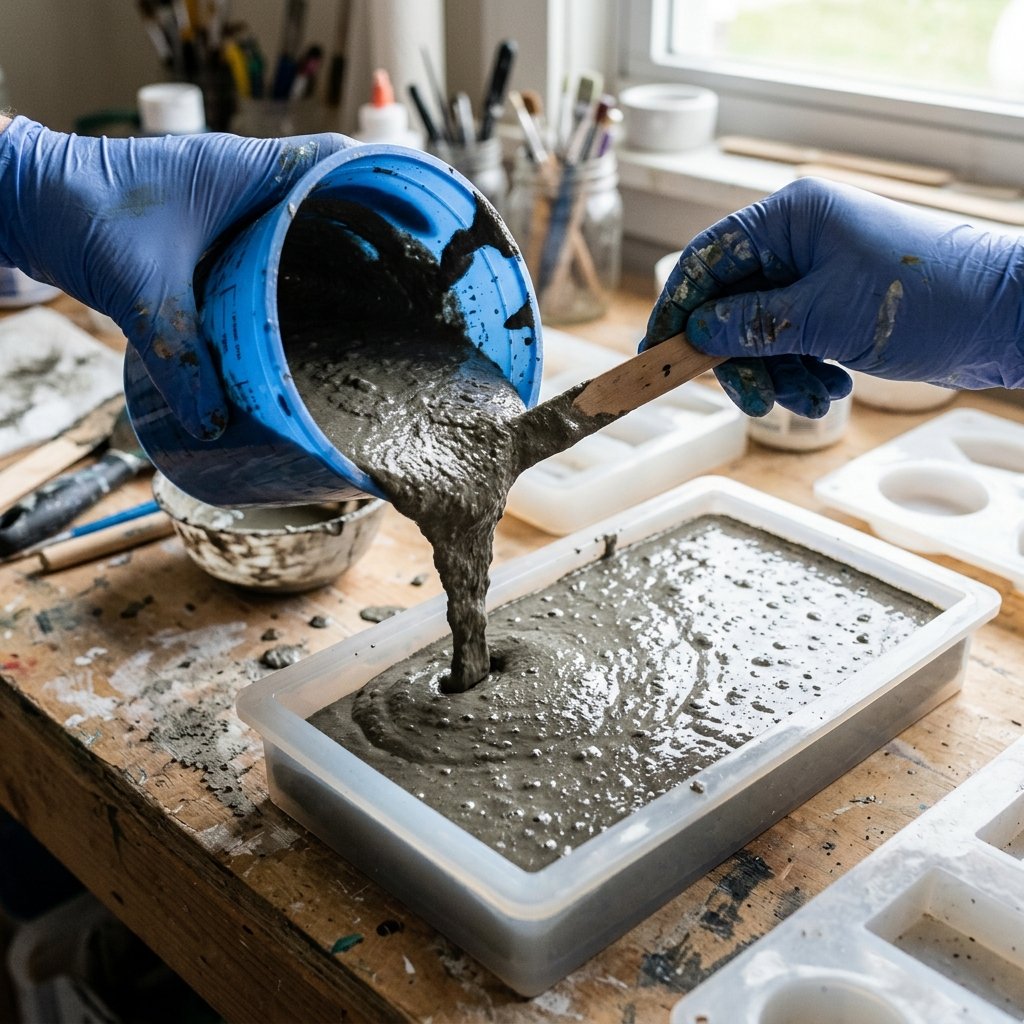
Mastering the Concrete Recipe
Mixing concrete is much like baking; the ratio of dry ingredients to wet ingredients dictates the success of the final product. If your mix is too dry, your tray will be crumbly, structurally weak, and full of air pockets. If it is too wet, the concrete will shrink excessively as it cures, leading to surface cracks and a chalky, fragile finish.
While every brand of concrete mix has specific instructions, a general rule of thumb for small, detailed casts is to aim for the consistency of thick pancake batter or creamy peanut butter. It should hold its shape slightly when stirred but settle flat when tapped.
| Concrete Mix | Water Ratio | Ideal Consistency |
|---|---|---|
| Standard Portland/Sand Mix | 4 parts mix : 1 part water | Thick oatmeal, requires heavy vibration. |
| Shapecrete / Sculpting Mix | 3 parts mix : 1 part water | Thick clay-like, mouldable by hand. |
| Rapid Set Cement All | 4 parts mix : 1 part water | Pancake batter, flows easily into corners. |
Step-by-Step Mixing and Pouring:
- Measure: Pour your dry mix into your dedicated mixing bowl. Add water gradually. It is always easier to add a few drops of water than to try and thicken a soupy mix.
- Mix Aggressively: Use a sturdy wooden stir stick or a dedicated metal spoon. Scrape the bottom and sides of the bowl to ensure no dry powder is hiding. Mix for at least 2 to 3 minutes until the color is uniform and the texture is completely smooth.
- The First Pour: Pour the concrete into your mold, filling it about halfway.
- The Inner Mold (If Upcycling): If you are using the nested container method, press your smaller container into the center of the wet concrete. You will need to weigh this inner container down so it doesn’t float up. A handful of rocks, a heavy bolt, or a bag of sand works perfectly. (If using a solid silicone mold, simply fill the mold to the top edge).
- The Crucial Step – VIBRATION: This is what separates amateur crafts from $100 designer pieces. Concrete traps air bubbles during mixing. If you don’t release them, your tray will look like Swiss cheese. Tap the sides of your mold rapidly with a wooden spoon, or pick the mold up slightly and drop it repeatedly on the table. You can even hold an electric sander (without sandpaper) or an electric toothbrush against the side of the mold. Watch as hundreds of tiny bubbles rise to the surface and pop. Continue vibrating for 3 to 5 minutes.
Patience and Unmolding: The Reveal
The Waiting Game
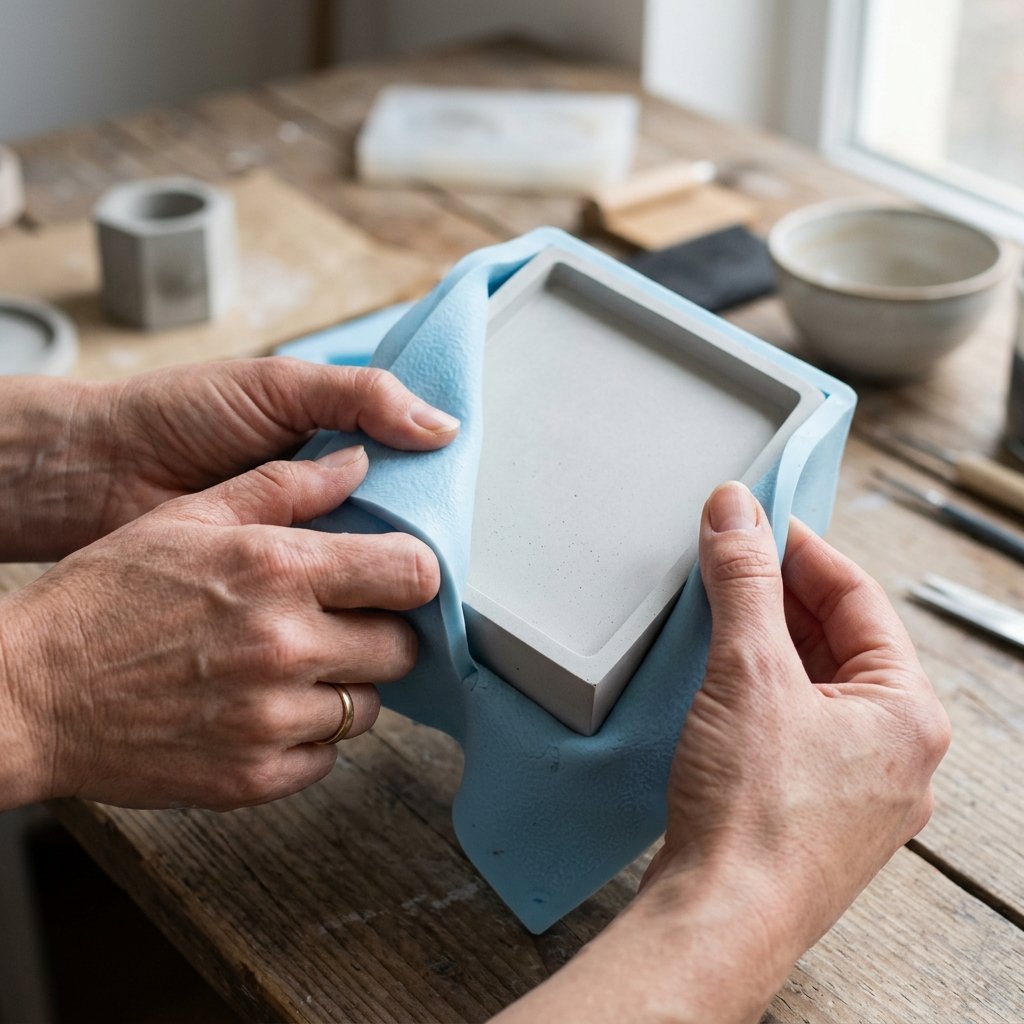
In our fast-paced world, waiting is often the hardest part of any DIY project. But concrete demands patience. While some rapid-set mixes claim to be “hard in 15 minutes,” that is only true for industrial applications. For a thin-walled, delicate valet tray, rushing the unmolding process will almost certainly result in snapped corners or cracked bases.
The Golden Rule of Curing: Leave your mold completely undisturbed in a room-temperature environment for a minimum of 24 to 48 hours. Do not poke it. Do not move it. Let the chemical reaction (hydration) do its work.
During the curing process, you may notice the concrete getting warm to the touch. This is perfectly normal; hydration is an exothermic reaction. You will also see the color shift from a dark, wet slate grey to a much lighter, chalky dove grey.
The Art of Unmolding
Once your patience has paid off, it is time for the reveal. If you used a silicone mold, gently pull the flexible walls away from the concrete, working your way around the perimeter to break the air seal. Then, place your hand over the exposed concrete and carefully invert the mold, pushing from the bottom until the tray pops out.
If you used the nested plastic container method, start by removing the weights from the inner container. Gently squeeze the sides of the inner container to break the suction, and pull it straight up. Next, flex the outer container slightly on all four sides. Turn it upside down and give the bottom a firm tap. Your concrete tray should slide right out, revealing its raw, brutalist beauty.
Sanding, Sealing, and Adding Rugged Details
Refining the Edges
Straight out of the mold, your tray will look fantastic, but the top edges (the part that was exposed to the air) might be slightly sharp, uneven, or feature a small “lip” of excess concrete. This is where we elevate the piece from a homemade craft to a luxury good.
Take a sheet of 220-grit sandpaper, lay it flat on your workbench, and flip your tray upside down. Rub the top edge of the tray in a figure-eight motion against the sandpaper. This ensures perfectly flat, even sanding. Once the lip is gone, take a piece of 400-grit sandpaper and gently soften all the sharp 90-degree corners by hand. You want the edges to feel smooth and inviting to the touch, not sharp enough to scratch a leather wallet.
Sealing for Longevity
Raw concrete is highly porous. If you place a set of oily keys or a damp bottle of cologne on an unsealed tray, it will absorb the moisture and stain permanently. To protect your handiwork and give it a subtle, expensive sheen, you must seal it.
- Matte Acrylic Sealer: For a modern, invisible finish, brush on a water-based matte concrete sealer. It penetrates the pores and locks out moisture without altering the color.
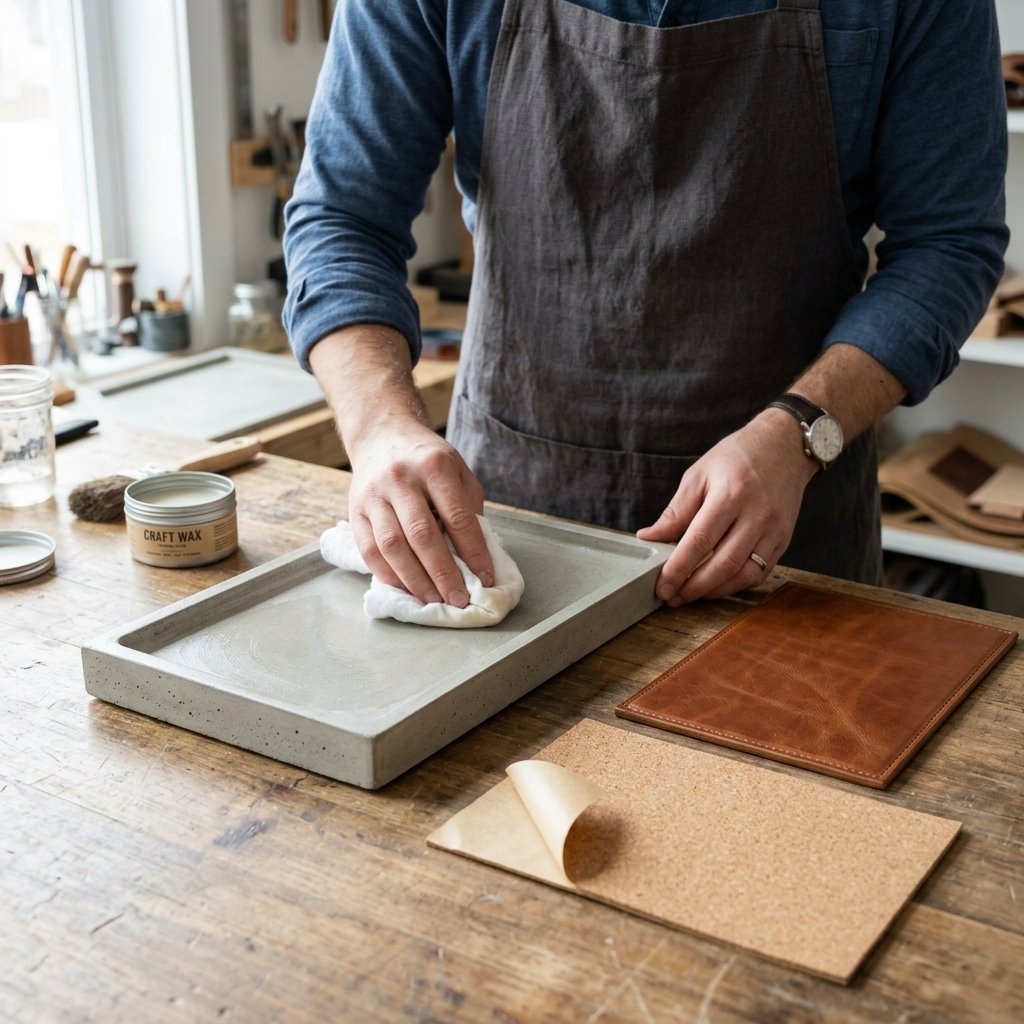
- Beeswax or Mineral Oil: For a more rugged, slightly darker, and organic finish, rub food-grade mineral oil or natural beeswax into the concrete with a microfiber cloth. This deepens the grey tone and provides a beautiful, soft luster.
The Finishing Touches: Leather and Cork
To truly replicate that $100 designer aesthetic, we need to add contrasting textures. The cold, hard nature of concrete pairs perfectly with the warm, rich texture of leather and cork.
- The Base: Concrete is abrasive. If you put this tray on a nice wooden nightstand, it will scratch the finish. Buy a roll of adhesive-backed cork or thick felt. Trace the bottom of your tray onto the material, cut it slightly smaller than the footprint of the tray (so it is invisible from the top), and stick it to the bottom.
- The Leather Insert (Optional but Highly Recommended): Measure the inside floor of your tray. Cut a piece of scrap leather (you can upcycle an old belt, a thrifted leather jacket, or buy cheap scraps from a craft store) to fit precisely inside. You can glue this down with a few dabs of super glue, or leave it loose so it can be removed for cleaning. The visual contrast of the dark leather against the pale concrete is stunning and gives the tray a bespoke, gentlemanly vibe.
Conclusion
From Dusty Mix to Designer Masterpiece
And there you have it—a masterclass in transforming a few dollars’ worth of hardware store concrete into a sleek, sophisticated valet tray that rivals anything found in a high-end boutique. By mastering the ratios, perfecting the vibration technique, and adding those crucial finishing touches like sanding, sealing, and leather accents, you have unlocked a craft that is as practical as it is beautiful.
This project is more than just making a catch-all for keys and coins; it is about reclaiming the power of DIY to create luxury on a budget. Whether you are gifting this to a notoriously hard-to-shop-for father, presenting it as a bespoke groomsman gift, or simply upgrading your own daily carry organization, this concrete valet tray stands as a testament to your resourcefulness. It is heavy, it is handsome, and best of all, it is 100% handmade. Now, clear off that cluttered nightstand, place your new designer-quality tray in its rightful spot, and enjoy the rugged elegance you created with your own two hands.

Makenzie is the founder and lead writer at MoneyHackTips.com — a personal finance blog dedicated to delivering street-smart financial wisdom for real people on real budgets. With 300+ published articles covering everything from debt management to investing fundamentals, Makenzie’s mission is to make every dollar work harder. When not writing about money hacks, Makenzie is testing frugal living strategies, optimizing side hustles, and helping readers build financial freedom from scratch.