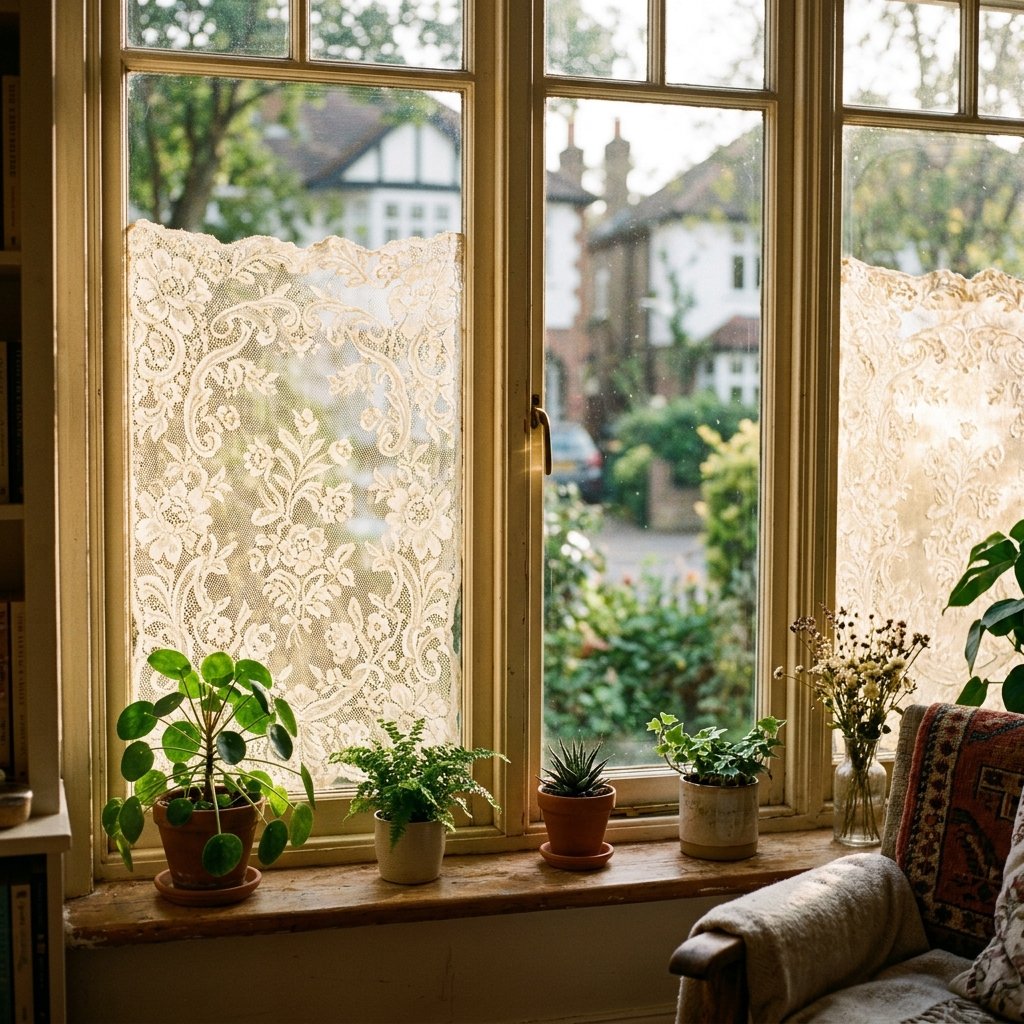

We have all been there. You are enjoying a quiet, peaceful Sunday morning in your favorite worn-in sweatpants, coffee in hand, only to look up and make direct, awkward eye contact with the neighbor walking their dog right past your front window. The illusion of your private sanctuary is instantly shattered. Your immediate thought? I need blinds. I need curtains. I need a fortress. But then you price out custom blinds, frosted glass films, or high-end plantation shutters, and suddenly, living in a fishbowl does not seem so bad compared to dropping $300 per window.
Welcome to the ultimate frugal DIYer’s secret weapon. As resourceful upcyclers and clever budget-savvy decorators, we do not throw money at problems; we throw creativity at them. What if I told you that you could completely block out nosey neighbors, maintain all of your beautiful natural sunlight, and add a touch of high-end, vintage elegance to your home for under $5? Enter the DIY lace window privacy screen.
“True craftsmanship isn’t about how much money you spend; it’s about how resourcefully you can transform the mundane into the magnificent.”
This is not just any craft project. This is a renter-friendly, completely removable, practically zero-budget hack that uses cheap lace (think thrift store finds or Dollar Tree tablecloths) and a homemade paste straight from your kitchen pantry. Whether you are a handy parent trying to add privacy to a street-facing bathroom, a budget bride upcycling leftover wedding decor, or simply a crafty expert looking to elevate your space, this guide will walk you through exactly how to execute this brilliant, trash-to-treasure window treatment.
The Clever Craftsmanship Behind the Lace Window Hack

Before we dive into the sticky, satisfying process of applying lace to glass, we need to understand the practical magic behind why this works so incredibly well. Traditional window treatments like heavy drapes or vinyl blinds force you to make a miserable choice: privacy or natural light. You either live in a dark cave to keep prying eyes out, or you open the blinds and put your life on display.
The Science of Light Filtering
Lace solves this dilemma through the clever physics of light diffusion. The intricate, woven patterns of the fabric act as a scatter-lens. When sunlight hits the lace, it diffuses the rays, filling your room with a soft, glowing, ambient light. However, because the pattern is dense enough, it completely breaks up the line of sight from the outside looking in. Even at night, with your interior lights on, the most a nosey neighbor will see is a vague, unidentifiable shadow. It is the perfect blend of practical, masculine-elegant utility and vintage charm.
Why Not Use Store-Bought Frosted Film?
You might be wondering, why not just buy a roll of frosted window cling from the hardware store? While those films are an option, they come with several distinct disadvantages for the budget-savvy crafter. First, they are notoriously difficult to cut to perfect size, often resulting in jagged edges or wasted material. Second, they are prone to trapping massive, unsightly air bubbles that require a squeegee and the patience of a saint to remove. Finally, quality static-cling films can cost upwards of $30 to $50 for a single large window.
Our DIY lace method, on the other hand, is forgiving. The fabric stretches and molds to the glass, air bubbles brush out effortlessly with a sponge, and if you make a mistake, you simply peel it off, wash it, and try again. It is the ultimate low-risk, high-reward upcycling project.
Material Breakdown: High-End Elegance on a Dollar Store Budget
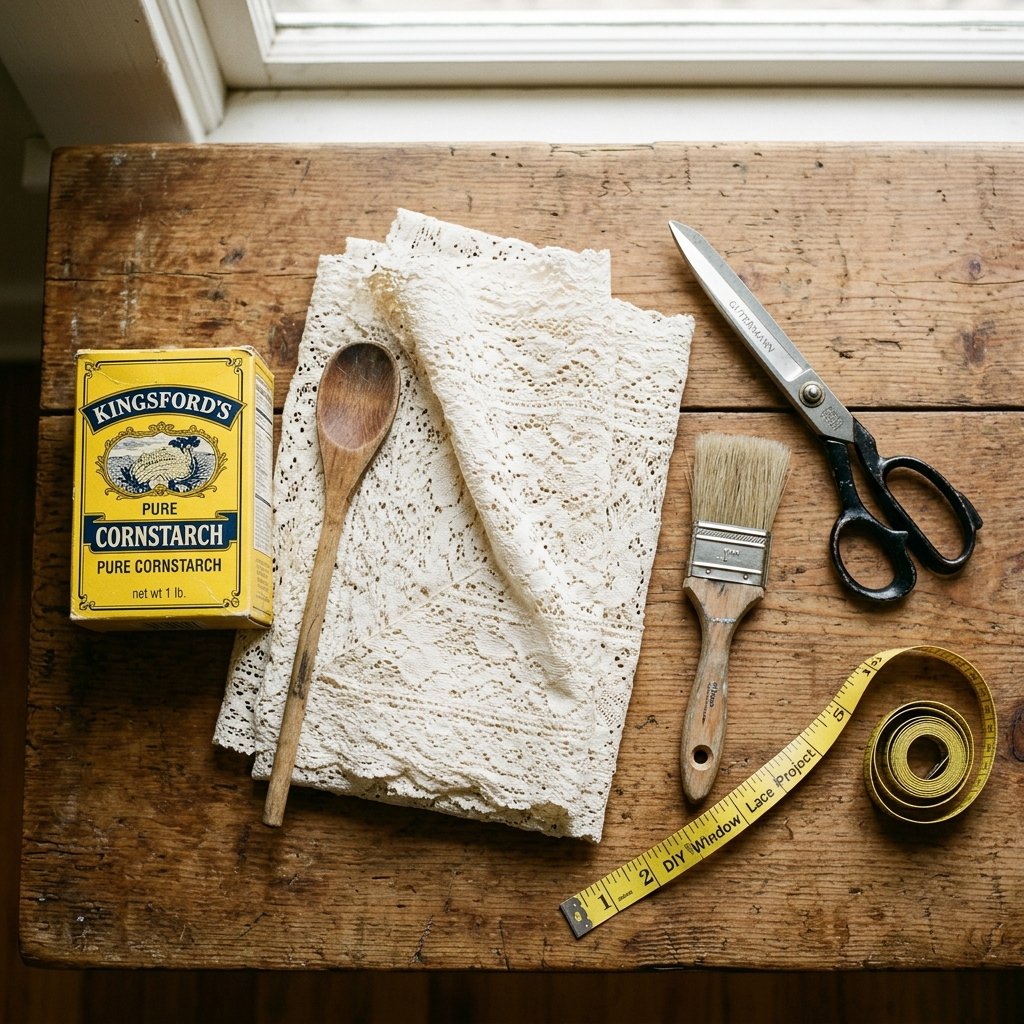
One of the most satisfying aspects of this project is gathering the materials. You likely already have the adhesive ingredients in your kitchen cabinet, leaving only the lace to be sourced. This is where your inner thrifty scavenger gets to shine. You do not need expensive, high-end fabric store yardage to make this look incredible.
Sourcing Your Lace
The beauty of this project lies in its flexibility. Here are the best places to source your privacy screen material:
- Thrift Stores and Estate Sales: Look for vintage lace tablecloths, old curtains, or even large doilies. You can often score a massive tablecloth for $2 to $4, which is enough to cover multiple windows.
- The Dollar Tree: Keep an eye out for their seasonal lace table runners or cheap sheer curtain panels. They are lightweight, easy to cut, and cost exactly $1.25.
- Fabric Remnants: Check the clearance bins at your local craft store for off-cuts of lace apparel fabric.
Let’s look at the hard numbers. Here is a breakdown of what you can expect to spend compared to traditional store-bought solutions.
| Privacy Solution Type | Estimated Cost (Per Standard Window) | Pros | Cons |
|---|---|---|---|
| Custom Cellular Blinds | $80 – $150+ | Excellent insulation, clean look | Expensive, blocks light when closed, hard to clean |
| Store-Bought Frosted Film | $25 – $45 | Modern look, easy to wipe down | Prone to bubbles, tricky to cut perfectly, moderate cost |
| DIY Lace & Cornstarch Screen | $1 – $5 | Extremely cheap, renter-friendly, diffuses light beautifully, easy to apply | Requires DIY effort, not suitable for high-splash zones (like inside a shower) |
The Required Arsenal
To execute this project flawlessly, gather the following supplies before you begin:
- Your chosen lace fabric (washed and dried to prevent future shrinking)
- Cornstarch (about 2 tablespoons per window)
- Cold water and boiling water
- A wide paintbrush or a clean sponge
- Fabric scissors or a rotary cutter
- A measuring tape
- Rubbing alcohol and a lint-free cloth (for window prep)
The Master Formulator’s Cornstarch Paste Recipe
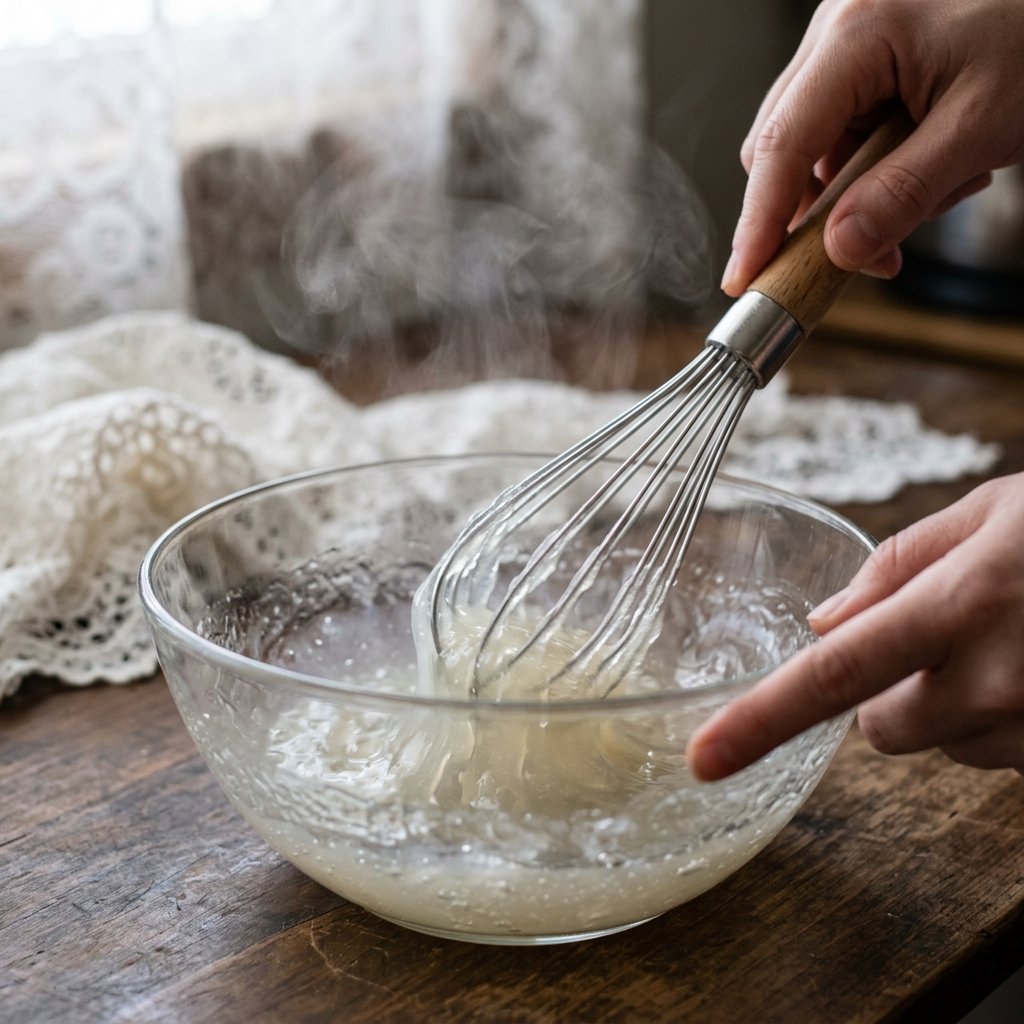
This is where the real crafty magic happens. You might be tempted to use Mod Podge, wallpaper paste, or watered-down school glue. Stop right there. If you use commercial glues, you will be cursing yourself in a year when you try to remove it, spending hours scraping rock-hard adhesive off your glass with a razor blade.
The secret to a perfectly renter-friendly, easily removable, yet incredibly durable hold is a simple, old-fashioned cornstarch paste. This formula acts exactly like a lightweight sizing. It dries completely clear, holds the fabric tightly to the glass for years, but dissolves instantly the moment you apply warm water to it.
“Safety Note: When mixing the paste, you will be working with boiling water. Handle with care, and always let the paste cool to a safe, warm temperature before applying it with your hands or a brush to avoid burns.”
Here is the foolproof recipe for the perfect consistency. You want a paste that resembles thin gravy or heavy cream—thick enough to stick, but thin enough to soak completely through the lace fibers.
| Ingredient | Measurement | Purpose in the Formula |
|---|---|---|
| Cornstarch | 2 Tablespoons | The binding agent; creates the clear, adhesive gel when heated. |
| Cold Water | 2 Tablespoons | Used to create a ‘slurry’ with the cornstarch, preventing lumps before adding heat. |
| Boiling Water | 1.5 Cups | Activates the starches, instantly thickening the slurry into a smooth, clear paste. |
Step-by-Step Paste Mixing Instructions
- In a heat-safe bowl or measuring cup, whisk together the 2 tablespoons of cornstarch and the 2 tablespoons of cold water. Stir vigorously until it forms a smooth, milky liquid with absolutely zero lumps.
- Boil exactly 1.5 cups of water on the stove or in an electric kettle.
- Slowly pour the boiling water into your cold cornstarch slurry while whisking continuously. You will notice the mixture almost instantly transform from a milky liquid into a thicker, slightly translucent gel.
- If the mixture does not thicken immediately, pour it into a small saucepan and heat it gently over medium-low heat for 30 to 60 seconds, stirring constantly until it reaches the consistency of a thin gel.
- Remove from heat and let it cool until it is comfortable to touch. It will thicken slightly more as it cools.
Prepping the Canvas: Cleaning and Measuring Your Windows

A master craftsman knows that the foundation of any great project is the preparation. You cannot build a solid house on a cracked foundation, and you cannot stick lace to a dirty, greasy window. If there is dust, pet nose smudges, or cooking grease on your glass, the cornstarch paste will fail to bond, and your beautiful privacy screen will peel at the corners.
The Deep Clean
Do not just use a standard blue glass cleaner, as these often leave behind a microscopic film that repels adhesives. Instead, create a rugged, heavy-duty cleaning solution.
- Mix a solution of 50% rubbing alcohol and 50% distilled water.
- Spray the window generously.
- Wipe it down using a lint-free microfiber cloth or crumpled newspaper. Pay special attention to the corners and edges where dust tends to accumulate.
- Allow the glass to dry completely. It should squeak when you run a clean finger across it.
Measuring and Cutting the Lace
Now comes the precision work. You have two options for sizing your lace, depending on your preferred workflow.
Method 1: The Pre-Cut (For the Meticulous Measurer)
Measure the exact dimensions of your window pane (just the glass, not the frame). Lay your washed and ironed lace flat on a large table. Using a rotary cutter and a straight edge, cut the lace exactly to size, leaving perhaps a 1/8-inch gap around the perimeter to ensure the fabric does not overlap onto the window caulk.
Method 2: The Rough Cut & Trim (For the Free-Spirited Crafter)
Measure your window and cut the lace so it is about 1 to 2 inches larger than the pane on all sides. You will apply the oversized lace to the window, let it dry stiff, and then use a sharp utility knife or razor blade to trim the excess perfectly along the edge of the window frame. This method often yields the cleanest, most custom-looking edge, especially if your window frames are not perfectly square (a common issue in older homes).
The Application Masterclass: Installing Your Lace Privacy Screen
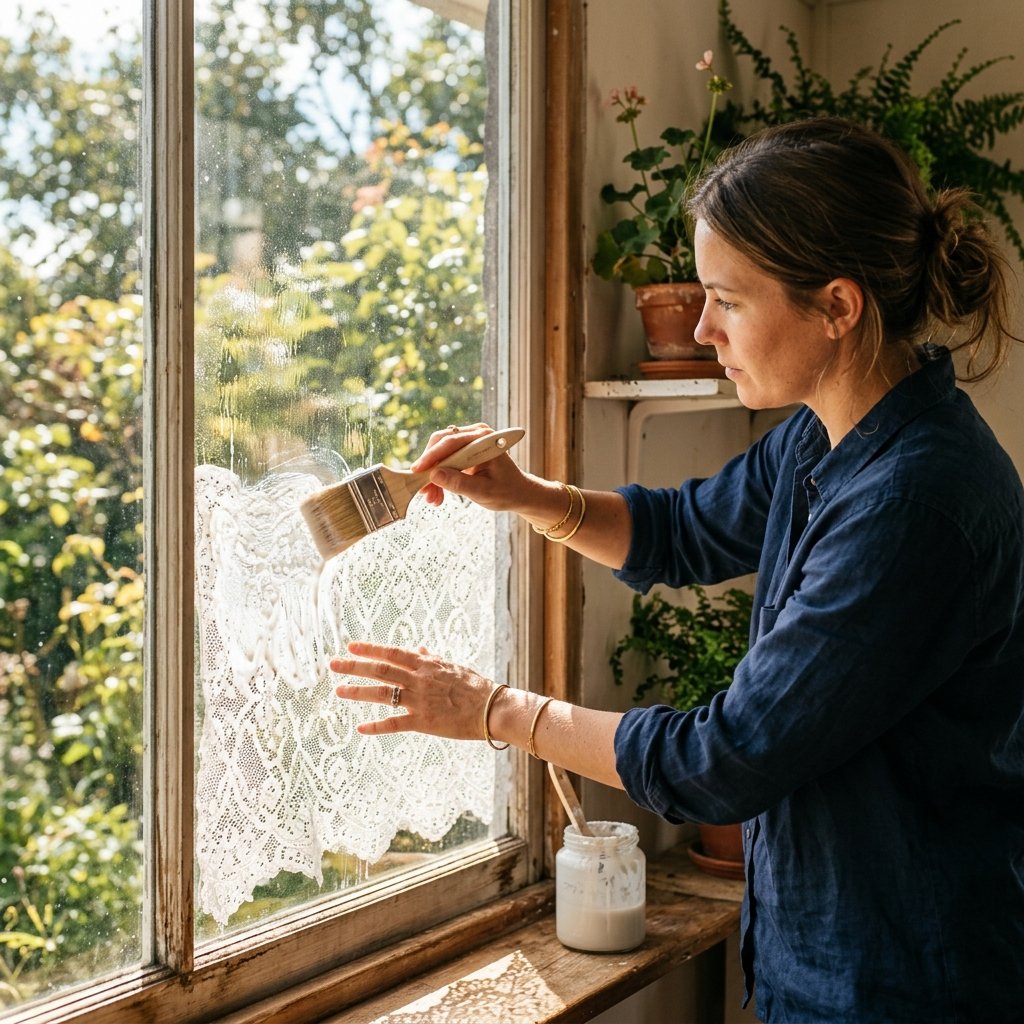
This is the moment of truth. It is time to transform that bare, exposed glass into a stunning, textured privacy screen. The process is a bit messy, highly tactile, and incredibly rewarding. Lay down an old towel or a drop cloth on the window sill and floor to catch any drips of the cornstarch paste.
The Installation Steps
Follow these steps with confidence. Remember, the cornstarch paste is extremely forgiving. If you place the lace crooked, you can simply peel it off, re-position it, and smooth it down again.
- Prime the Glass: Dip your wide paintbrush or clean sponge into the cooled cornstarch paste. Brush a generous, even layer of the paste directly onto the clean window glass. Do not be stingy; the glass should be completely wet.
- Position the Lace: Take your pre-cut (or rough-cut) lace and align the top edge with the top of the window pane. Gently press the top edge into the paste.
- Smooth and Stretch: Working from the top center downward and outward, use your hands or a dry sponge to smooth the lace against the glass. The fabric will soak up the paste from the glass. Gently stretch the lace to ensure the pattern is straight and there are no wrinkles.
- The Top Coat: Once the lace is positioned flat against the window, dip your brush back into the paste. Apply a second, generous layer of paste directly over the lace. You want to completely saturate the fabric so that the paste acts as a sealant.
- Squeegee the Excess: Use your fingers or a flexible plastic scraper to gently press out any excess paste or trapped air bubbles, pushing them toward the edges of the frame. Wipe away the excess paste from the window frame with a damp cloth.
- Let it Cure: Allow the window to dry completely. Depending on the humidity and temperature of your room, this can take anywhere from 2 to 12 hours. As it dries, the milky paste will turn completely clear, and the lace will become stiff and firmly bonded to the glass.
“Pro Tip: If you used the ‘Rough Cut’ method, wait until the lace is 100% bone-dry and stiff. Then, take a fresh, sharp razor blade and run it carefully along the edge of the window caulk to slice off the excess lace. It will cut cleanly like paper!”
Troubleshooting, Maintenance, and Renter-Friendly Removal
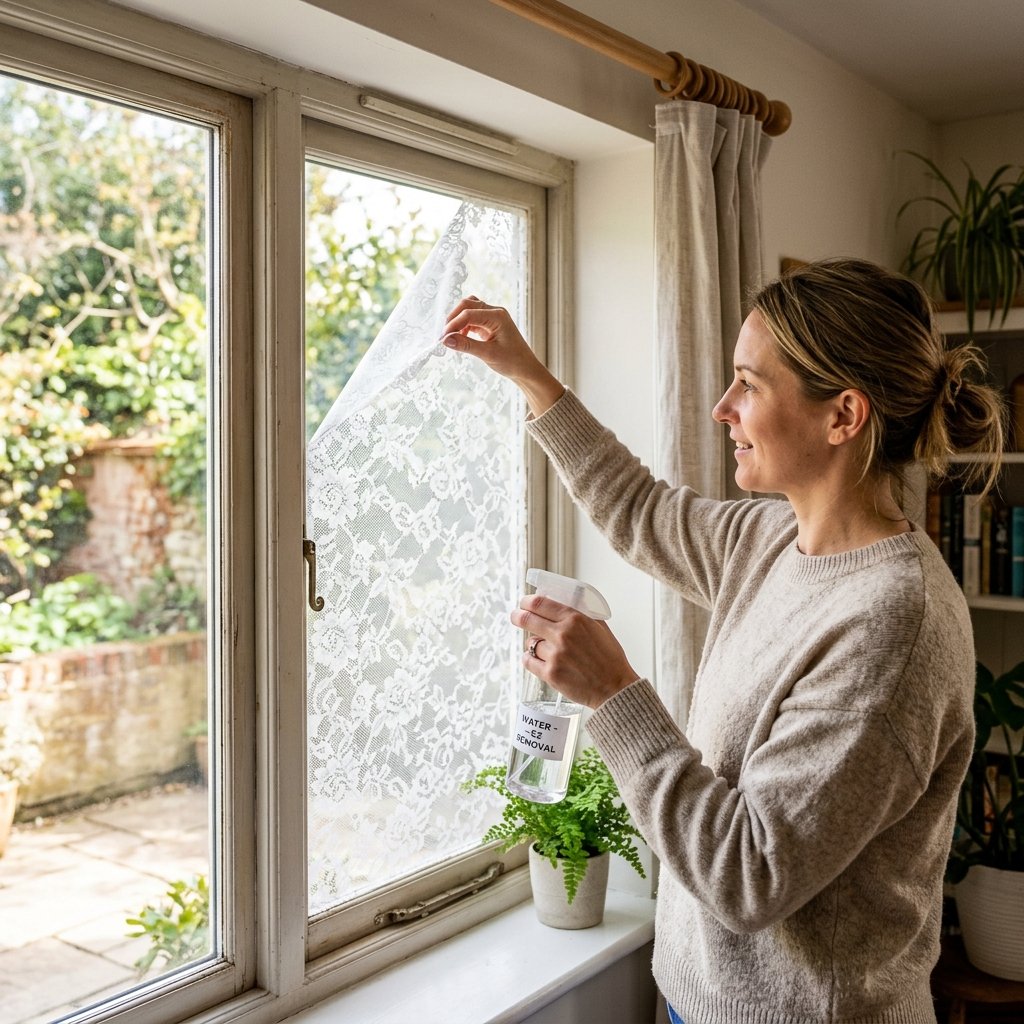
Congratulations! You have successfully upgraded your home’s privacy and aesthetic for the cost of a cup of coffee. But as any seasoned DIYer knows, the true test of a project is how it holds up over time. Will it peel? How do you clean it? What happens when it is time to move out?
Long-Term Maintenance and Cleaning
Once the cornstarch paste is fully cured, the lace becomes incredibly durable. However, because it is essentially starched fabric, it will collect dust over time. To clean your new privacy screen, do not spray it with liquid glass cleaner, as this will re-activate the paste and cause the lace to slide off.
Instead, use the brush attachment on your vacuum cleaner to gently lift away dust. For a deeper clean, a dry microfiber cloth or a classic feather duster works perfectly. If a spot gets stained, you can carefully dab it with a barely-damp cloth, but avoid soaking the area.
The Humidity Factor
Can you use this hack in a bathroom? Yes, but with a caveat. If your bathroom lacks proper ventilation and turns into a steam room every time you shower, the extreme moisture in the air can soften the cornstarch paste over time, causing the lace to peel at the corners. If you notice peeling, simply brush a little fresh paste under the corner and press it back down. For high-moisture areas, ensuring good airflow with an exhaust fan is key to longevity.
| Common Issue | Likely Cause | The Quick Fix |
|---|---|---|
| Corners peeling down | Glass wasn’t clean enough, or not enough paste was applied to the edges. | Brush a small amount of fresh paste under the peeling corner, press firmly, and let dry. |
| Paste dried cloudy, not clear | Paste was applied way too thick, or the cornstarch wasn’t fully dissolved. | Wipe with a warm, damp cloth to remove excess surface paste. It will dry clear. |
| Lace shrunk after drying | Fabric was not pre-washed/shrunk before application. | Unfortunately, you must remove it, wash the lace, and reapply. Always pre-wash! |
The Magic of Renter-Friendly Removal
Perhaps the greatest triumph of this project is how easily it can be undone. When your lease is up, or if you simply decide you want to change out the lace pattern, removal takes less than 5 minutes.
Fill a spray bottle with very warm water and generously spray the entire window. Let the warm water sit on the lace for about 2 to 3 minutes. The water will re-hydrate the cornstarch paste, turning it back into a soft gel. Grab a top corner of the lace and gently pull downward. The entire panel will peel off in one satisfying, intact sheet. Toss the lace in the washing machine, wipe the remaining cornstarch residue off the window with a wet rag, and the glass will look exactly as it did before you started. Zero damage, zero scraping, zero lost security deposits.
Conclusion
Reclaiming your privacy from nosey neighbors does not require a massive budget, a contractor, or a compromise on natural light. By combining the frugal resourcefulness of upcycling with a simple, clever kitchen chemistry trick, you have created a custom, high-end window treatment that looks like a million bucks but costs less than five.
This DIY lace window privacy screen is the epitome of what it means to be a crafty, budget-savvy homeowner or renter. It is practical, beautiful, completely reversible, and fiercely protective of your personal sanctuary. So go ahead—brew that cup of coffee, put on your most comfortable sweatpants, and bask in the soft, diffused, entirely private sunlight of your newly upgraded room. You have earned it.

Makenzie is the founder and lead writer at MoneyHackTips.com — a personal finance blog dedicated to delivering street-smart financial wisdom for real people on real budgets. With 300+ published articles covering everything from debt management to investing fundamentals, Makenzie’s mission is to make every dollar work harder. When not writing about money hacks, Makenzie is testing frugal living strategies, optimizing side hustles, and helping readers build financial freedom from scratch.