
The Art of the Industrial Gift: Why Copper is King
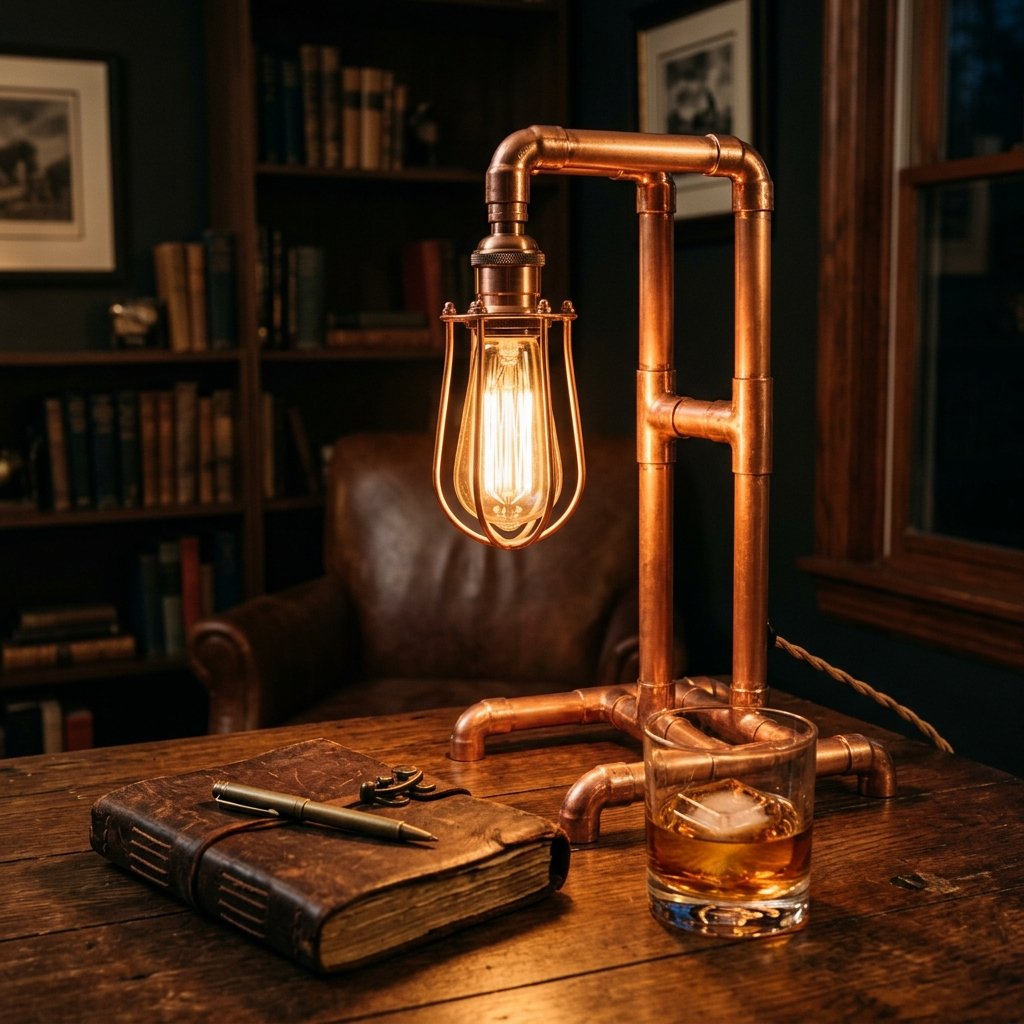
Let’s be honest: finding a gift for a man that is both functional and aesthetically pleasing—without breaking the bank—is a challenge that even the most seasoned crafters face. You want something that says ‘I am incredibly talented and thoughtful,’ but also something he will actually want to display on his desk rather than hide in the closet. Enter the Industrial Copper Pipe Desk Lamp. This project is the holy grail of DIY gifts. It combines the rugged, raw appeal of exposed plumbing with the sophisticated, warm glow of copper, resulting in a piece of ‘Masculine-Elegant’ decor that looks like it walked straight out of a $400 Restoration Hardware catalog.
As a frugal DIYer, you know that the secret to high-end design isn’t a high-end budget; it’s resourcefulness. By sourcing your materials from the local hardware store’s plumbing aisle, you are bypassing the massive markups of boutique home stores. We aren’t just making a lamp; we are engineering a piece of functional art. Whether he’s into steampunk aesthetics, minimalist modernism, or a classic workshop vibe, this lamp is adaptable, durable, and undeniably cool. In this guide, we will walk through the selection of the perfect copper fittings, the precision of electrical wiring, and the crafty secrets to getting that perfect ‘aged’ or ‘mirror-polished’ finish. Get ready to flex those maker muscles and create a gift that will be the centerpiece of his workspace for years to come.
The Blueprint: Materials, Tools, and Your Budget Breakdown
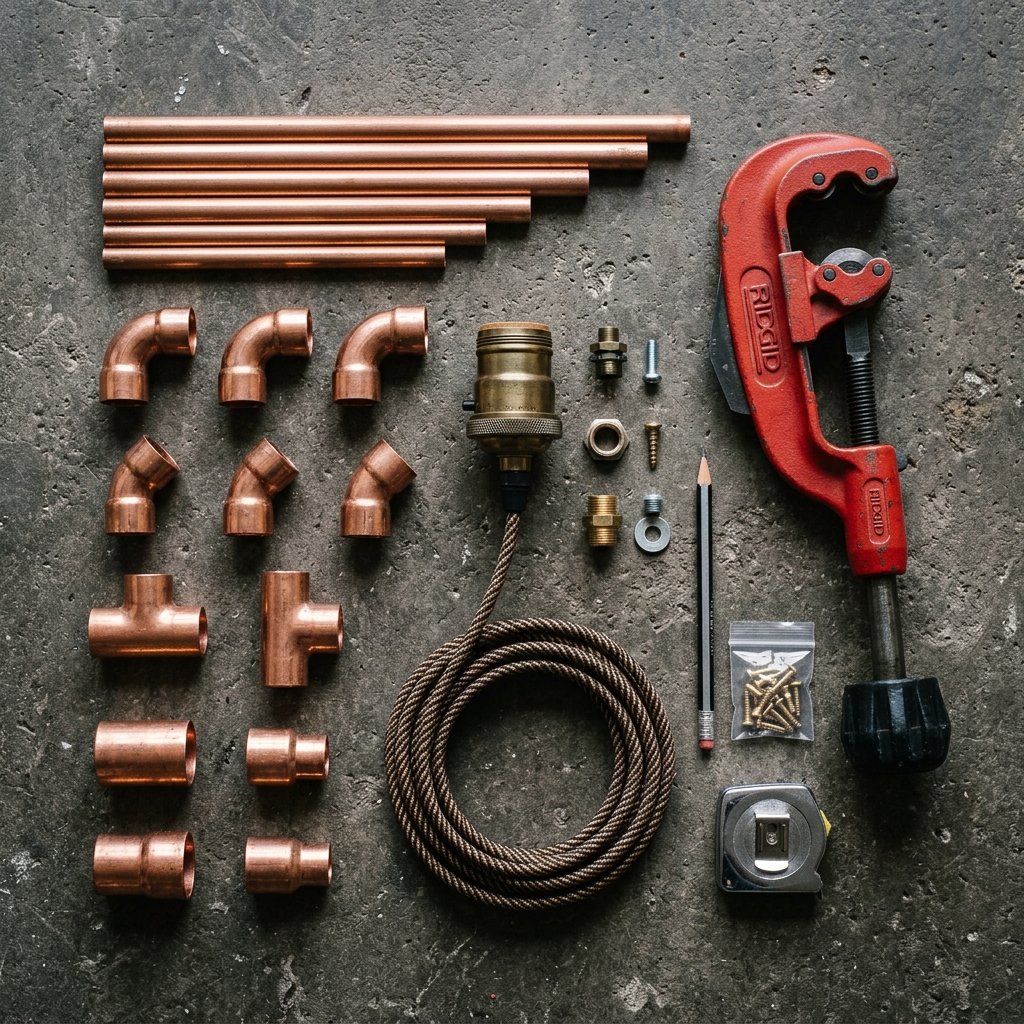
Sourcing Your Supplies Like a Pro
The beauty of working with copper is that it is incredibly forgiving and visually striking. For this build, we are using 1/2-inch copper pressure pipe. It is sturdy enough to hold its shape but light enough to work with comfortably. Before you head to the hardware store, let’s look at the cost-benefit of building this yourself versus buying a pre-made designer version.
| Material Item | Quantity | Estimated Cost |
|---|---|---|
| 1/2″ Copper Pipe (5 ft) | 1 | $12.00 |
| 1/2″ Copper 90-Degree Elbows | 4-6 | $5.00 |
| 1/2″ Copper T-Fittings | 2 | $3.00 |
| Lamp Cord with Switch (6ft) | 1 | $7.00 |
| Weathered Brass Socket | 1 | $6.00 |
| Edison Style LED Bulb | 1 | $5.00 |
| Total Estimated DIY Cost | – | $38.00 |
| Retail Store Equivalent | – | $150.00 – $350.00 |
Essential Tools for the Job
- Pipe Cutter: A small, handheld rotary cutter is essential for clean, burr-free edges.
- Super Glue or Epoxy: Since this isn’t carrying water, we can skip the blowtorch and use high-strength adhesive for the joints.
- Wire Strippers: For safely prepping your electrical connections.
- Steel Wool (0000 grade): To polish the copper to a high shine before sealing.
Budget Mantra: A clever crafter never pays retail for ‘character.’ We build the character ourselves with sweat equity and a sharp eye for materials.
Safety First: The Golden Rules of DIY Electrical Work
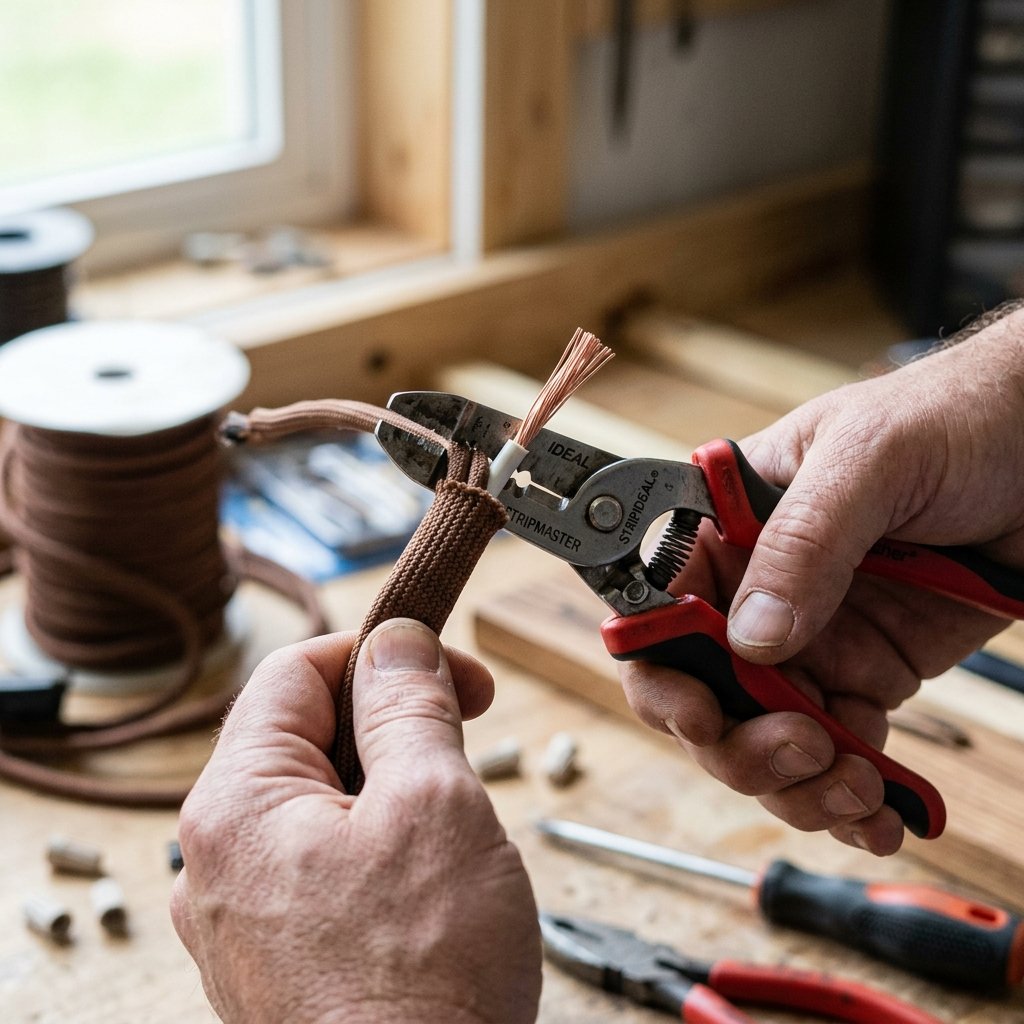
Don’t Get Zapped: Working with Voltage
Before we start threading wires through our copper frame, we need to address the elephant in the room: electricity. Building a lamp is a fantastic entry-level electrical project, but it requires respect for the power running through it. Copper is an excellent conductor of electricity. This means if a wire is frayed or a connection is loose and touches the pipe, the entire lamp frame could become ‘live.’ To prevent this, we use a few crafty tricks.
- Check your insulation: Always inspect the lamp cord for nicks or cuts.
- Use a Bushing: Where the wire enters the copper pipe, ensure there are no sharp metal edges that could slice the plastic coating over time.
- The Underwriter’s Knot: This is a classic electrician’s knot used inside the socket to ensure that if someone pulls on the cord, the tension is placed on the knot rather than the electrical terminals.
Safety Note: Always ensure the lamp is unplugged during the entire assembly process. Never test the circuit until the socket is fully assembled and the bulb is screwed in.
Step-by-Step Construction: Forging the Frame
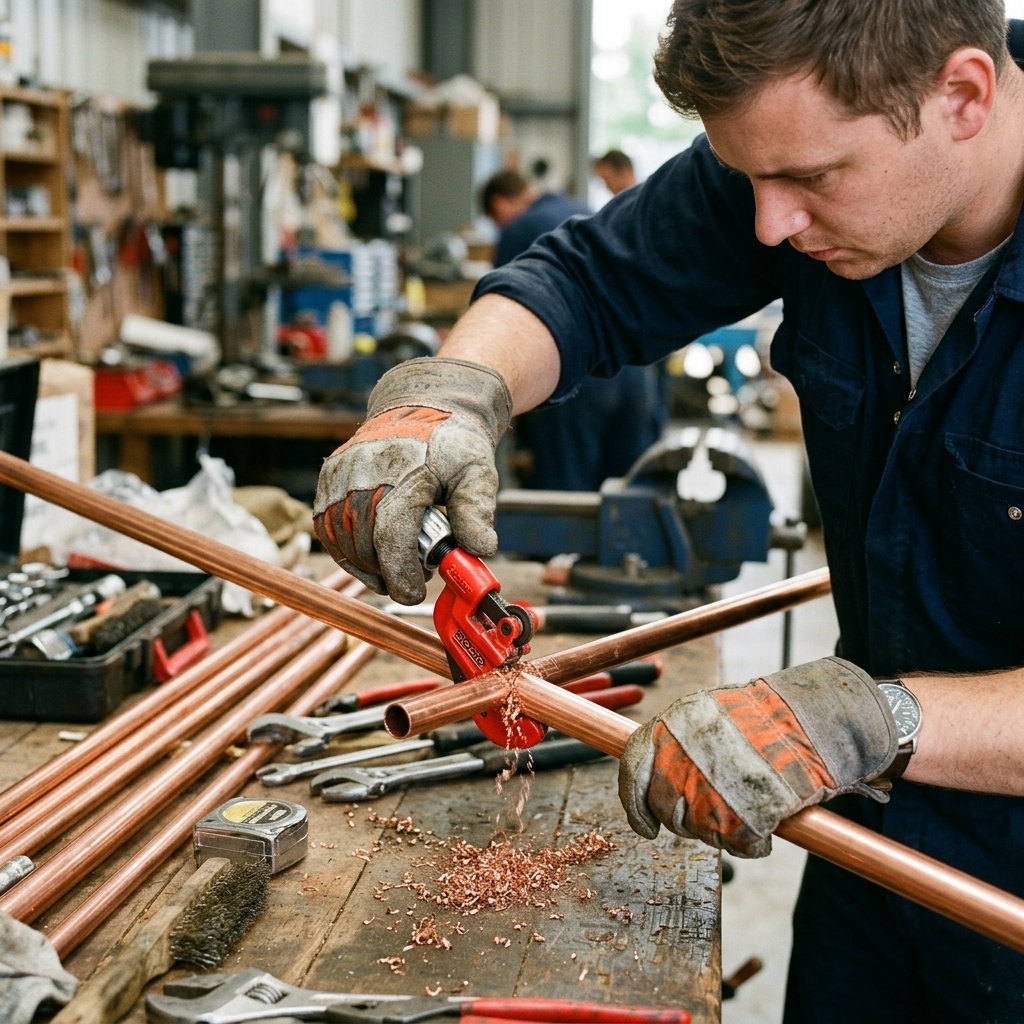
Phase 1: Cutting and Dry Fitting
The most satisfying part of this project is the ‘dry fit.’ This is where you assemble the lamp without glue to ensure the proportions are perfect. Follow these steps for a classic ‘L-shaped’ desk lamp design:
- Measure and Cut: Cut your 5-foot pipe into the following segments: One 10-inch piece (the neck), two 6-inch pieces (the base sides), and one 4-inch piece (the base back).
- The Base: Connect the two 6-inch pieces to the 4-inch piece using two 90-degree elbows. This creates a ‘U’ shape that will sit flat on the desk.
- The Vertical Rise: Use a T-fitting in the center of the 4-inch back piece to point a segment upward. Connect your 10-inch piece here.
- The Head: Attach another 90-degree elbow to the top of the 10-inch piece, followed by a small 2-inch ‘nipple’ of pipe where the socket will eventually sit.
Phase 2: The Glue Up
Once you love the shape, it’s time to make it permanent. Apply a small amount of clear epoxy or industrial-strength super glue to the inside of each fitting. Twist the pipe as you push it in to spread the glue evenly. Pro Tip: Use a square or a flat table surface to ensure your lamp isn’t leaning to one side. You have about 30 seconds to adjust before the glue sets!
Wiring the Masterpiece: Bringing the Light

Threading the Needle
Now that the frame is solid, we need to run the ‘veins’ of the lamp. Take your lamp cord and thread it through the base, up the vertical pipe, and out through the head where the socket will sit. If you find the wire getting stuck at the elbows, try fishing it through with a piece of string and a small weight (like a nut or bolt) first.
Connecting the Socket
Standard lamp sockets have two screws: a brass screw (hot) and a silver screw (neutral). When wiring your cord:
- Identify the ‘ribbed’ side of the wire; this is usually the neutral wire. Connect it to the silver screw.
- The ‘smooth’ side is the hot wire. Connect it to the brass screw.
- Wrap the wire clockwise around the screw so that as you tighten the screw, it pulls the wire tighter.
Once the wires are secure, snap the socket housing together. It should fit snugly against your final copper elbow. You can use a bit of electrical tape or a specialized 1/2″ to 1″ threaded adapter if your socket is larger than the pipe.
The Finishing Touch: Patina vs. Polish
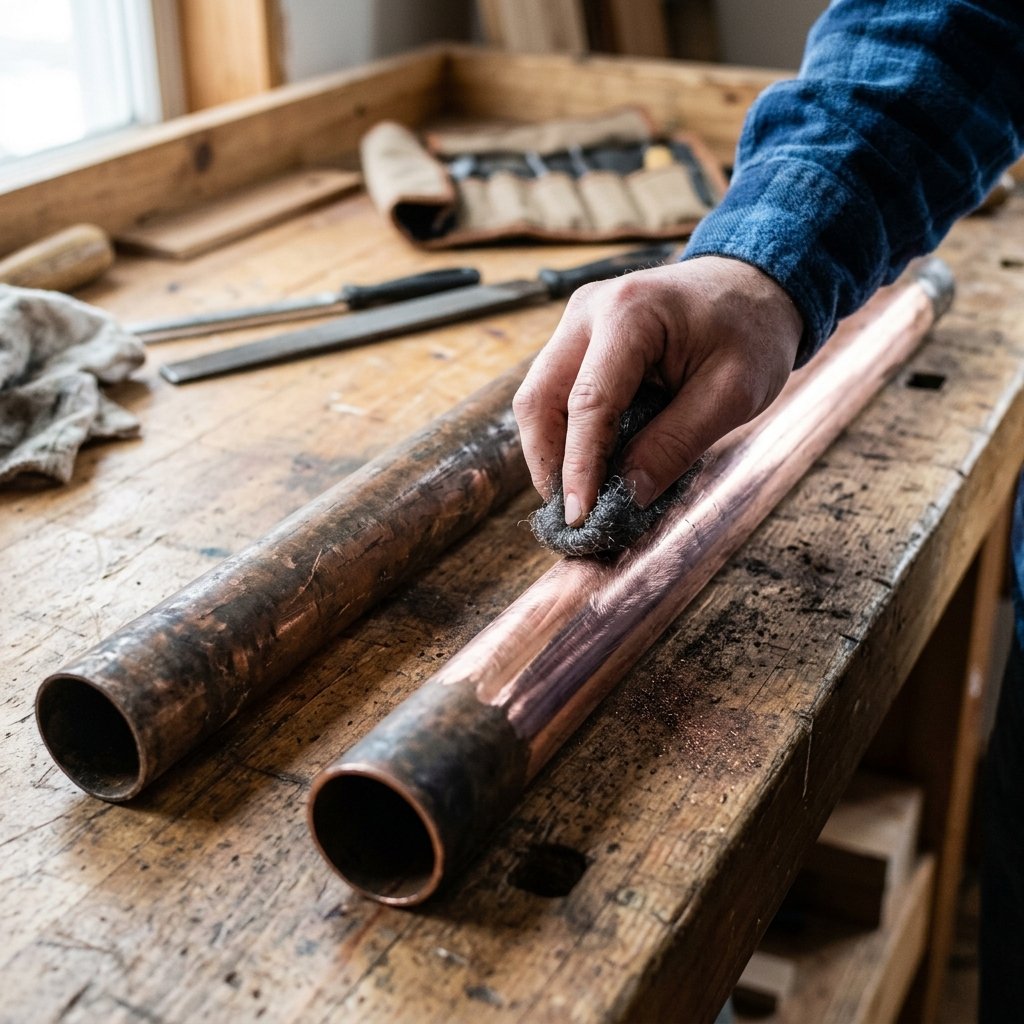
Choosing the Aesthetic
How you finish the copper determines the ‘vibe’ of the gift. You have three main options depending on your boyfriend’s style:
- The Mirror Shine: Use 0000 steel wool to scrub the copper until it glows like a new penny. Once polished, spray it with a clear gloss lacquer to prevent it from tarnishing. This looks great in modern, clean offices.
- The Natural Patina: Leave the copper raw. Over the next few months, the oils from his hands and the oxygen in the air will turn the copper a deep, chocolatey bronze. This is the ultimate ‘rugged’ look.
- The Forced Antique: If you want that ‘found in an old factory’ look immediately, you can use a mixture of vinegar and salt. Spray it on the copper and let it sit for an hour to create green and turquoise highlights (verdigris), then wipe dry and seal.
The Bulb Choice
Don’t ruin a beautiful lamp with a cheap plastic LED bulb. For this project, an Edison-style filament bulb is mandatory. Look for one with a warm color temperature (2200K – 2700K). This provides that amber, cozy glow that makes industrial decor feel high-end and inviting rather than cold and sterile.
Conclusion
A Gift That Stands the Test of Time
Congratulations! You’ve just successfully navigated the world of plumbing, electrical work, and high-end design. By choosing to build The Coolest DIY Industrial Copper Pipe Desk Lamp, you haven’t just given your boyfriend a light source; you’ve given him a conversation piece that embodies resourcefulness and craft. This lamp represents the best of the ‘Trash-to-Treasure’ philosophy—taking basic, utilitarian materials and elevating them through clever design.
Every time he flips that switch to start his workday or settle in for a night of gaming, he’ll be reminded of the effort and creativity you poured into his gift. And the best part? You did it all for a fraction of the retail price, proving once again that a budget-savvy approach never has to sacrifice style. Now, wrap it up in some brown butcher paper with a twine bow to complete that rugged aesthetic, and get ready for the best reaction ever. Happy crafting!

Makenzie is the founder and lead writer at MoneyHackTips.com — a personal finance blog dedicated to delivering street-smart financial wisdom for real people on real budgets. With 300+ published articles covering everything from debt management to investing fundamentals, Makenzie’s mission is to make every dollar work harder. When not writing about money hacks, Makenzie is testing frugal living strategies, optimizing side hustles, and helping readers build financial freedom from scratch.