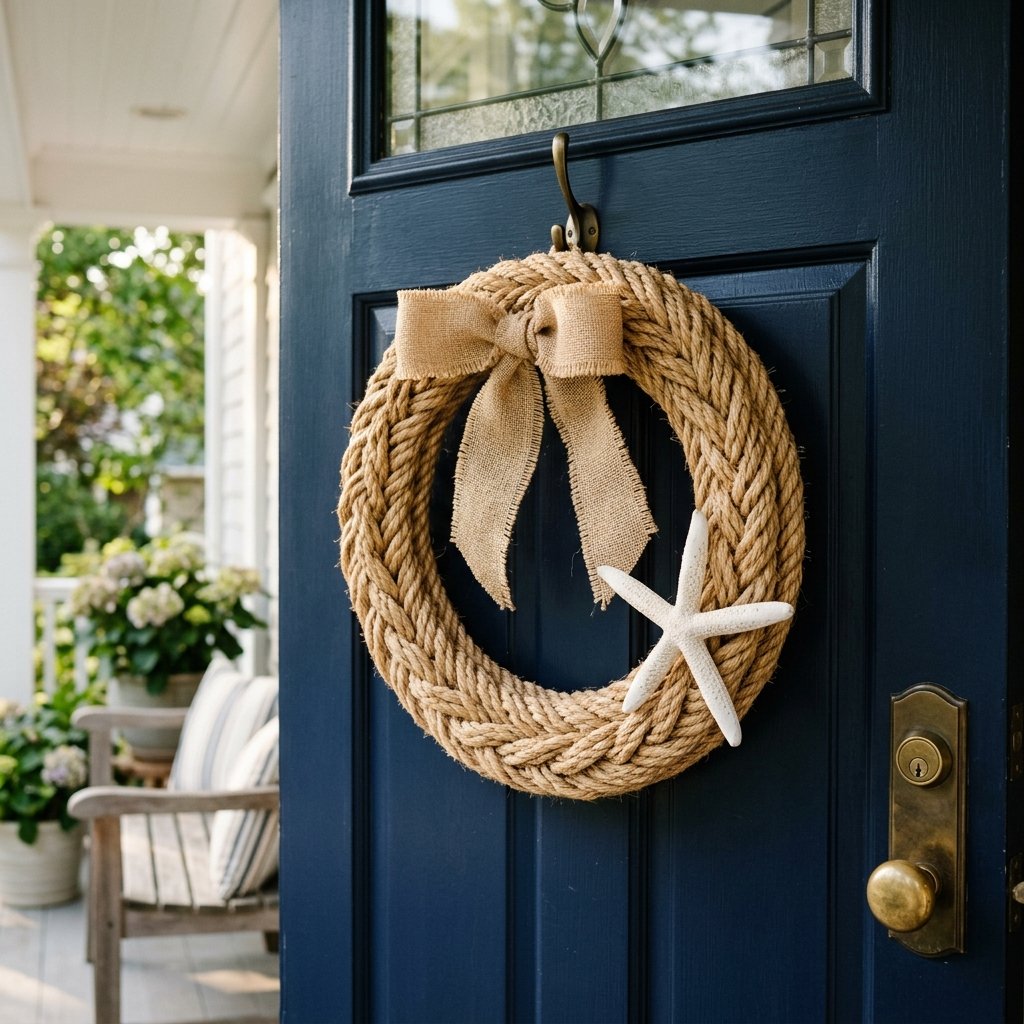

There is a specific kind of magic that happens when you take a handful of items from the $1.25 aisle and transform them into something that looks like it walked straight out of a high-end coastal boutique. We have all seen those stunning nautical wreaths in seaside gift shops, often sporting price tags upwards of $75 or even $120. But here is the secret your neighbors do not know: with a little bit of rugged ingenuity and a few rolls of cotton or sisal rope, you can replicate that masculine-elegant aesthetic for less than the price of a fancy latte. This project is not just about saving money; it is about the satisfaction of building something durable, beautiful, and timeless with your own two hands. Whether you are a seasoned crafter or a frugal DIYer looking to boost your curb appeal, this nautical rope wreath is the ultimate ‘trash-to-treasure’ victory. We are going to dive deep into the mechanics of the perfect wrap, the secrets of weather-proofing your decor, and how to style this piece so it looks like a custom designer commission rather than a budget-friendly weekend project.
The Strategic Treasure Hunt: Materials and Budget Breakdown
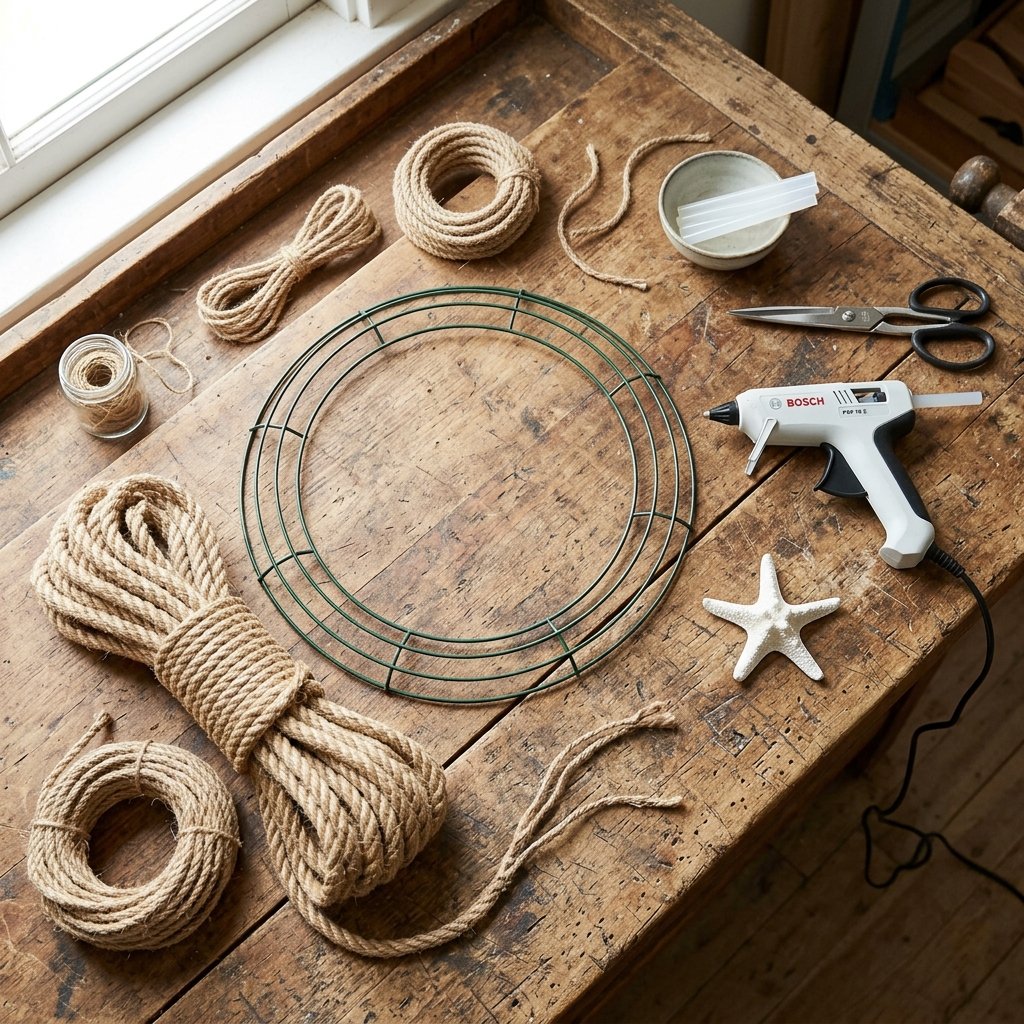
The foundation of any great ‘dupe’ is knowing exactly what to look for. When you walk into the Dollar Tree, you need to look past the bright plastics and see the raw potential in the utility aisle. For this project, we are focusing on texture and structural integrity. A nautical wreath needs weight and presence. We will be using a wire wreath form as our skeleton and multiple packs of nautical rope to build the body. Below is the exact breakdown of what you need to grab to achieve that high-end look without the high-end invoice.
| Item Description | Source | Estimated Cost |
|---|---|---|
| 14-inch Wire Wreath Form | Dollar Tree | $1.25 |
| Cotton or Sisal Nautical Rope (6-8 packs) | Dollar Tree | $7.50 – $10.00 |
| High-Temp Hot Glue Sticks (Bulk Pack) | Hardware Store/Stock | $2.00 |
| Decorative Accent (Starfish, Anchor, or Wood Cutout) | Dollar Tree | $1.25 |
| Weather-Resistant Clear Sealer | Workshop Stock | $0.00 |
| TOTAL PROJECT COST | — | $12.00 – $14.50 |
When compared to the $85.00 average price of a similar wreath at a specialty home decor store, you are looking at a total savings of approximately 85%. That is the power of resourceful crafting. Keep an eye out for the ‘Decorative Nautical Rope’ in the craft section; it often has a better sheen and tighter weave than the utility rope found in the hardware section.
The Foundation: Prepping for Structural Success
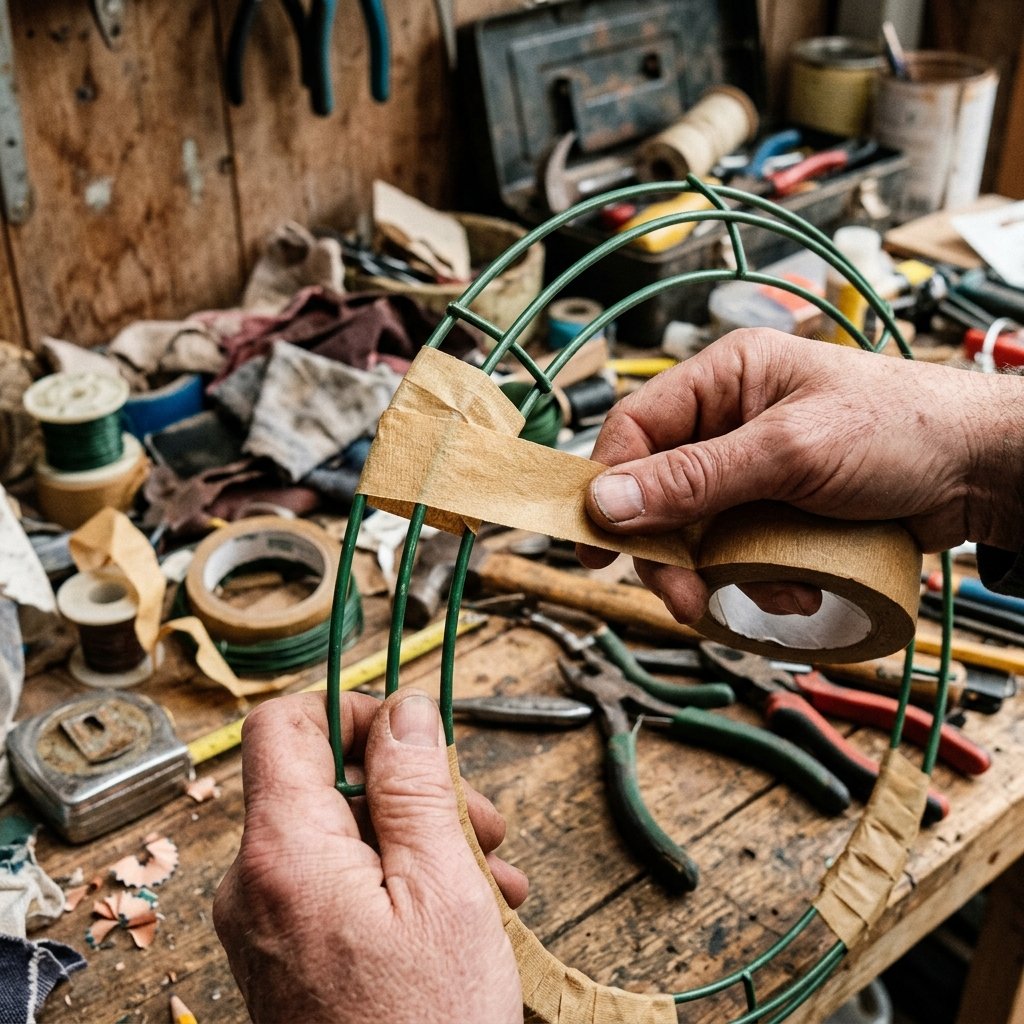
Before we start gluing, we need to talk about the ‘skeleton’ of your wreath. A wire frame is superior to foam for a nautical project because it allows the rope to ‘bite’ into the structure, preventing the heavy rope from sliding around over time. If you want a truly beefy, thick wreath, you might consider zip-tying two frames together, but for a standard front door, a single 14-inch frame is perfect.
“Budget Guru Tip: Always start with a clean, dry frame. If your wire frame has any rough edges or manufacturing burrs, a quick pass with a piece of sandpaper will prevent the rope from snagging during the wrap.”
If you are worried about the green wire showing through the natural rope, you can do a quick ‘base coat’ by wrapping the frame in tan masking tape or even strips of brown paper bag. This is a clever trick that ensures that even if your rope gaps slightly, the eye sees a cohesive, sandy color instead of industrial green wire. It takes an extra 10 minutes, but it is the difference between a ‘DIY’ look and a ‘Designer’ finish.
The Master Wrap: Precision Technique for a Professional Finish
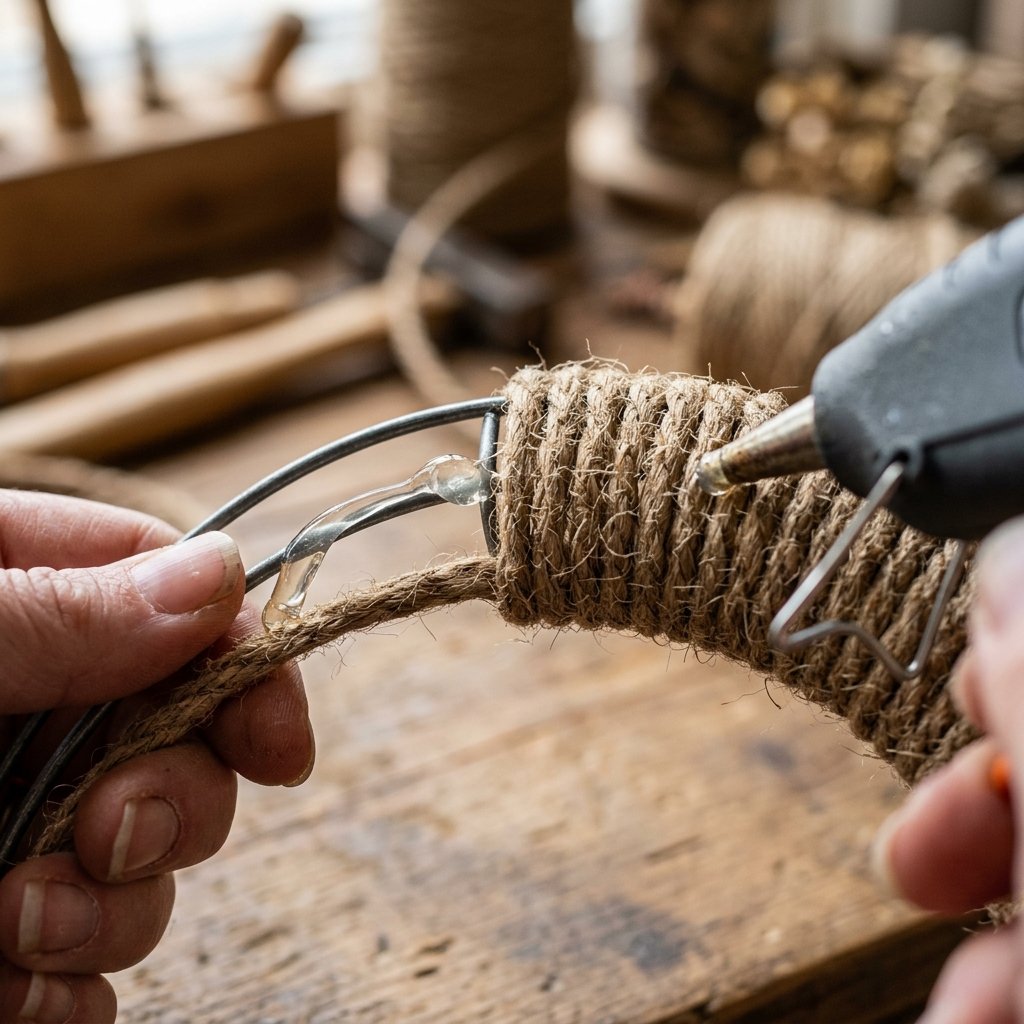
This is where the magic happens. Wrapping rope is a meditative process, but it requires consistent tension. If you pull too tight, you risk warping the wire frame; too loose, and the rope will sag under its own weight when hung on the door. We are going to use a ‘spiral wrap’ technique that ensures maximum coverage and a rugged, textured appearance.
The Step-by-Step Wrapping Process
- Apply a generous bead of high-temp hot glue to the back of the wire frame and press the start of your first rope coil firmly into place. Hold for 30 seconds.
- Begin wrapping the rope around the frame, pulling it through the center and over the outside edge. Ensure each pass is flush against the previous one.
- Every 5 or 6 wraps, apply a small dot of glue to the wire to ‘lock’ the rope in place. This prevents the entire project from unraveling if one section gets snagged.
- When you reach the end of a rope coil, cut the end at a 45-degree angle and glue it to the back. Start the next coil with a matching 45-degree cut to create a ‘scarf joint’ that is virtually invisible.
Consistency is key. You want to maintain the same angle for every single wrap. If you find yourself with a small gap at the inner curve of the wreath, do not worry. You can ‘wedge’ a small piece of rope into the gap on the backside to push the front-facing rope closer together. This is a classic upholsterer’s trick adapted for the frugal crafter.
Advanced Nautical Detailing: Knots and Accents

A plain rope wreath is handsome, but adding a focal point is what makes it ‘copy-worthy.’ For a masculine-elegant look, avoid over-the-top glitter or bright colors. Stick to natural elements like wood, metal, or dried sea life. A simple sailor’s knot or a ‘Monkey’s Fist’ knot can add incredible architectural interest to the top or bottom of your wreath.
Styling Options for Different Aesthetics
- The Minimalist: A single, oversized white starfish glued at the 4 o’clock position.
- The Industrial: A rusted metal anchor tied with a bit of frayed twine for a rugged, weathered look.
- The Classic Coastal: A simple burlap bow with a navy blue pinstripe ribbon layered over the top.
If you choose to use a wood cutout from the Dollar Tree, consider using the ‘baking soda paint’ trick to give it a ceramic or stone-like texture. Mix 1 part acrylic paint with 1/2 part baking soda. The resulting paste dries with a beautiful, matte, gritty texture that mimics expensive pottery. It is a clever way to turn a $1.25 wooden anchor into a high-end focal piece.
Weatherproofing and Long-Term Maintenance
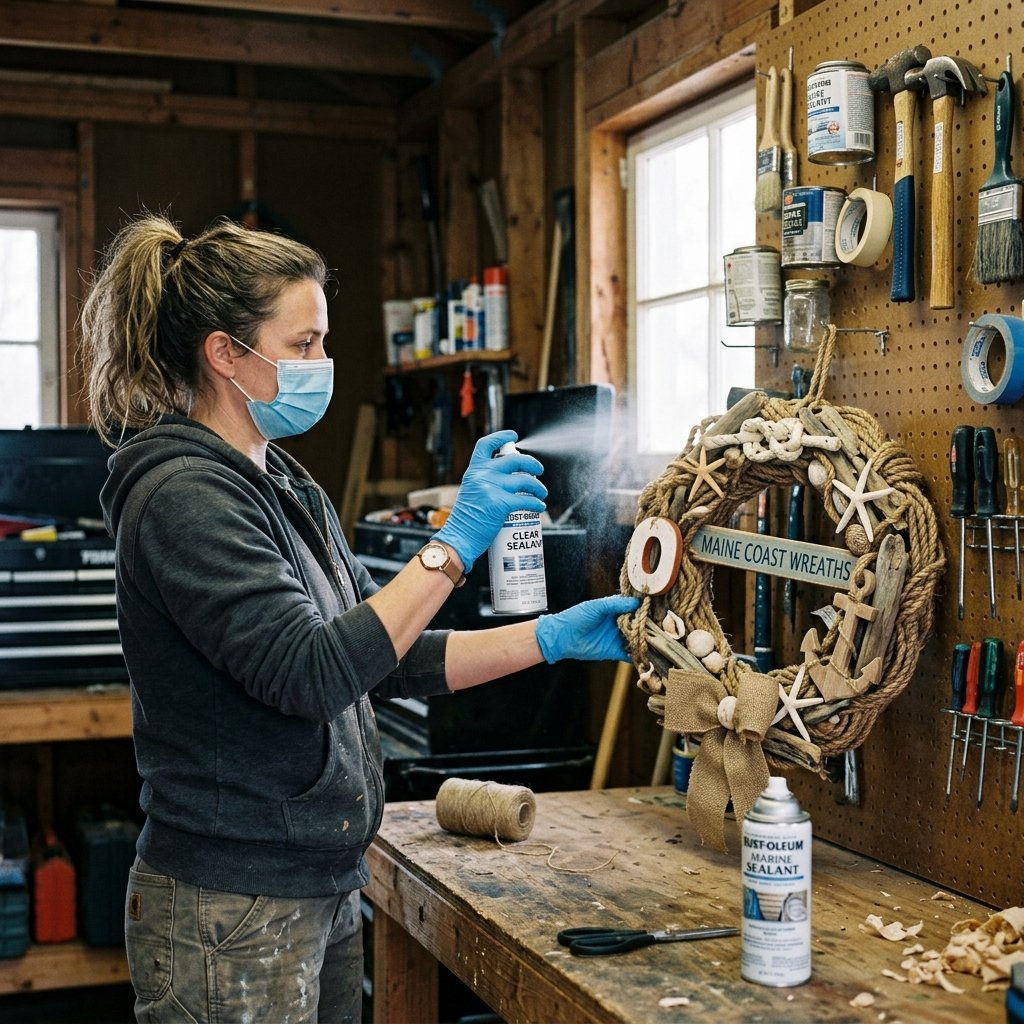
Since this wreath will be living on your front door, it needs to stand up to the elements. Natural fibers like sisal and cotton can absorb moisture, which may lead to mildew or sagging if not properly treated. A quick spray of a clear, matte UV-resistant sealer will protect the fibers from sun bleaching and water damage.
“The Golden Rule of Outdoor Decor: If it’s made of organic fiber, seal it. A 5-minute spray session can add 5 years to the life of your project.”
Check your wreath once a season. If the hot glue begins to brittle in extreme heat or cold, you can reinforce the back with a few dabs of E6000 industrial adhesive. For cleaning, a simple blast of compressed air (like the kind used for keyboards) will remove dust from the crevices of the rope without damaging the fibers. This is practical, low-maintenance elegance at its finest.
The Curb Appeal Transformation: Installation Tips

How you hang your wreath is just as important as how you make it. For a heavy rope wreath, a flimsy plastic hook won’t cut it. Use a sturdy metal over-the-door hanger or a magnetic hook if you have a metal door. To prevent the wreath from banging against the door in high winds, you can glue small felt pads or ‘bumpers’ to the back of the wire frame. This protects your door’s paint and ensures a silent, high-quality feel every time you open the door.
| Hanging Method | Best For | Durability Rating |
|---|---|---|
| Metal Over-the-Door Hanger | Standard Wood/Fiberglass Doors | High |
| Magnetic Wreath Hook | Metal/Steel Doors | Medium-High |
| Command Heavy-Duty Hook | Smooth Surfaces/Renters | Medium |
| Suction Cup Hook | Glass Storm Doors | Low (Not Recommended) |
Position the wreath at eye level—typically about 57 to 60 inches from the ground. This creates an inviting focal point that draws the eye and immediately signals to your neighbors that a person of taste and craft lives here. Do not be surprised if you see a few people stopping to take a closer look; the texture of the rope is incredibly tactile and inviting.
Conclusion
Creating a high-end look on a Dollar Tree budget is not just about the items you buy; it is about the care and technique you apply to them. By choosing the right materials, maintaining consistent tension in your wrap, and adding thoughtful, rugged accents, you have created a piece of decor that rivals anything found in a luxury catalog. This nautical rope wreath is a testament to the power of frugal DIY—it is sturdy, stylish, and carries the unique character of something handmade. Your neighbors will copy it because it looks fantastic, but you will have the satisfaction of knowing you built it for a fraction of the cost. Now, hang that masterpiece with pride and enjoy the best-looking door on the block!

Makenzie is the founder and lead writer at MoneyHackTips.com — a personal finance blog dedicated to delivering street-smart financial wisdom for real people on real budgets. With 300+ published articles covering everything from debt management to investing fundamentals, Makenzie’s mission is to make every dollar work harder. When not writing about money hacks, Makenzie is testing frugal living strategies, optimizing side hustles, and helping readers build financial freedom from scratch.