
The Rugged Beauty of Recycled Indigo
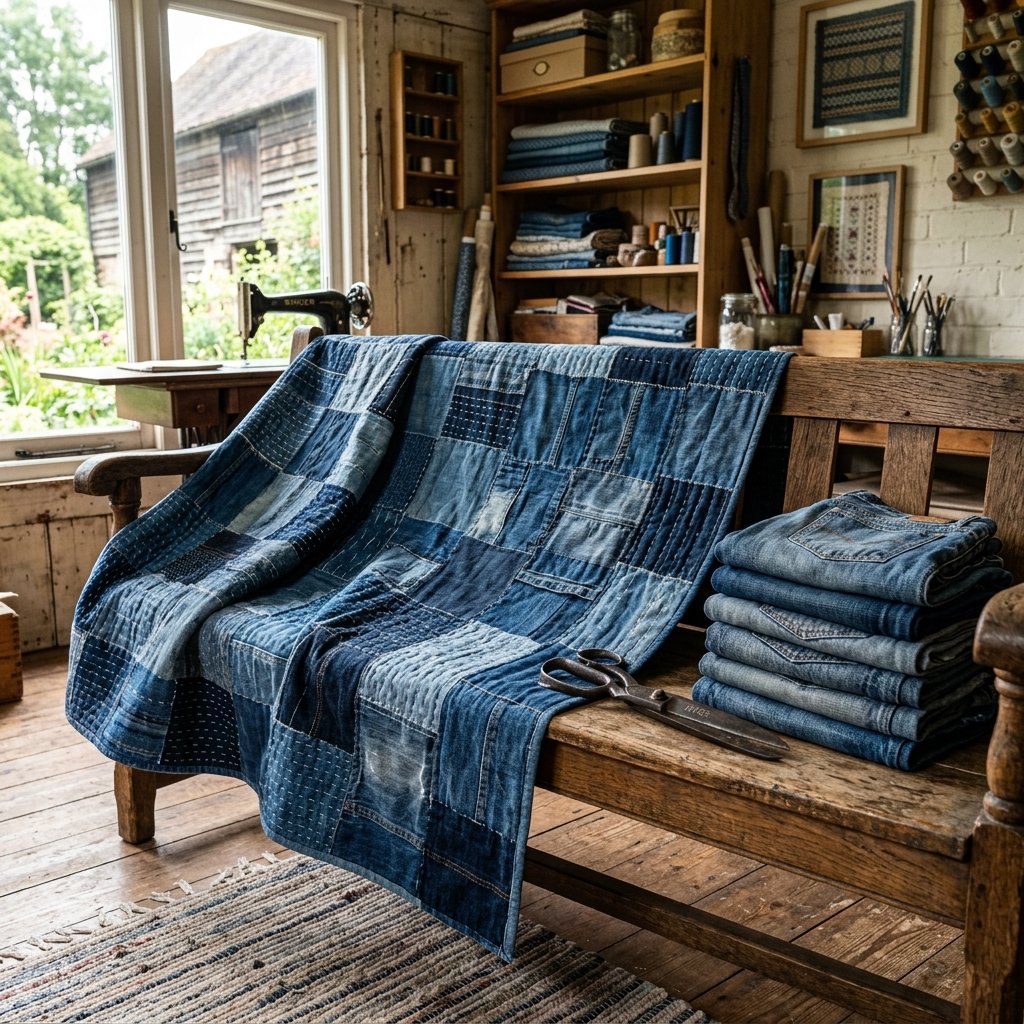
There is a specific kind of magic in a pair of well-worn jeans. They hold memories of yard work, weekend hikes, and late-night bonfires. But eventually, the knees blow out or the hems fray beyond repair. Before you even think about tossing that ‘blue gold’ into the trash, consider this: denim is one of the most durable, versatile, and aesthetically pleasing textiles on the planet. By upcycling these scraps, you aren’t just saving money; you are creating a heavy-duty heirloom that can withstand decades of use.
In this guide, we will dive deep into the art of the denim quilt. Whether you are a frugal crafter looking to decorate your home for $0 or a handy parent wanting to make a ‘bulletproof’ picnic blanket for the kids, this project is your ultimate weekend win. We will move past basic blankets and into the realm of masculine-elegant design, using clever tricks to manage thick seams and create a professional finish that looks like it came from a high-end boutique.
The Denim Harvest: Sourcing and Prepping Your Material
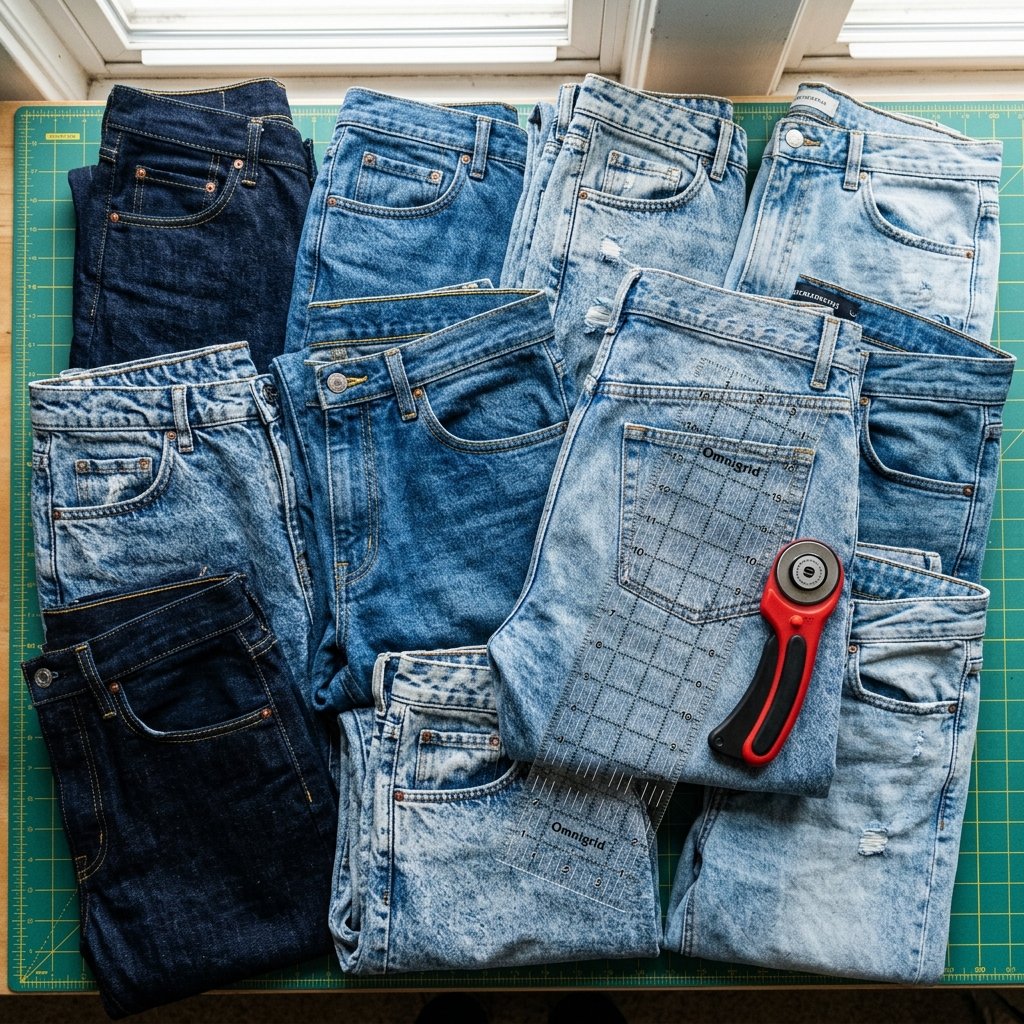
The first step in any thrifty masterpiece is the hunt. You don’t need to buy expensive fabric bolts; your raw materials are likely already in your closet or at the local thrift store’s ‘last chance’ bin. For a standard throw-sized quilt, you will want approximately 8 to 12 pairs of adult-sized jeans.
Where to Find Your ‘Blue Gold’
- Your Own Closet: The best source for free material. Even jeans with massive holes are 90% usable.
- Thrift Store ‘Fill-a-Bag’ Days: Look for the stained or ripped sections that others pass over.
- Garage Sales: Often, you can find bags of old clothes for $1-$5.
- Friends and Family: Put out a call on social media. People are usually thrilled to clear out their clutter for a good cause.
| Source | Estimated Cost | Value Grade |
|---|---|---|
| Personal Closet | $0 | Premium (Pre-washed & Soft) |
| Thrift Store Clearance | $1 – $3 per pair | High (Variety of Washes) |
| Estate Sales | $0.50 – $2 per pair | Excellent (Vintage Denim Quality) |
| Store-Bought Denim Fabric | $15 – $25 per yard | Poor (Expensive & Lacks Character) |
“The secret to a stunning denim quilt isn’t the pattern; it’s the contrast. Mix deep raw indigos with acid-washed light blues and mid-tones to create visual depth that a single-tone quilt can never achieve.”
The Essential Toolkit for Heavy-Duty Sewing

Denim is a beast of a fabric. It is thick, stubborn, and can break a standard sewing needle in a heartbeat. To succeed, you need to treat this like a rugged construction project rather than a delicate embroidery session. You don’t need a $1,000 machine, but you do need the right accessories.
Must-Have Gear for Denim Success
- Denim/Jeans Needles: Specifically size 90/14 or 100/16. These have a reinforced shaft and a sharp point to punch through multiple layers.
- Heavy-Duty Thread: Look for all-purpose polyester or dedicated ‘Jeans Thread.’ Cotton thread is often too weak for the weight of denim.
- Rotary Cutter and Mat: Cutting denim with scissors is a recipe for hand cramps. A sharp 45mm rotary blade will slice through denim like butter.
- A ‘Hump Jumper’ or Jean-a-ma-jig: This tiny plastic tool helps your presser foot climb over thick seams without skipping stitches.
- Walking Foot: If your machine allows it, a walking foot will feed the top and bottom layers of denim at the same rate, preventing ‘fabric creep.’
| Tool | Why You Need It | Budget Tip |
|---|---|---|
| Denim Needles | Prevents breakage & skipped stitches | Buy a multi-pack to save 20% |
| Rotary Cutter | Ensures perfectly square blocks | Use a 40% off coupon at craft stores |
| Iron/Steam | Crucial for flattening bulky seams | Use a heavy thrifted iron for extra weight |
Designing the Layout: From Chaos to Cohesion
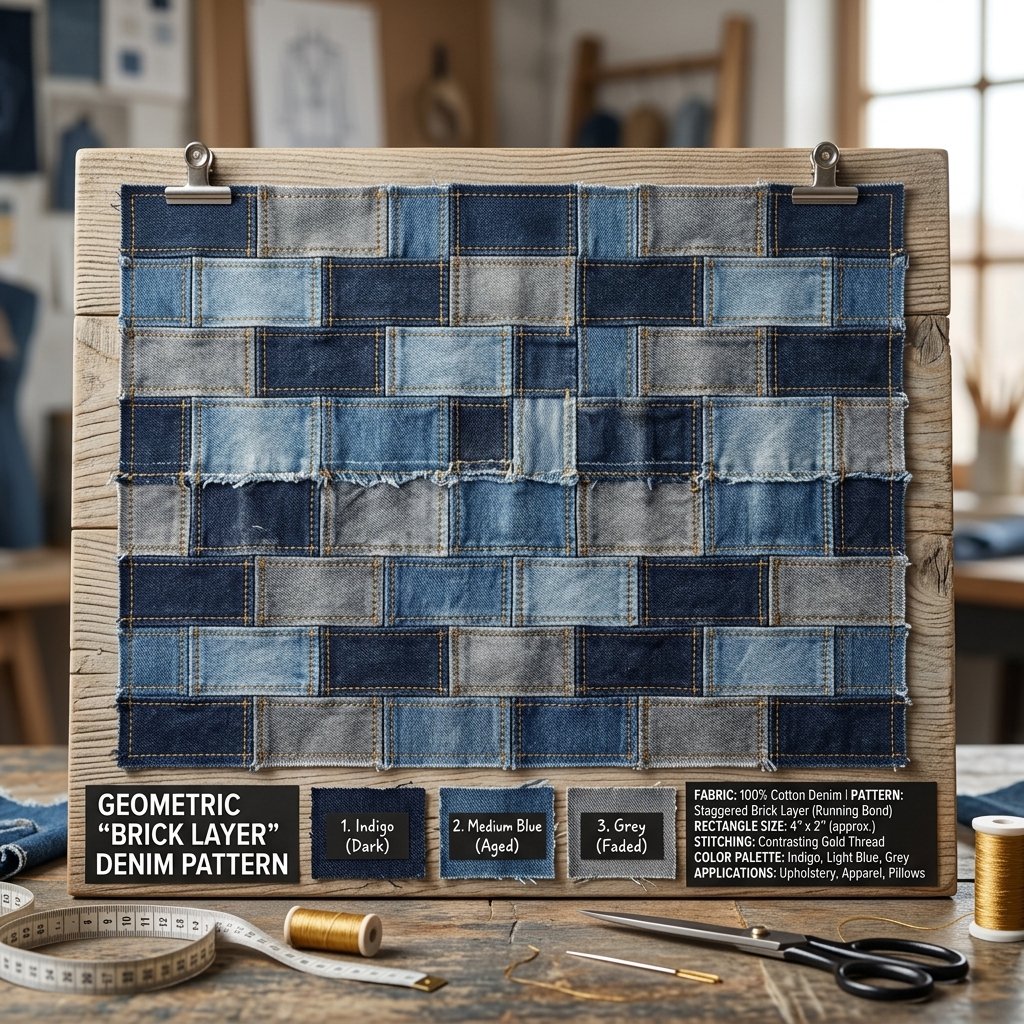
While a ‘random’ scrap quilt has charm, a little bit of planning turns a rag-tag blanket into a piece of art. Because denim is heavy, we recommend simple geometric patterns that minimize the number of intersecting seams.
Popular Denim Patterns
- The Classic Grid: Simple 6-inch or 8-inch squares. This is the most beginner-friendly and resource-efficient method.
- The Brick Layer: Rectangular strips (e.g., 5″ x 10″) offset by half a length in each row. This creates a rugged, architectural look.
- The Log Cabin: Strips of denim sewn around a center square. This is excellent for using up very small, thin scraps of denim.
- The Pocket Mosaic: Incorporating the actual back pockets of the jeans into the quilt. This provides functional storage for remotes or phones when using the quilt on a couch!
“Pro Tip: When cutting your pieces, avoid the flat-felled seams (the thick side seams of the jeans) for the main blocks. Save those thick ‘cables’ for a future project or use them as a rugged border.”
Step-by-Step Construction: Taming the Indigo Beast
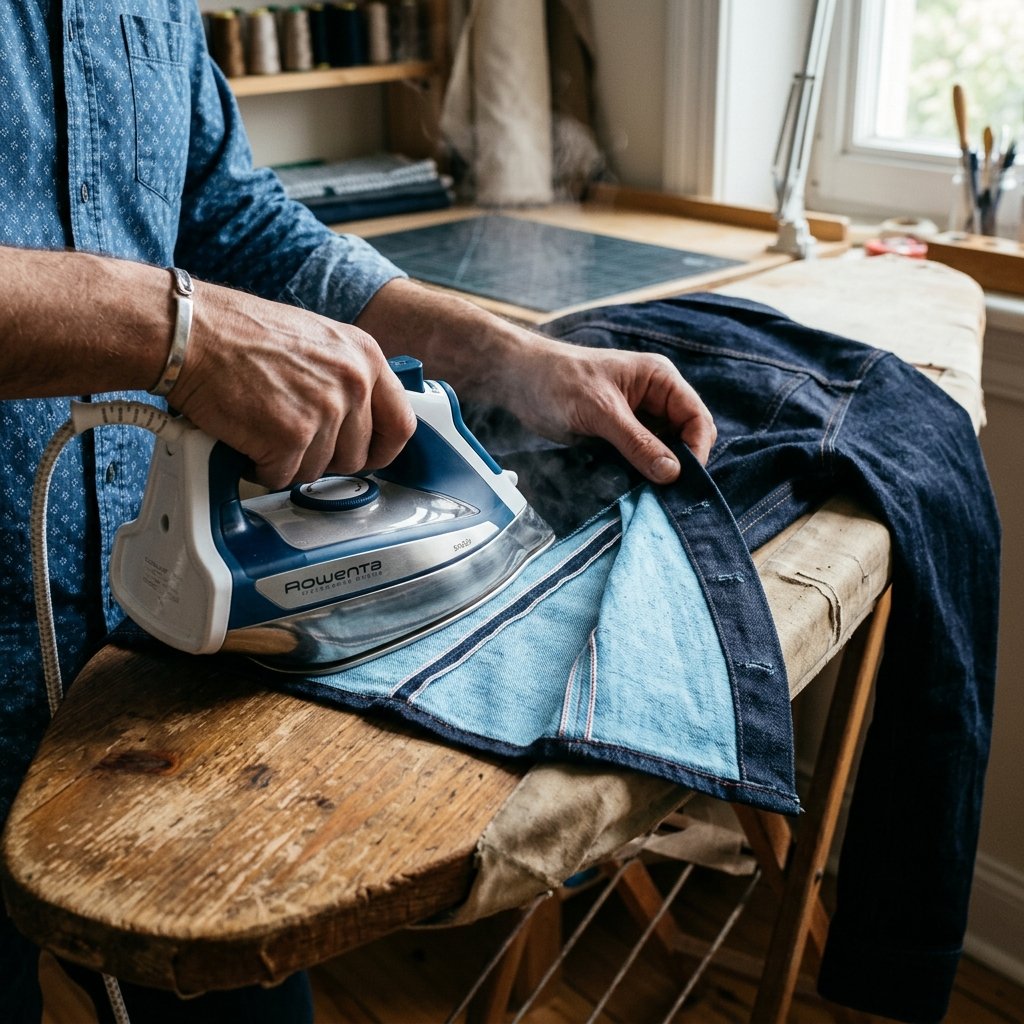
Now we get to the grit of the project. Follow these steps to ensure your quilt doesn’t become a lumpy mess.
1. The Deconstruction
Cut the legs off the jeans. Cut along the inseams and outseams to lay the fabric flat. Avoid the crotch area and the waistband as they are too distorted for flat quilting. Press every piece flat with high steam before cutting your squares.
2. Squaring Up
Using your rotary cutter, cut your desired shapes. For a standard throw, 80 squares of 6.5 inches will create a 48″ x 60″ quilt top. Precision here saves hours of frustration later.
3. The ‘Open Seam’ Secret
In traditional quilting, you press seams to one side. Do not do this with denim. To reduce bulk, you must press your seams open. Use a heavy iron and a bit of steam to make them as flat as possible.
4. Chain Piecing
To save time and thread, use the ‘chain piecing’ method. Feed your pairs of squares through the machine one after another without cutting the thread in between. This can cut your assembly time by 30%.
| Step | Time Investment | Focus Area |
|---|---|---|
| Deconstruction | 2 Hours | Maximizing fabric yield |
| Cutting/Squaring | 1.5 Hours | Precision & Accuracy |
| Piecing Rows | 4 Hours | Seam alignment |
| Joining Rows | 2 Hours | Managing bulk at intersections |
Finishing: Backing, Binding, and Durability
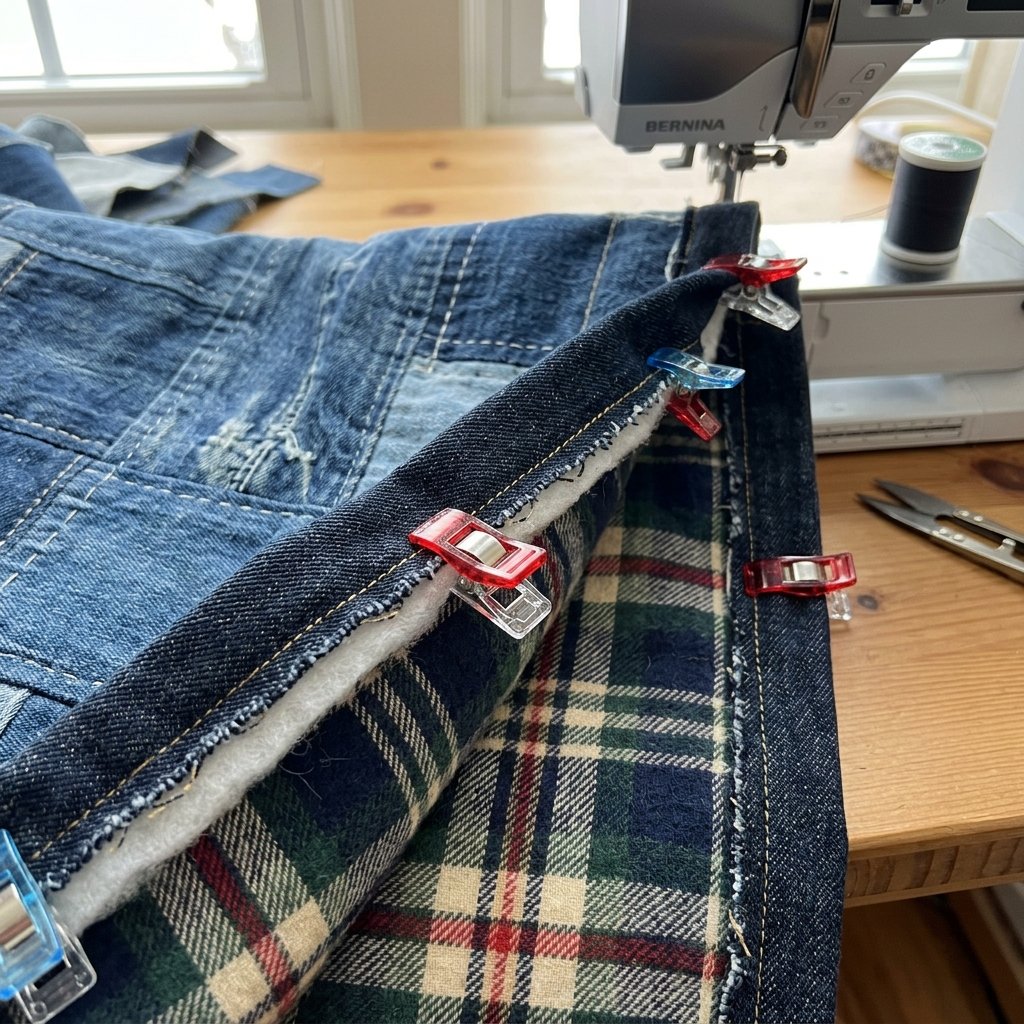
A denim quilt top is heavy. You need a backing that can support that weight without being too slippery. Flannel is the ultimate choice—it’s cozy, affordable, and grips the denim well.
The ‘No-Batting’ Option
Because denim is so thick and warm, you can often skip the middle layer of batting entirely. This makes the quilt easier to sew on a home machine and reduces the cost by $20-$40. If you want extra warmth, use a thin cotton batting or a recycled fleece blanket.
Rugged Binding
For the edges, you can use store-bought bias tape, but for a truly ‘thrifty-expert’ look, make your own binding from the remaining long strips of denim. Warning: This will be very thick at the corners. Take it slow and use a fresh needle.
“Budget Mantra: A quilt is a hug you can keep. By using old jeans, you’re wrapping yourself in the strength of the past while building something for the future.”
Conclusion
Your Legacy in Denim
Congratulations! You have successfully turned a pile of discarded ‘trash’ into a gorgeous, functional work of art. This denim scrap quilt is more than just a blanket; it’s a testament to your resourcefulness and craft. It’s perfect for stadium seating, car camping, or as a masculine throw for a leather sofa. Unlike store-bought quilts that fray and thin over time, your denim masterpiece will only get softer and more full of character with every wash. Now, go find those old jeans and start your indigo journey—your future self (and your wallet) will thank you!

Makenzie is the founder and lead writer at MoneyHackTips.com — a personal finance blog dedicated to delivering street-smart financial wisdom for real people on real budgets. With 300+ published articles covering everything from debt management to investing fundamentals, Makenzie’s mission is to make every dollar work harder. When not writing about money hacks, Makenzie is testing frugal living strategies, optimizing side hustles, and helping readers build financial freedom from scratch.