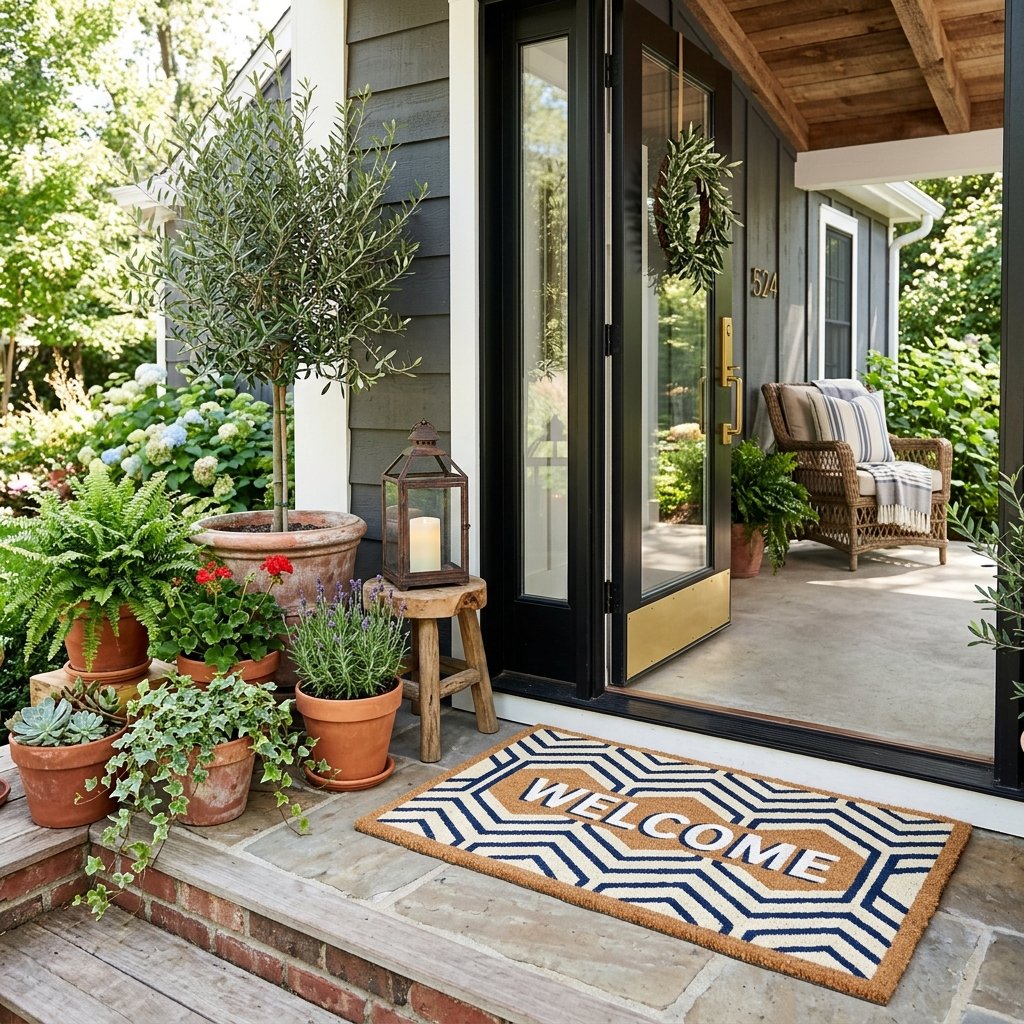

Let us face a harsh reality of home styling: front porch decor is outrageously overpriced. If you have ever scrolled through the glossy pages of a high-end home goods catalog or wandered the aisles of a premium boutique, you have likely seen those thick, beautifully painted coir welcome mats. They feature clever greetings, elegant monograms, or striking geometric patterns. They also feature a heart-stopping price tag of $40 to $60. For a rug that is literally designed to have mud scraped across it by rugged work boots and dirty sneakers, spending that much of your hard-earned cash is simply out of the question for the resourceful upcycler.
But what if you could achieve that exact same premium, heavy-duty designer look for less than the cost of a fast-food lunch? Welcome to the ultimate budget-savvy porch makeover. By sourcing a blank, unpainted coir mat from a big-box hardware store or a budget retailer, and utilizing leftover craft paints and clever homemade stenciling techniques, you can craft a custom masterpiece for under $10.
“Frugality is not about depriving yourself of beautiful things; it is about using your hands, your head, and your crafty ingenuity to create luxury on a dime.”
Whether you are a budget bride making personalized gifts for your bridal party, a handy parent looking for a durable mudroom solution, or a frugal DIYer ready to elevate your curb appeal, this comprehensive guide will walk you through every single step. We will cover how to prep the notoriously shedding coir fibers, the secret “stippling” paint technique that prevents bleeds, and the heavy-duty weatherproofing required to make your mat withstand the harshest elements. Roll up your sleeves, grab your stencil brush, and let us turn a cheap blank canvas into a rugged, elegant piece of functional art.
The Anatomy of a High-End Dupe: Gathering Your Materials
Before we dive into the paint, we need to gather our arsenal. The secret to a successful high-end dupe is knowing exactly where to source your base materials without sacrificing quality. The foundation of this project is the coir mat itself. Coir is a natural fiber extracted from the outer husk of coconuts. It is incredibly durable, naturally water-resistant, and possesses the perfect abrasive texture for scraping dirt off shoes. However, buying a pre-painted one comes with a massive markup.
Where to Source Your Blank Canvas
You can find plain, unadorned coir mats at several budget-friendly locations. IKEA’s TRAMPA mat is a legend in the DIY community, often priced around $5.99. Target, Home Depot, and Lowe’s also sell basic blanks ranging from $7 to $10. When selecting your mat, look for one with a tight, dense weave. The denser the fibers, the easier it will be to paint crisp, clean lines.
The Paint and Stencil Arsenal
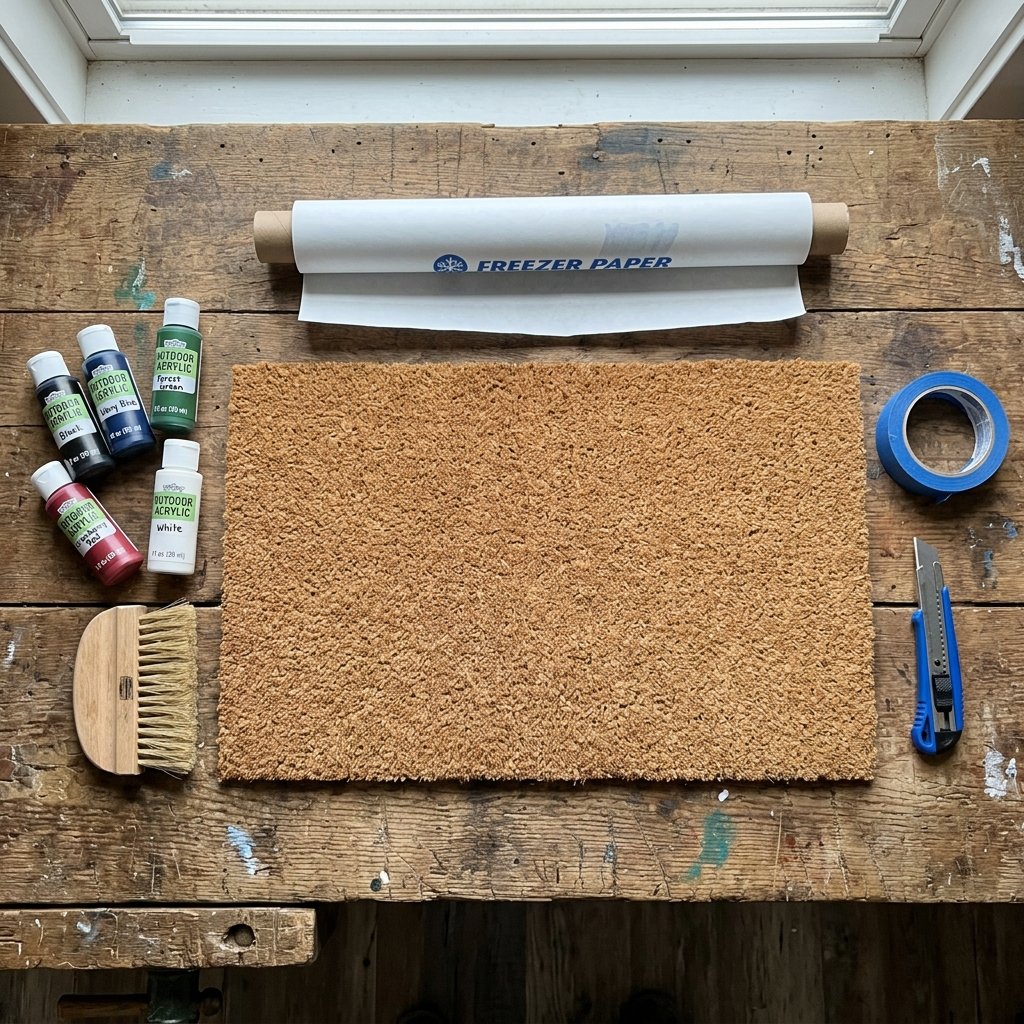
You do not need expensive specialty paints for this project. In fact, you likely already have what you need in your craft stash or garage. Here is what you will need to assemble:
- Blank Coir Mat: Your blank canvas (approx. 18×30 inches).
- Outdoor Acrylic Paint or Leftover House Paint: Heavy-duty exterior latex paint or outdoor craft acrylics work best. For a rugged, masculine look, flat black is unmatched.
- Stencil Material: Freezer paper (the absolute best budget hack), wide painter’s tape, or thick cardstock.
- Stencil Brush: A stiff-bristled brush is non-negotiable. Do not use a soft watercolor brush.
- Sealer: A clear, UV-resistant waterproof aerosol spray (like Rust-Oleum or Flex Seal Clear).
- Utility Knife & Iron: For cutting and adhering your custom stencil.
| Item | Store-Bought Designer Price | Frugal DIY Cost |
|---|---|---|
| Coir Doormat | $45.00 | $5.99 (IKEA/Home Depot) |
| Custom Paint/Design | Included (Markup) | $1.50 (Craft Paint) |
| Stencil Materials | N/A | $1.00 (Freezer Paper/Tape) |
| Weather Sealer | N/A | $1.50 (Fraction of a spray can) |
| Total Investment | $45.00+ | $9.99 |
As you can see, the savings are astronomical. You are keeping $35 in your pocket while gaining the ability to customize the mat to your exact aesthetic, whether that is a sophisticated family crest or a clever, welcoming pun.
Prepping Your Coir Canvas for Maximum Paint Adhesion
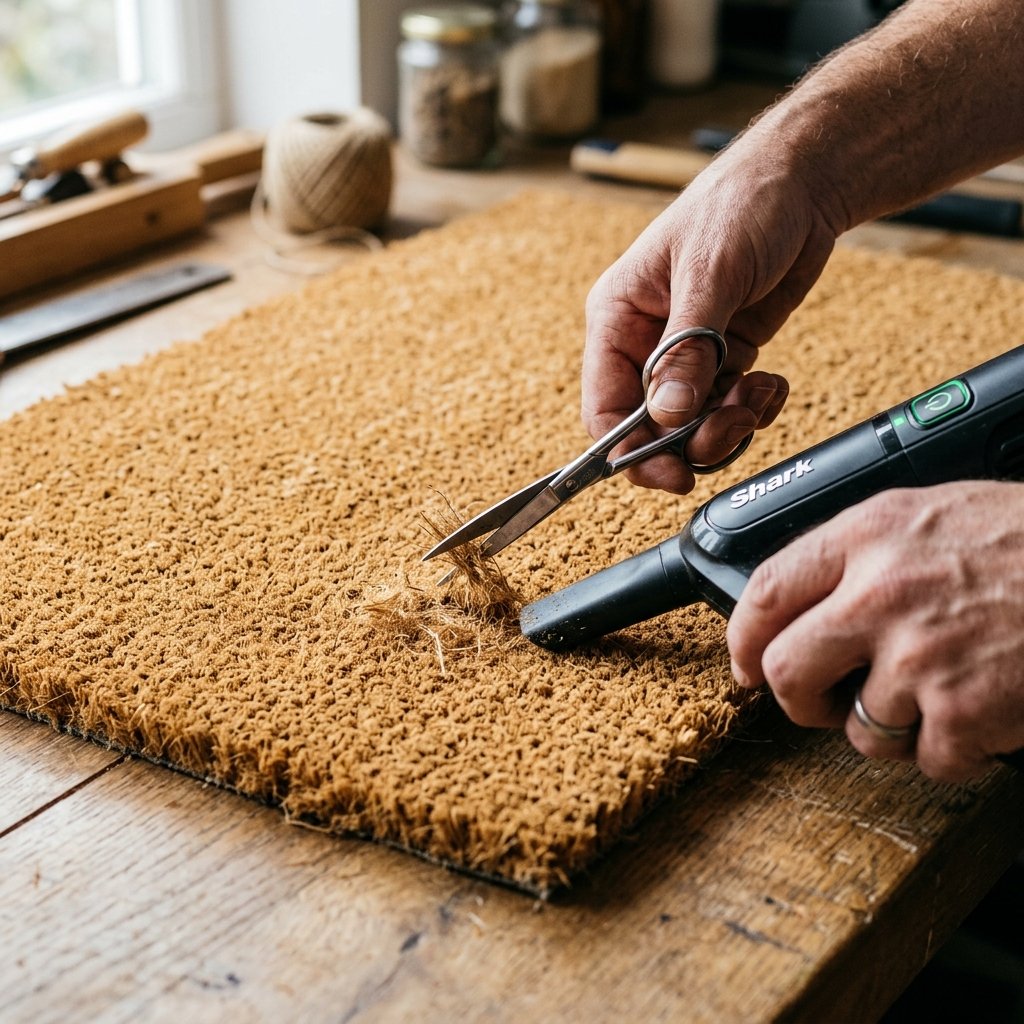
One of the biggest mistakes novice crafters make is slapping paint directly onto a brand-new coir mat straight from the store. Coir is a natural, rustic material. Out of the packaging, it is shedding loose fibers, covered in coconut dust, and features wild, uneven bristles. If you paint over this mess, your crisp lines will flake off within a week as the loose fibers naturally shed.
Step 1: The Deep Vacuum
Take your mat outside or into your garage and hit it with a high-powered shop vacuum or your household vacuum’s brush attachment. Run it over the mat aggressively for a solid 5 minutes. You will be shocked at how much loose dust and fiber gets sucked up. This step ensures your paint adheres to the structural fibers of the mat, not the loose debris sitting on top.
Step 2: The Barber Shop Trim
Run your hand over the surface of the mat. You will notice long, rogue fibers sticking up higher than the rest. These “wild hairs” will catch your stencil brush and flick wet paint outside of your design area, ruining your crisp lines. Take a pair of sharp household scissors or grooming shears and give your mat a quick haircut. Trim down any exceptionally long fibers so the surface is as flat and uniform as possible.
“Preparation is the invisible foundation of every great DIY project. Spend 10 minutes prepping your surface, and your paint job will last 10 times longer.”
Step 3: Tape Off the Borders (Optional but Recommended)
If you are creating a geometric pattern, a faux-woven look, or adding a crisp border, now is the time to lay down your heavy-duty painter’s tape. Press the tape down firmly. Because coir is highly textured, tape will not form a perfect seal on its own, which brings us to the crucial stenciling techniques in the next section.
Designing & Cutting Your Stencil: No Fancy Machine Required!

While electronic cutting machines like Cricuts and Silhouettes are fantastic tools, you absolutely do not need to drop hundreds of dollars on one to get a flawless, professional-looking stencil. We are going to use an old-school, budget-savvy crafter’s secret weapon: Freezer Paper.
The Magic of Freezer Paper
Freezer paper (found in the aluminum foil aisle of your grocery store for about $4 a roll) has a matte paper side and a plastic-coated shiny side. When you apply heat to the paper side, the plastic side lightly melts and temporarily adheres to fabric and porous surfaces—including coir! It creates a surprisingly tight seal that prevents paint from bleeding, and it peels off cleanly without leaving any sticky residue.
- Design Your Layout: Print your desired text, monogram, or silhouette on regular printer paper. If it is large, you can print it across multiple pages and tape them together.
- Trace onto Freezer Paper: Tape your printed design to a bright window. Place a sheet of freezer paper over it (shiny side down, matte paper side facing you) and trace the design using a dark pencil or marker.
- Cut the Stencil: Place the freezer paper on a self-healing cutting mat or a piece of scrap cardboard. Using a sharp utility knife or craft blade, carefully cut out the letters or shapes. Remember to save the “islands” (the inside pieces of letters like O, A, and R)!
- Iron It Down: Position your freezer paper stencil (shiny side down) onto your prepped coir mat. Set your household iron to a medium-high, dry setting (NO STEAM). Carefully press the iron over the paper for 10 to 15 seconds per section. The heat will bond the plastic coating to the rough coir bristles. Don’t forget to iron down your letter islands!
Alternative: The Painter’s Tape Geometric Method
If typography isn’t your style and you prefer a rugged, modern, masculine-elegant aesthetic, skip the freezer paper entirely. Use varying widths of high-quality painter’s tape to create bold stripes, classic argyle, or sharp geometric triangles. Use a tape measure to ensure your lines are perfectly parallel, pressing the tape down as firmly as humanly possible into the bristles.
The Secret Painting Technique: Stippling Like a Pro

This is the most critical section of the entire project. If you take a loaded paintbrush and swipe it side-to-side across your stencil like you are painting a living room wall, you will fail. The paint will instantly catch the rough bristles, bleed under your stencil, and turn your beautiful design into an illegible, blurry blob. To paint coir, you must master the art of stippling.
What is Stippling?
Stippling is the process of applying paint by dabbing it in an up-and-down, vertical motion. You are essentially stamping the paint down into the deep fibers of the mat rather than brushing it across the top.
The Step-by-Step Stippling Process
- Load the Brush Sparingly: Dip just the flat tip of your stiff-bristled stencil brush into your outdoor acrylic or latex paint. Less is more. You want the brush to be almost dry. Too much liquid will pool and bleed.
- Off-Load the Excess: Tap the brush onto a paper towel or a scrap piece of cardboard to remove excess globs of paint.
- Dab Straight Down: Hold your brush perfectly vertical, perpendicular to the mat. Strike the brush straight down into the stencil opening. Use a firm, aggressive pouncing motion to drive the pigment deep into the coir fibers.
- Work from the Edges In: When stippling near the edge of your freezer paper or tape, angle your brush slightly inward, away from the stencil edge. This further prevents any paint from being pushed underneath the barrier.
- Build in Layers: Coir is highly absorbent. Your first pass will likely look faded or gray as the fibers soak up the paint. Do not panic and glob on more paint. Let the first light layer dry for 10 minutes, then do a second (and potentially third) stippled layer until the color is opaque and vibrant.
“Patience is your greatest tool here. Three light, stippled layers will always yield a sharper, more professional result than one heavy, sloppy coat.”
Safety & Clean-Up Note
If you are using heavy-duty exterior latex or oil-based paints for maximum durability, ensure you are working in a well-ventilated area, preferably outdoors or in an open garage. Keep mineral spirits on hand for cleaning your brushes if using oil-based products, though water-based outdoor acrylics offer the best balance of easy soap-and-water cleanup and lasting durability.
Weatherproofing Your Masterpiece: Sealing Against Mud and Rain
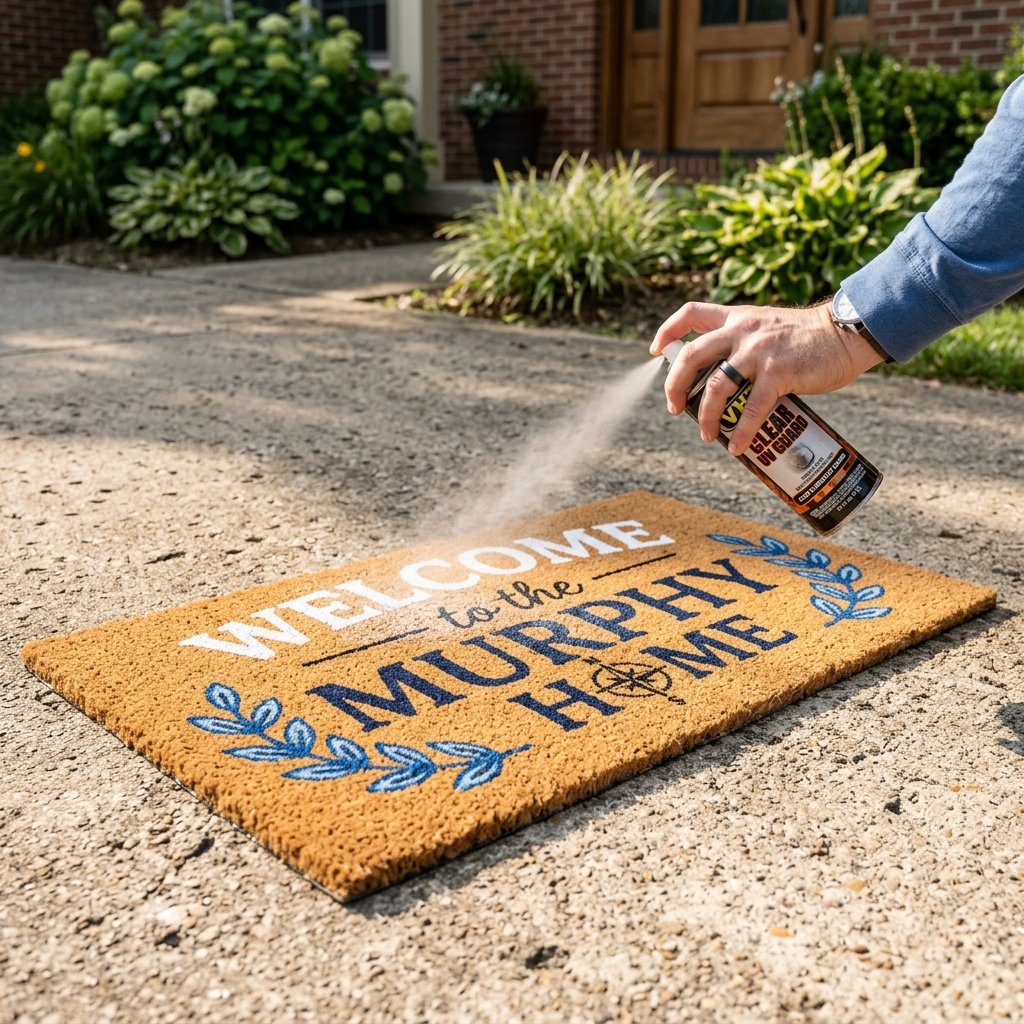
You have spent time prepping, cutting, and painstakingly stippling your custom design. Peeling back that stencil to reveal crisp, perfect lines is one of the most satisfying feelings in the DIY world. But the job is not done. Your mat is about to be subjected to muddy boots, pouring rain, glaring UV rays, and freezing snow. To protect your $10 investment and make it last like a $60 designer piece, you must seal it.
Choosing the Right Sealant
Unsealed acrylic paint will eventually crack and fade under the sun, and water will cause it to lift from the natural fibers. You need a heavy-duty, clear, flexible sealant. Polyurethane can sometimes yellow under direct sunlight, so opt for a UV-resistant clear acrylic sealer or a flexible rubberized clear coat.
| Sealant Type | Pros | Cons | Best Environment |
|---|---|---|---|
| UV-Resistant Clear Acrylic Spray | Dries fast, prevents sun fading, cheap | Requires multiple coats for water protection | Covered porches, sunny climates |
| Clear Flex Seal / Rubberized Spray | 100% waterproof, highly durable, flexible | Slightly more expensive, longer cure time | Uncovered stoops, heavy rain/snow areas |
| Marine Varnish (Spray) | Ultimate durability, meant for boats | Can yellow slightly over time | Extreme weather, high foot traffic |
The Sealing Application Process
- Wait for a Full Cure: Do not spray your mat the moment you finish painting. Allow the acrylic paint to cure for at least 24 to 48 hours in a dry, warm place. Paint may feel dry to the touch in an hour, but it takes days to fully bond to the fibers.
- Sweep Away Loose Bristles: Give the mat one gentle shake or a light sweep with a broom to remove any fibers that were loosened during the painting process.
- Apply in Light Coats: Take the mat outside. Holding your aerosol sealant about 10 to 12 inches away from the surface, spray a light, even coat over the entire mat, focusing heavily on the painted areas.
- Layering for Armor: Apply three light coats, allowing 15 to 20 minutes of drying time between each coat. This builds a flexible, invisible armor over your design that will repel water and prevent the paint from chipping when stepped on.
Top 5 Foolproof Design Aesthetics to Try
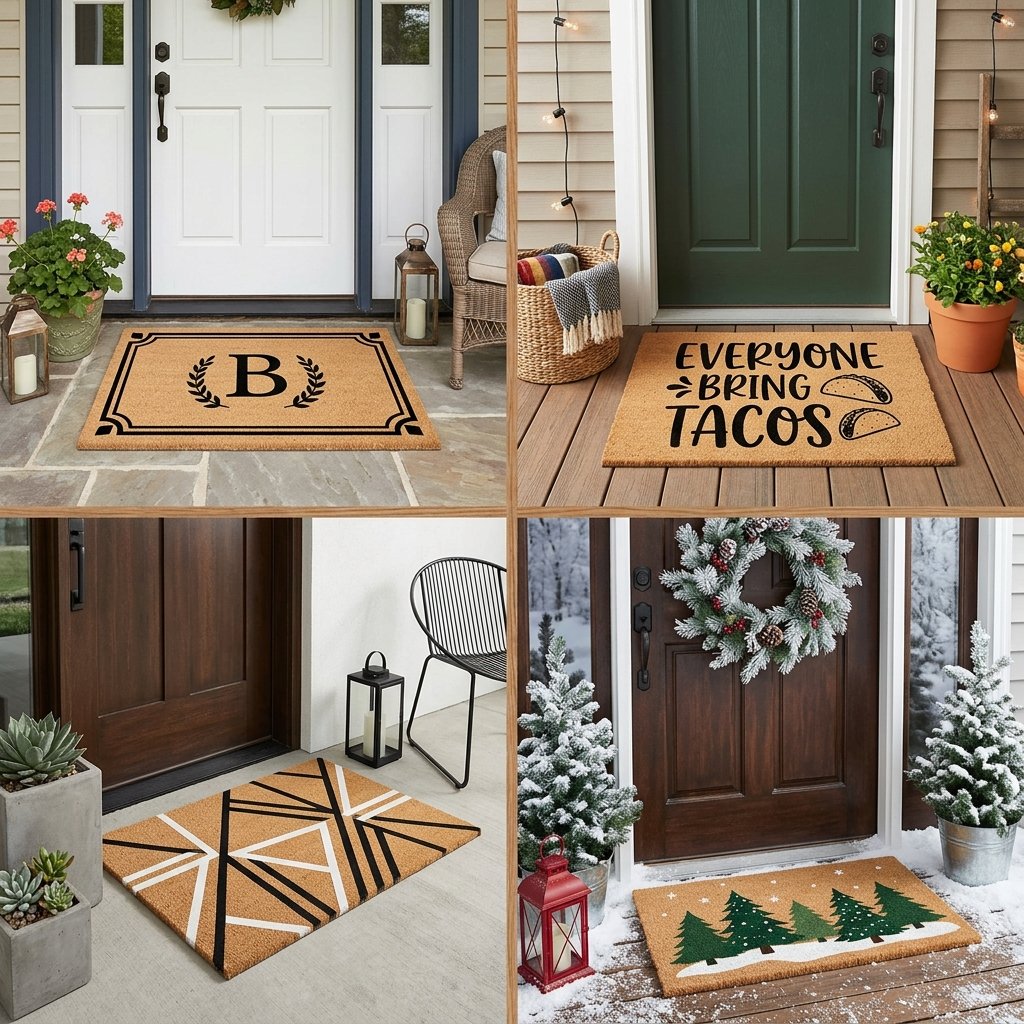
Now that you are armed with the technical knowledge of prepping, stippling, and sealing, the only limit is your creativity. If you are making these for your own home or crafting them as thoughtful, practical gifts for housewarmings, weddings, or Father’s Day, here are five highly sought-after designer aesthetics you can easily replicate on a budget:
- 1. The Classic Masculine Monogram: Perfect for a thoughtful Father’s Day gift or a wedding present. Use a bold, serif font (like Times New Roman or Georgia) to cut a large single initial, flanked by the family’s established year. Paint it in stark, flat black for a rugged, timeless look that rivals premium catalogs.
- 2. Modern Geometric Lines: Ditch the freezer paper and use painter’s tape to create overlapping triangles, thick border stripes, or a minimalist asymmetrical grid. Stick to a dual-tone palette, like crisp white and deep charcoal, for a sleek, mid-century modern vibe.
- 3. The Cheeky Greeting: Frugal doesn’t mean boring. Use fun typography to paint welcoming puns or clever phrases like “Hope You Brought Tacos,” “Definitely Not a Trap Door,” or a simple, elegant “Hello There.” These are incredibly popular in expensive boutique shops.
- 4. Faux Woven / Moroccan Tile Look: This requires a bit more patience. Create a repeating intricate tile stencil. By stippling this pattern across the entire surface of the mat, you completely disguise the plain coir, creating the illusion of an expensive, woven outdoor rug.
- 5. The Seasonal Swap-Out: Because these mats cost under $10 to make, you can afford to be festive! Create a spooky bat motif for Halloween, a minimalist pine tree forest for winter, or bright citrus slices for summer. Store them flat in your garage and rotate them out to keep your porch looking fresh year-round.
By utilizing these designs, you are not just saving money; you are creating bespoke, personalized decor that simply cannot be bought off a big-box store shelf. You are infusing your home’s entryway with character, craftsmanship, and undeniable frugal ingenuity.
Conclusion
Upcycling and budget crafting are about so much more than just pinching pennies. They are about looking at a plain, utilitarian object—like a rough, shedding $5 coir mat—and seeing the potential for high-end design. By taking the time to properly prep your surface, utilizing the brilliant freezer paper stencil hack, mastering the patient art of stippling, and sealing your work against the elements, you have completely bypassed the outrageous retail markups of the home decor industry.
“The most welcoming porches are not those furnished with the most expensive items, but those crafted with intention, creativity, and a touch of handmade pride.”
You now possess the skills to create unlimited, custom-tailored designer doormats for under $10 a piece. Whether you are outfitting your own front door, creating rugged and practical gifts for the men in your life, or adding an elegant, personalized touch to a friend’s new home, you have proven that true style isn’t bought—it is resourcefully, cleverly, and beautifully made. Now, step back, admire your handiwork, and get ready to welcome your guests in style!

Makenzie is the founder and lead writer at MoneyHackTips.com — a personal finance blog dedicated to delivering street-smart financial wisdom for real people on real budgets. With 300+ published articles covering everything from debt management to investing fundamentals, Makenzie’s mission is to make every dollar work harder. When not writing about money hacks, Makenzie is testing frugal living strategies, optimizing side hustles, and helping readers build financial freedom from scratch.