
The Brutalist Beauty of Budget-Friendly Elegance
Planning a wedding often feels like a tug-of-war between high-end dreams and a real-world budget. We see those stunning Pinterest boards filled with industrial-chic aesthetics, minimalist tablescapes, and architectural accents, only to realize that a single designer candle holder can retail for $20 to $40. When you need fifty of them for a reception, the math simply doesn’t work for the frugal, savvy couple. Enter the world of DIY concrete crafting. Concrete is the ultimate ‘trash-to-treasure’ material; it is rugged, masculine, yet incredibly elegant when paired with the soft flicker of a tealight and the delicate greenery of a wedding bouquet.
As a seasoned crafter and budget-savvy stylist, I’ve found that concrete is one of the most rewarding materials to work with. It is forgiving, incredibly cheap, and possesses a tactile weight that feels expensive to the touch. In this guide, we aren’t just ‘making crafts’—we are engineering bespoke decor. Whether you are a handy groom looking to contribute a rugged touch to the big day, or a budget-savvy bride aiming for that metropolitan gallery look, these concrete tealight holders are your ticket to a high-end atmosphere on a micro-budget. We will cover everything from sourcing the right mix to the secret ‘vibration technique’ that ensures a glass-smooth finish.
The Scavenger’s Supply List: Hardware Store Hauls and Recycled Molds
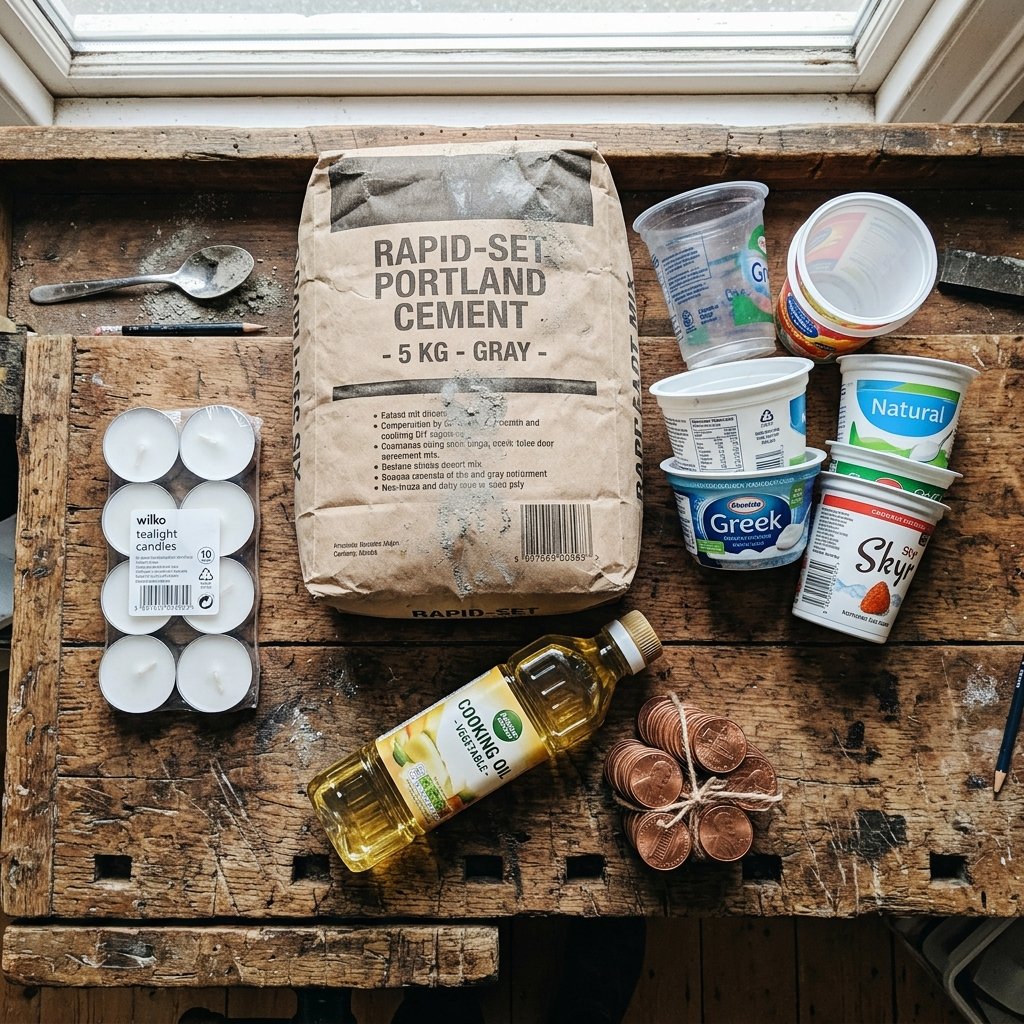
The beauty of this project lies in its accessibility. You don’t need a specialized craft store; a quick trip to the local hardware store and a look through your recycling bin will provide 90% of your materials. The goal is to keep our per-unit cost under $0.50.
Essential Materials
- Quikrete Anchor Cement or Portland Cement Mix: Anchor cement is preferred for its fine grain and fast setting time (usually 15-30 minutes).
- Recycled Molds: Look for plastic yogurt containers, juice cartons, or 2-liter soda bottle bottoms. The smoother the plastic, the smoother the concrete.
- Tealight Candles: Standard size (approx. 1.5 inches in diameter). These will serve as our ‘negative space’ makers.
- Cooking Spray or Vegetable Oil: This acts as our budget-friendly mold release agent.
- Sandpaper: A variety pack ranging from 80-grit (for heavy shaping) to 400-grit (for a buttery-smooth finish).
- Weights: Pennies, small rocks, or washers to weigh down the tealight inserts during the curing process.
| Material | Source | Estimated Cost |
|---|---|---|
| 80lb Bag of Concrete | Hardware Store | $6.00 |
| Plastic Molds | Recycling Bin | $0.00 |
| 100-Pack Tealights | Dollar Store | $5.00 |
| Sandpaper Variety Pack | Hardware Store | $4.50 |
| Total per 50 units | Resourceful Sourcing | ~$15.50 |
Budget Guru Tip: Don’t buy the ‘craft concrete’ in small tubs at the hobby store. It is the exact same material as the industrial bags but marked up by 400%. Buy the big bag at the hardware store and share the leftovers with a friend!
The Chemistry of Craft: Mastering the Perfect Pourable Slurry
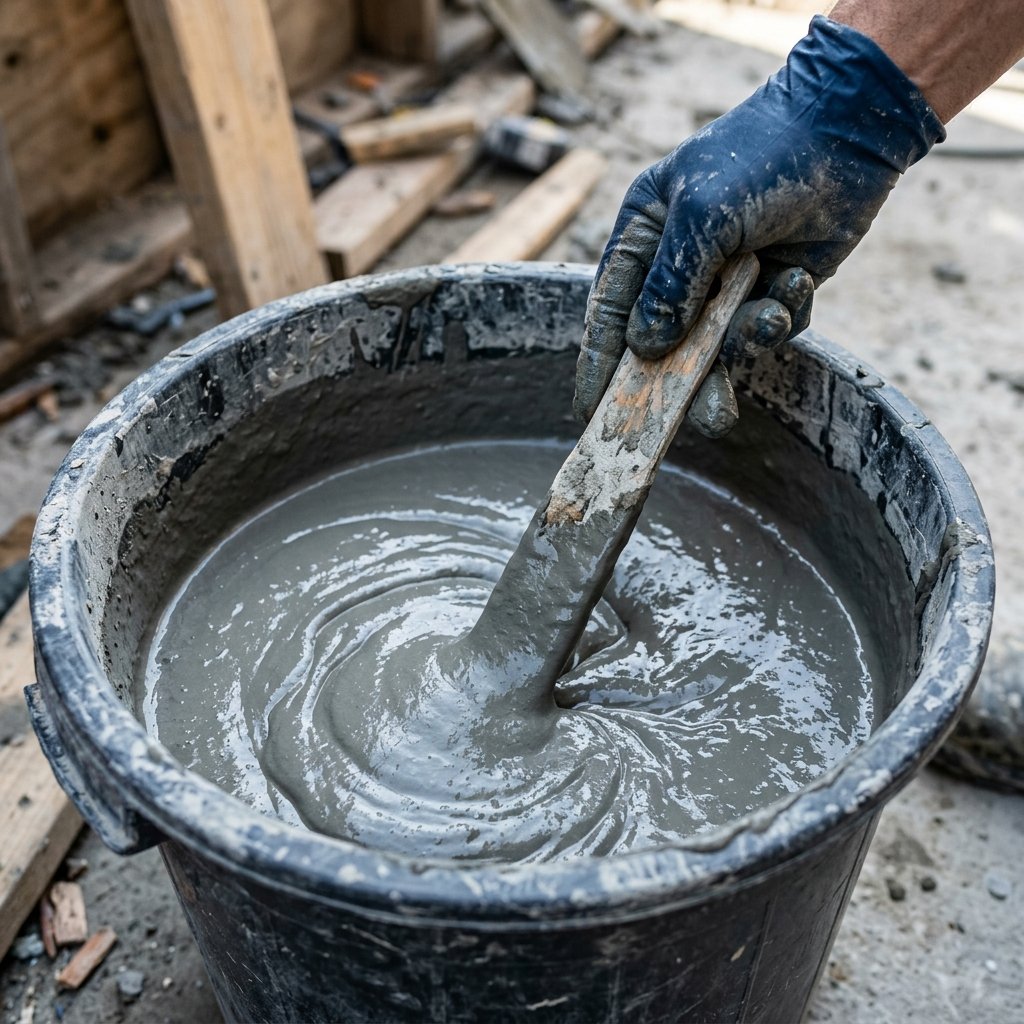
Concrete is a science, but it isn’t rocket science. The secret to a professional, bubble-free candle holder is the water-to-cement ratio. If it’s too thick, you’ll get ‘honeycombing’ (large air pockets); if it’s too thin, the concrete will be weak and prone to cracking.
The Mixing Process
- Safety First: Always wear a dust mask and gloves. Concrete is caustic and the dust is not something you want in your lungs.
- The Ratio: Aim for a consistency similar to thick pancake batter or peanut butter. Start with your dry mix in a bucket and add water one tablespoon at a time.
- The Sift: For an ultra-modern look, sift your dry concrete through a kitchen strainer first to remove large aggregate stones. This results in a ‘silk’ finish.
- The Agitation: Once mixed, let the concrete sit for 2 minutes to allow the water to fully hydrate the particles, then give it one final stir.
Safety Note: Concrete dust contains silica. Always mix outdoors or in a well-ventilated area, and use a N95 mask to protect your respiratory health. Avoid skin contact as the alkaline nature of cement can cause irritation.
From Liquid to Solid: The Art of Mold Release and Bubble Management
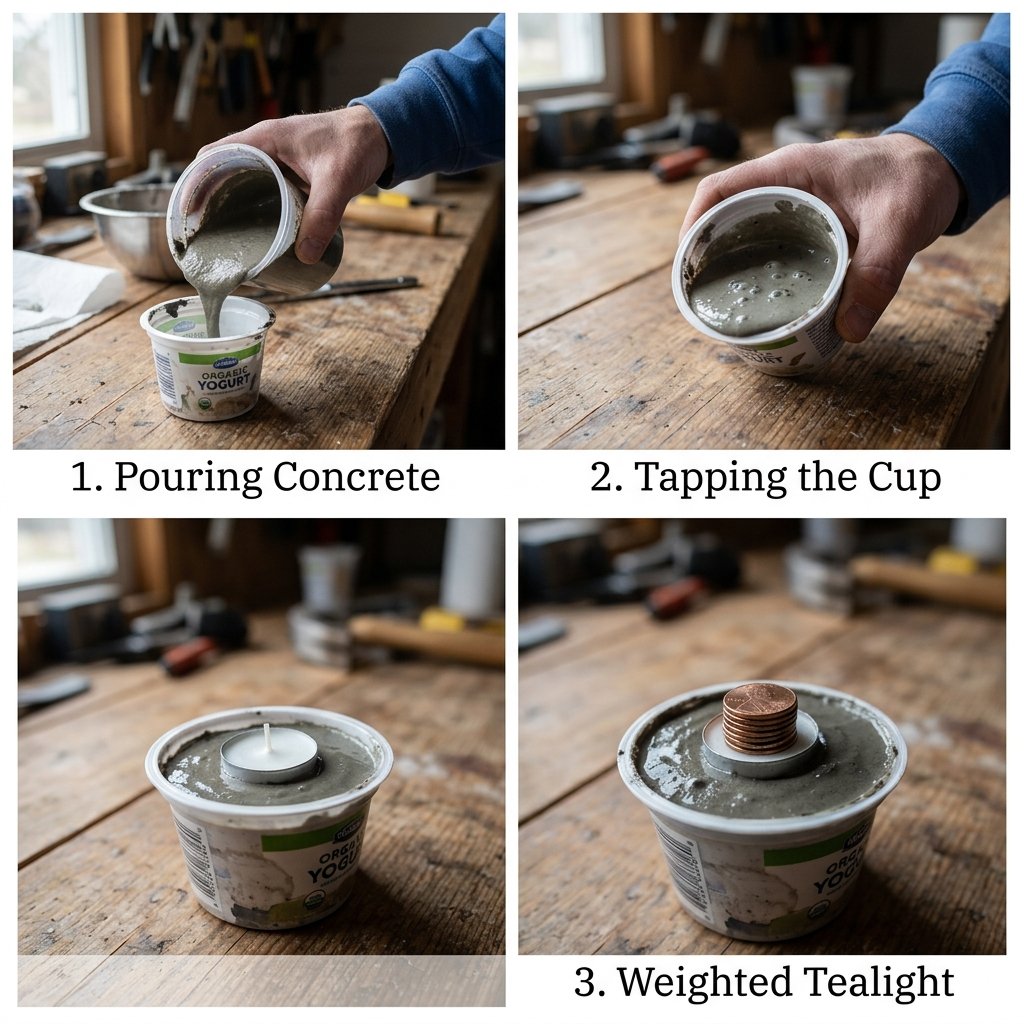
Now we move to the ‘pour.’ This is where your candle holders take shape. Success here depends on how you handle the physics of air bubbles.
Step-by-Step Pouring
- Prep the Molds: Lightly coat the inside of your plastic molds and the outside of your tealight inserts with cooking spray. Wipe away any drips—you want a micro-thin film, not a puddle.
- The Pour: Fill your mold about 3/4 full. Do not fill to the top yet, as the displacement from the tealight will raise the level.
- Vibration is Key: This is the pro-secret. Pick up the mold and tap it firmly on your workbench for 60 seconds. You will see tiny bubbles rising to the surface. This ensures the sides of your holder are flawless.
- Setting the Insert: Press an empty tealight (or a plastic cup of the same size) into the center. Place your weights (pennies or rocks) inside the tealight to keep it from floating back up.
Curing Times
| Stage | Time Duration | Action Required |
|---|---|---|
| Initial Set | 30 – 60 Minutes | Do not touch; let the chemical heat reaction occur. |
| Unmolding | 24 Hours | Carefully peel back the plastic mold. |
| Full Cure | 7 Days | Wait for the concrete to turn from dark gray to a light, chalky gray. |
The Refined Finish: Sanding, Polishing, and Metallic Accents

Once your holders are unmolded, they might look a bit ‘raw.’ This is where we apply the ‘Chic’ to our concrete. We want to transform these from construction-site leftovers into boutique-quality decor.
Sanding for Sophistication
Start with 80-grit sandpaper to level the bottom so the holder doesn’t wobble on the wedding table. Move to 200-grit for the sides, and finish with 400-grit for a surface that feels like polished stone. If you want a ‘distressed’ look, you can leave some of the small air bubble voids exposed.
Adding the Luxury Touch
- The Gold Dip: Use painter’s tape to mark off the bottom third of the holder. Spray paint it with metallic gold or copper for a high-contrast, modern look.
- The Marble Effect: While the concrete is still wet in the mixing stage, you can swirl in a bit of black acrylic paint to create a faux-marble vein.
- Sealing: To prevent the concrete from ‘dusting’ onto your white wedding linens, apply a quick coat of clear matte sealant or even a simple rub of beeswax.
Mantra for the Maker: ‘Imperfection is the soul of the handmade.’ Don’t stress over a tiny chip or a slight color variation; it adds to the rugged, authentic charm of your wedding theme.
The Grand Display: Styling Your Concrete Masterpieces for Maximum Impact
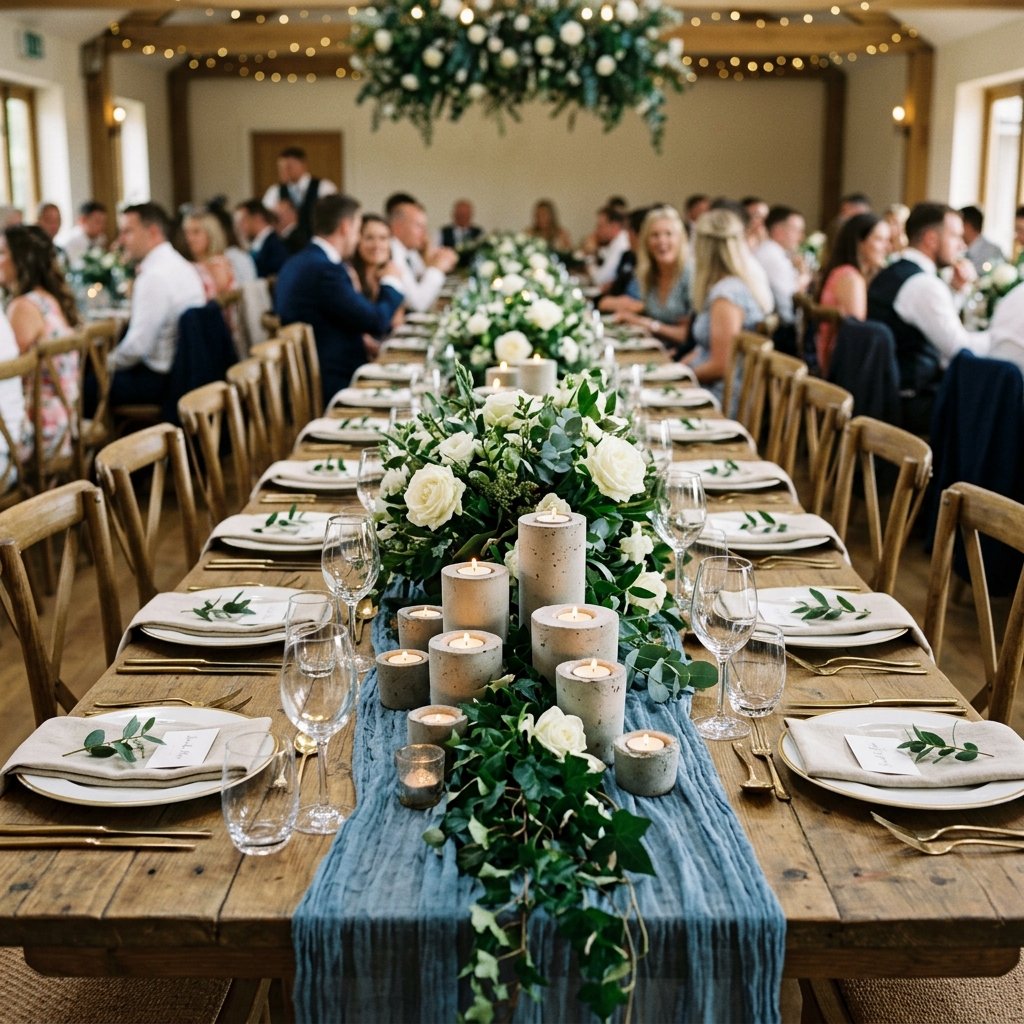
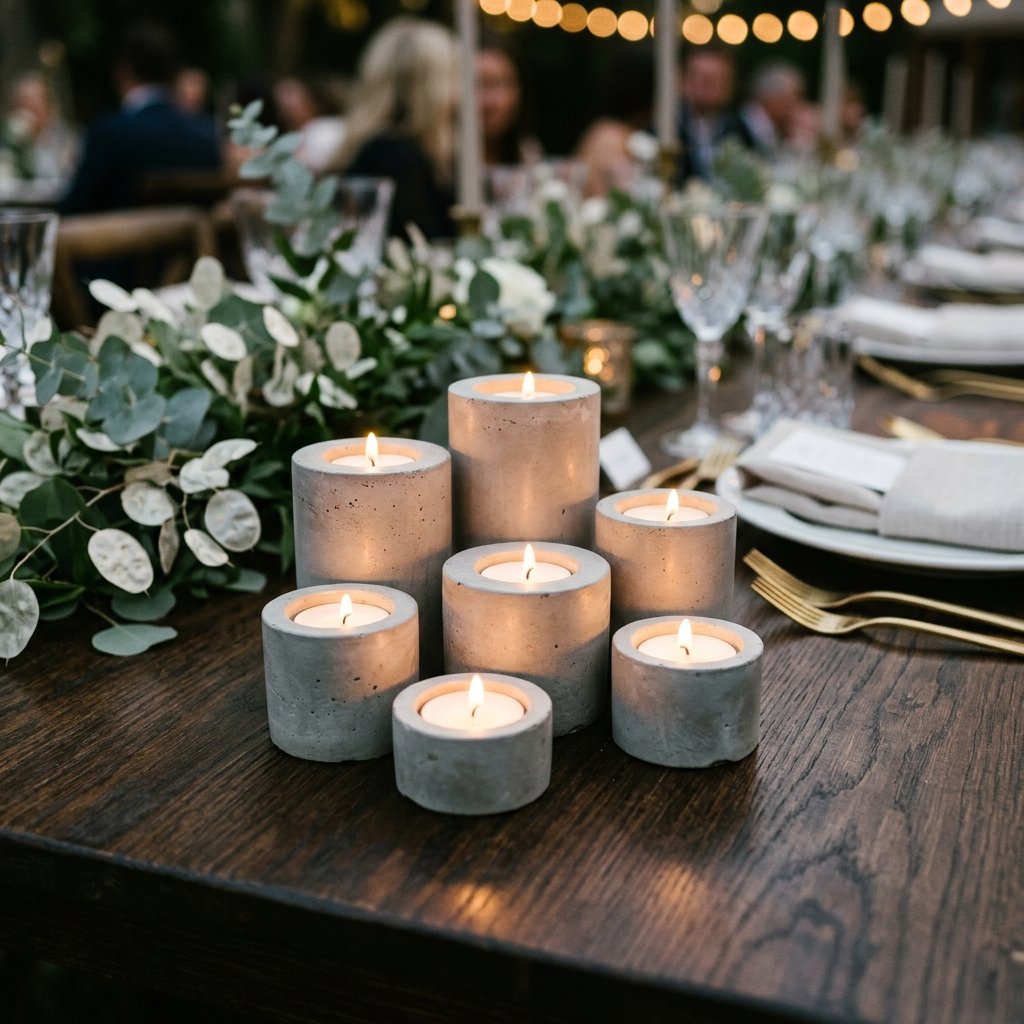
Your holders are finished, cured, and polished. Now, how do we make them look like $1,000 centerpieces? The secret is in the grouping and the contrast of textures.
Professional Styling Tips
- Vary the Heights: Use different sized molds (e.g., a tall juice carton vs. a short tuna can) to create visual interest. Group them in clusters of three.
- Organic Contrast: Place the cold, hard concrete next to soft, organic elements. A sprig of seeded eucalyptus or a delicate white ranunculus creates a stunning juxtaposition.
- The Runner: Set your concrete holders on a cheesecloth or linen runner. The soft folds of the fabric will emphasize the sharp, clean lines of the concrete.
| Look | Pairing Material | Vibe |
|---|---|---|
| Industrial | Copper Pipe Scraps | Rugged & Urban |
| Minimalist | Single Green Leaf | Clean & Modern |
| Romantic | Blush Silk Ribbon | Soft & Sophisticated |
Conclusion
A Wedding Look That Lasts
By choosing to DIY your concrete tealight holders, you haven’t just saved hundreds of dollars—you’ve infused your wedding with a sense of bespoke craftsmanship. These aren’t just decorations; they are heavy, tactile reminders of the effort and creativity you poured into your special day. Best of all, these holders are incredibly durable. Long after the cake has been eaten and the flowers have faded, these concrete pieces can live on in your home as a rugged-elegant memento of your union. You’ve proven that with a little hardware store ingenuity and a savvy eye for design, ‘budget’ doesn’t mean ‘basic.’ It means brilliant.

Makenzie is the founder and lead writer at MoneyHackTips.com — a personal finance blog dedicated to delivering street-smart financial wisdom for real people on real budgets. With 300+ published articles covering everything from debt management to investing fundamentals, Makenzie’s mission is to make every dollar work harder. When not writing about money hacks, Makenzie is testing frugal living strategies, optimizing side hustles, and helping readers build financial freedom from scratch.