The Art of the Architectural Upcycle
In a world of mass-produced plastic, there is something profoundly satisfying about taking a discarded shipping box and transforming it into a piece of functional art. We aren’t just talking about a ‘craft project’—we are talking about resourceful engineering. These DIY cardboard nesting cups are the ultimate ‘trash to treasure’ hack, combining the rugged aesthetic of raw corrugated fiberboard with the precision of a bespoke design. Whether you are a frugal parent looking for a Montessori-inspired toy that doesn’t cost $40, or a savvy organizer needing custom drawer dividers, this project is your 15-minute ticket to success.
Why cardboard? It is the most accessible material on the planet. It’s durable, lightweight, and surprisingly elegant when handled with a bit of craft-expert finesse. By the end of this guide, you will have mastered the art of the ‘clean cut’ and the ‘structural fold,’ turning what was destined for the recycling bin into a set of nesting vessels that look like they belong in a high-end boutique. Let’s get our hands dirty—metaphorically speaking—and build something remarkable for zero dollars.
The Blueprint: Materials and Cost Breakdown

Success in any DIY endeavor begins with the right kit. For this project, we are sticking to the ‘rugged minimalist’ philosophy. You don’t need a workshop full of power tools; you need a sharp blade and a keen eye. Below is the breakdown of what you’ll need. Notice the cost: if you’re doing this right, your total investment should be $0.00 because you likely already own these essentials.
| Material/Tool | The ‘Frugal Guru’ Source | Estimated Cost |
|---|---|---|
| Double-Wall Cardboard | Amazon/Shipping Boxes | $0.00 |
| Utility Knife/Box Cutter | Existing Tool Kit | $0.00 |
| Metal Ruler/Straight Edge | Home Office/Toolbox | $0.00 |
| Hot Glue or Wood Glue | Craft Drawer | $0.00 |
| Sandpaper (Optional) | Scrap Pile | $0.00 |
| TOTAL | Your Recycling Bin | $0.00 |
The Budget Savvy Mantra: ‘The best material is the one you already have. The best tool is the one you know how to use.’
When selecting your cardboard, look for pieces that are clean and free of heavy creases. Double-wall corrugated cardboard provides a more ‘masculine-elegant’ feel and superior durability, making the cups feel substantial in the hand rather than flimsy.
The Geometry of Nesting: Precision Sizing
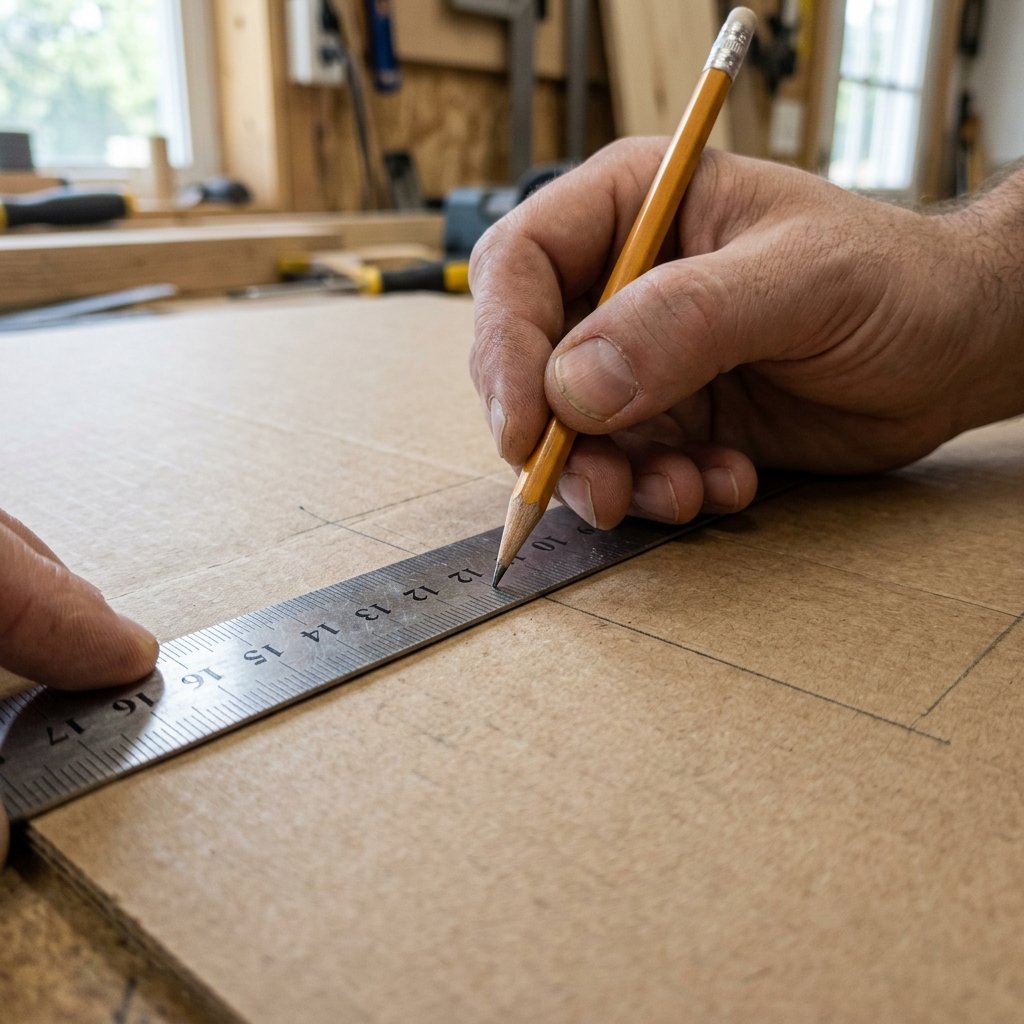
Calculating the Increments
To ensure your cups nest perfectly, we must account for the thickness of the cardboard. This is where most beginners fail. If your cardboard is 1/8 inch thick, each subsequent cup must be at least 1/4 inch smaller in both width and depth to slide in effortlessly. For a classic 5-cup set, follow this sizing matrix for the base squares:
| Cup Level | Base Dimensions | Wall Height |
|---|---|---|
| Cup 1 (Largest) | 5″ x 5″ | 5″ |
| Cup 2 | 4.5″ x 4.5″ | 4.5″ |
| Cup 3 | 4″ x 4″ | 4″ |
| Cup 4 | 3.5″ x 3.5″ | 3.5″ |
| Cup 5 (Smallest) | 3″ x 3″ | 3″ |
Using your metal ruler, mark your lines with a pencil. Pro Tip: Always cut on the outside of your line to allow for that extra hair of space that makes nesting smooth. A tight fit is the enemy of a 15-minute project; aim for a ‘gliding fit’.
The Master’s Cut: Executing the 15-Minute Build
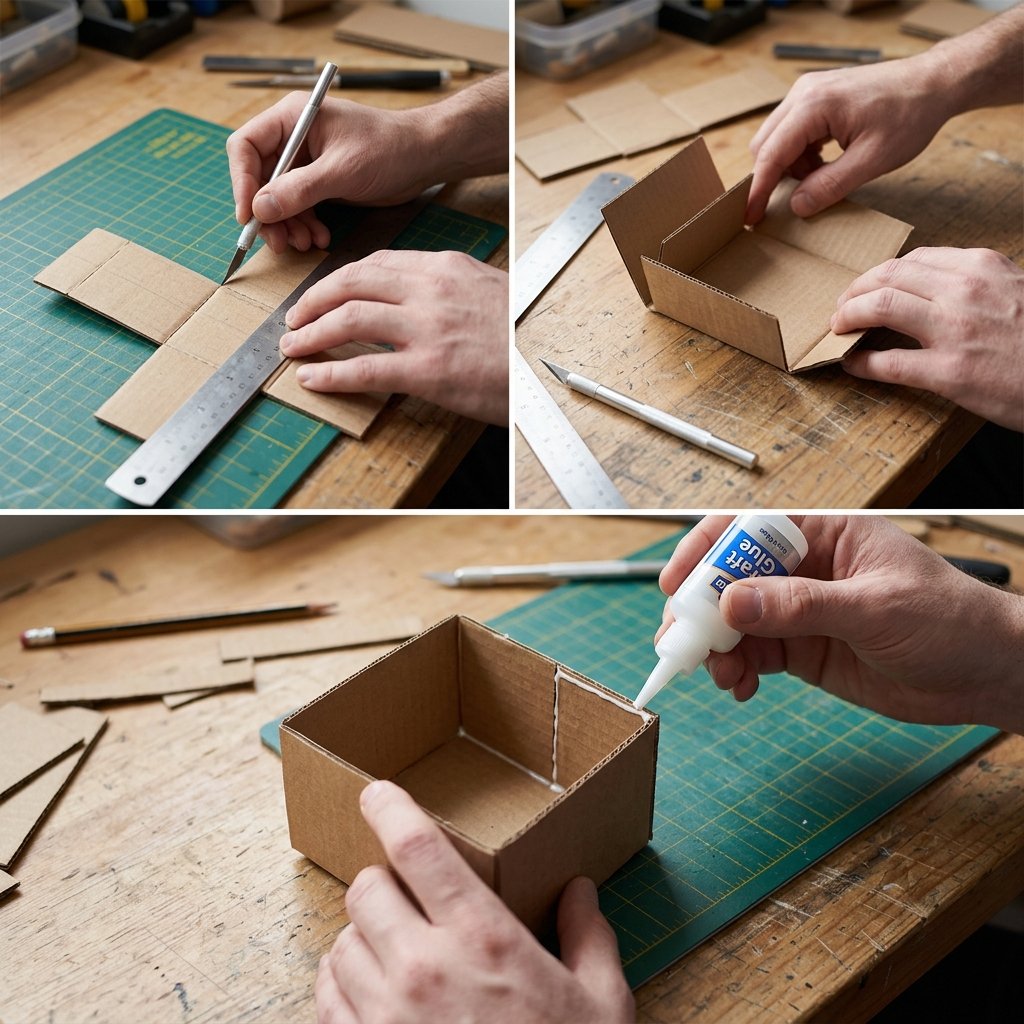
Step-by-Step Construction
Efficiency is key when you’re on a 15-minute clock. Follow these steps with precision and confidence:
- The Cross Layout: Instead of cutting five separate pieces for each cup, cut one large ‘cross’ shape. The center square is your base, and the four surrounding squares are your walls. This reduces the number of glued seams from four to four, but ensures the bottom is structurally sound.
- The Score: Do not cut all the way through the ‘hinge’ lines where the walls meet the base. Use your knife to lightly score the top layer of the cardboard. This allows for a crisp, professional 90-degree bend.
- The Folding: Fold the walls upward. If you scored correctly, they will snap into place with satisfying resistance.
- The Bond: Apply a thin bead of hot glue to the vertical edges. Hold for 10 seconds. For a more ‘high-end’ look, use wood glue and painter’s tape to hold the seams while they dry, though this will extend your project time beyond the 15-minute mark.
- Edge Refinement: Take a small piece of sandpaper and lightly buff the top edges. This removes any ‘burrs’ from the cardboard and gives it a soft, premium feel.
Safety First: Always cut away from your body. Cardboard requires more force to cut than paper, and a slipping blade is a ‘DIY disaster’ waiting to happen. Keep your guiding hand well behind the path of the knife.
The Designer’s Touch: Finishing for a High-End Look
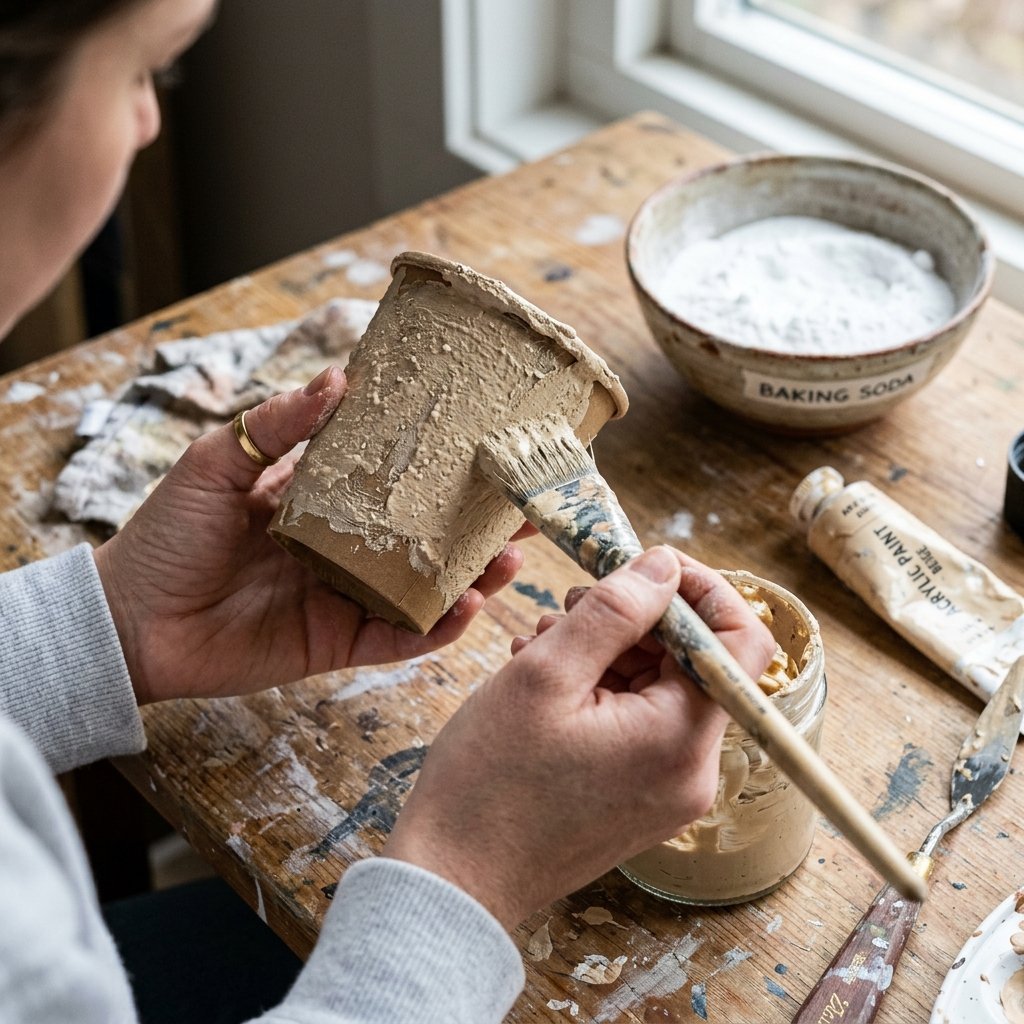
Elevating the Aesthetic
Raw cardboard has a rugged, industrial charm, but if you want these to look like a $50 set from a Scandinavian design house, you need a finish. Here are three budget-savvy ways to ‘level up’ your treasure:
- The Baking Soda Paint Trick: Mix 1 part acrylic paint (any color) with 1 part baking soda. Apply with a brush. The result is a thick, matte, stone-like texture that completely hides the fact that the material is cardboard.
- The Minimalist Twine Wrap: Wrap the top 1 inch of each cup in jute twine, securing it with hot glue. This adds a tactile, ‘masculine-elegant’ contrast to the smooth cardboard walls.
- The Interior Pop: Paint only the inside of the cups a vibrant color (like deep forest green or burnt orange) while leaving the outside raw. This creates a sophisticated ‘designer’ surprise when they are unstacked.
| Finish Style | Materials Needed | Vibe |
|---|---|---|
| Faux Stone | Paint + Baking Soda | Modern/Architectural |
| Rustic Explorer | Jute Twine | Rugged/Handcrafted |
| Industrial Chic | Clear Matte Varnish | Raw/Minimalist |
Practical Applications: From Playroom to Office
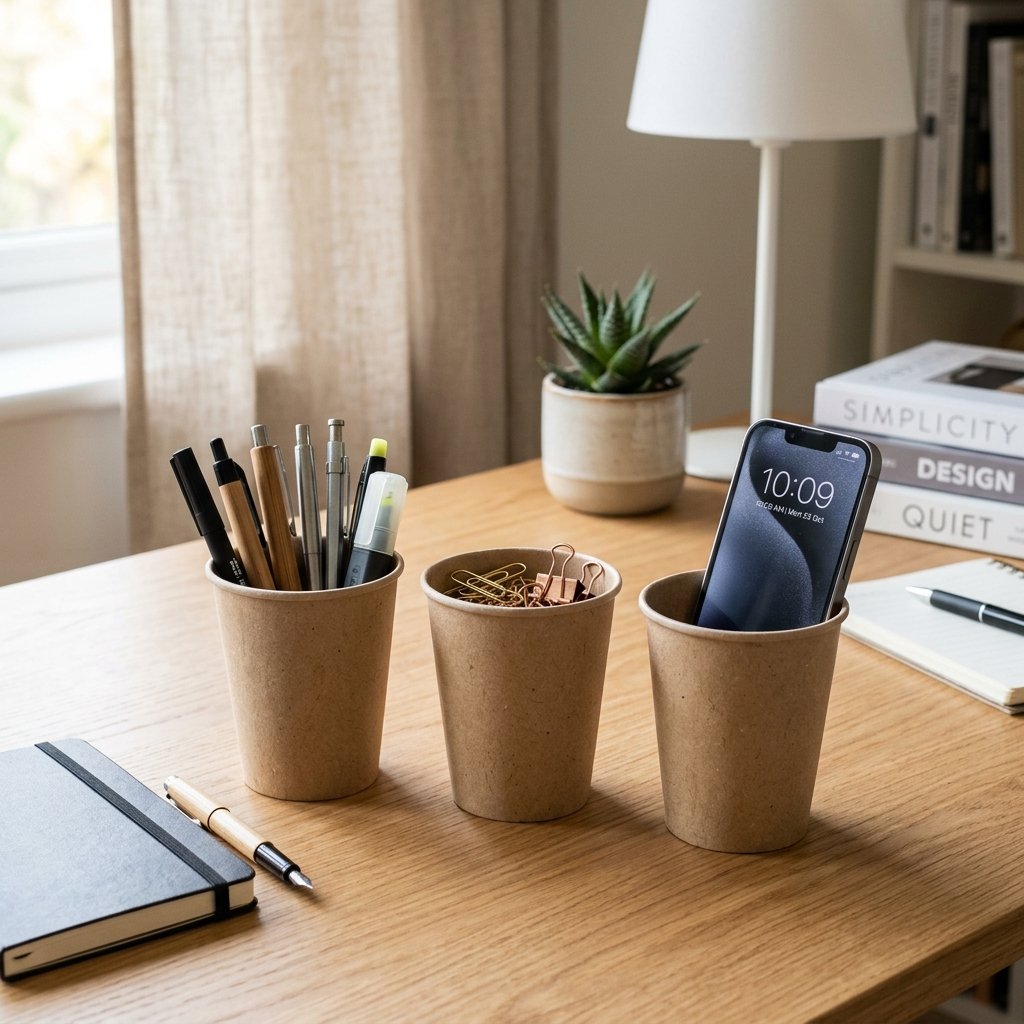
Versatility in Design
These nesting cups aren’t just for show. Their structural integrity makes them incredibly useful across the home. Because you made them for free, you can customize the sizes for specific needs.
- For the Handy Parent: These are excellent for teaching toddlers about size graduation and spatial awareness. Unlike plastic toys, the texture of cardboard provides better sensory feedback.
- For the Crafty Organizer: Use them as ‘modular’ dividers in your junk drawer. The nesting capability means you can expand or contract your storage as needed.
- For the Creative Gift-Giver: Use the largest cup as a unique, eco-friendly gift box. The recipient gets a gift inside a gift that they can actually use.
By mastering this 15-minute build, you’ve effectively gained a lifetime skill in ‘on-demand’ organization. No more trips to the store for plastic bins that don’t quite fit; you are now the master of your own dimensions.
Conclusion
The Power of Resourceful Creativity
You’ve done it. You’ve taken a piece of waste and engineered it into a set of beautiful DIY nesting cups. In less time than it takes to drive to the store, you’ve saved money, reduced waste, and exercised your creative muscles. This project proves that ‘luxury’ isn’t about the price tag—it’s about the intentionality of the maker. Whether these cups end up on your child’s playroom floor or your executive desk, they carry the story of a budget-savvy creator who knows how to spot treasure in the trash. Keep those blades sharp and your eyes open; your next masterpiece is likely sitting in your recycling bin right now.

Makenzie is the founder and lead writer at MoneyHackTips.com — a personal finance blog dedicated to delivering street-smart financial wisdom for real people on real budgets. With 300+ published articles covering everything from debt management to investing fundamentals, Makenzie’s mission is to make every dollar work harder. When not writing about money hacks, Makenzie is testing frugal living strategies, optimizing side hustles, and helping readers build financial freedom from scratch.