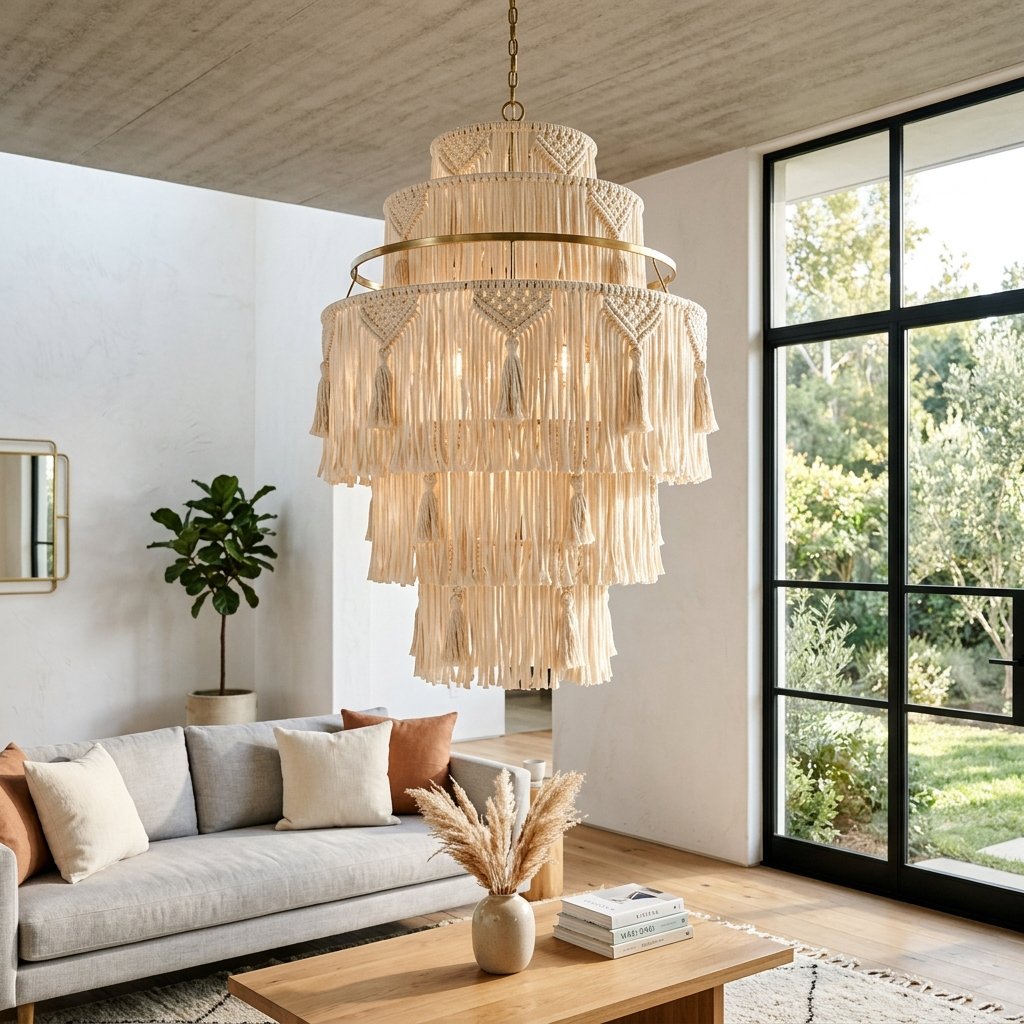

Let’s be honest: walking through a high-end home decor boutique can be a humbling experience for the wallet. You spot a $350 woven boho chandelier and think, “I could make that,” but then life happens. Well, today is the day we stop thinking and start creating. If you have a stack of old, worn-out cotton T-shirts and a couple of wire baskets from the dollar store, you are already halfway to owning a lighting fixture that looks like it was plucked straight from a luxury catalog. This isn’t just about saving money; it’s about the resourceful satisfaction of turning literal rags into a sophisticated center-piece. We are going to dive deep into the art of the ‘T-shirt yarn’—a medium that is as forgiving as it is beautiful—to craft a ruggedly elegant lantern that brings texture, warmth, and a bespoke touch to any room. Whether you are a seasoned crafter or a handy parent looking for a weekend project that doesn’t require a workshop full of power tools, this guide will walk you through the clever, budget-savvy steps to achieve an ultra-luxe result for less than the cost of a fancy latte.
The Strategic Scout: Materials and Cost Breakdown

Before we start knotting, we need to gather our supplies. The beauty of this project lies in its low-barrier to entry. Most of these items are likely gathering dust in your closet or can be found at a local thrift shop for pennies. We are aiming for a ‘High-End Dupe’ aesthetic, which means we need to be selective about our colors. Stick to neutrals like cream, charcoal, or olive for that masculine-elegant vibe. Below is a comparison of what you’d pay at a retail store versus our scrappy, DIY approach.
| Material Item | Retail Store Price | DIY/Upcycled Cost |
|---|---|---|
| Tiered Wire Frame | $45.00 | $2.50 (2 Wire Baskets) |
| 100 Yards of Cotton Cord | $35.00 | $0.00 (4 Old T-Shirts) |
| Light Fixture/Puck Light | $120.00 | $5.00 (Remote LED) |
| Total Investment | $200.00+ | $7.50 |
As you can see, the savings are massive. You will need: 3-5 large 100% cotton T-shirts (avoid side seams if possible), two wire hanging plant baskets (one slightly smaller than the other), sharp fabric shears, and a roll of masking tape to keep your ends from fraying while you work.
Fabric Engineering: Creating Continuous T-Shirt Yarn
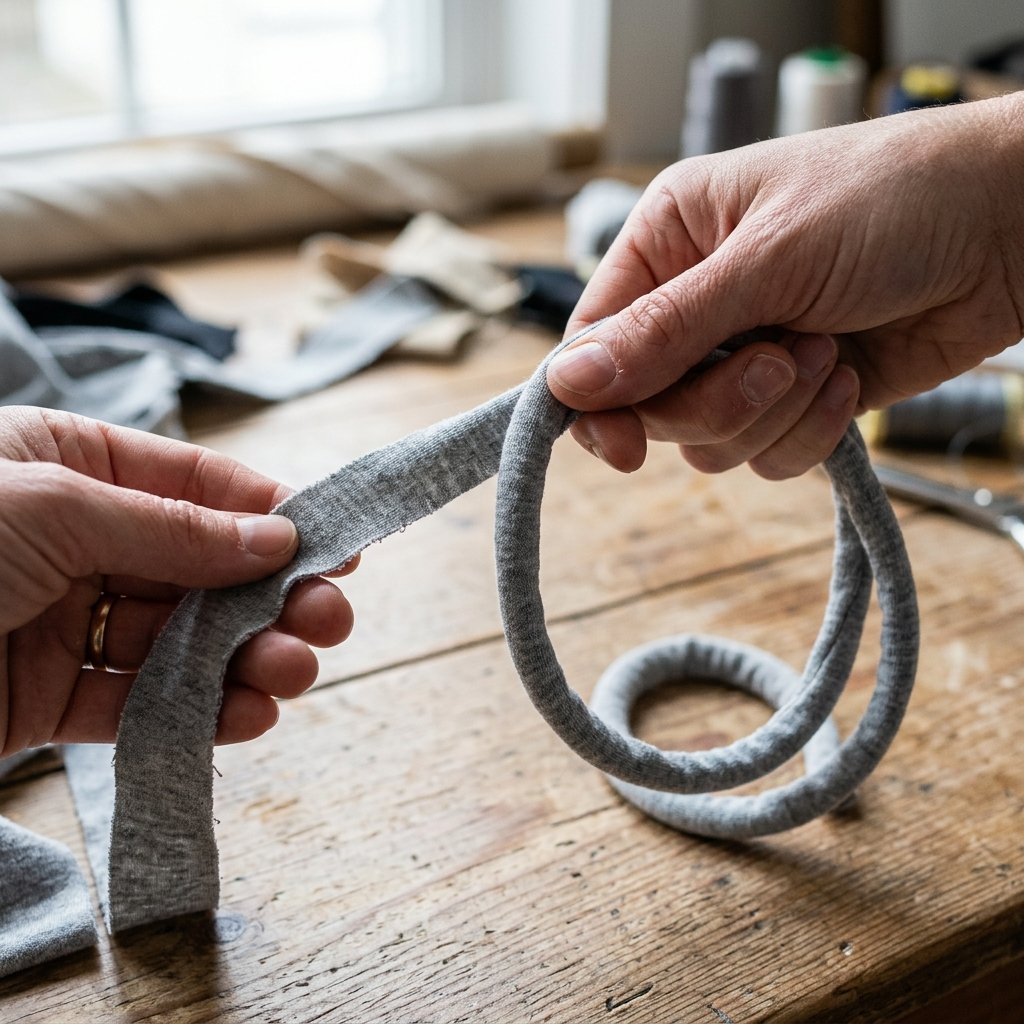
The secret to a professional-looking chandelier is the quality of your yarn. We aren’t just cutting strips; we are engineering continuous cordage. This method ensures you have long, unbroken lengths of material, which minimizes the need for unsightly knots in your final piece. To start, lay your T-shirt flat and cut off the bottom hem and the top section (from the armpits up). You should be left with a rectangular tube of fabric.
Pro-Tip: Use 100% cotton jersey. The way the edges curl inward when stretched is what gives the yarn its ‘cord’ appearance rather than just looking like cut fabric.
Follow these steps to create your yarn:
- Fold the tube in half, but leave about 1 inch of the bottom layer sticking out past the top layer.
- Cut slits into the folded fabric about 1 inch apart, stopping at the 1-inch overlap.
- Open the fabric so the uncut center strip is visible.
- Cut diagonally from the first slit to the second, the second to the third, and so on. This creates one long, continuous strand.
- The Magic Step: Grab the strand and pull it taut. Watch as the edges curl in, transforming the flat fabric into a rounded, professional-grade yarn.
The Framework: Assembling the Chandelier Skeleton
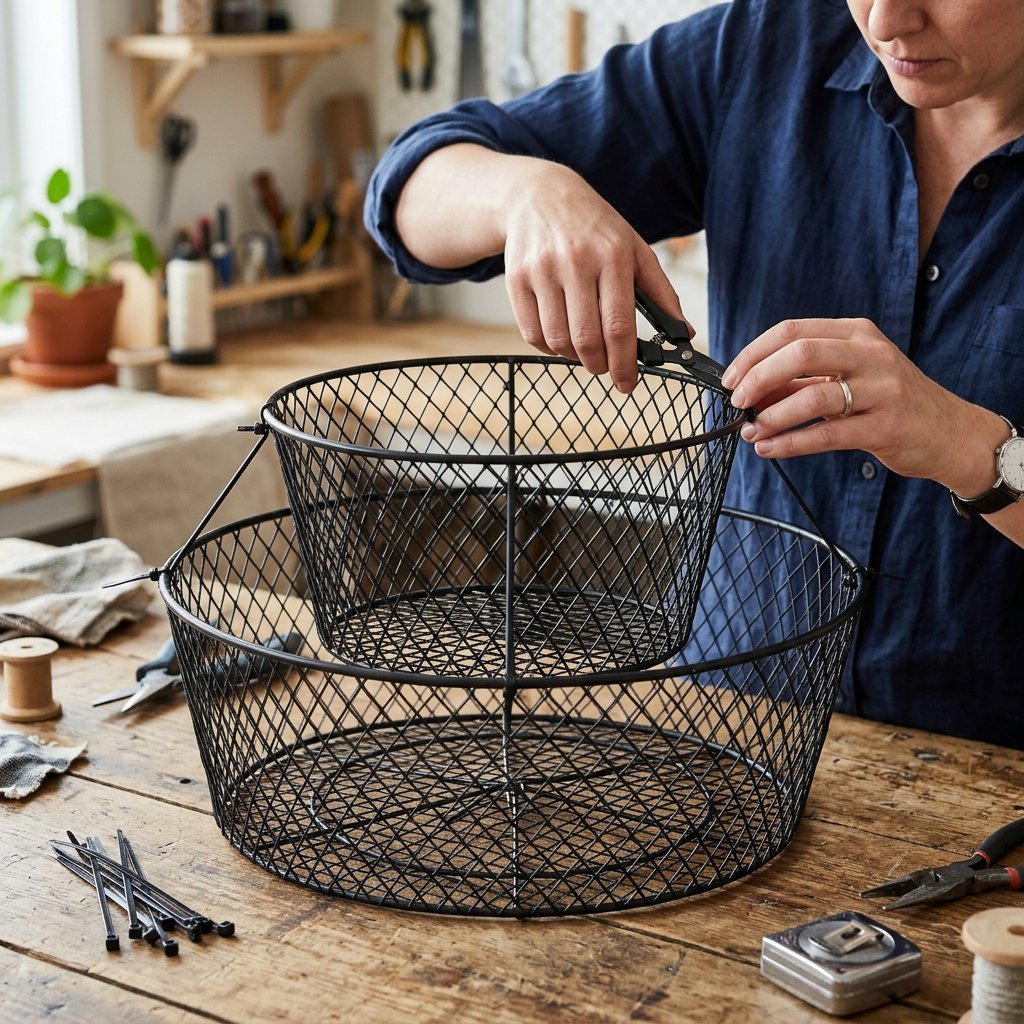
To get that tiered, ‘ultra-luxe’ look, we need a solid foundation. We are using two wire hanging baskets to create a nested frame. This gives the chandelier volume and depth. Remove the chains from your baskets—keep them for future projects!—and flip them upside down. We want the wider opening to face the ceiling for a modern lantern silhouette. Connect the smaller basket to the center of the larger basket using heavy-duty zip ties or leftover scraps of your T-shirt yarn. Ensure they are perfectly centered to prevent the chandelier from hanging lopsided.
Safety Note: If you plan on using a corded light bulb rather than a battery-operated puck light, ensure the top basket has a wide enough opening in the wire grid to accommodate a standard E26 socket.
Once your frames are secured, it’s time to prep the ‘fringe.’ Measure the height of your baskets and double it, then add 6 inches. This will be the length of each yarn strip. You will need approximately 80 to 120 strips depending on the density of your wire frame. This part is meditative—put on a podcast and get to cutting. Consistency is key here for a rugged yet polished finish.
The Master Knot: Executing the Lark’s Head Technique
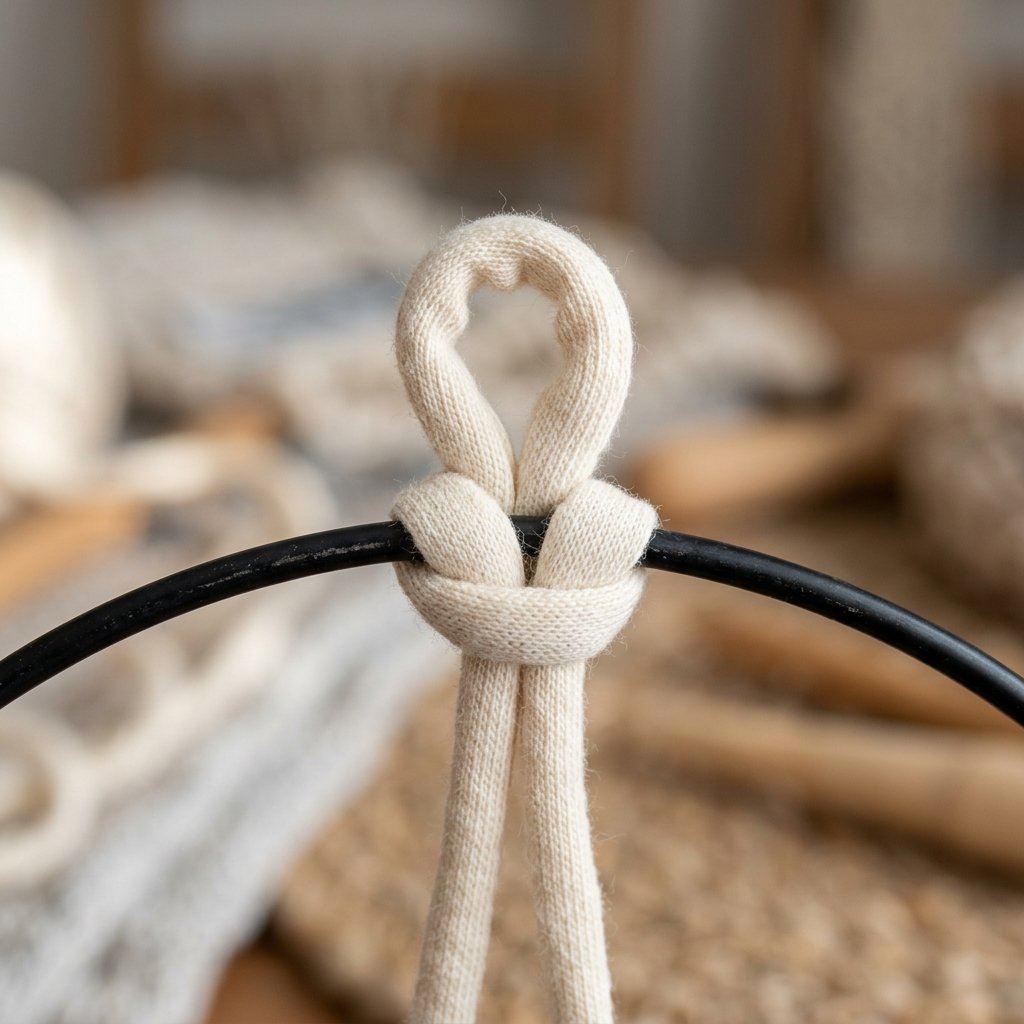
Now we move into the assembly phase. We will use the Lark’s Head Knot, a staple in macramé that provides a clean, symmetrical attachment. It is incredibly simple but looks sophisticated when repeated around the entire circumference of the frame. Follow these steps for a flawless finish:
- Take a strip of yarn and fold it exactly in half to create a loop.
- Place the loop over the top wire of your basket frame.
- Pull the two loose ends of the yarn through the loop and pull tight.
- Slide the knot so it sits snugly against the previous one.
Repeat this process around the entire outer ring of the large basket first, then move to the inner/lower basket. To add that ‘designer’ flair, try vary the lengths of the yarn on the inner tier to create a tapered, waterfall effect. This adds movement and a sense of ‘expensive’ craftsmanship that flat-cut fringe lacks. Aim for 100% coverage of the wire; you shouldn’t see any of the metal frame once you are finished.
Electrifying the Vision: Safe and Savvy Lighting
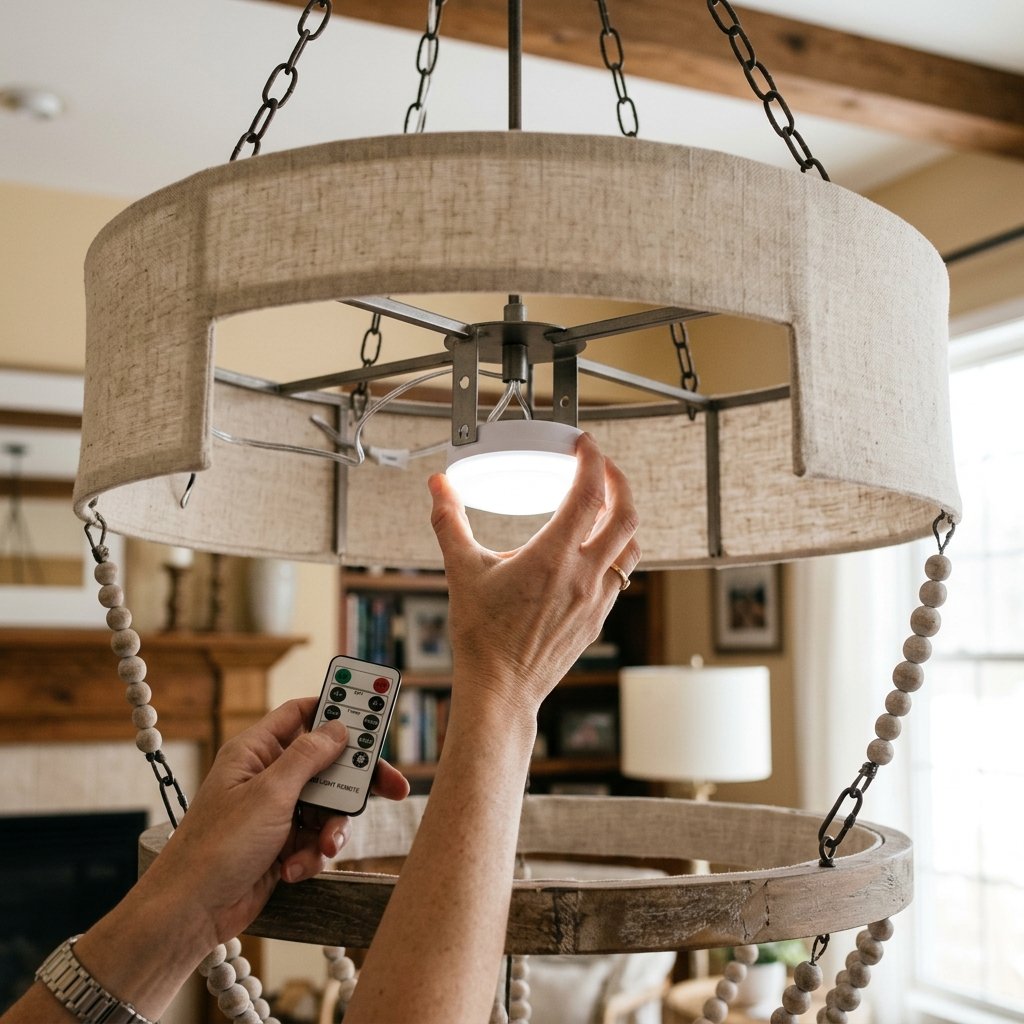
A chandelier is only as good as the light it casts. Because we are using cotton fabric, we must be highly conscious of heat. The most budget-friendly and safest option for this DIY is a battery-operated LED puck light with a remote control. These are widely available for around $5.00 and eliminate the need for complicated wiring or an electrician.
Heat Disclaimer: Never use traditional incandescent bulbs with fabric-based lanterns. Only use LEDs, which remain cool to the touch even after hours of use.
To install, simply glue or zip-tie the mounting bracket of the puck light to the center-top of your wire frame. This allows you to twist the light off to change batteries without dismantling your masterpiece. If you prefer a hard-wired look, you can purchase a simple ‘plug-in pendant cord’ for about $10.00, but ensure the bulb is a low-wattage LED to keep the fabric safe.
The Final Polish: Grooming and Styling
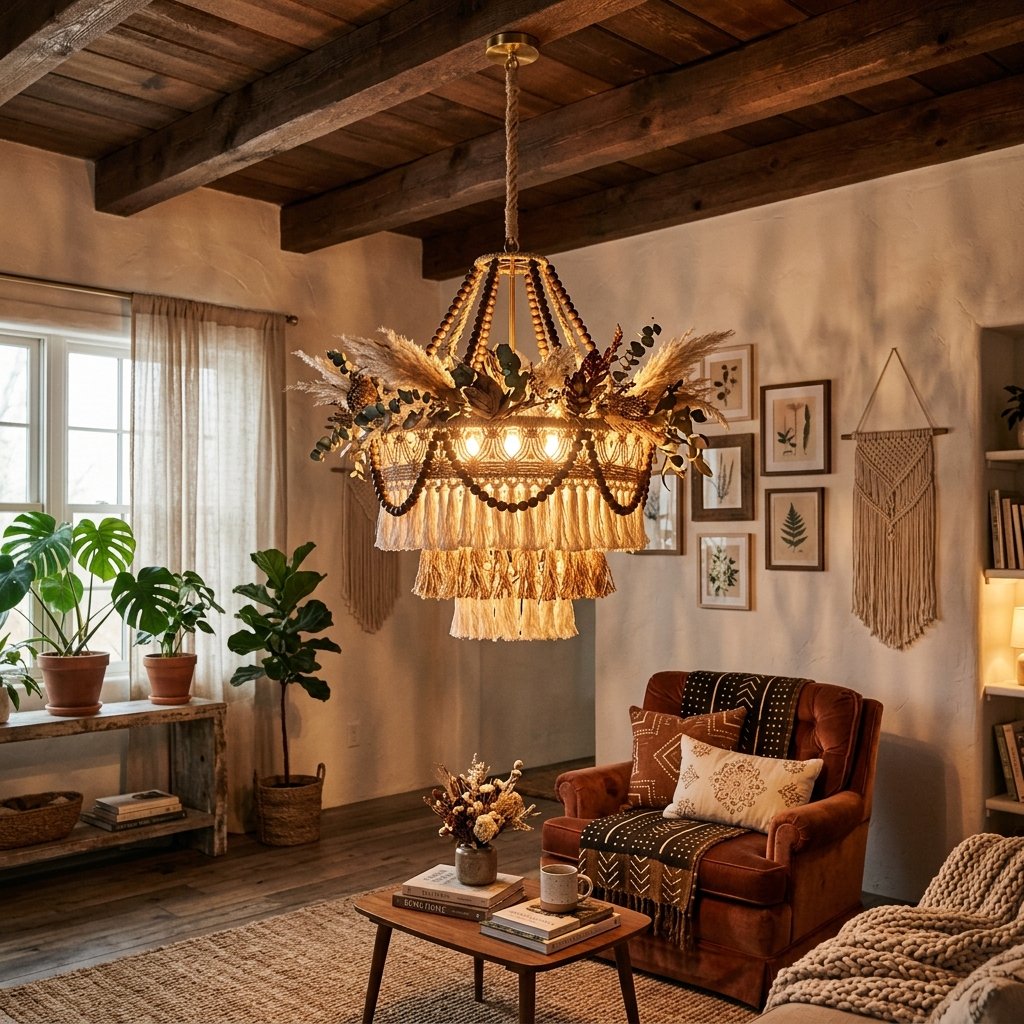
Once all your knots are tied and your light is installed, your chandelier might look a bit ‘shaggy.’ This is where we apply some ‘masculine-elegant’ grooming. Hang the chandelier at eye level. Use a wide-tooth comb or just your fingers to straighten every strand of yarn. If you want a clean, modern look, use your fabric shears to trim the bottom of the fringe into a perfectly level circle or a sharp ‘V’ shape. For a more organic, boho vibe, leave the lengths slightly irregular. Hang your new treasure in a corner over a leather armchair, or as a focal point in a nursery. The soft texture of the T-shirt yarn dampens sound and emits a warm, diffused glow that makes any room feel like a high-end retreat. You’ve just turned $8.00 of materials into a piece that would retail for twenty times that amount. That’s not just crafting; that’s strategic living.
Conclusion
Creating this ultra-luxe boho chandelier is a testament to the power of resourceful creativity. By looking at a pile of old T-shirts and seeing a high-end lighting fixture, you’ve embraced the heart of the frugal DIYer spirit. This project proves that you don’t need a massive budget to have a home that feels curated and sophisticated; you just need a bit of patience, a few clever knots, and the willingness to upcycle the ordinary into the extraordinary. Your new chandelier isn’t just a light source—it’s a conversation starter and a trophy of your handiwork. So, go ahead, hang it up, dim the lights, and enjoy the high-end glow of a job well done on a dime. Happy crafting!

Makenzie is the founder and lead writer at MoneyHackTips.com — a personal finance blog dedicated to delivering street-smart financial wisdom for real people on real budgets. With 300+ published articles covering everything from debt management to investing fundamentals, Makenzie’s mission is to make every dollar work harder. When not writing about money hacks, Makenzie is testing frugal living strategies, optimizing side hustles, and helping readers build financial freedom from scratch.