
The Magic of the Humble Box
Why spend $60 to $100 on a plastic, mass-produced playset when the ultimate prehistoric world is currently sitting in your recycling bin? As a resourceful crafter, you know that a double-walled shipping box isn’t just trash—it is the skeletal structure of an epic adventure. Today, we are going to channel our inner engineers and artists to build a rugged, masculine-elegant dinosaur sensory playset that rivals any boutique toy store find. This project is about more than just glue and paper; it is about teaching our kids the value of resourcefulness and the power of imagination. By the time we are done, you will have a durable, multi-sensory environment that provides hours of engagement for the cost of $0.
The Blueprint: Engineering a Prehistoric World from Scrap

Before we make the first cut, we need to gather our ‘raw materials.’ The goal here is a zero-waste build. We aren’t just looking for any box; we want structural integrity. Look for double-walled corrugated cardboard for the base to ensure it can handle the weight of sensory fillers like sand or rice.
| Material | Upcycled Source | Estimated Cost |
|---|---|---|
| Base Structure | Large Shipping Box (Amazon/Home Depot) | $0.00 |
| Mountain Peaks | Egg Cartons / Toilet Paper Rolls | $0.00 |
| Texture Layers | Torn Brown Paper Bags / Cereal Boxes | $0.00 |
| Adhesive | Hot Glue Gun / Flour Paste | $1.25 (DT) |
| Total Project Cost | Scavenged Items | ~$1.25 |
Pro-Tip: Always check the ‘flute’ of your cardboard. For vertical supports like trees or cliffs, run the fluting vertically to maximize the weight-bearing capacity of your playset.
Structural Integrity: From Flat Box to 3D Terrain
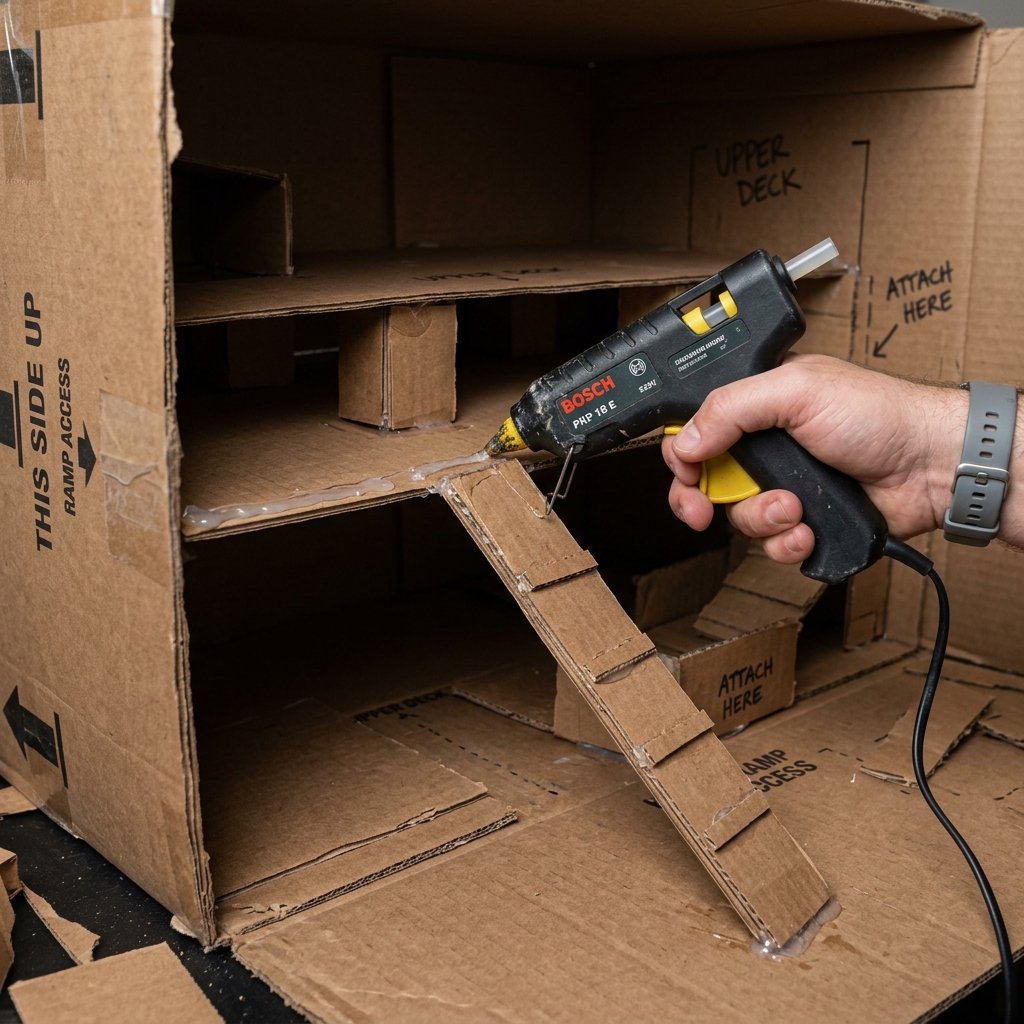
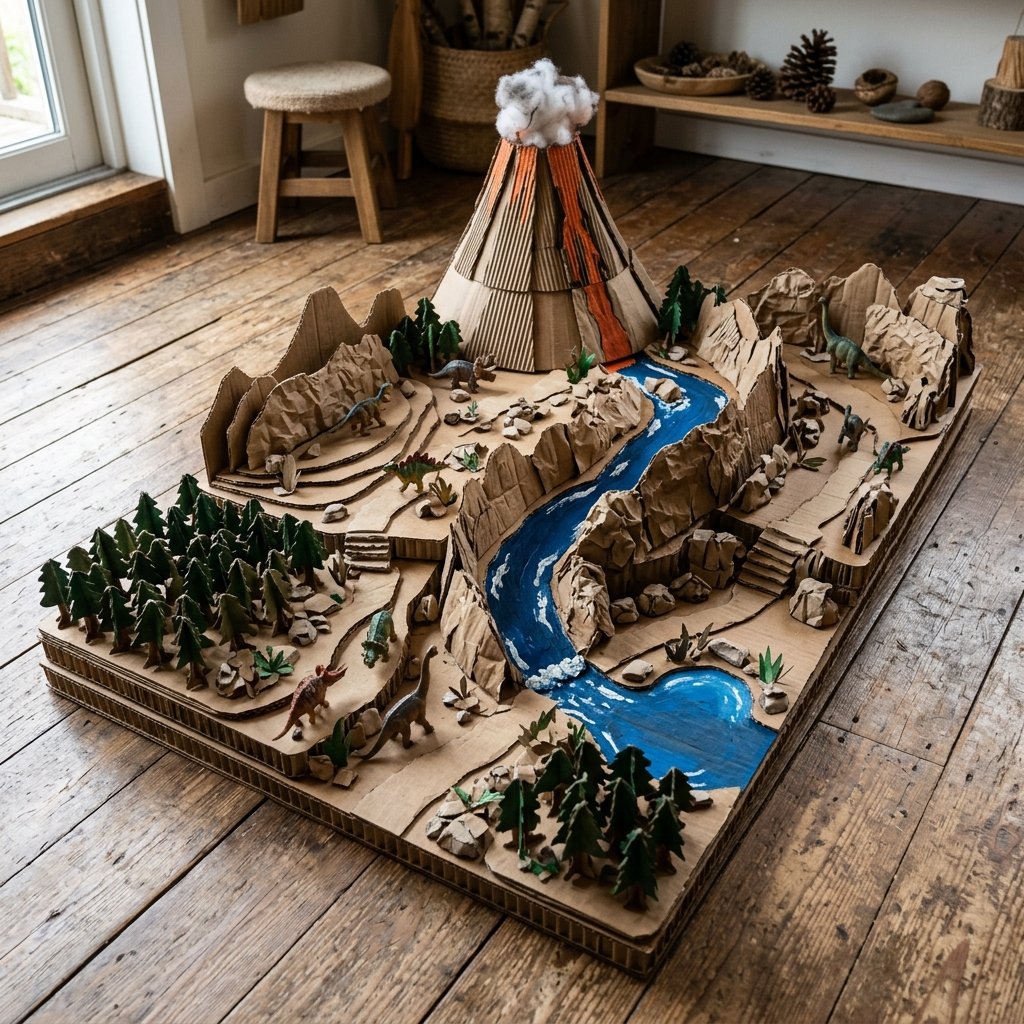
The foundation of any epic playset is the ‘diorama shell.’ We want to create depth and verticality. Start by cutting the top flaps off your large box, but do not throw them away. These will become your ramps, cliffs, and plateaus.
- The Perimeter: Keep the walls of the box at least 4 inches high to contain the sensory materials.
- The Plateau: Use a smaller box or a folded piece of flap-cardboard to create a secondary level. This adds visual interest and a ‘high ground’ for the Pterodactyls.
- The Riverbed: Cut a winding path out of a thin piece of cardboard and glue it to the floor of the box. This creates a physical boundary for your ‘water’ sensory filler later.
Safety First: When using a utility knife, always cut away from your body. If you are crafting with kids, let them handle the ‘engineering’ and ‘design’ while you handle the sharp blades.
Texturing the Triassic: The Secret to High-End Upcycling
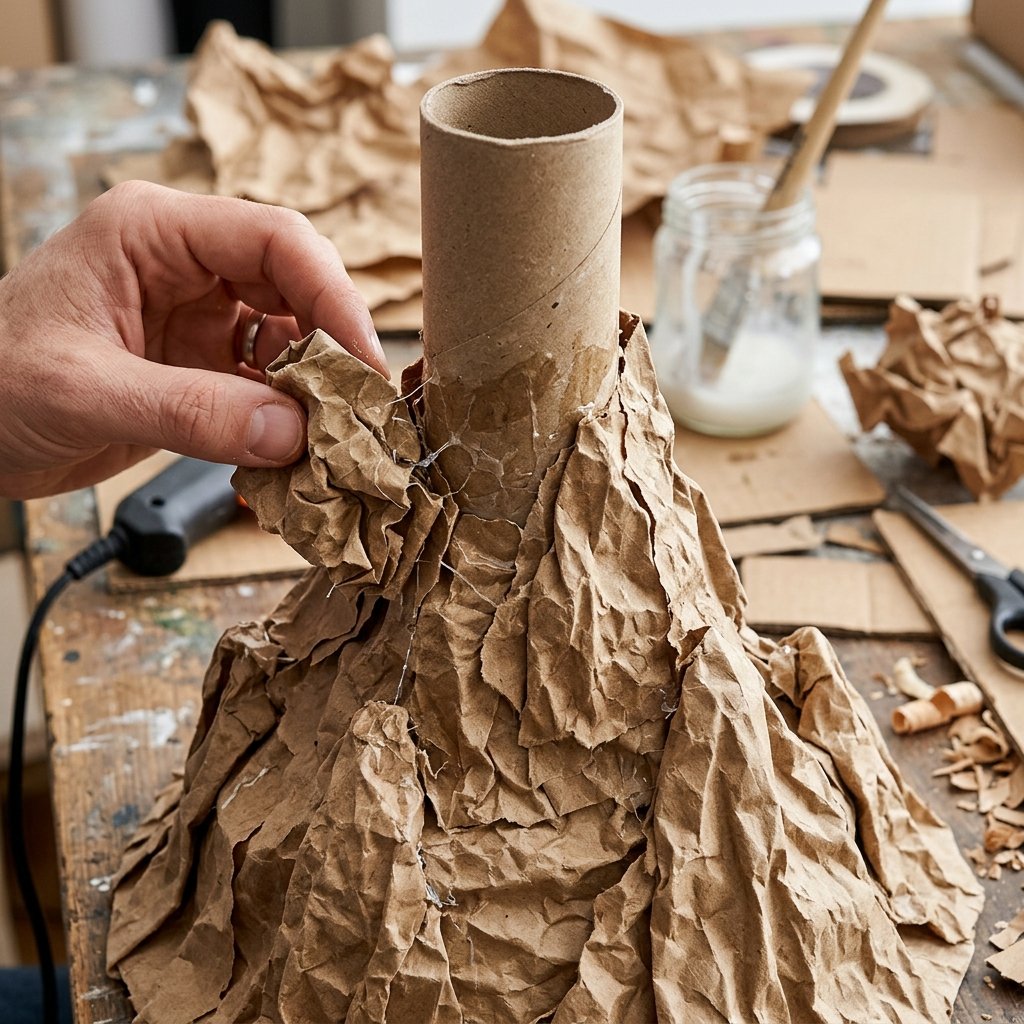
Flat cardboard looks like… well, cardboard. To achieve that rugged, masculine-elegant look, we need texture. This is where we turn ‘trash’ into ‘stone.’ We will use the ‘sculpting’ method to create realistic rock formations.
Creating the Volcano
Take two empty toilet paper rolls and glue them upright. Crumple up brown paper grocery bags and wrap them around the rolls, securing them with hot glue. The wrinkles in the paper naturally mimic the jagged edges of a volcanic mountain. For the lava flow, you can use red yarn or simply paint the ‘cracks’ in the paper later.
The Rocky Cliffs
Cut egg cartons into individual cups. Glue them upside down in clusters along the back wall of the box. Once painted, these look like a series of weathered boulders. This provides a tactile surface for kids to run their fingers over—a key component of sensory play.
The Rugged Aesthetic: Painting and Detailing
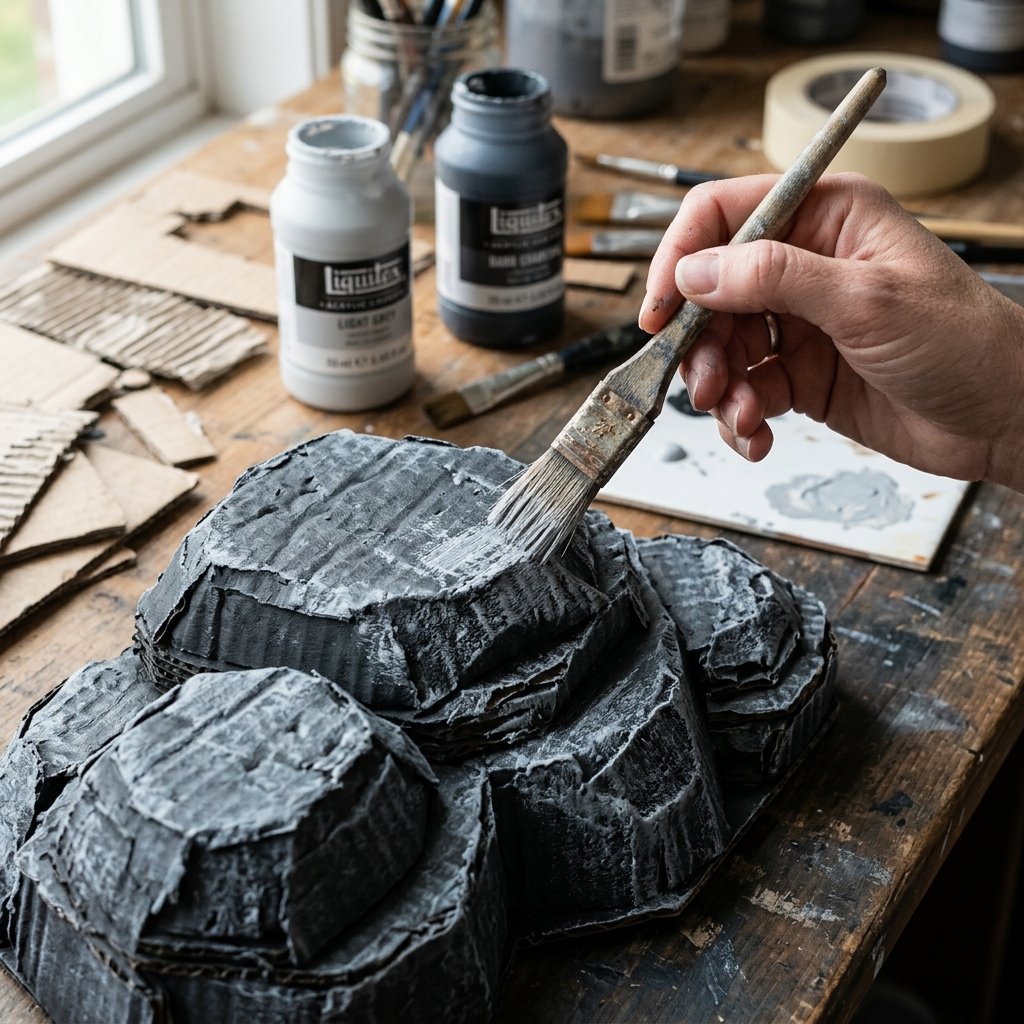
To make this look like a Pottery Barn replica rather than a school project, we use a specific painting technique. Avoid glossy paints; we want matte, earthy tones.
- The Base Coat: Mix cheap acrylic paint (browns, tans, and greys) with a tablespoon of baking soda. This creates a thick, stone-like texture that hides the cardboard seams.
- Dry Brushing: Once the base is dry, take a lighter tan color on a dry brush and lightly flick it over the ridges of your paper-bag mountains. This highlights the ‘peaks’ and adds incredible depth.
- The Water: Paint your riverbed a deep navy blue, then add a layer of clear school glue over the top once dry. This creates a ‘glossy’ water effect for $0 extra cost.
| Surface Type | Paint Mix | Visual Effect |
|---|---|---|
| Rocky Cliffs | Grey + Baking Soda | Stone Texture |
| Forest Floor | Dark Green + Sand | Earth/Moss Feel |
| Lava/River | Glossy Acrylic | Liquid Reflection |
The Sensory Fill: Budget-Friendly Substrates
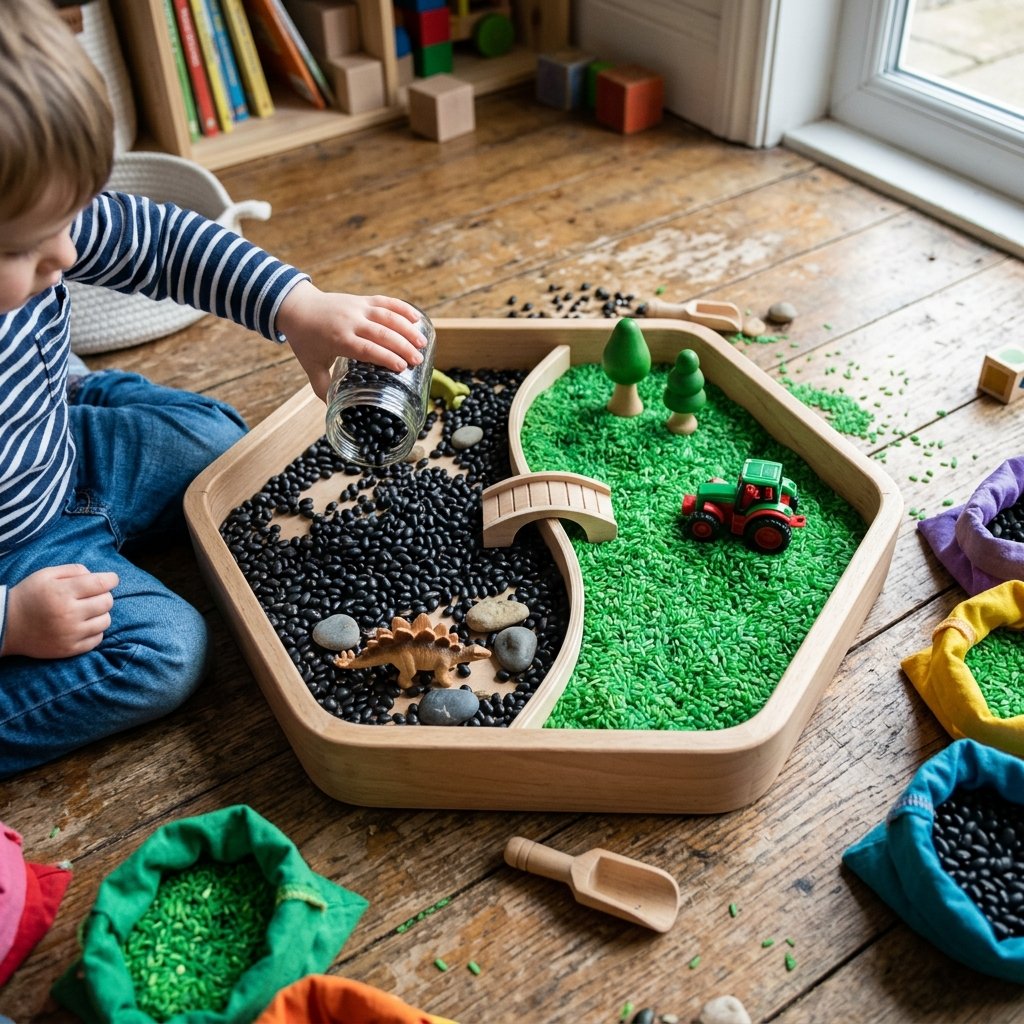
The ‘playset’ is the stage, but the sensory fillers are the actors. To keep this project budget-savvy, we look to the pantry. Sensory play is vital for fine motor skills and tactile processing.
- The Earth: Use dried black beans or pinto beans. They are heavy, satisfying to pour, and look like large river stones.
- The Grass: Take 2 cups of white rice, add a few drops of green food coloring and a teaspoon of vinegar. Shake in a bag and let dry. You now have ‘grass’ for under $1.
- The Sand: If you have a sandbox, use a cup of real sand. If not, coarse cornmeal works as a fantastic, edible-safe alternative for younger toddlers.
The Rule of Threes: For the best sensory experience, include at least three different textures: something smooth (beans), something grainy (sand/rice), and something rough (the cardboard mountains).
Conclusion
A Prehistoric Masterpiece for Pennies
By following this guide, you have successfully diverted waste from the landfill and created a high-quality, educational toy that encourages open-ended play. Your epic dinosaur sensory playset is a testament to the fact that creativity and a bit of ‘rugged engineering’ are far more valuable than a big budget. Whether you are a handy parent looking for a rainy-day project or a frugal crafter making a birthday gift, this cardboard transformation proves that with a little hot glue and vision, the possibilities are prehistoric! Total savings: approximately $75. Total memories: priceless.

Makenzie is the founder and lead writer at MoneyHackTips.com — a personal finance blog dedicated to delivering street-smart financial wisdom for real people on real budgets. With 300+ published articles covering everything from debt management to investing fundamentals, Makenzie’s mission is to make every dollar work harder. When not writing about money hacks, Makenzie is testing frugal living strategies, optimizing side hustles, and helping readers build financial freedom from scratch.