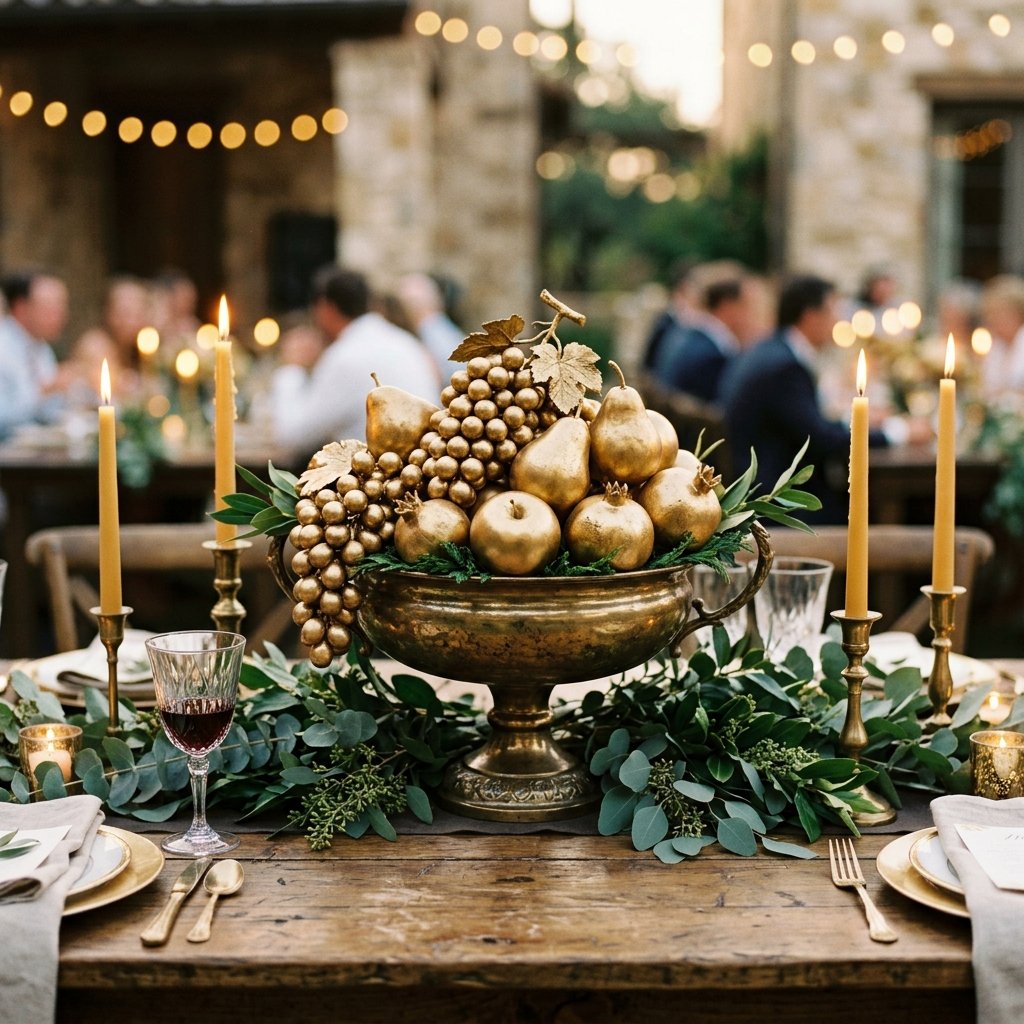

Welcome, budget-savvy brides, frugal DIYers, and resourcefully-creative event stylists! If you are staring down a wedding budget that seems to be spiraling out of control, take a deep breath and put away the credit card. You absolutely do not need to spend thousands of dollars on fresh florals that will inevitably wilt and be thrown in the trash by Sunday morning. Instead, we are going to dive into an incredibly clever, high-end hack that will leave your guests utterly speechless and your wallet happily intact. We are talking about the $5 Gilded Fruit Wedding Centerpiece. This isn’t just a simple craft project; it is a masterclass in visual alchemy. By combining the opulent, moody aesthetics of 17th-century Dutch still-life paintings with the practical, budget-stretching magic of Dollar Tree faux fruit and a little bit of elbow grease, you can create a tablescape that radiates timeless romance and masculine-elegant luxury.
Whether you are a handy mom helping your daughter plan her dream day, a crafty gift-giver looking to elevate a holiday table, or a rugged upcycler who loves turning discarded items into gold, this comprehensive guide will walk you through every single step. We will cover the psychology of why gilded decor looks so expensive, exactly where to scavenge for the best materials, the secret painting techniques that prevent a cheap ‘plastic’ look, and the architectural principles of building a centerpiece that commands the room. Get ready to roll up your sleeves and turn literal plastic into absolute treasure.
The Dutch Masters’ Secret: Why Gilded Decor Screams Luxury
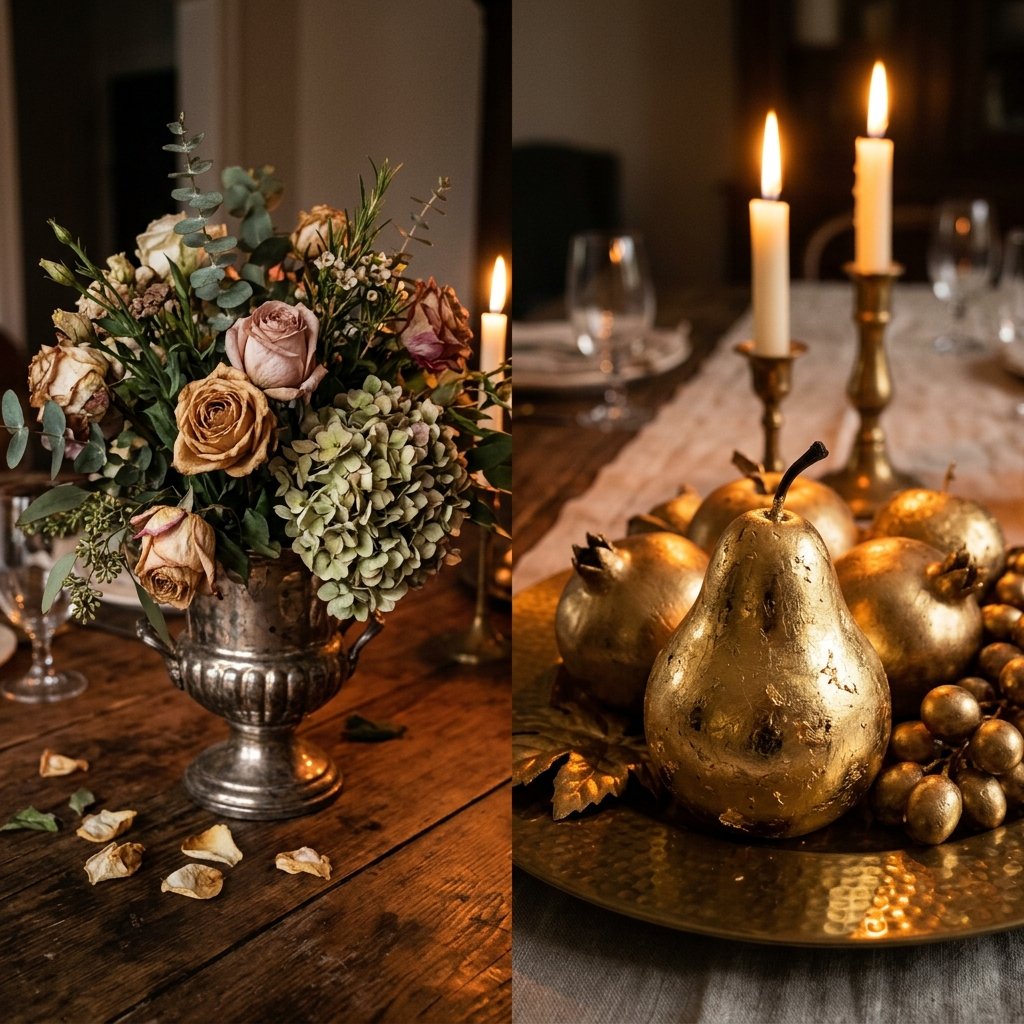
Before we break out the spray paint and hot glue, it is essential to understand exactly why this budget hack works so incredibly well. When guests walk into a wedding reception, their eyes are immediately scanning for visual cues of abundance, effort, and style. For centuries, fresh out-of-season fruit and solid gold were the ultimate status symbols. By combining the two, you are tapping into a deeply ingrained psychological association with wealth and royalty.
The Psychology of Gold and Abundance
In the art world, specifically during the Dutch Golden Age, painters used overflowing bowls of fruit to symbolize prosperity, beauty, and the fleeting nature of time. When you take the recognizable shapes of pears, grapes, and pomegranates and unify them with a rich, metallic gold finish, you remove the ‘everyday’ nature of the fruit and elevate it into a sculptural art piece. The gold reflects candlelight beautifully, creating a warm, inviting, and expensive-looking ambiance that fresh flowers often struggle to achieve in dimly lit reception halls.
Breaking Down the Unbelievable Savings
Let’s talk numbers, because as frugal DIYers, the math is where the real magic happens. The average florist charges a premium not just for the flowers, but for the labor, the vessel rental, and the perishable nature of the product. By opting for a non-perishable, upcycled centerpiece, you are slashing your decor budget by over 95%.
| Centerpiece Type | Estimated Cost Per Table | Lifespan & Reusability |
|---|---|---|
| Traditional Fresh Floral Arrangement (Florist) | $150 – $300+ | 3-4 days (Zero resale value) |
| High-End Faux Floral Arrangement (Rented) | $60 – $100 | Must be returned (Zero resale value) |
| The DIY Gilded Fruit Centerpiece | $4.50 – $6.00 | Forever (Can be resold or gifted!) |
As you can see, outfitting a 15-table reception with fresh flowers could easily cost you $3,000. Our resourcefully-creative gilded fruit method will cost you around $75 for the entire room. That is thousands of dollars saved that can go toward your honeymoon, a down payment on a house, or simply keeping your savings account healthy.
The Scavenger’s Guide: Gathering Materials on a Shoestring Budget
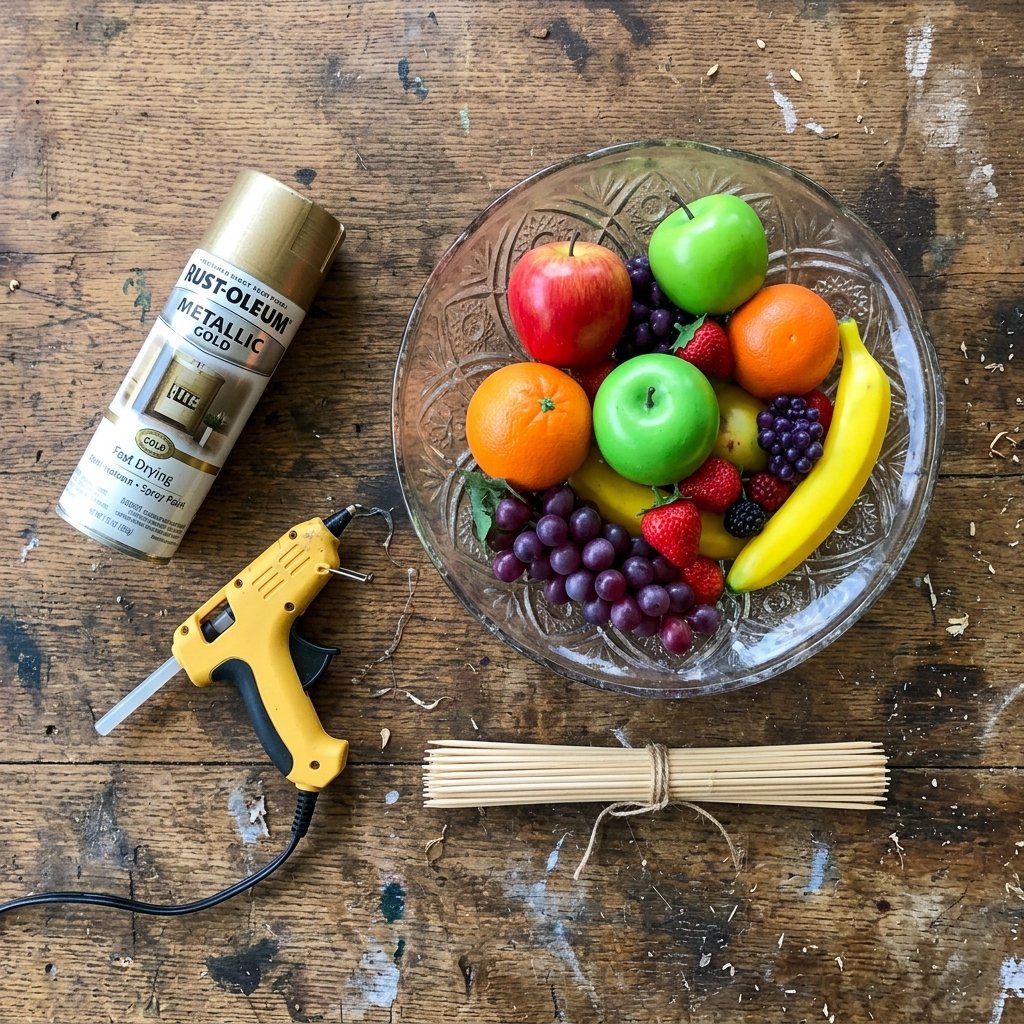
The true mark of a crafty expert is knowing exactly where to source materials without paying retail prices. To keep this project strictly under the $5 per table mark, you need to channel your inner scavenger. We are going to hit up dollar stores, thrift shops, and even your own recycling bin.
Hunting for the Perfect Vessels
The foundation of your centerpiece is the bowl or pedestal. You want something with height and a classic, architectural shape. Compote bowls, small urns, and footed fruit bowls are ideal. Head to your local thrift store (Goodwill, Salvation Army, or local charity shops) and look past the ugly colors. You are hunting for shape, not finish, because we are going to paint it anyway.
- Glass Compote Bowls: Often found for $1.00 to $2.00. Even if they are cheap clear glass, paint will transform them into heavy antique brass.
- Tarnished Silverplate: Don’t bother polishing it! Tarnished silver trays and bowls make an incredibly rugged, masculine-elegant base for your gold fruit.
- Dollar Tree Plastic Urns: During the spring, dollar stores sell plastic garden urns. When weighted with a little plaster or rocks and painted, they look exactly like cast iron or heavy bronze.
Sourcing the Faux Fruit
Dollar Tree and other discount stores are your best friends here. You are looking for variety in shape and size to create visual interest. Grapes are absolutely essential because they drape beautifully over the edge of your vessel, creating that classic Renaissance overflow.
- Pears and Apples: Provide bulk and height.
- Grapes: Provide movement and drape.
- Lemons and Limes: Add interesting oval shapes and textured skin.
- Pomegranates: If you can find them at craft stores on clearance, their crowned tops look incredibly regal when gilded.
| DIY Material | Source | Estimated Cost (Per Centerpiece) |
|---|---|---|
| Thrifted Pedestal Bowl / Urn | Local Thrift Store | $1.50 |
| 3-4 Pieces of Faux Fruit | Dollar Tree ($1.25 each) | $2.50 |
| Gold Spray Paint / Rub ‘n Buff (Prorated) | Hardware Store / Craft Store | $0.75 |
| Floral Foam / Hot Glue / Skewers | Dollar Tree / Stash | $0.25 |
Frugal Pro-Tip: Always check Facebook Marketplace or local Buy Nothing groups before purchasing. Many people give away old bowls of faux fruit from the 1990s that are just begging to be upcycled!
The Alchemist’s Process: Prepping and Painting for Maximum Luxury
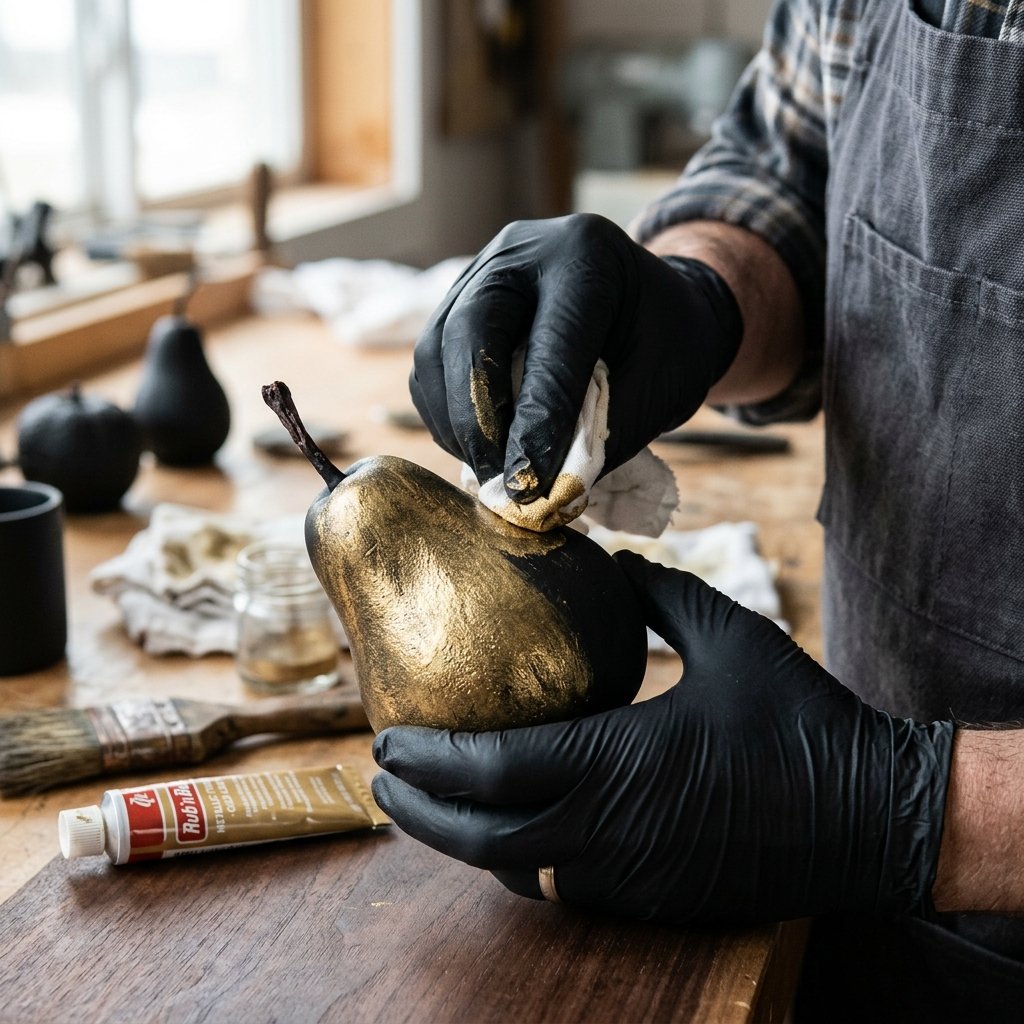
This is where the magic happens. Slapping a single coat of cheap, shiny gold paint onto a plastic apple will make it look exactly like a plastic apple with cheap gold paint on it. To achieve that incredibly luxurious, heavy, antique metal look, we need to employ a few clever crafting techniques. It is all about texture, layering, and creating depth.
Step 1: Prepping the Surface
Plastic fruit often has a slick, waxy coating that repels paint. If you skip this step, your gold finish will easily scratch off, ruining the illusion.
- Wash and Dry: Wipe down all your faux fruit and thrifted vessels with warm water and a little dish soap to remove dust and oils. Dry them completely.
- Light Sanding (Optional but Recommended): Take a fine-grit sandpaper (around 220 grit) and very lightly scuff the surface of the shiny plastic fruit. You don’t need to gouge it; just remove the sheen so the primer has something to grip.
- The Skewer Trick: To paint the fruit evenly without leaving fingerprints, carefully poke a wooden bamboo skewer into the bottom of each piece of fruit. You can stick the other end of the skewer into a cardboard box or a block of Styrofoam so the fruit stands upright while drying.
Safety Note: Always use spray paints and harsh chemicals in a well-ventilated area, preferably outdoors. Wear a mask to protect your lungs from aerosolized particles, and use a drop cloth to protect your driveway or lawn.
Step 2: The Dark Base Coat
To make the gold look like heavy, aged metal rather than cheap plastic, you must start with a dark base. Spray paint all your fruit and your vessel with a coat of matte black or dark flat brown spray paint. This acts as a primer and provides deep shadows for the gold to sit on top of. Let this dry completely (usually about 20-30 minutes depending on the weather).
Step 3: The Gilded Layers
Now comes the gold. You have two options here depending on your budget and desired finish.
- Option A: Metallic Spray Paint (Fastest). Hold a can of high-quality metallic gold spray paint (like Rust-Oleum Pure Gold or Antique Brass) about 12 inches away from the fruit. Do not aim for 100% solid coverage. Apply light, sweeping bursts. You want tiny hints of that dark base coat to peek through the crevices, especially in the grapes. This gives it instant antique depth.
- Option B: Rub ‘n Buff (Most Luxurious). If you want a truly high-end, museum-quality finish, invest in a tube of Rub ‘n Buff in ‘Antique Gold’ or ‘Grecian Gold’. Squeeze a pea-sized amount onto an old rag or your gloved finger, and gently rub it over the black-painted fruit. The wax-based metallic paste will catch on the high points of the fruit’s texture while leaving the recesses dark. It is a deeply satisfying, crafty-expert technique that yields unbelievable results.
Architectural Styling: Assembling the Centerpiece
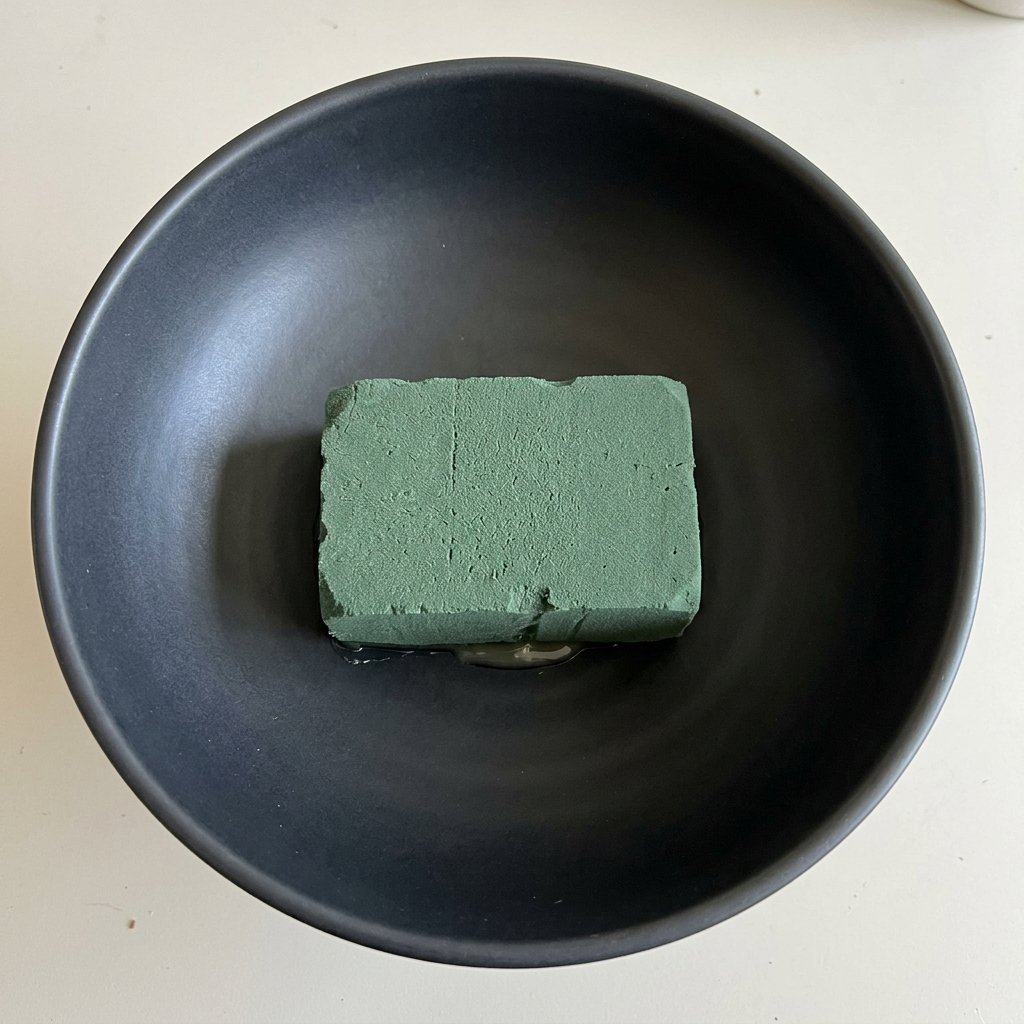
Having beautiful gilded fruit is only half the battle. The way you arrange it will determine whether it looks like a random pile of painted plastic or a deliberate, expensive piece of event styling. We are going to build this centerpiece using the same structural principles that high-end florists use.
The Foundation and Mechanics
You cannot just dump the fruit into the bowl; it will roll around and look flat. You need mechanics to give the arrangement height and stability.
- Insert the Foam: Cut a block of dry floral foam (from the dollar store) and hot glue it directly into the center of your thrifted vessel. The foam should sit about an inch below the rim of the bowl.
- Create the Drape: Start with your grapes. Faux grapes usually have a small wire loop or stem at the top. Use a floral pin or a piece of bent wire to secure the top of the grape cluster into the foam, allowing the heavy bottom of the cluster to spill over the edge of the bowl. Do this on two opposite sides for balance.
- Place the Focal Fruits: Take your largest pieces of fruit (usually the pears or pomegranates). Snip your wooden skewers so they are about 2 inches long. Poke one end into the bottom of the fruit, and stab the other end securely into the floral foam. Place these large fruits near the center and slightly angled outward.
- Fill in the Gaps: Use the smaller fruits (apples, lemons) to fill in the spaces around the focal fruits. Use the skewer method to hold them at dynamic angles. You want the fruit to look as though it is naturally tumbling out of the bowl, but it should be completely secure. You should be able to turn the bowl upside down without losing a single piece.
Styling Mantra: “Build triangles, not squares.” When placing your fruit, try to create asymmetrical triangles of height and width. Symmetrical, perfectly round domes look manufactured; asymmetrical, cascading shapes look organic, artistic, and expensive.
Adding the Finishing Touches
To really sell the illusion of luxury, you need to soften the hard edges of the metallic fruit. Tuck small sprigs of dark greenery (like faux seeded eucalyptus, ivy, or even preserved Spanish moss) into the gaps between the fruit to hide the floral foam and the skewers. The contrast between the dark, matte greenery and the reflective gold fruit is breathtaking.
Seasonal Adaptations and Tablescape Integration
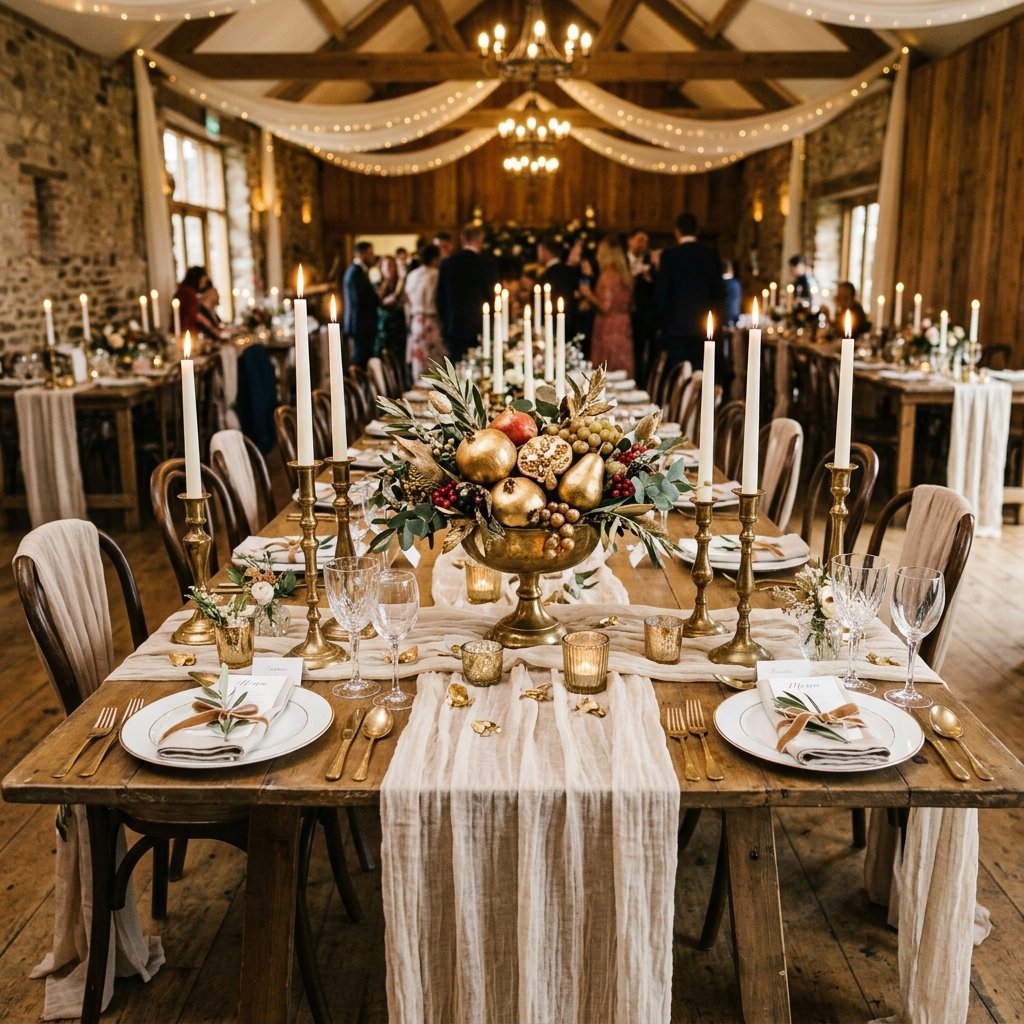
One of the greatest advantages of this frugal DIY hack is its incredible versatility. The gilded fruit centerpiece can be easily adapted to fit the specific season, mood, or color palette of your wedding or event. By tweaking the accent elements, you can take the same $5 base and make it look entirely custom.
Seasonal Tweaks for Frugal Brides
- Autumn / Fall Weddings: Lean into the harvest theme. Mix small faux pumpkins, gourds, and pinecones into your fruit mix. Instead of bright gold, use a deep bronze or copper spray paint for a warmer, cozier vibe. Surround the base of the vessel with scattered faux autumn leaves and cinnamon sticks.
- Winter / Holiday Weddings: Create a ‘frosted’ look. After gilding your fruit, lightly spray the tops with a faux snow aerosol, or brush them with Mod Podge and sprinkle with clear glass glitter or Epsom salts to mimic ice crystals. Add sprigs of faux pine and cedar instead of eucalyptus.
- Spring / Summer Weddings: Keep the gold light and bright (think champagne gold rather than heavy antique brass). Focus heavily on lemons, limes, and grapes. Pair the gold centerpieces with light, airy table runners like inexpensive cheesecloth dyed in pastel blush or sage green.
Lighting: The Ultimate Enhancer
The absolute most critical element to pairing with your gilded fruit is lighting. Gold comes alive under warm, flickering light. Without it, the centerpiece can look static. With it, the centerpiece looks like a glowing, romantic masterpiece.
| Lighting Element | Budget Source | Styling Tip |
|---|---|---|
| Taper Candles | Dollar Tree (2-packs for $1.25) | Place 3 varying heights of taper candles around the base of the centerpiece. |
| Brass Candlesticks | Thrift Stores ($0.50 – $2.00 each) | Mix and match different shapes for a curated, collected-over-time look. |
| Glass Votives | Bulk Online (approx. $0.50 each) | Scatter 4-5 small votives near the cascading grapes to highlight the texture. |
By surrounding your $5 masterpiece with cheap, elegant taper candles, the light will bounce off the metallic curves of the fruit, casting beautiful, dramatic shadows across your reception tables. Your guests will assume you hired a high-end event designer, and you can sit back, sip your champagne, and smile knowing you crafted the entire room for less than the cost of a single dinner out.
Conclusion
There you have it—the ultimate, resourcefully-creative guide to building a luxurious, jaw-dropping wedding centerpiece for the cost of a fancy cup of coffee. By embracing the “Trash-to-Treasure” mindset, you have learned how to look past the cheap plastic exterior of dollar store items and see the magnificent, gilded potential hiding underneath. This project proves that elegance is not about how much money you spend; it is about creativity, technique, and the willingness to get a little paint on your hands.
As you embark on your wedding planning or event styling journey, remember this frugal mantra: “Texture and lighting are the enemies of cheap.” Apply those principles to every DIY project you tackle, and you will build an unforgettable celebration that is as budget-savvy as it is beautiful. Now, grab those thrifted bowls, fire up that hot glue gun, and start gilding your way to the wedding of your dreams. Happy crafting, and congratulations on pulling off the smartest decor hack of the year!

Makenzie is the founder and lead writer at MoneyHackTips.com — a personal finance blog dedicated to delivering street-smart financial wisdom for real people on real budgets. With 300+ published articles covering everything from debt management to investing fundamentals, Makenzie’s mission is to make every dollar work harder. When not writing about money hacks, Makenzie is testing frugal living strategies, optimizing side hustles, and helping readers build financial freedom from scratch.