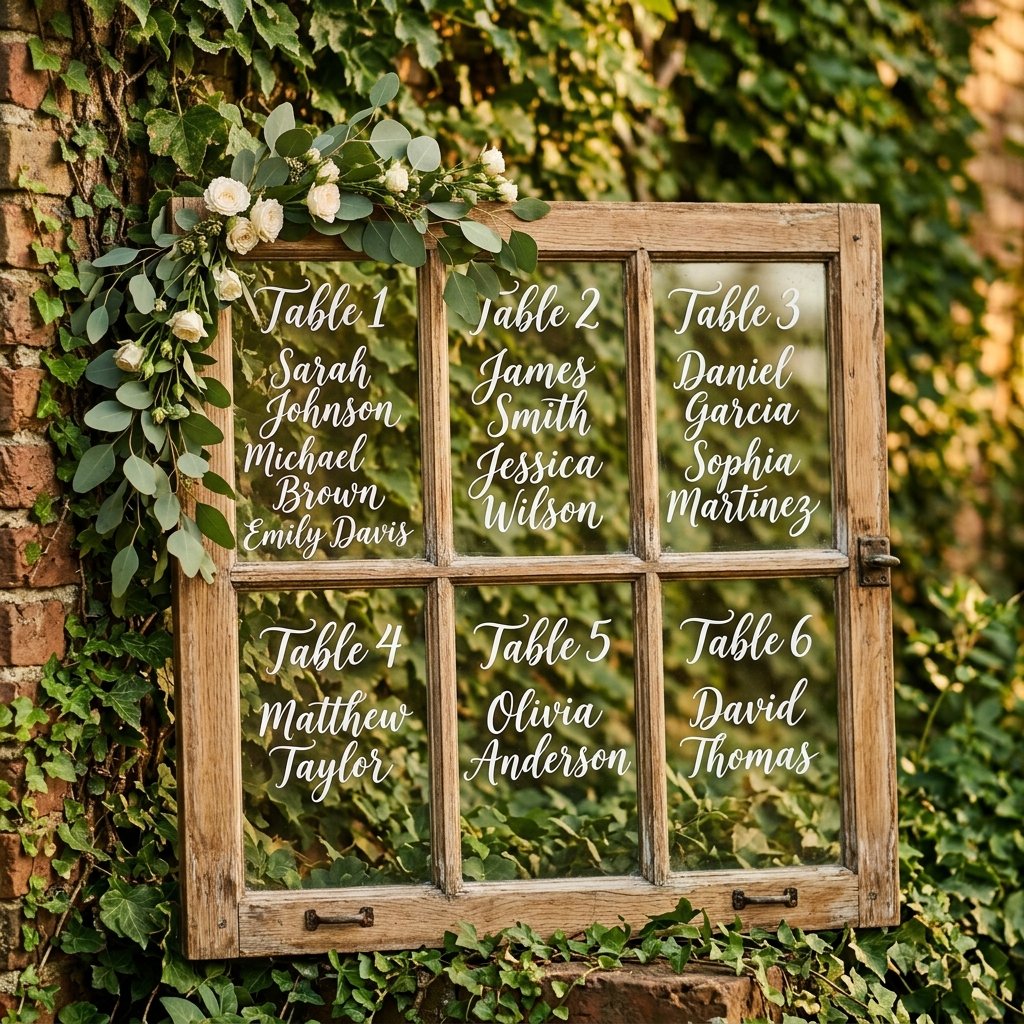

Welcome to the ultimate masterclass in high-impact, low-cost wedding styling. If you have ever stepped foot into a boutique wedding rental shop, you have likely seen vintage window seating charts listed for $150 to $300 for a single day’s use. Today, we are tossing that price tag out the window. As a resourceful DIYer, you know that beauty doesn’t require a massive budget—it requires vision, grit, and a little elbow grease. By the end of this guide, you will have the skills to take a $10 architectural salvage piece and turn it into the centerpiece of your wedding reception. We are talking about a rugged, masculine-elegant aesthetic that combines the history of reclaimed wood with the refined precision of modern calligraphy. Whether you are a budget-savvy bride, a handy groom, or a crafty friend helping out, this project is the gold standard of trash-to-treasure upcycling. Let’s get our hands dirty and create something truly jaw-dropping.
The Strategic Hunt: Sourcing the Perfect Pane
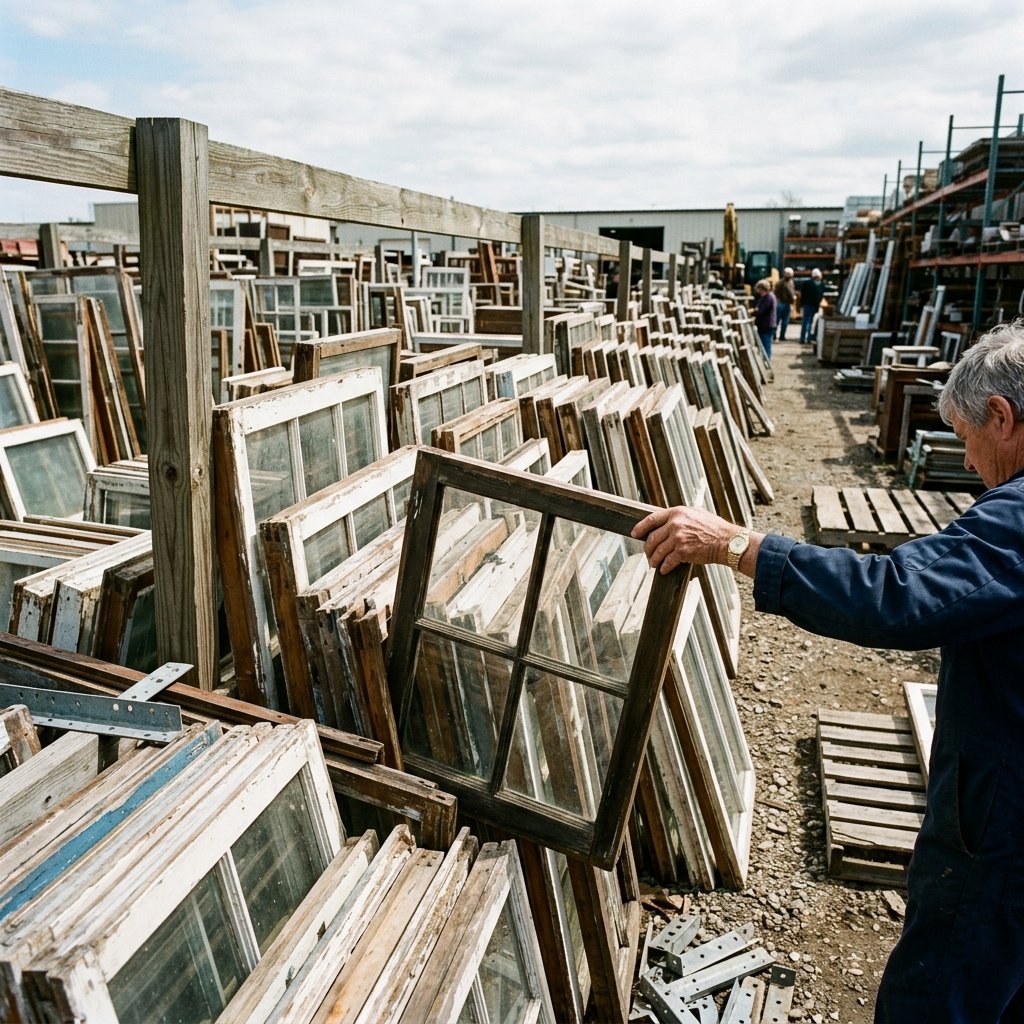
The success of this project begins in the aisles of your local thrift store, salvage yard, or the depths of Facebook Marketplace. You aren’t just looking for any window; you are looking for a frame with character and structural integrity. Look for multi-pane windows (often called ‘lights’) that match your guest count. A 6-pane window is perfect for a wedding of 60 to 100 guests, allowing roughly 15-18 names per pane.
Where to Look
- Habitat for Humanity ReStore: The holy grail for architectural salvage. You can often find windows for $5 to $15.
- Facebook Marketplace: Search for ‘old windows’ or ‘storm windows.’ Pro tip: check the ‘Free’ section on Sunday evenings.
- Antique Malls: Usually more expensive, but the glass might have that beautiful wavy texture from the early 20th century.
| Source Type | Estimated Cost | Quality Level |
|---|---|---|
| Salvage Yard | $5 – $12 | Rugged / Needs Work |
| Facebook Marketplace | $0 – $20 | Varies Greatly |
| Boutique Rental | $150+ | Finished / Temporary |
Before you buy, check for ‘The Big Three’: lead paint, wood rot, and loose glass. If the wood feels soft or ‘spongy’ when you press a fingernail into it, walk away.
The Restoration Phase: From Grime to Glamour
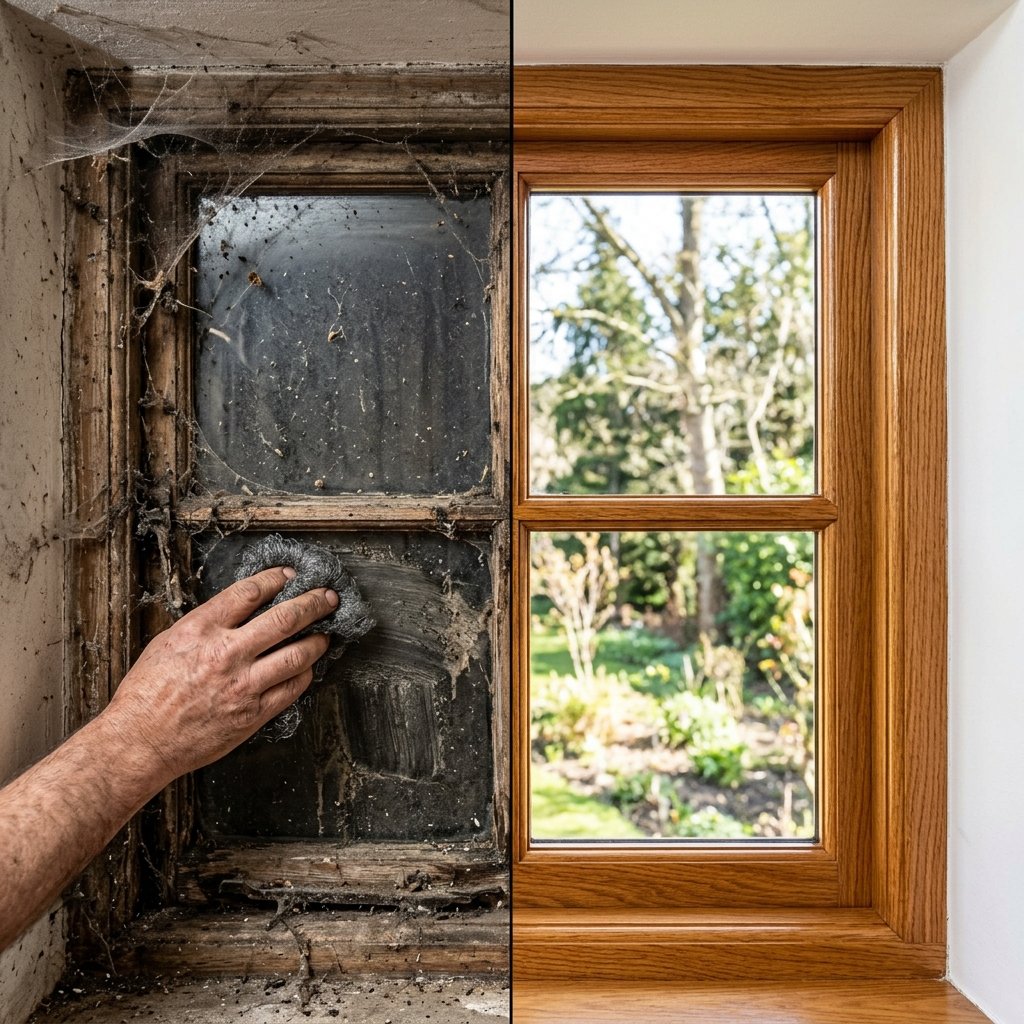
Once you’ve secured your frame, it’s time to strip away decades of dust. This is where the masculine-elegant aesthetic is born—balancing the raw, weathered wood with crystal-clear glass. Safety is paramount here, especially when dealing with older items that might contain lead-based paint.
Step-by-Step Prep
- Safety Check: Use a lead paint test kit (available for $10 at hardware stores) if the window is pre-1978. If it tests positive, do not sand it. Instead, seal it with a clear matte topcoat to prevent flaking.
- Deep Clean: Use a 50/50 mix of white vinegar and water. For stubborn grime on the glass, use 0000 grade steel wool. It sounds scary, but 0000 grade will not scratch glass; it will, however, remove years of oxidation and paint overspray.
- Stabilization: If the glass is rattling, apply a thin bead of clear silicone caulk along the edge where the glass meets the wood. This ensures your window doesn’t shatter during transport.
Refining the Wood
If the wood is too rough, a light sanding with 120-grit sandpaper followed by 220-grit will smooth it out without losing the ‘aged’ look. You can finish it with a simple coat of linseed oil or a dark walnut stain to give it a sophisticated, rugged feel.
The Master’s Layout: Precision Alignment Without the Stress
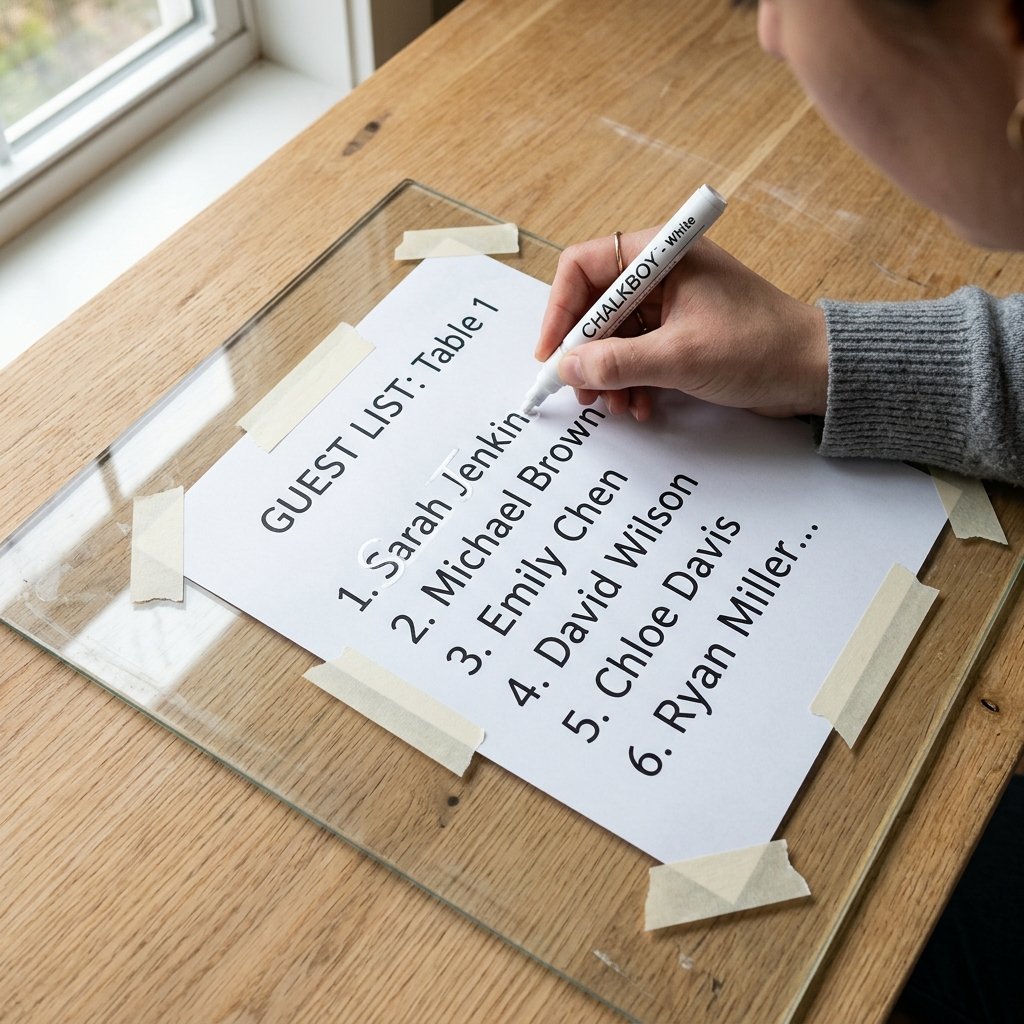
The biggest mistake DIYers make is ‘eyeballing’ the lettering. To achieve a professional, high-end look, you need a template. The beauty of glass is transparency—we are going to use that to our advantage.
Creating Your Template
- Digital Design: Use a free tool like Canva or Google Docs. Set your page size to the exact dimensions of one window pane.
- Font Selection: Choose a clean, readable serif font for the names and a bold, elegant script for the table numbers (e.g., ‘Table One’).
- Printing: Print your guest list on standard 8.5×11 paper and tape the sheets together to fit the pane.
The Transfer Hack
Tape your printed guest list to the back of the glass. When you flip the window over, you will see the names perfectly through the glass. Now, you are simply tracing, which eliminates the fear of ‘messing up’ your spacing. This ensures every line is perfectly level and every margin is symmetrically balanced.
The Lettering Masterclass: Marker Selection and Stroke Technique
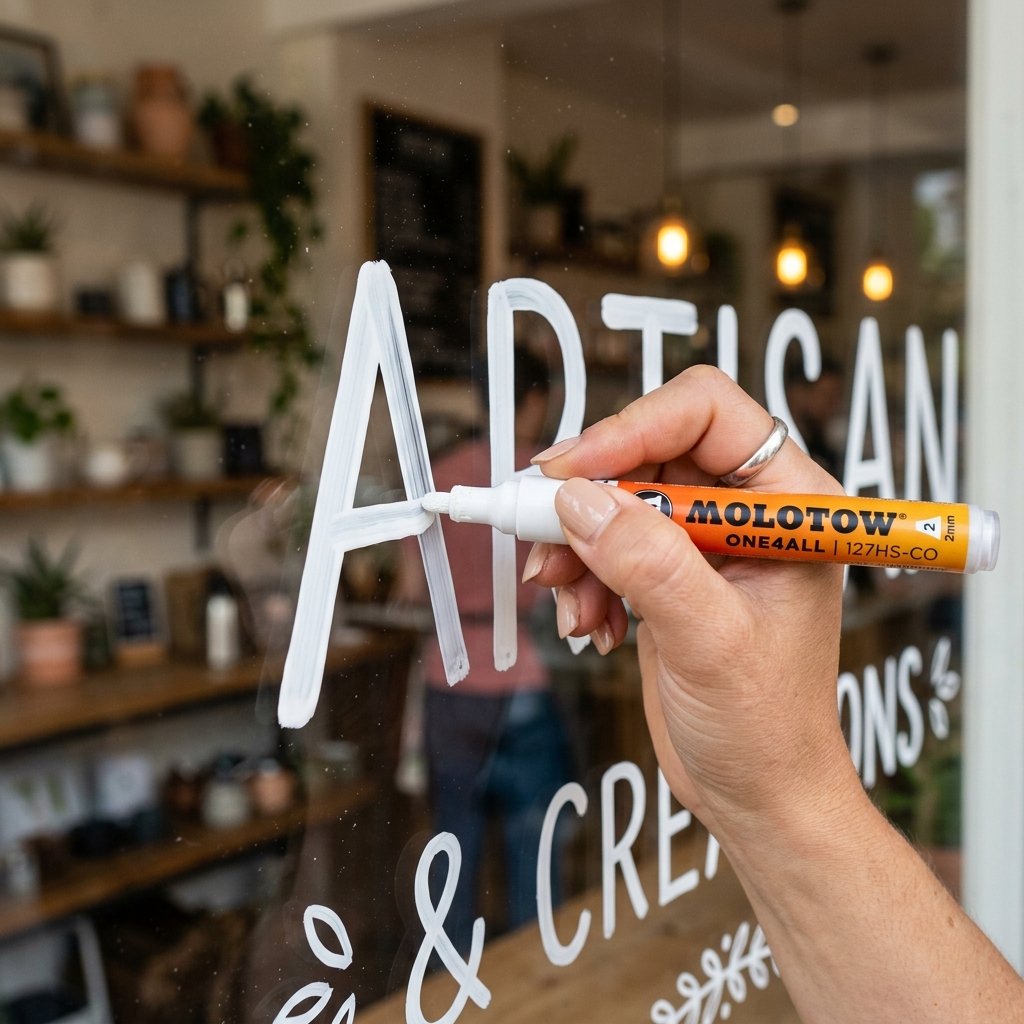
Not all markers are created equal. For a wedding seating chart, you want a medium that is opaque, crisp, and smudge-proof, yet removable if you make a mistake. We recommend oil-based paint markers or high-quality liquid chalk markers.
| Marker Type | Pros | Cons |
|---|---|---|
| Liquid Chalk | Easy to erase, very matte | Can smudge if touched |
| Oil-Based Paint | Permanent, waterproof, glossy | Requires mineral spirits to fix |
| Acrylic Paint Pen | Great flow, vibrant | Can flake off glass over time |
Execution Tips
- Prime the Pen: Shake the marker for 30 seconds and depress the nib on a scrap piece of cardboard until the ink flows consistently.
- Consistent Pressure: Use steady, even pressure. For a ‘faux-calligraphy’ look, go back and thicken the downstrokes of each letter.
- Work Top to Bottom: To avoid smearing your own work, always start at the top-left of the pane and work your way down and across.
The ‘Ghosting’ Fix: If you make a mistake with a chalk marker, a Q-tip dipped in Windex will provide surgical precision for erasing single letters without ruining the whole pane.
Structural Integrity: Mounting and Finishing for the Big Day

A vintage window is heavy. The last thing you want is for your masterpiece to tip over onto a guest or shatter during the cocktail hour. You must prioritize structural engineering alongside aesthetics.
The Display Strategy
- The Easel Method: Use a heavy-duty wooden easel. Avoid flimsy metal ones. Secure the window to the easel using clear fishing line or brown leather straps for a more rugged, masculine look.
- The Freestanding Build: If you are handy with a drill, screw two 2×4 boards into the base of the frame to create ‘feet.’ Paint or stain them to match the frame.
- The Hanging Option: If the venue allows, use heavy-duty eye hooks and thick manila rope to hang the window from a beam or a custom-built arbor.
The Final Flourish
Dress the corners. A simple swag of seeded eucalyptus or dried ruscus attached with a small Command hook on the back of the frame adds a touch of organic elegance. This softens the hard lines of the wood and glass, creating that jaw-dropping Pinterest-worthy finish.
Conclusion
Creating a DIY wedding seating chart from a thrifted window is more than just a money-saving hack; it is a statement piece that tells a story of resourcefulness and style. By following this guide, you have transformed a forgotten relic into a functional work of art for approximately $20, saving yourself hundreds of dollars that can now be spent on your honeymoon or a better open bar. Remember, the beauty of DIY lies in the imperfections and the pride of saying, ‘I made that.’ Your guests will be floored by the elegance, and you will rest easy knowing you conquered the wedding industry’s pricing with cleverness and craft. Now, go find that window and start creating!

Makenzie is the founder and lead writer at MoneyHackTips.com — a personal finance blog dedicated to delivering street-smart financial wisdom for real people on real budgets. With 300+ published articles covering everything from debt management to investing fundamentals, Makenzie’s mission is to make every dollar work harder. When not writing about money hacks, Makenzie is testing frugal living strategies, optimizing side hustles, and helping readers build financial freedom from scratch.