
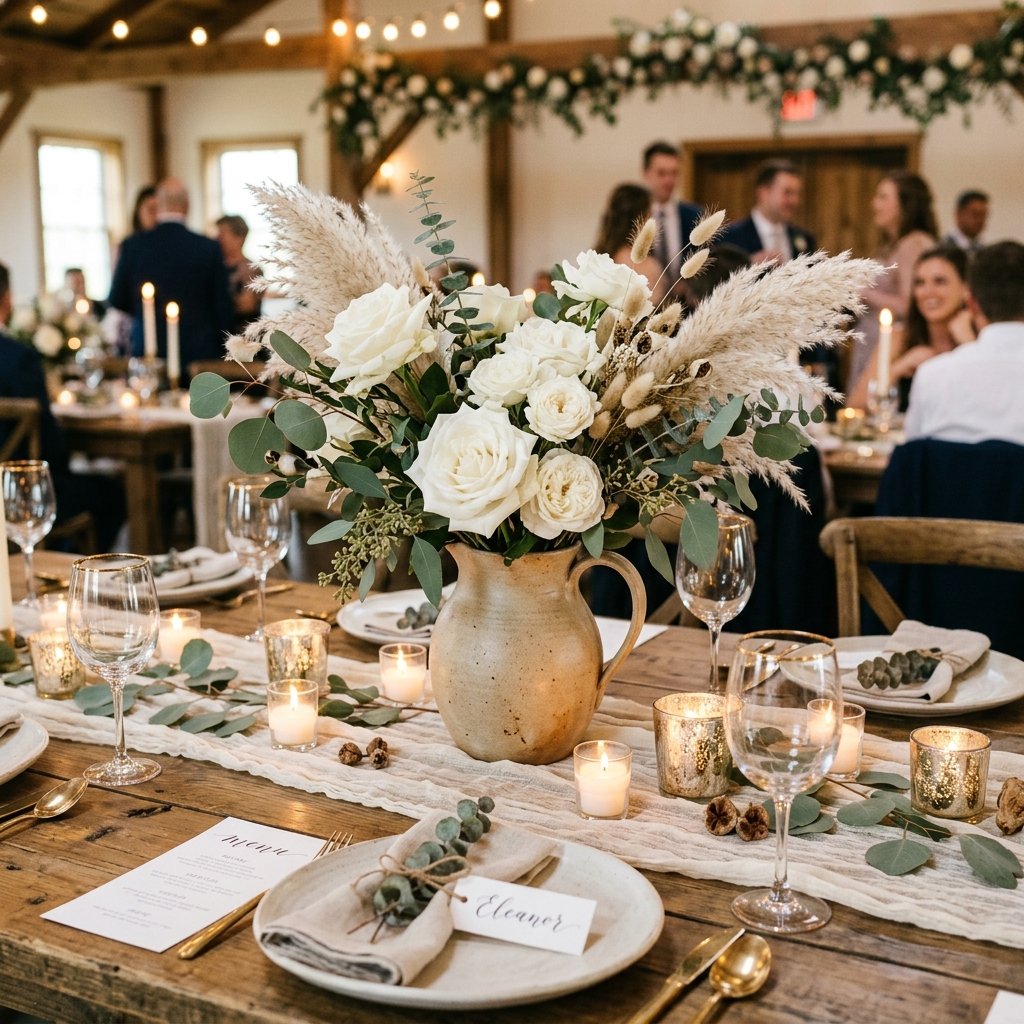

Welcome to the Ultimate Trash-to-Treasure Wedding Masterclass
Listen up, budget brides, frugal grooms, and crafty upcyclers! If you are planning a wedding, you already know that the word ‘wedding’ comes with a massive markup. Floral arrangements and table centerpieces can easily eat up thousands of dollars, leaving your budget battered and bruised. But what if I told you that you do not need to drop a mortgage payment on flowers to achieve that ultra-elegant, Pinterest-worthy reception aesthetic? The secret weapon hiding in plain sight is something you have probably walked past a hundred times: the humble, thrifted ceramic pitcher.
For just a few dollars each, local thrift stores, estate sales, and flea markets are overflowing with discarded ceramic pitchers. Some are outdated 1980s relics covered in peeling floral decals, while others are oddly colored cast-offs. But to the trained eye of a resourceful DIYer, these are blank canvases waiting for a high-end transformation. By utilizing clever upcycling techniques, a little elbow grease, and some professional florist hacks, you can create breathtaking centerpieces that look like they cost $150 each, for under $15.
“Budget Mantra: Never underestimate the power of a coat of paint, a bundle of fresh greenery, and a little bit of crafty ingenuity. Your guests will never know your luxury centerpieces started in the bargain bin!”
In this comprehensive guide, we are going to roll up our sleeves and dive deep into 10 distinct, high-end centerpiece designs using cheap thrifted pitchers. We will cover everything from the rugged, masculine woodland aesthetic to delicate, romantic garden party vibes. I will walk you through the exact materials needed, the step-by-step transformations, and the floral mechanics required to make your arrangements look professionally styled. Grab your heavy-duty floral shears, put on your crafting apron, and let us turn that thrift store trash into wedding day treasure!
The Art of the Thrift: Sourcing and Prepping Your Pitchers
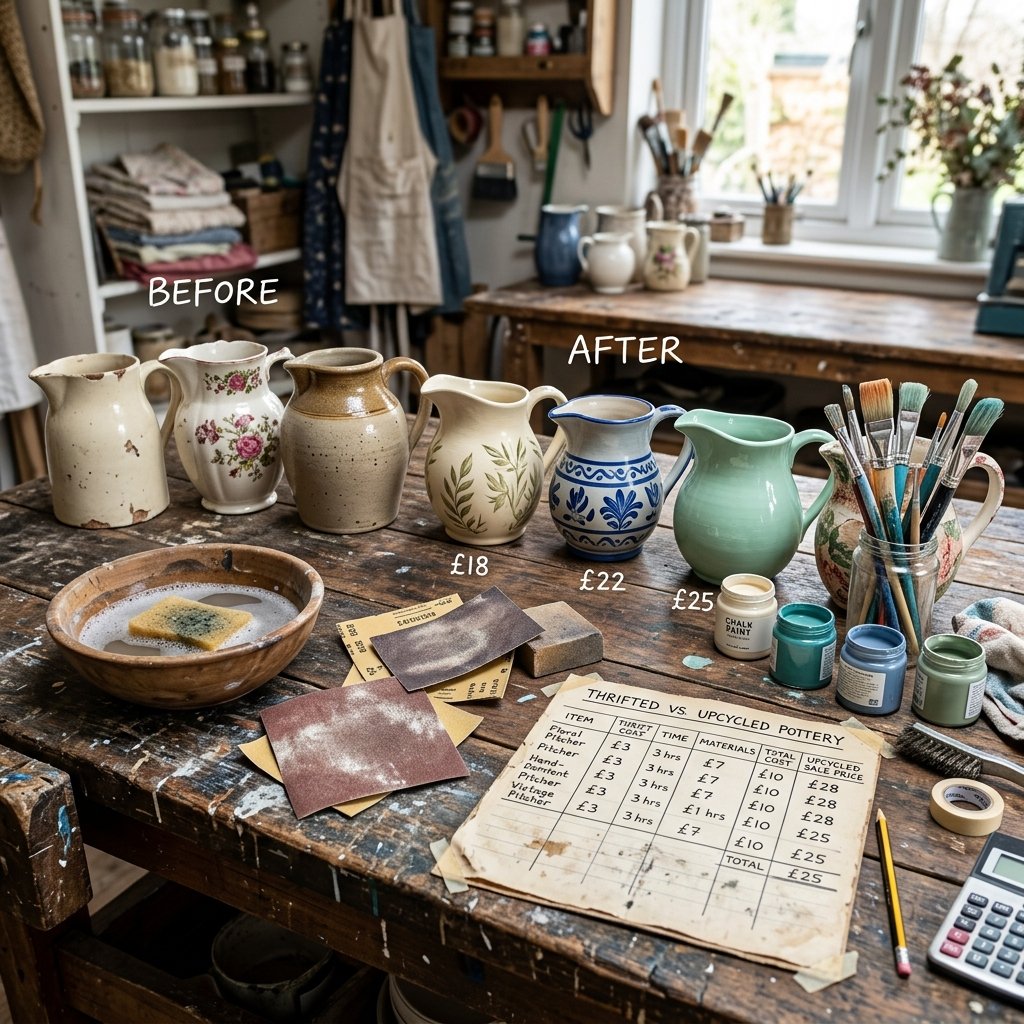
Before we can start arranging beautiful blooms, we need to gather and prep our vessels. Thrifting for wedding decor requires a strategic approach. You are not looking for perfection; you are looking for shape, size, and potential. When scouring your local Goodwill, Salvation Army, or neighborhood garage sales, focus entirely on the silhouette of the pitcher. Ignore the ugly colors, the chipped paint, or the outdated patterns. A sleek, modern silhouette can be painted matte black for an architectural look, while a bulbous, ornate pitcher is perfect for a romantic, vintage vibe.
Step-by-Step Prep and Cleaning
- The Hot Water Soak: Thrifted items are notoriously sticky. Fill your sink with hot water and a generous squirt of heavy-duty dish soap. Let the pitchers soak for at least 30 minutes to loosen decades-old grime and stubborn price tags.
- The Goo-Gone Scrub: For tags that refuse to budge, apply a citrus-based adhesive remover. Use a coarse scrubbing pad to gently buff away the residue.
- Sanitization: Because these pitchers will hold water and fresh flowers, you must kill any bacteria inside, which can cause your flowers to wilt prematurely. Rinse the inside with a solution of one part bleach to ten parts water, then rinse thoroughly.
- Surface Sanding: If you plan to paint your pitchers (which we will be doing for many of these designs), lightly scuff the exterior with a 220-grit sandpaper. This gives the ceramic a ‘tooth’ for the primer and paint to grip onto, preventing future peeling.
“Safety Note: Always wear a dust mask when sanding ceramics, and ensure you are working in a well-ventilated area when using spray paints or chemical adhesive removers.”
The Real Cost of Wedding Florals: Store-Bought vs. DIY
To truly appreciate the value of this project, let us break down the numbers. The table below illustrates the staggering difference between hiring a traditional florist and taking the resourceful DIY route using thrifted pitchers.
| Wedding Centerpiece Component | Traditional Florist Cost (Per Table) | Thrifted DIY Cost (Per Table) | Total Savings for 10 Tables |
|---|---|---|---|
| Vessel / Vase | $25.00 – $60.00 (Rental or Purchase) | $1.50 – $4.00 (Thrifted) | $235.00 – $560.00 |
| Floral Mechanics (Foam/Wire) | $5.00 – $10.00 | $1.00 (Chicken Wire) | $40.00 – $90.00 |
| Blooms and Greenery | $75.00 – $150.00+ | $15.00 – $30.00 (Wholesale/Trader Joe’s) | $600.00 – $1,200.00 |
| Labor and Delivery | $20.00 – $50.00 | $0.00 (Sweat Equity) | $200.00 – $500.00 |
| Total Estimated Cost | $125.00 – $270.00 | $17.50 – $35.00 | $1,075.00 – $2,350.00 |
As you can see, by simply swapping out expensive florist vessels for upcycled thrift store pitchers and doing the arranging yourself, you are keeping thousands of dollars in your pocket. Now, let us jump into the 10 stunning designs!
Centerpieces 1-3: The Rustic & Farmhouse Charmers
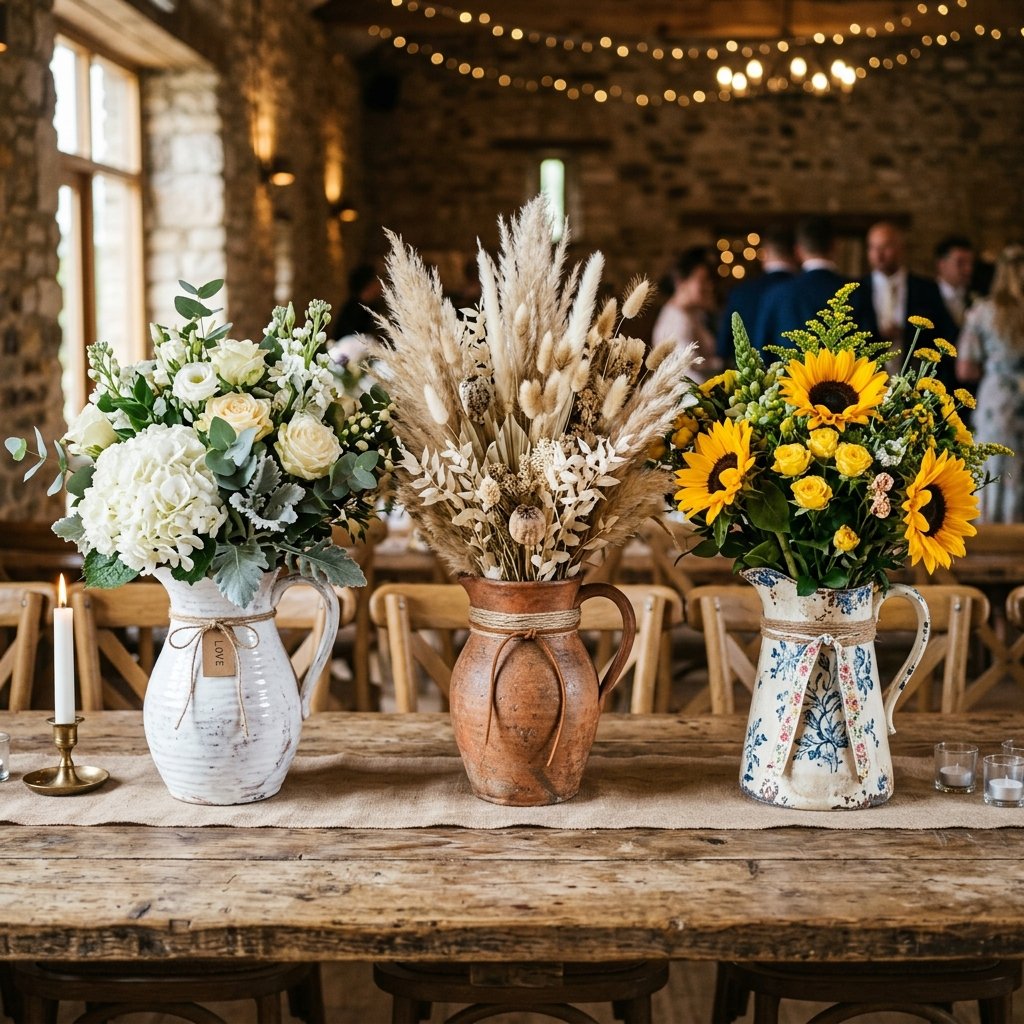
The farmhouse aesthetic remains incredibly popular for weddings, offering a warm, inviting, and relaxed atmosphere. These first three centerpiece designs lean heavily into rustic textures, muted tones, and organic, unstructured floral arrangements.
1. The Whitewashed French Country Pitcher
This design takes an overly bright or garish ceramic pitcher and tones it down with a beautiful, chalky whitewash finish that mimics antique French ironstone.
- The Transformation: Mix equal parts white chalk paint and water to create a thin wash. Brush this mixture over your sanded pitcher, working in small sections. Immediately take a lint-free rag and wipe away the excess, allowing the original color of the pitcher to peek through the crevices. Seal with a matte wax.
- The Floral Formula: Keep it airy and romantic. Use 3 stems of white hydrangeas as your base, add 5 stems of dusty miller for that silvery-green contrast, and fill the gaps with sprigs of baby’s breath and seeded eucalyptus.
2. The Faux Terracotta Desert Pitcher
Perfect for a boho or desert-themed wedding, this technique turns any glossy ceramic into a porous, earthy terracotta masterpiece using the famous baking soda paint trick.
- The Transformation: Mix 1 cup of burnt orange or rust-colored acrylic paint with 1/4 cup of baking soda. The mixture will become thick and frothy. Use a cheap bristle brush to stipple the paint onto the pitcher, creating a textured, stone-like finish. Let it dry for 2 hours and apply a second coat.
- The Floral Formula: Embrace dried elements. Combine dried pampas grass, bleached bunny tails, dried palm spears, and a few fresh toffee-colored roses for a stunning, textural contrast.
3. The Distressed Vintage Floral Pitcher
If you actually find a pitcher with a beautiful, vintage floral pattern (think old English tea party), do not paint over it! Instead, enhance its antique charm.
- The Transformation: Use a fine-grit sanding block to gently distress the edges, the handle, and the spout, making it look authentically aged. Rub a tiny amount of dark antiquing wax over the sanded spots to simulate years of love and use.
- The Floral Formula: Play off the colors in the pitcher. If the pattern has blue flowers, use vibrant yellow sunflowers, blue thistle, and wild daisies for a freshly-picked-from-the-meadow look.
“Pro Tip: When arranging wildflowers, always work in odd numbers. Three sunflowers will look significantly more natural and pleasing to the eye than four.”
Centerpieces 4-6: Modern Minimalist & Architectural
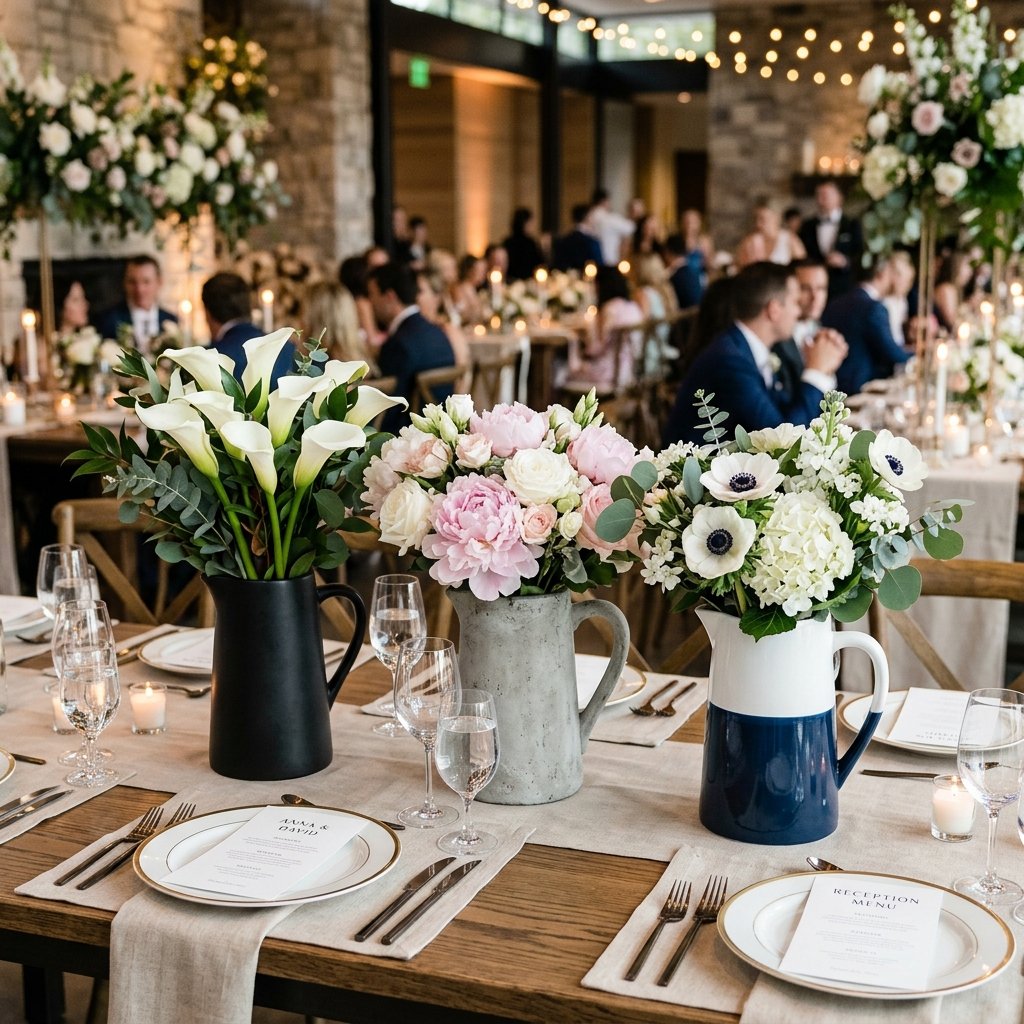
For the couple who loves clean lines, contemporary design, and a chic, uncluttered aesthetic, these three pitchers are all about bold statements and geometric simplicity. We are leaving the rustic vibes behind and moving into high-end, gallery-worthy territory.
4. The Matte Black Statement Pitcher
Nothing screams modern luxury quite like matte black. This design transforms even the most awkwardly shaped pitcher into a striking architectural piece.
- The Transformation: Take your prepped pitcher outside and place it on a drop cloth. Apply a high-quality matte black spray paint + primer in one. Hold the can 10 to 12 inches away and apply three very light coats, waiting 15 minutes between each coat to prevent drips. The result is a velvety, expensive-looking vessel.
- The Floral Formula: Minimalism is key here. Use a single, massive Monstera leaf, paired with 3 to 5 elegant white Calla Lilies. The stark contrast between the black pitcher, the vibrant green leaf, and the pure white lilies is breathtaking.
5. The Faux Concrete Industrial Pitcher
Industrial chic weddings held in converted warehouses or lofts call for raw materials. We can fake the look of heavy, poured concrete using paint and a sponge.
- The Transformation: Paint the entire pitcher with a medium gray chalk paint. While the paint is still tacky, use a sea sponge to dab on patches of light gray and dark charcoal paint. Finally, dust a tiny bit of actual flour or fine sand over the wet paint to give it that gritty, concrete texture. Seal with a matte spray.
- The Floral Formula: Soften the harshness of the ‘concrete’ with romantic, soft blooms. A massive arrangement of soft pink peonies, white ranunculus, and trailing silver dollar eucalyptus creates a perfect juxtaposition of hard and soft.
6. The Color-Blocked Dipped Pitcher
This is a clever, budget-savvy way to incorporate your specific wedding colors while maintaining a modern, crisp look.
- The Transformation: Paint the entire pitcher a crisp, glossy white. Once fully dry (wait at least 24 hours), use painter’s tape to tape off the bottom third of the pitcher on a sharp diagonal. Paint the bottom section in your wedding’s primary accent color (e.g., navy blue, emerald green, or mustard yellow). Remove the tape while the second color is still slightly wet for the crispest line.
- The Floral Formula: Keep the flowers monochromatic to match the painted dip. If you painted the bottom navy, use entirely white flowers like tulips or anemones with dark blue centers to tie the look together seamlessly.
| Modern Style | Paint Technique Focus | Best Floral Pairing |
|---|---|---|
| Matte Black | Light, even spray coats; zero drips | Architectural greens, Calla Lilies |
| Faux Concrete | Sponging, layering grays, adding grit | Soft, fluffy pinks (Peonies) |
| Color-Blocked | Precision taping, high contrast | Monochromatic, high-contrast blooms |
Centerpieces 7-9: Romantic Garden & Antique Elegance
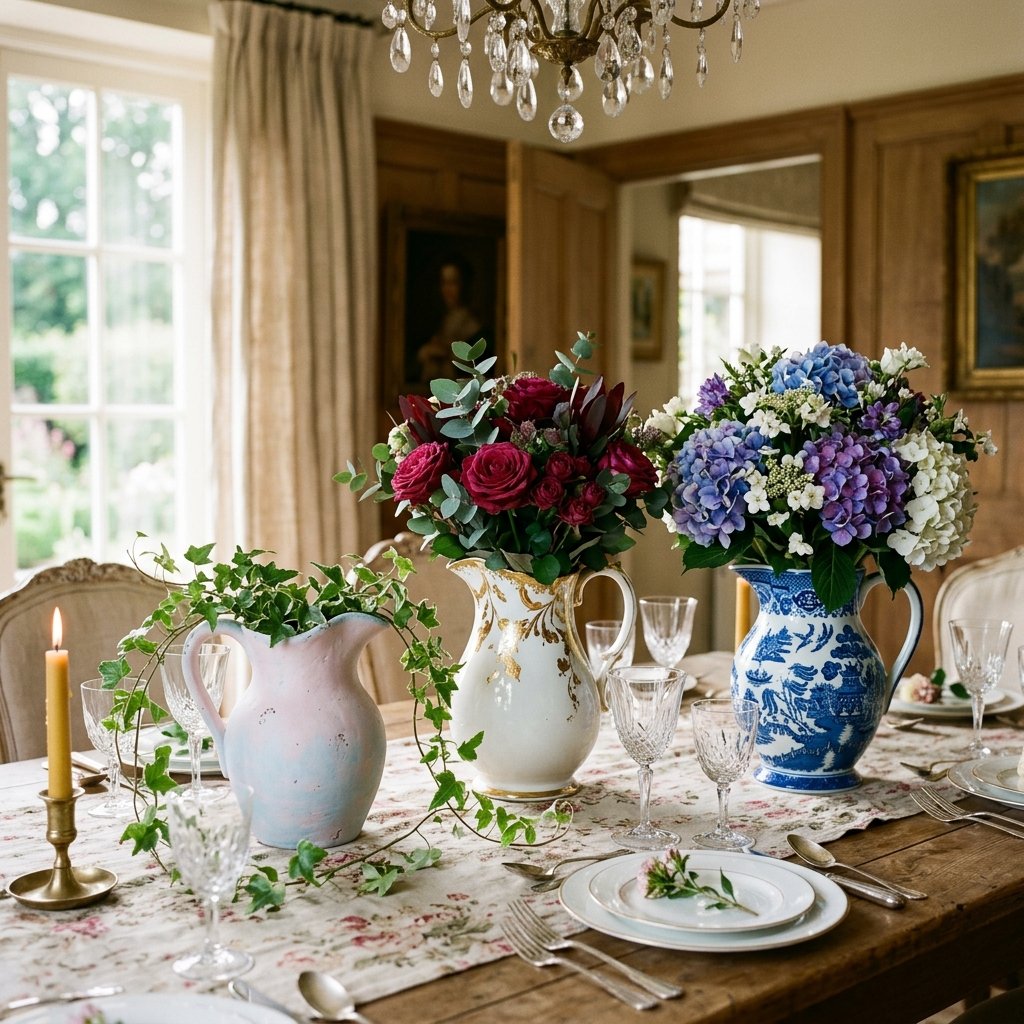
If your dream wedding involves string lights, lace, classical music, and an abundance of romance, these three centerpiece designs will elevate your tablescape to a level of antique elegance. We are focusing on soft colors, metallic accents, and lush, overflowing floral arrangements.
7. The Pastel Plaster Pitcher
This technique gives the pitcher a soft, romantic, old-world plaster texture, perfect for a springtime garden party.
- The Transformation: Mix plaster of Paris with water until it reaches a pancake batter consistency. Add a few drops of soft blush pink or sage green acrylic paint. Brush this thick mixture onto the pitcher using a crisscross motion to create heavy, visible brush strokes. Once dry, it will look like an ancient, romantic artifact.
- The Floral Formula: Create a ‘spilling’ effect. Use heavy blooms like garden roses and dahlias in the center, and allow trailing ivy or jasmine vine to spill out of the pitcher’s spout and cascade down onto the table.
8. The Gilded-Edge Luxury Pitcher
A touch of gold instantly elevates any item from cheap to luxurious. This design is incredibly simple but packs a massive visual punch.
- The Transformation: Spray paint the entire pitcher in a glossy ivory or alabaster white. Once dry, take a small detail brush and carefully paint the rim, the handle, and the very tip of the spout with liquid gold leaf. The metallic shine against the glossy white looks exactly like high-end designer porcelain.
- The Floral Formula: Go for deep, passionate colors. Deep burgundy dahlias, black magic roses, and dark purple lisianthus will pop magnificently against the white and gold vessel.
9. The Faux Chinoiserie Pitcher
Authentic blue and white Chinoiserie vases can cost hundreds of dollars each. We are going to fake it with a brilliant crafting hack using paper napkins!
- The Transformation: This requires the art of decoupage. Paint your pitcher stark white. Find cheap paper napkins with a beautiful blue and white willow or floral pattern. Peel the napkin so you only have the top printed layer. Tear out the motifs, apply a thin layer of Mod Podge to the pitcher, gently lay the napkin motif down, and seal it with another layer of Mod Podge. Once covered and dried, it looks hand-painted!
- The Floral Formula: Keep it classic and voluminous. Massive mophead hydrangeas in shades of white and pale blue will perfectly complement the Chinoiserie pattern without overwhelming it.
“Crafty Expert Tip: When decoupaging napkins onto curved ceramic surfaces, small wrinkles are inevitable. Embrace them! Once the piece is fully dry and sealed, those tiny wrinkles just add to the authentic, antique pottery aesthetic.”
Centerpiece 10: The Rugged Woodland & Masculine Edge
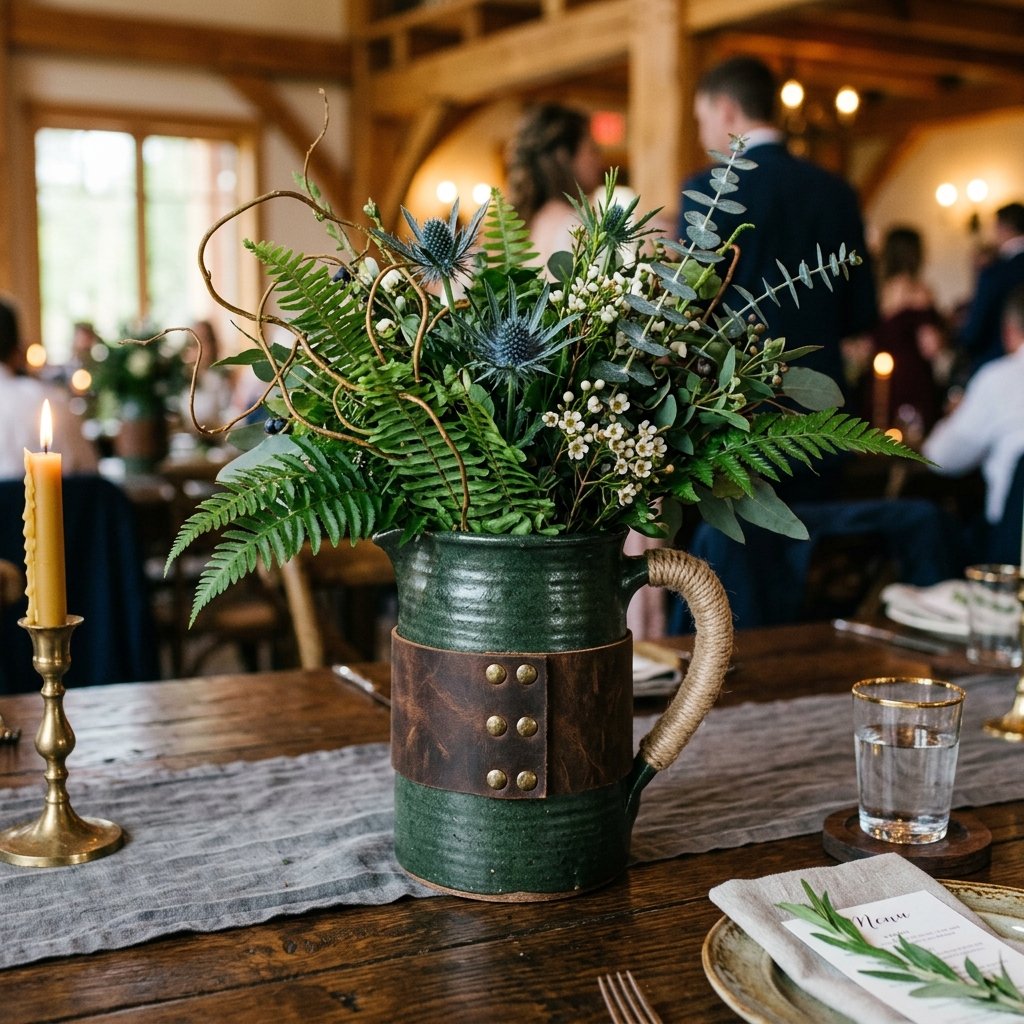
Wedding decor often leans heavily into the ultra-feminine, but for couples who want a more rugged, practical, and masculine-elegant vibe, this final centerpiece is the perfect solution. It is ideal for mountain lodge weddings, autumn celebrations, or couples who prefer the scent of pine and leather over roses and lilies.
10. The Leather-Wrapped & Twine-Bound Pitcher
This design utilizes dark, moody ceramics and incorporates raw, masculine materials like leather, copper, and heavy jute twine to create a centerpiece that feels grounded, earthy, and incredibly unique.
- The Transformation: Start with a pitcher painted in a deep, matte forest green or charcoal gray. Purchase cheap scrap leather from a craft store (or cut up an old thrifted leather belt or jacket). Cut a thick band of leather and wrap it tightly around the belly of the pitcher. Secure it in place using heavy-duty brass studs or by tightly lacing it with copper wire. Wrap the handle tightly in thick jute twine, securing the ends with hot glue, to give it a rugged, tactile grip.
- The Floral Formula: Ditch the traditional delicate flowers entirely. Build a highly textural, woodland arrangement using structural elements. Start with a base of dark green ferns and cedar branches. Add height with curly willow twigs or birch branches. For color and texture, incorporate blue thistle (Eryngium), hypericum berries, and even small, natural pinecones wired onto stems.
“Rugged DIY Mantra: Real elegance does not have to be fragile. By mixing heavy textures like leather, copper, and rough ceramic, you create a centerpiece that commands attention and tells a story of the outdoors.”
This centerpiece not only looks incredible on a reception table, but it also serves as a fantastic, practical gift for the groomsmen or fathers after the wedding. Remove the flowers, and that leather-wrapped jug becomes a stunning piece of home decor for a study, a man cave, or a rustic cabin.
Pro Floral Mechanics & Stress-Free Transportation
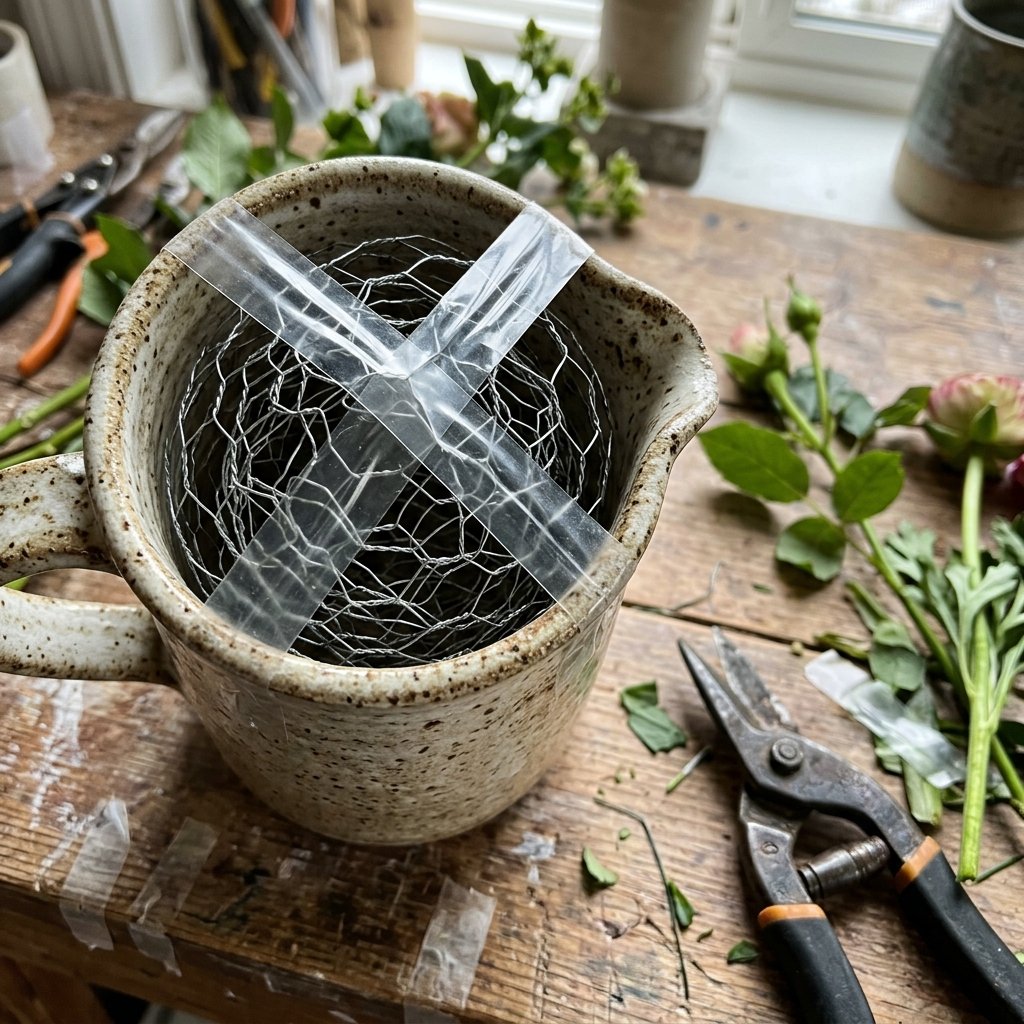
You have successfully upcycled your thrifted pitchers and selected your floral formulas. But how do you ensure the flowers stay exactly where you want them, and more importantly, how do you transport 10 water-filled ceramic pitchers to your venue without a catastrophic spill? Welcome to the practical, handy-parent guide to floral mechanics.
Ditching the Floral Foam: The Chicken Wire Trick
Traditional green floral foam is terrible for the environment, expensive, and can actually clog the stems of certain flowers, causing them to wilt faster. Professional florists on a budget use a much more resourceful trick: chicken wire.
- Measure and Cut: Using heavy-duty wire snips, cut a square of coated chicken wire roughly twice the width of your pitcher’s opening.
- Form the Pillow: Crumple the chicken wire into a loose ball or ‘pillow’ shape.
- Insert and Secure: Shove the wire pillow into the neck of the pitcher. It should fit snugly. Take a piece of clear, waterproof floral tape and make an ‘X’ over the top of the pitcher’s opening, securing the wire in place.
- Arrange with Ease: As you insert your stems, the layers of chicken wire will hold them perfectly at any angle you desire, allowing you to create wide, sprawling arrangements with zero drooping.
The Master Transportation Plan
Transporting DIY centerpieces is where many frugal DIYers panic. Follow these steps to ensure your creations arrive at the venue looking flawless.
- The Box Method: Do not just put pitchers on the floor of your car. Go to a liquor store and ask for their discarded wine boxes. These boxes have cardboard dividers inside that perfectly cradle the base of ceramic pitchers, preventing them from tipping over or clanking together.
- Water Management: Never transport pitchers completely full of water. Fill them only one-third of the way for the car ride. Bring a clean watering can to the venue and top off the pitchers once they are safely placed on the reception tables.
- Temperature Control: Keep the car air conditioning blasting. Heat is the enemy of fresh cut flowers. If you must store them overnight, keep them in the coolest, darkest room in your house—away from direct sunlight and ripening fruit (which emits ethylene gas that wilts flowers).
| Mechanic / Tool | Purpose | Budget-Savvy Cost |
|---|---|---|
| Coated Chicken Wire | Creates structure, holds stems in place, reusable | $5.00 (per large roll) |
| Waterproof Floral Tape | Secures wire, creates grids over wide openings | $3.00 (per roll) |
| Liquor Store Boxes | Safe, divided transportation for fragile ceramics | $0.00 (100% Free) |
| Heavy-Duty Snips | Cleanly cutting thick stems and wire | $12.00 (One-time investment) |
Conclusion
Wrap-Up: Your Big Day, Your Frugal Way
And there you have it—a complete, master-level guide to turning cheap, discarded thrift store pitchers into jaw-dropping, high-end wedding centerpieces. By embracing the art of the upcycle, you are doing so much more than just saving money. You are injecting your own creativity, resourcefulness, and personal touch into every single table at your reception. You are proving that luxury is not about how much money you spend; it is about the cleverness and care you put into the details.
Whether you chose the rugged leather-bound woodland look, the delicate decoupaged Chinoiserie, or the sleek matte black modern design, you have successfully beaten the wedding industry markup. So, take a step back, admire your handiwork, and enjoy the profound satisfaction of knowing you created something beautiful out of almost nothing. Now, go hit those thrift stores, grab those paint brushes, and have the most incredibly stylish, budget-savvy wedding of the year!

Makenzie is the founder and lead writer at MoneyHackTips.com — a personal finance blog dedicated to delivering street-smart financial wisdom for real people on real budgets. With 300+ published articles covering everything from debt management to investing fundamentals, Makenzie’s mission is to make every dollar work harder. When not writing about money hacks, Makenzie is testing frugal living strategies, optimizing side hustles, and helping readers build financial freedom from scratch.


