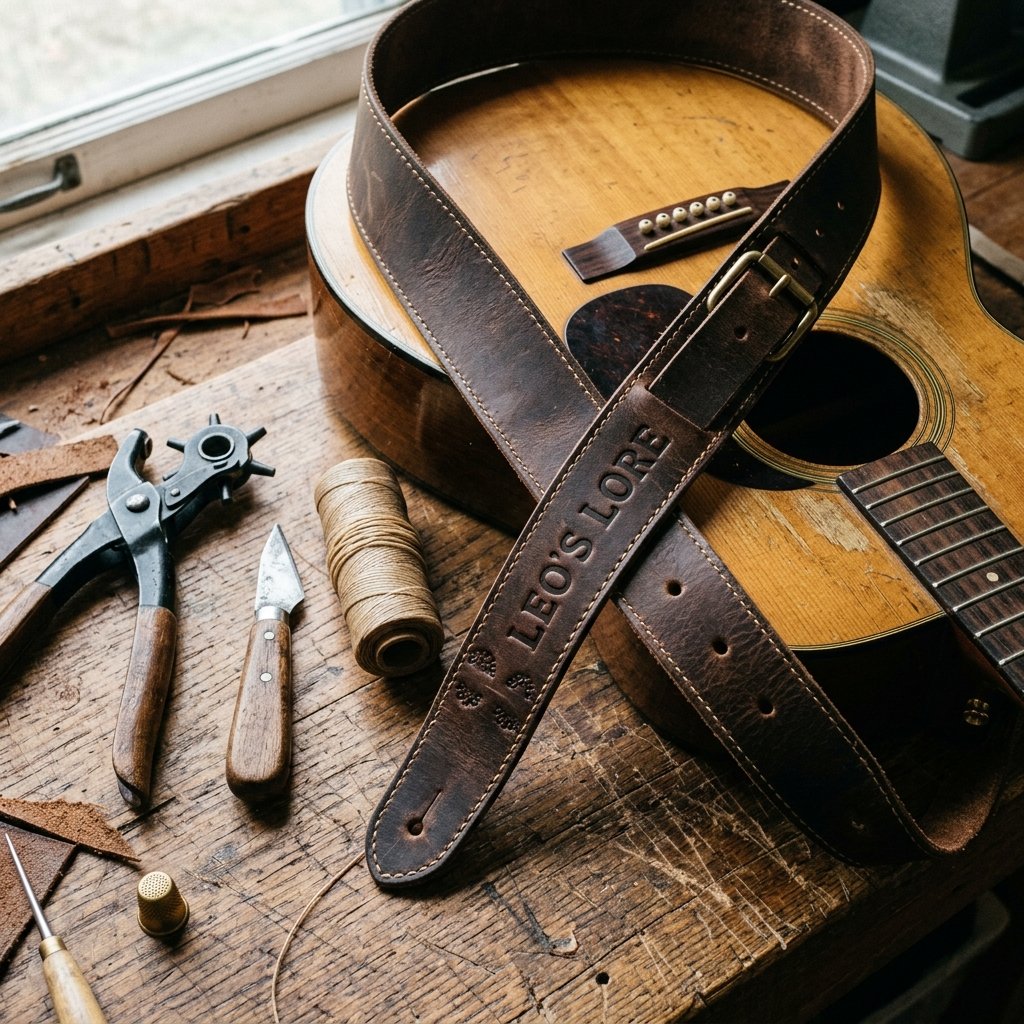

There is something inherently soulful about the combination of wood, wire, and worn leather. For the musician in your life, a guitar isn’t just an instrument; it’s an extension of their identity. However, if you’ve ever stepped into a high-end music boutique, you know that a genuine, thick, full-grain leather strap can easily command a price tag of $80 to $150. That is a steep price for a piece of gear that is essentially a long strip of hide. But here is the clever secret: the world is full of high-quality leather just waiting for a second act. By upcycling thrifted belts or leather scraps, you can craft a bespoke, ruggedly elegant guitar strap that feels like a vintage heirloom from day one.
This project is for the resourceful gift-giver who isn’t afraid to get their hands a little dirty. Whether you are a handy parent looking to surprise a musical child or a crafty partner wanting to give a gift with real weight and meaning, this guide will walk you through the process of turning ‘trash’ into a professional-grade accessory. We are talking about a 100% custom piece that beats the mass-produced nylon straps any day of the week. Let’s roll up our sleeves and build something that will last through a thousand performances.
The Resourceful Scavenger: Sourcing High-Quality Leather
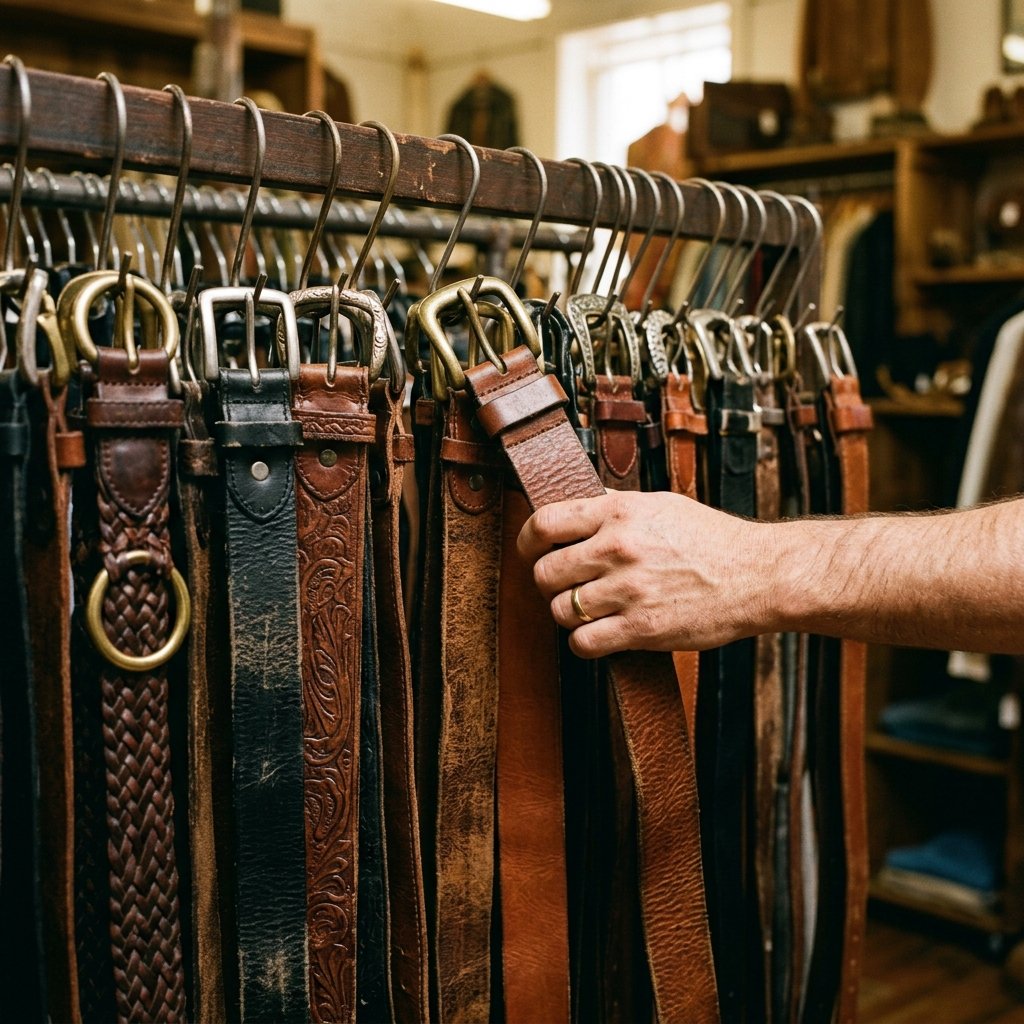
The secret to a high-end look on a Dollar Tree budget is the quality of your raw materials. You aren’t looking for ‘genuine leather’—which is often just leather dust glued together—you are hunting for full-grain or top-grain leather. The best place to find this? The thrift store belt rack. Look for extra-long, wide belts that are thick and sturdy. A single heavy-duty work belt or a vintage ’70s wide belt can serve as the primary anchor for your strap.
What to Look For
- Thickness: Aim for leather that is at least 3mm to 4mm thick. If it’s too thin, it will stretch and fail under the weight of a heavy electric guitar.
- Width: A standard guitar strap is 2 inches wide. While most belts are 1.5 inches, you can use them as the ‘adjustment’ tail or find extra-wide fashion belts for the main shoulder section.
- Suppleness: Avoid leather that is cracked or ‘rotting.’ You want a piece that feels oily and flexible, not brittle.
| Source Material | Potential Cost | Quality Level |
|---|---|---|
| Thrifted Work Belt | $2.00 – $5.00 | High (Full Grain) |
| Old Leather Jacket Scraps | $5.00 – $10.00 | Medium (Supple but thin) |
| Upholstery Remnants | $0.00 – $3.00 | Varies |
The Minimalist Toolbelt: What You Actually Need
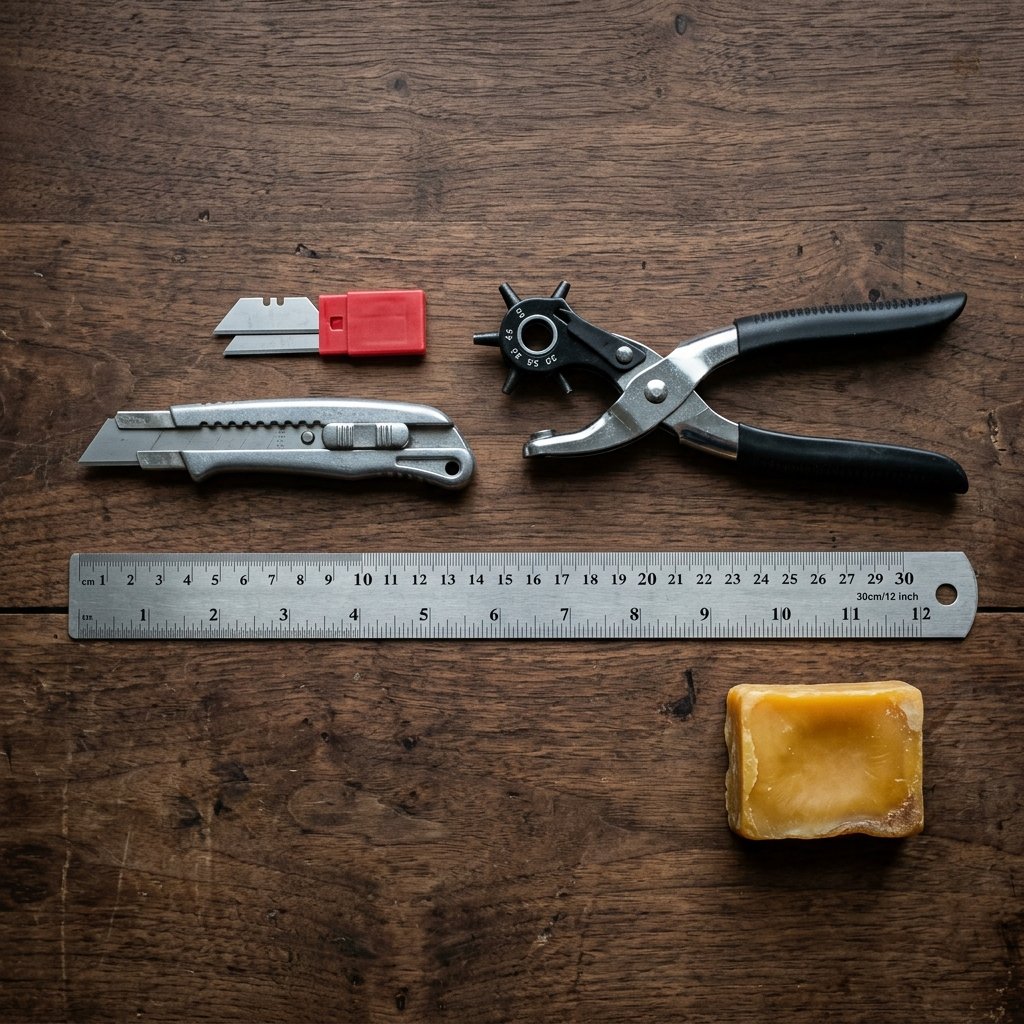
You don’t need a thousand-dollar leather studio to make a professional strap. You just need a few specific, budget-friendly tools that you likely already have in your garage or can pick up for the price of a latte. The goal is precision and durability. If you’re a frugal DIYer, you probably already have a utility knife and a metal ruler. The only ‘specialty’ item is a rotary leather punch, which is a $8 investment that will serve you for years of future projects.
The Essential Checklist
- Heavy-Duty Utility Knife: For clean, straight cuts. A fresh blade is non-negotiable.
- Rotary Leather Punch: To create the holes for the guitar pins.
- Metal Ruler: Essential for keeping your lines straight and your measurements exact.
- Waxed Polyester Thread: If you choose to do any decorative stitching, this is the gold standard for strength.
- Beeswax or an Old Candle: To burnish and smooth the edges of the leather for that ‘pro’ finish.
Safety First: Leather is tough, and you will need to apply pressure. Always cut away from your body and keep your fingers clear of the metal ruler’s edge. A sharp blade is actually safer than a dull one because it requires less force to move through the material.
Engineering the Ergonomics: Measuring for Comfort
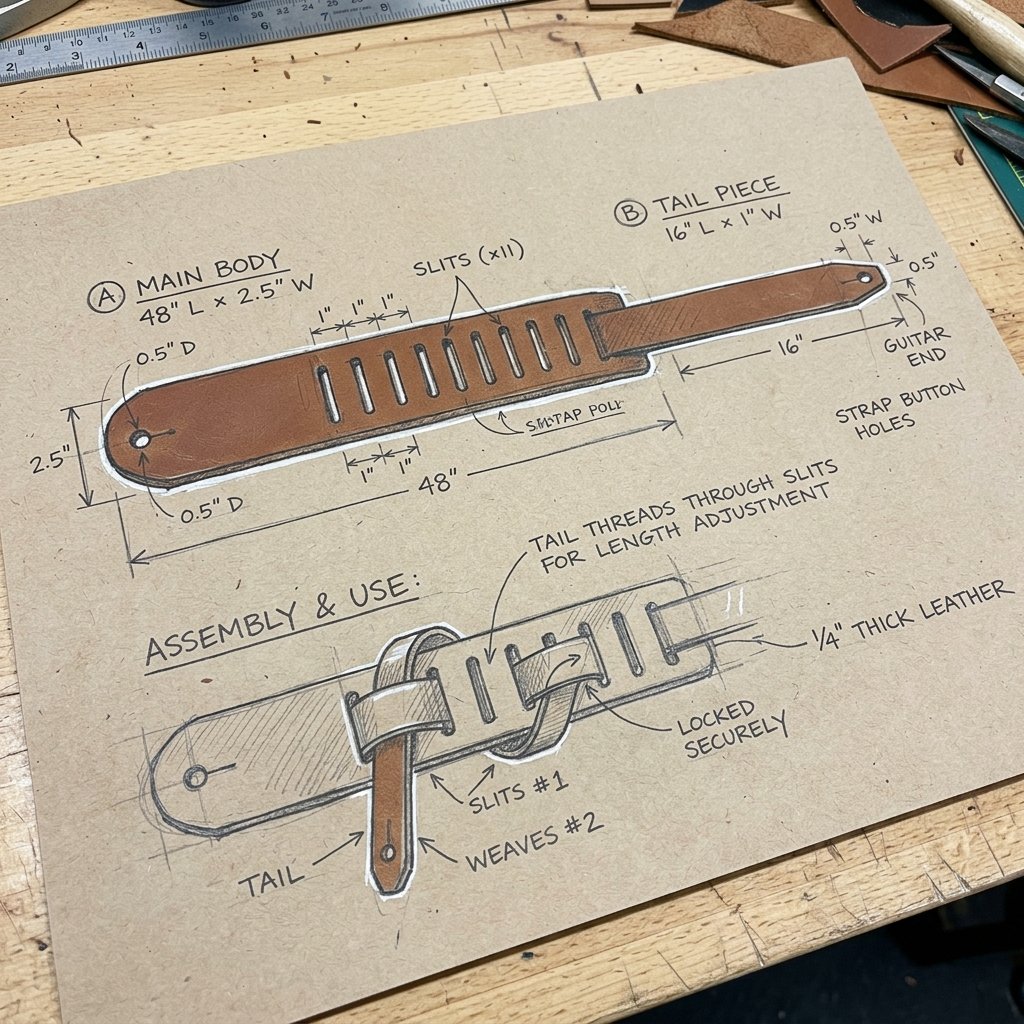
A guitar strap isn’t just a string; it’s a weight-distribution system. If it’s too short, the guitar sits at the chin; too long, and it’s at the knees. The ‘sweet spot’ for most musicians is a total length of 40 to 60 inches. Since most belts aren’t 60 inches long, we use a clever two-piece design: the ‘Main Body’ and the ‘Adjustment Tail.’
The Two-Piece Blueprint
- The Main Body: This should be approximately 30-35 inches long and 2 inches wide. This part sits on the shoulder.
- The Tail: This is a narrower strip (usually 1 inch wide) that is 15-20 inches long. It threads through ‘ladder’ slits in the main body to allow for height adjustment.
- The Pin Holes: You will need a hole at each end. These should be punched with a 3/16 inch hole, with a small 1/2 inch slit cut upward from the hole to allow the guitar’s strap button to slide through and then lock into place.
By using this ‘ladder’ adjustment style, you eliminate the need for expensive metal buckles that can actually scratch the finish of a beautiful guitar. It’s a rugged, all-leather solution that looks incredibly bespoke.
The Craft: Step-by-Step Construction
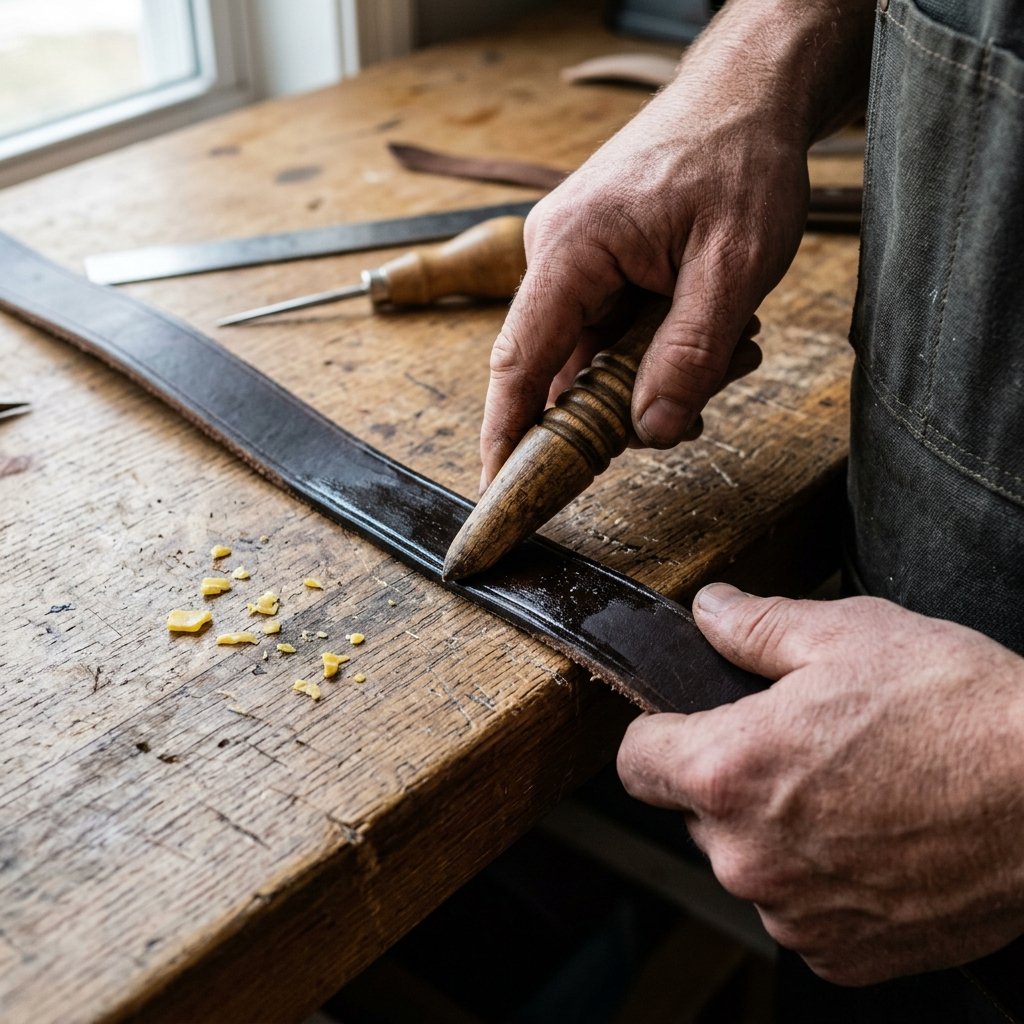
Now comes the satisfying part: the assembly. This is where your thrifted find officially becomes a piece of musical gear. Follow these steps to ensure a clean, professional result that can withstand the rigors of a garage band or a world tour.
The Process
- Leveling the Leather: Use your metal ruler and utility knife to trim your thrifted leather into a consistent 2-inch width. Take your time; straight lines are the difference between ‘homemade’ and ‘handcrafted.’
- Punching the Ladder: On one end of the Main Body, punch a series of holes 1 inch apart, starting 2 inches from the end. Use your knife to connect the holes, creating 1-inch slits. This is where your Tail piece will weave through.
- The Pin Slits: On the front end of the Main Body and the far end of the Tail, punch your 3/16 inch holes. Carefully cut the ‘keyhole’ slit. Pro Tip: Place a small piece of scrap wood under the leather while punching to get a clean, crisp hole.
- Smoothing the Edges: Take your beeswax and rub it vigorously along the raw, cut edges of the leather. Then, take a piece of denim or a smooth wooden dowel and rub the edge until it becomes shiny and dark. This process, called burnishing, seals the fibers and prevents fraying.
| Step | Time Investment | Difficulty |
|---|---|---|
| Cutting & Trimming | 15 Minutes | Moderate |
| Punching & Slitting | 10 Minutes | Easy |
| Edge Burnishing | 20 Minutes | Easy (Requires Elbow Grease) |
| Total Time | 45 Minutes | Beginner Friendly |
The Master’s Touch: Personalization and Patina
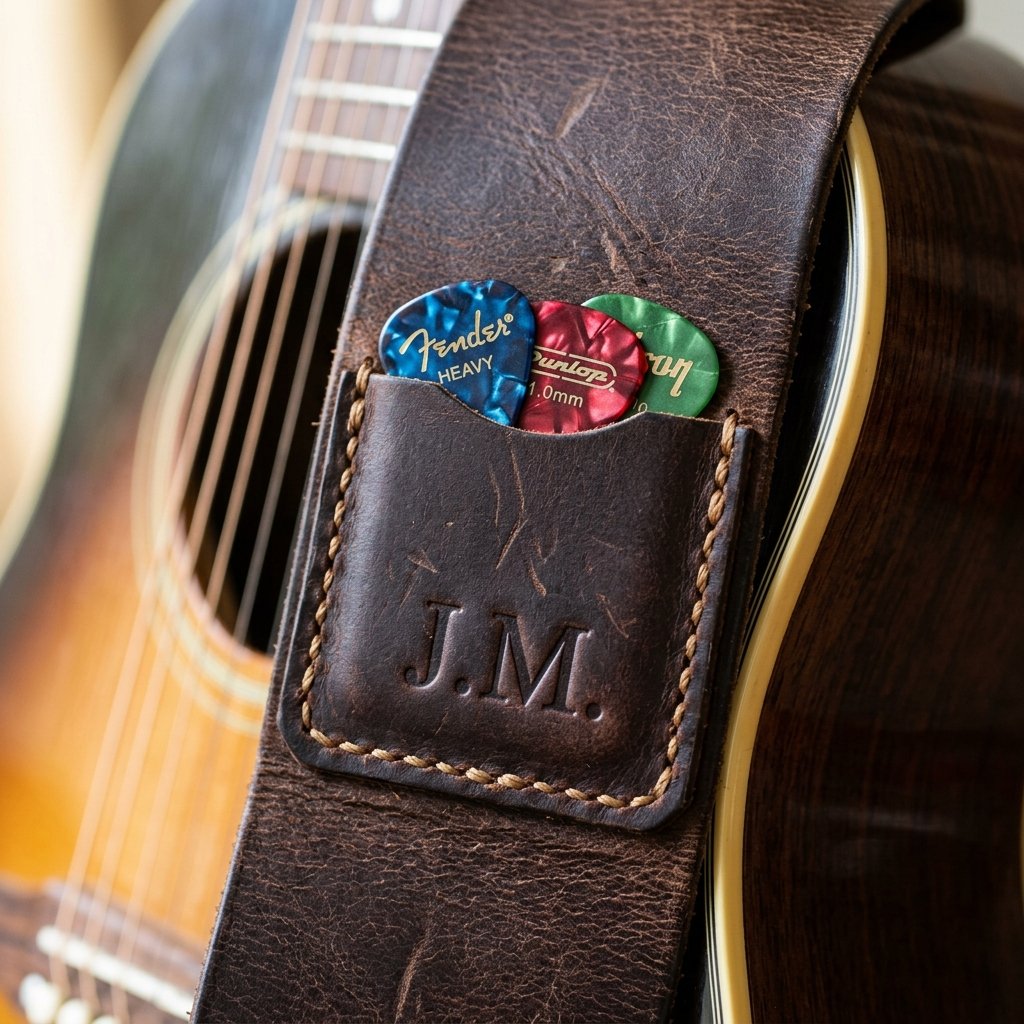
To truly ‘Rock His World,’ you need to add those custom touches that no store-bought strap can offer. This is where you can get creative and make the gift truly personal. Since we saved so much on materials, we can afford to spend a little extra time on the details.
Creative Customization Ideas
- Stamping: Use a cheap set of alphabet stamps (found at most craft stores for $5) to emboss the musician’s initials or band name into the leather. Wet the leather slightly before stamping for a deep, permanent impression.
- The Pick Pocket: Use a small scrap of leather to sew a tiny pocket onto the front of the strap. It’s the perfect size to hold 2 or 3 guitar picks, ensuring they are always within reach during a solo.
- Distressing: If the leather looks too new, rub it with a bit of high-grit sandpaper or a little bit of coffee grounds to give it that ‘toured-for-twenty-years’ look.
- Conditioning: Finish the entire piece with a coat of olive oil or dedicated leather conditioner. This will darken the color and give it a masculine-elegant sheen.
Budget Mantra: A gift’s value is not measured by the receipt, but by the resourcefulness of the maker. A hand-stamped, upcycled strap tells a story that a plastic-wrapped one never could.
Conclusion
Building an upcycled leather guitar strap is more than just a DIY project; it is an act of creative rebellion against the throwaway culture of modern retail. For less than $10 and an hour of your time, you have created a rugged, functional piece of art that supports the music of someone you care about. This strap will age beautifully, picking up its own ‘scars’ and stories alongside the musician. Whether it’s for Father’s Day, a birthday, or a ‘congrats on the first gig’ surprise, this gift carries the weight of your effort and the soul of the materials you rescued. Now, go find that perfect belt and start crafting—your musician’s guitar is waiting for its new best friend.

Makenzie is the founder and lead writer at MoneyHackTips.com — a personal finance blog dedicated to delivering street-smart financial wisdom for real people on real budgets. With 300+ published articles covering everything from debt management to investing fundamentals, Makenzie’s mission is to make every dollar work harder. When not writing about money hacks, Makenzie is testing frugal living strategies, optimizing side hustles, and helping readers build financial freedom from scratch.