The Playroom Apocalypse Meets Its Match
We have all been there: that moment of total surrender when you realize the playroom floor has been completely conquered by a literal mountain of plush toys. As a frugal DIYer, you know that buying a plastic, store-bought organizer isn’t just a blow to your budget, it’s a missed opportunity for a clever upcycling win. Enter the Genius No-Sew DIY T-Shirt Yarn Toy Hammock. This project is the ultimate ‘trash-to-treasure’ maneuver. By repurposing those old, stretched-out T-shirts that were destined for the rag bin, you can create a high-capacity, ruggedly elegant storage solution for $0. This isn’t just about cleaning up; it’s about reclaiming your space with a crafty, masculine-elegant aesthetic that looks like it belongs in a high-end boutique rather than a bargain bin.
The Strategy: Why T-Shirt Yarn Beats Store-Bought Plastic

When it comes to organization, flexibility is king. Store-bought mesh hammocks are often flimsy, prone to tearing, and frankly, they look cheap. By making your own ‘Tarn’ (T-shirt yarn), you are utilizing the natural elasticity and durability of jersey cotton. This material stretches to accommodate the bulkiest of teddy bears while maintaining its structural integrity. It is a resourceful solution for the handy parent who values both form and function.
The Budget Breakdown
Before we dive into the ‘how-to,’ let’s look at the cold, hard numbers. A typical hanging toy net can cost you anywhere from $15 to $35 at a big-box retailer. Our DIY version? It costs exactly what you paid for those old shirts—which is likely nothing.
| Feature | Store-Bought Mesh Net | DIY T-Shirt Yarn Hammock |
|---|---|---|
| Cost | $15 – $35 | $0.00 |
| Durability | Low (Plastic Mesh) | High (Cotton Jersey) |
| Customization | None | Infinite (Color & Size) |
| Time to Make | Shipping Time (2-5 days) | 45 Minutes |
The frugal crafter’s mantra: Never buy what you can build better for free.
Scavenging Your Supplies: The Perfect Shirt Selection

Not all T-shirts are created equal. To ensure your hammock has that professional, rugged look, you need to be selective about your materials. Look for 100% cotton jersey. Avoid shirts with large, stiff plastic screen prints, as these will crack and make your yarn lumpy. Side-seam-free shirts (tubular knit) are the gold standard here because they allow for a continuous, unbroken strand of yarn.
Materials Needed
- 3 to 5 Large T-Shirts (The bigger the shirt, the longer the yarn).
- Fabric Scissors (Must be sharp for clean edges).
- A Measuring Tape (For consistent knot spacing).
- Two or Three Wall Hooks (Command hooks or heavy-duty screw-ins).
Pro Tip: Use a mix of colors like charcoal grey, navy blue, and heathered oatmeal to create a sophisticated, masculine-elegant palette that fits any modern home decor.
The ‘Tarn’ Factory: How to Cut Continuous Yarn
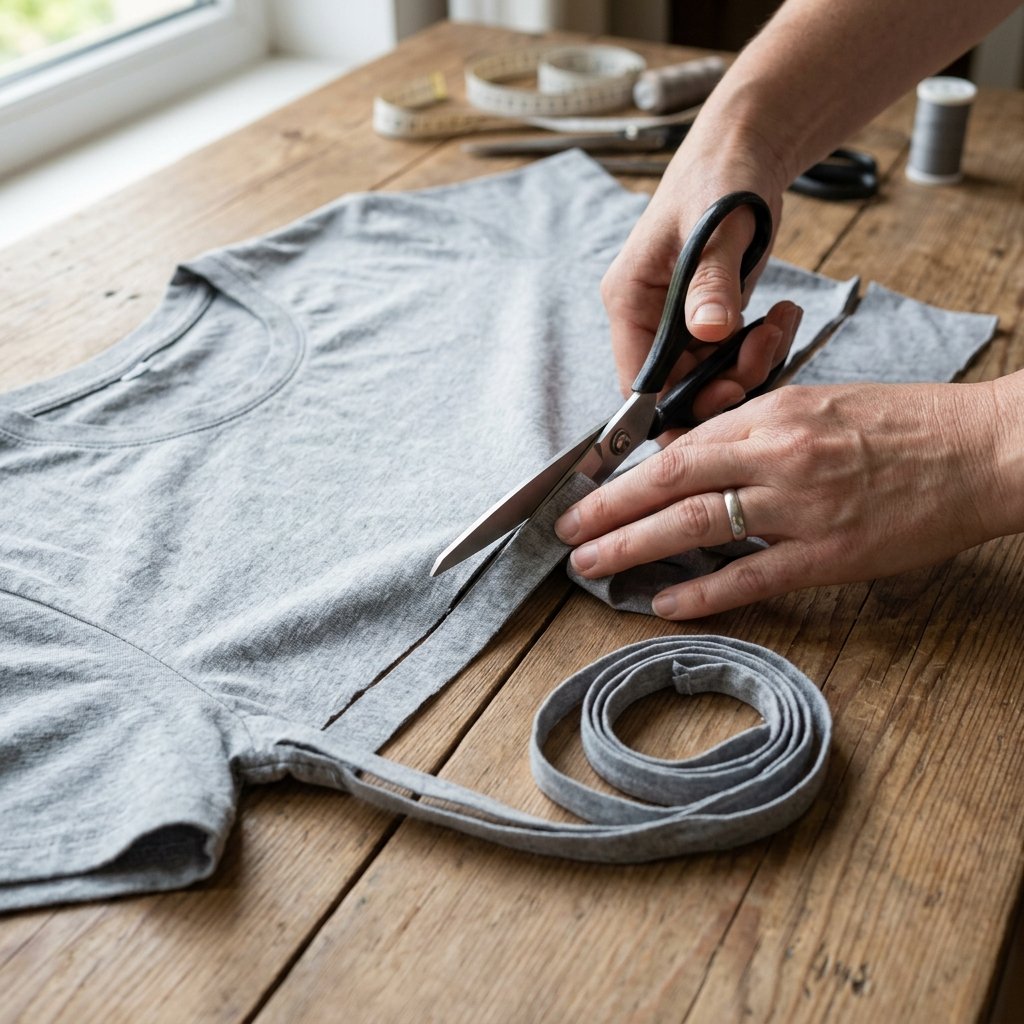
The secret to a no-sew hammock is creating one long, continuous strand of yarn from a single shirt. This eliminates the need for messy knots or sewing pieces together. Follow these steps to become a T-shirt yarn pro:
- Prep the Shirt: Lay the shirt flat and cut off the bottom hem and the top part (from the armpits up). You are left with a rectangular tube of fabric.
- The Fringe Cut: Fold the tube in half, but leave about 1 inch of the bottom layer peeking out past the top layer.
- The Slits: Cut strips about 1 inch wide across the folded fabric, stopping just as you hit that 1-inch overlap. Do not cut all the way through!
- The Diagonal Connection: Open the shirt so the uncut 1-inch strip is in the center. Cut diagonally from the first slit to the second, the second to the third, and so on. This creates one long spiral.
- The Stretch: This is the magic part. Pull the yarn taut. The raw edges will curl inward, creating a clean, rounded cord.
Precision in the cut leads to strength in the knot. Take your time with the spiral.
The Macramé-Lite Weaving Technique
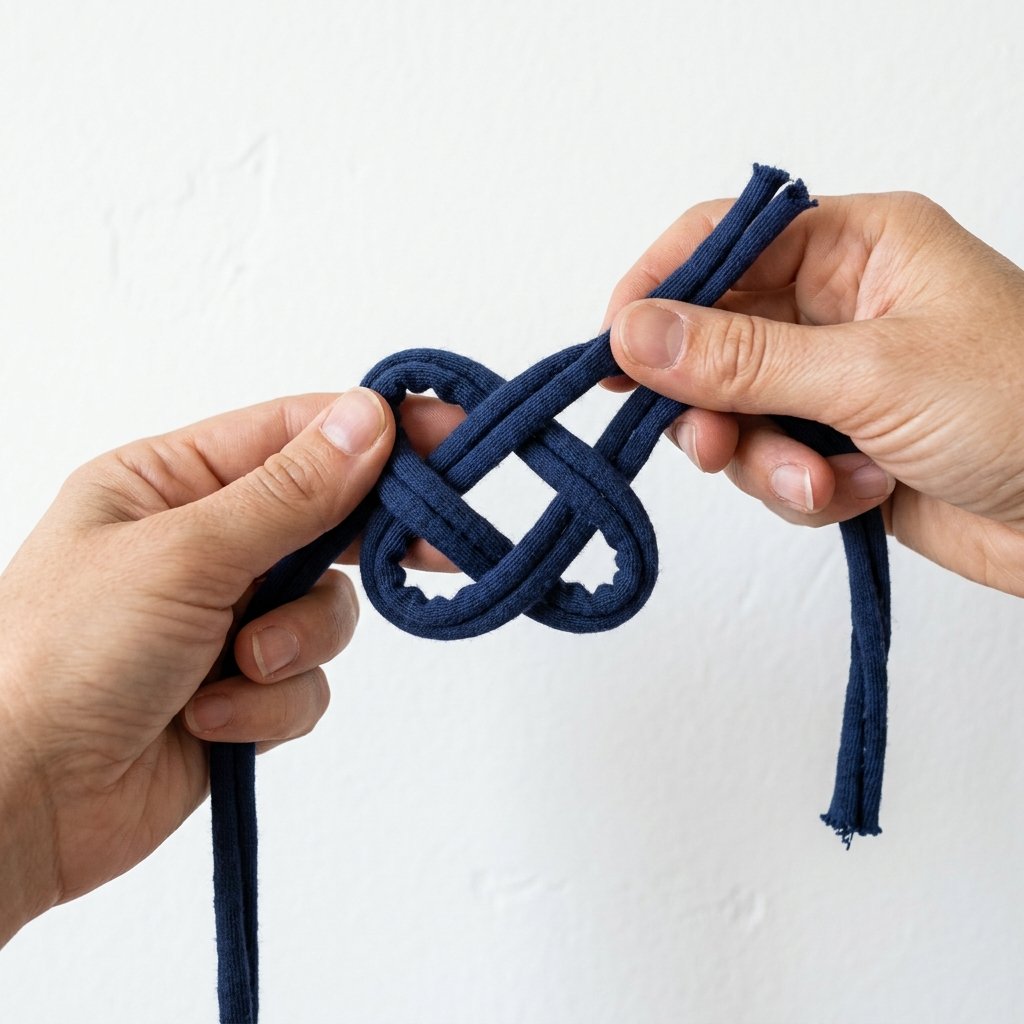
We are going to use a simplified diamond mesh knotting technique. It’s rugged, fast, and requires zero needles. We will start with a base ‘anchor’ cord and build the net downward.
Step-by-Step Construction
- The Anchor: Cut a piece of yarn 4 feet long. Secure it between two chairs or tape it to a table. This is your top edge.
- The Vertical Strands: Cut 12 to 16 strands of yarn, each 6 feet long. Fold them in half and loop them over the anchor cord using a ‘Lark’s Head’ knot. Space them about 3 inches apart.
- The First Row of Knots: Take one strand from the first pair and one from the second pair. Tie them together in a simple overhand knot about 4 inches down from the anchor. Repeat across the row.
- The Diamond Pattern: For the next row, take the strands and offset them, tying the neighboring strands together another 4 inches down. This creates the ‘diamond’ mesh.
- The Taper: To create the hammock shape, continue for 5-6 rows, then tie all remaining strands together in one large, decorative ‘finishing knot’ at the bottom.
Knot Spacing Guide
| Toy Size | Knot Spacing (Inches) | Mesh Density |
|---|---|---|
| Small (Matchbox/Figures) | 1.5 – 2 inches | Tight |
| Medium (Standard Plush) | 3 – 4 inches | Medium |
| Large (Jumbo Bears) | 5 – 6 inches | Loose |
Installation: Hanging for Maximum Load

A toy hammock is only as good as its anchors. Since T-shirt yarn has some ‘give,’ you want to mount your hooks slightly higher than you think you need. For a corner mount, place two hooks on adjacent walls about 3 feet apart, and a third hook in the very corner for a ‘triple point’ mount if you have a massive toy collection.
Safety First
Safety Note: Ensure the hammock is hung out of reach of infants and toddlers who might try to climb it. Use wall anchors if you are screwing into drywall to prevent the weight of the toys from pulling the hooks out.
Once hung, give the hammock a firm tug. The T-shirt yarn should stretch and settle. Now, load it up! Start with the largest items in the back and smaller plushies in the front for a curated, organized look.
Maintenance and Styling Hacks

One of the best features of this DIY project is that it is 100% washable. If the hammock gets dusty, simply unhook it, toss it in a mesh laundry bag, and run it through a cold cycle. Let it air dry to maintain the elasticity of the yarn.
Elevate the Look
- Dip-Dye: If you used white T-shirts, you can dip-dye the bottom ‘finishing knot’ in indigo or forest green for a trendy ombre effect.
- Wooden Beads: Slide large wooden craft beads onto the strands before knotting for a sophisticated, ‘Boho-meets-Modern’ vibe.
- Tassels: Use leftover scraps of yarn to create thick tassels to hang from the anchor points.
This project proves that being budget-savvy doesn’t mean sacrificing style. You’ve just turned clutter into a design feature.
Conclusion
The Victory of the Frugal Maker
By choosing to upcycle rather than purchase, you’ve saved $30, kept fabric out of a landfill, and solved the playroom clutter crisis in less time than it takes to watch a movie. The Genius No-Sew DIY T-Shirt Yarn Toy Hammock is a testament to what a resourceful parent can achieve with a pair of scissors and a bit of cleverness. Your playroom is now floor-clear, your toys have a rugged new home, and you’ve mastered the art of ‘Tarn.’ Now, go enjoy that clean floor—you’ve earned it!

Makenzie is the founder and lead writer at MoneyHackTips.com — a personal finance blog dedicated to delivering street-smart financial wisdom for real people on real budgets. With 300+ published articles covering everything from debt management to investing fundamentals, Makenzie’s mission is to make every dollar work harder. When not writing about money hacks, Makenzie is testing frugal living strategies, optimizing side hustles, and helping readers build financial freedom from scratch.