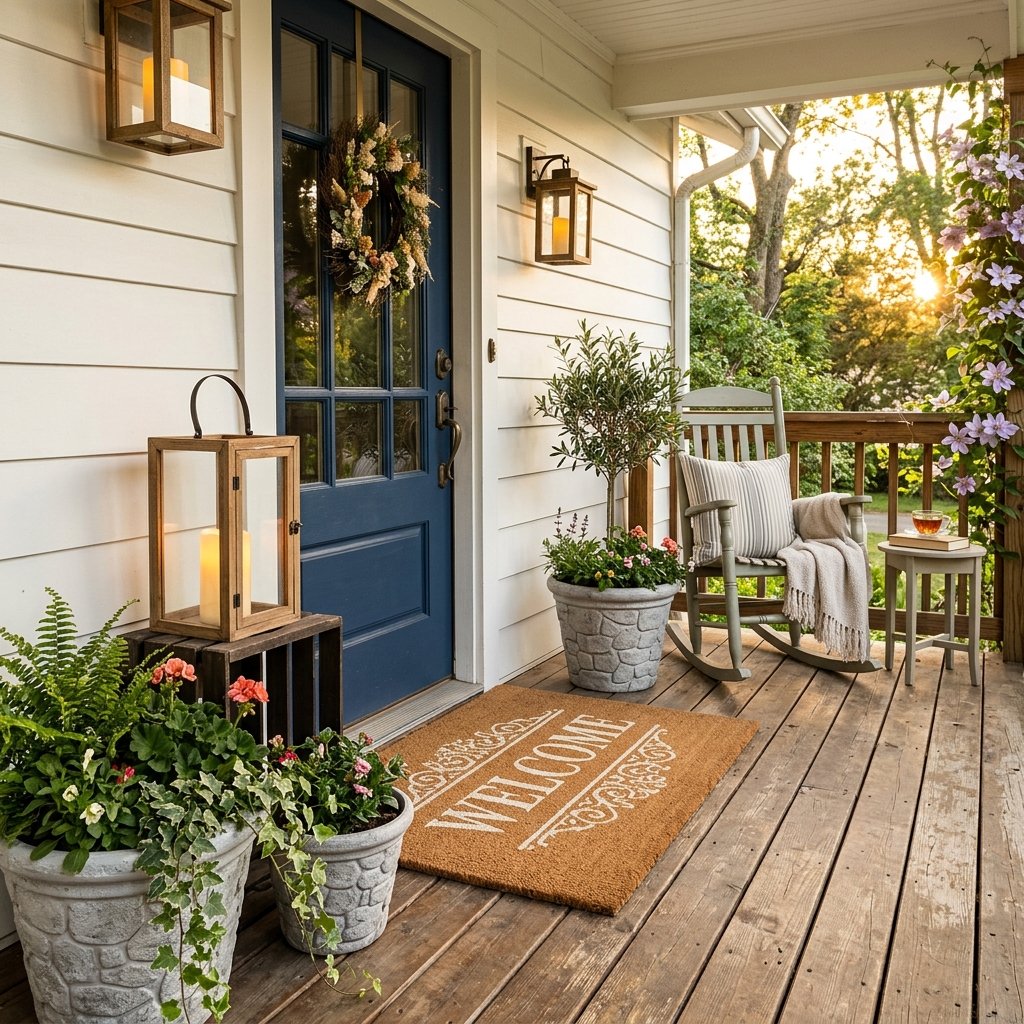

Let us set the scene: You pull into your driveway after a long day, and your eyes are immediately drawn to your front porch. Is it a welcoming, magazine-worthy oasis that screams curb appeal? Or is it a barren concrete slab with a faded, sad-looking welcome mat and a plastic planter from three summers ago? If it is the latter, do not panic. You do not need a $500 budget, a professional landscaper, or a shopping spree at a high-end boutique to fix it. You just need a healthy dose of resourcefulness, a free weekend, and a trip to your local Dollar Tree.
Welcome to the ultimate frugal DIYer’s guide to achieving a luxurious, masculine-elegant, and fiercely budget-savvy front porch makeover. We are talking about taking $1.25 items and upcycling them into heavy-duty, weather-resistant, and aesthetically stunning decor pieces that will have your neighbors begging for your interior designer’s number. As handy upcyclers and crafty experts, we know the secret to high-end design is not about how much you spend; it is about how cleverly you utilize texture, color, and structural ingenuity.
“The most beautiful homes are not bought; they are built with clever hands, a sharp eye for potential, and a budget-savvy mind.”
In this comprehensive masterclass, we are breaking down 10 genius Dollar Tree front porch makeover hacks. From mixing custom faux-stone textures to engineering outdoor lighting without hardwiring, these projects are practical, durable, and incredibly satisfying to build. Roll up your sleeves, plug in the hot glue gun, and let us turn that trash into absolute treasure.
Foundation Pieces: High-End Planters & Custom Mats

The foundation of any stunning porch is its greenery and the welcome mat. These are the anchor pieces that establish the aesthetic. Retailers know this, which is why large concrete planters and custom coir mats carry exorbitant price tags. But we are going to bypass the retail markup entirely with our first two genius hacks.
Hack 1: The Baking Soda Faux-Stone Planter Trick
Those massive, heavy concrete and stone planters you see at high-end nurseries? They look incredible, but they cost a fortune and are a nightmare to move. Instead, we are taking cheap, lightweight plastic bins and buckets from Dollar Tree and giving them a rugged, masculine faux-stone finish using a simple chemistry trick.
- Prep the Surface: Take a large plastic Dollar Tree bucket or wastebasket. Scuff the exterior lightly with sandpaper to give the paint something to grip.
- Mix the Magic Potion: In a disposable bowl, mix 2 parts matte exterior acrylic paint (a deep charcoal or warm taupe works best) with 1 part baking soda. Stir until it forms a thick, fluffy, mousse-like consistency.
- Apply the Texture: Use a cheap chip brush to stipple (dab) the mixture onto the plastic. Do not brush it on smoothly; you want it to look rough, porous, and organic like real stone.
- Layer and Seal: Once the first coat dries (about 30 minutes), dry-brush a slightly lighter shade of paint over the high points to create faux depth. Finish with a spray of matte clear coat for weatherproofing.
Safety Note: Always spray clear coats and sealants in a well-ventilated outdoor area. While baking soda and acrylic paint are non-toxic, aerosol sealants require proper airflow.
Hack 2: Designer Stenciled Coir Welcome Mats
A blank coir mat from a hardware store or discount shop is a blank canvas. Do not pay $40 for a mat with a clever saying when you can make a sharper, more personalized version yourself.
- Create the Stencil: Use a craft cutting machine, or simply print out a bold, masculine font or geometric pattern on cardstock and cut it out with a utility knife.
- Secure and Tape: Pin the stencil tightly to the blank mat using sewing pins. This prevents the paint from bleeding under the edges of the stencil.
- Paint with Precision: Use heavy-duty outdoor acrylic paint or Flex Seal spray. Use a stencil brush in a straight up-and-down motion. Do not sweep the brush, or you will push paint under the stencil.
- Cure: Let it dry for 24 hours before stepping on it.
| Porch Item | High-End Store Cost | Dollar Tree DIY Cost | Total Savings |
|---|---|---|---|
| Large Faux Stone Planter | $89.00 | $4.50 | $84.50 |
| Custom Typography Coir Mat | $45.00 | $7.00 | $38.00 |
Vertical Space & Lighting: Hanging Gardens & Rustic Lanterns
If you have a small porch, the floor space is premium real estate. To make the area feel grand and expansive, you must draw the eye upward. Utilizing vertical space and adding ambient, warm lighting are the hallmarks of a professionally styled exterior.
Hack 3: The Tension Rod Vertical Garden
This is a brilliant, renter-friendly hack that requires zero drilling. By utilizing the space between your porch floor and the overhang (or between two sturdy pillars), you can create a lush, floating garden.
- Sourcing the Rod: Purchase a heavy-duty tension shower rod (you may need to venture to a discount hardware store for a tall one, but Dollar Tree sells smaller ones perfect for window frames).
- The Hanging Mechanism: Grab a pack of heavy-duty black S-hooks and small galvanized metal buckets from the craft aisle at Dollar Tree.
- Assembly: Install the tension rod vertically or horizontally, ensuring it is cranked tight. Hang the S-hooks from the rod, and attach the metal buckets.
- Planting: Drill a single drainage hole in the bottom of each bucket. Fill with trailing plants like pothos, ivy, or creeping jenny to create a cascading waterfall of greenery.
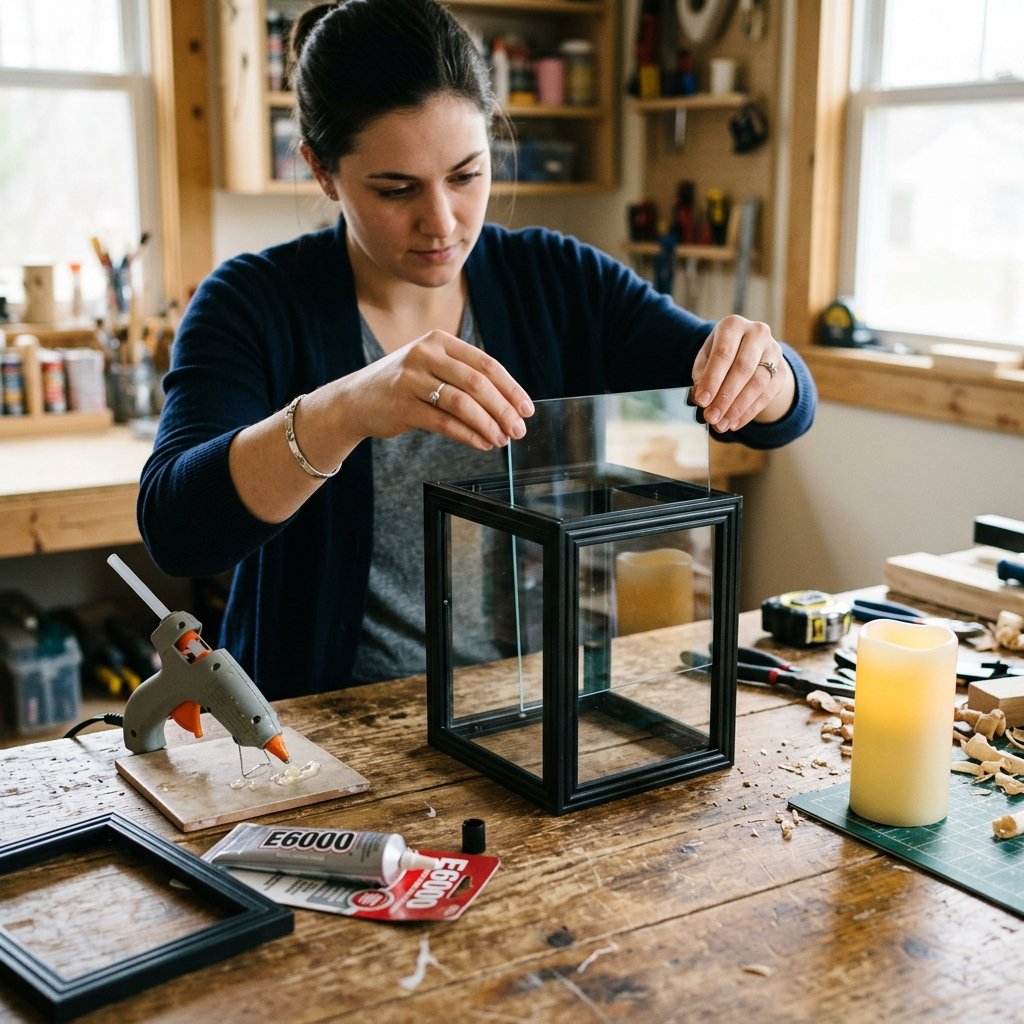
Hack 4: High-End Lantern Dupes from Picture Frames
Those gorgeous, oversized black metal lanterns that hold pillar candles look stunning flanking a front door. We are going to build exact replicas using $1.25 plastic picture frames.
- Deconstruct the Frames: Buy four identical 5×7 or 8×10 frames from Dollar Tree. Remove the glass, the backing, and the metal prongs. Save the glass!
- Glue the Structure: Run a bead of E6000 adhesive (for strength) and hot glue (for instant hold) along the long edges of the frames. Press them together to form a square box.
- Create the Roof: Use four square wooden coasters or thick foam board pieces, gluing them at an angle to form a pitched roof, topped with a plastic shower curtain ring as the handle.
- Paint and Reassemble: Spray paint the entire structure matte black or oil-rubbed bronze. Once dry, carefully glue the glass panels back onto the inside of the frames.
- The Illumination: Place an LED flameless candle (also from Dollar Tree) inside. Never use a real flame in a DIY plastic lantern!
Pro-Tip: The combination of E6000 and hot glue is the craftsman’s secret weapon. The hot glue holds the pieces together instantly for 5 minutes, acting as a clamp while the heavy-duty E6000 cures over 24 hours for a permanent, weatherproof bond.
| Material Needed | Purpose | Estimated Cost |
|---|---|---|
| 4x Dollar Tree Frames | Lantern Walls | $5.00 |
| E6000 & Hot Glue | Structural Integrity | $2.00 |
| Matte Black Spray Paint | Faux Metal Finish | $4.00 |
| LED Pillar Candle | Ambient Lighting | $1.25 |
Seating & Comfort: Nautical Ottomans & Faux Florals
A porch should invite you to sit down, take off your boots, and stay awhile. Adding textured seating elements and vibrant, long-lasting florals makes the space feel lived-in and loved. Here is how to achieve that rugged, comfortable aesthetic on a dime.
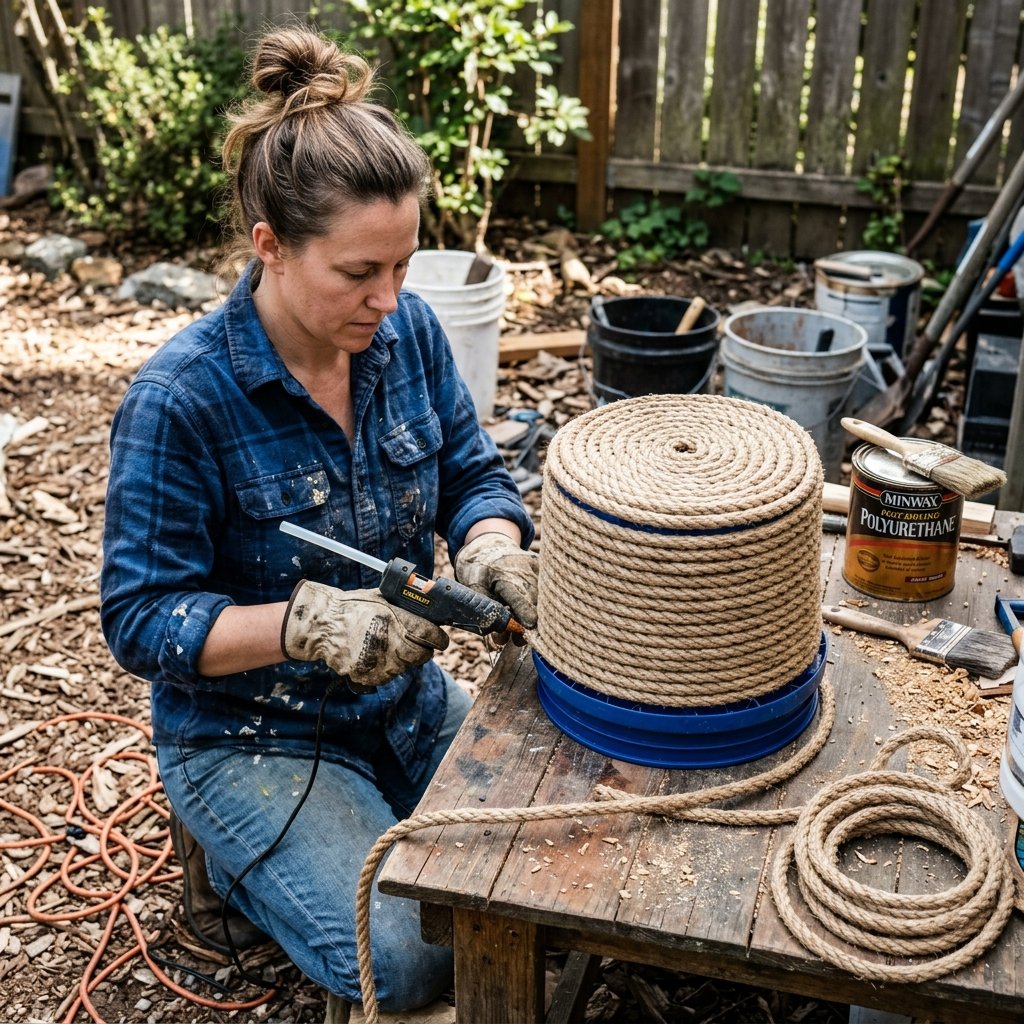
Hack 5: Woven Nautical Rope Tire/Bucket Ottoman
Whether you use an old spare tire sitting in your garage or a large plastic muck bucket, wrapping it in thick, masculine nautical rope transforms it into a high-end, coastal-inspired ottoman or side table.
- The Base: Clean your tire or bucket thoroughly. If using a bucket, flip it upside down so the flat bottom becomes the top of your ottoman.
- The Center Coil: Starting at the exact top center of the bucket, apply a generous dollop of hot glue. Coil the end of a thick Dollar Tree nautical rope tightly into a spiral, pressing it into the glue.
- Wrap and Glue: Continue coiling the rope outward in a tight spiral, gluing every two inches. Once you reach the edge, begin wrapping down the sides of the bucket.
- Secure the Ends: When you reach the bottom, cut the rope at an angle, tuck the tail under the previous row, and secure it with a heavy application of construction adhesive.
- Weatherproofing: Paint the entire rope surface with a clear, water-based polyurethane to protect it from moisture and prevent fraying.
Hack 6: UV-Proof Faux Floral Window Boxes
We all know that real flowers require maintenance, water, and perfect sunlight. Dollar Tree faux florals are a fantastic, zero-maintenance alternative, but they have one major enemy: the sun. Left untreated, they will fade to a sad, pale blue in a matter of weeks. Here is the upcycler’s secret to making them look real and last for years.
- Density is Key: The trick to making cheap faux flowers look expensive is density. Buy 3 times the amount you think you need. Pack them tightly into floral foam inside your window boxes.
- Bend and Shape: Cheap flowers look stiff. Take 10 minutes to manually bend every single stem, fluff the petals, and angle them naturally toward where the sun would be.
- The Secret Weapon (UV Spray): Before placing them outside, lay the flowers on a drop cloth and spray them generously with a UV-resistant clear acrylic coating (found at hardware stores). This acts as sunscreen for your fake plants, locking in the vibrant colors.
| DIY Project | Materials Required | Time to Complete | Durability Rating |
|---|---|---|---|
| Nautical Ottoman | Bucket, Rope, Glue, Polyurethane | 45 Minutes | High (Weather-sealed) |
| Faux Floral Box | Faux Florals, Foam, UV Spray | 20 Minutes | Medium (Requires yearly UV spray) |
Overhead Ambience & Railing Upgrades: Solar Chandeliers & Rope Wraps
Now that the ground and eye-level spaces are styled, we must look up and look to the perimeters. Overhead lighting and railing textures are the subtle details that elevate a porch from “nice” to “professionally designed.”
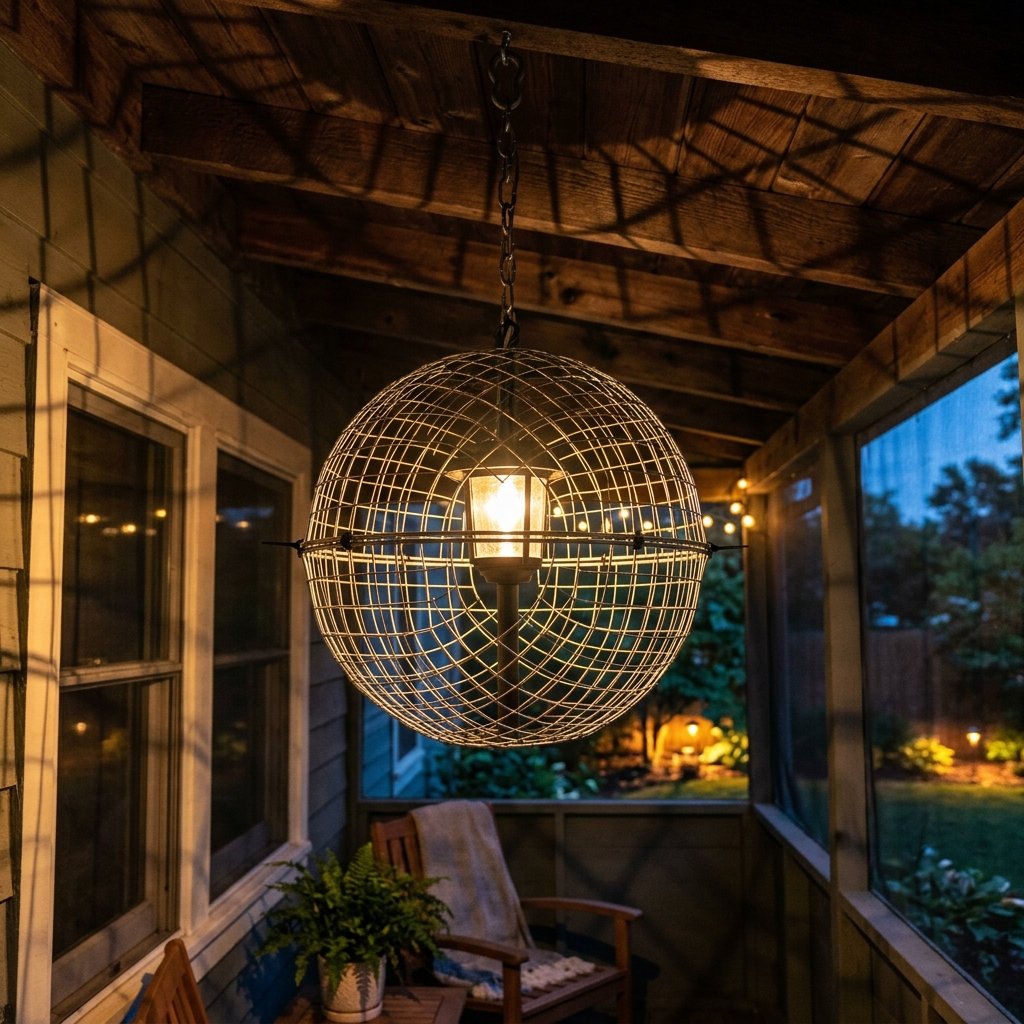
Hack 7: The Wire Basket Solar Chandelier
Hardwiring an outdoor chandelier can cost hundreds of dollars in electrician fees alone. We are going to bypass the wiring completely by utilizing the sun and some clever Dollar Tree hardware.
- The Frame: Purchase two identical wire hanging fruit baskets or wire decorative bowls from Dollar Tree.
- The Core: Take a $1.25 solar pathway light. Remove the stake so you are left with just the solar panel and the light bulb housing.
- Assembly: Zip-tie the solar light securely into the center of one of the wire baskets, ensuring the solar panel faces upward.
- Clam Shell: Place the second wire basket upside down over the first one, creating a wire globe. Zip-tie the edges together and snip the tails of the zip-ties flush for a clean look.
- Hanging: Attach a black metal chain to the top basket and hang it from your porch ceiling where it will receive daytime sunlight. At night, it will cast gorgeous, geometric shadows across your porch.
Hack 8: Bamboo or Nautical Rope Handrail Wrap
Standard metal porch railings can look cold, industrial, and uninviting. Adding a tactile, organic element warms up the entire facade.
“Texture is the unsung hero of outdoor design. Wrapping a cold metal railing in a natural fiber like jute or manila rope instantly adds a rugged, craftsman-style elegance that feels incredible to the touch.”
- Select Your Fiber: Dollar Tree sells small bundles of decorative nautical rope, but for a long railing, you may want to invest in a bulk spool of manila rope from a hardware store.
- The Anchor: Start at the bottom of the railing spindle. Apply a line of heavy-duty construction adhesive to the metal and tightly wrap the rope over it. Secure the very end with a hidden zip-tie until the glue dries.
- The Wrap: Tightly coil the rope up the spindle, pushing each layer down firmly so no metal shows through.
- The Finish: Once you reach the top, cut the rope, glue it heavily, and secure it with another hidden zip-tie. Once the glue cures, cut the zip-ties. The result is a thick, nautical-inspired grip that looks custom-made.
| Lighting/Railing Option | Traditional Cost | DIY Cost | Installation Difficulty |
|---|---|---|---|
| Hardwired Outdoor Chandelier | $250+ (with electrician) | $6.00 | Easy (No wiring) |
| Custom Wood/Textured Railings | $300+ | $15.00 | Moderate (Time-consuming) |
The Finishing Touches: House Numbers & Aged Terracotta
The final layer of our frugal porch makeover involves the small details that tie the whole look together. House numbers are functional but should also be beautiful, and your smaller accent pots need to match the high-end vibe of your new faux-stone planters.
Hack 9: The Cutting Board House Number Plaque
Do not settle for cheap sticker numbers on your mailbox. Create a heavy, substantial house number plaque using a Dollar Tree bamboo cutting board.
- The Base: Lightly sand a bamboo cutting board from the kitchen aisle. Stain it with a dark walnut wood stain or paint it matte black.
- The Backdrop: For a modern look, apply a sheet of Dollar Tree peel-and-stick faux subway tile or metallic backsplash to the center of the cutting board, leaving a one-inch wood border.
- The Numbers: Purchase floating metal house numbers from a hardware store (this is where we splurge a tiny bit for quality, usually $5 each). Drill them through the tile and into the cutting board.
- Mounting: Attach heavy-duty D-rings to the back of the cutting board and hang it proudly next to your front door.
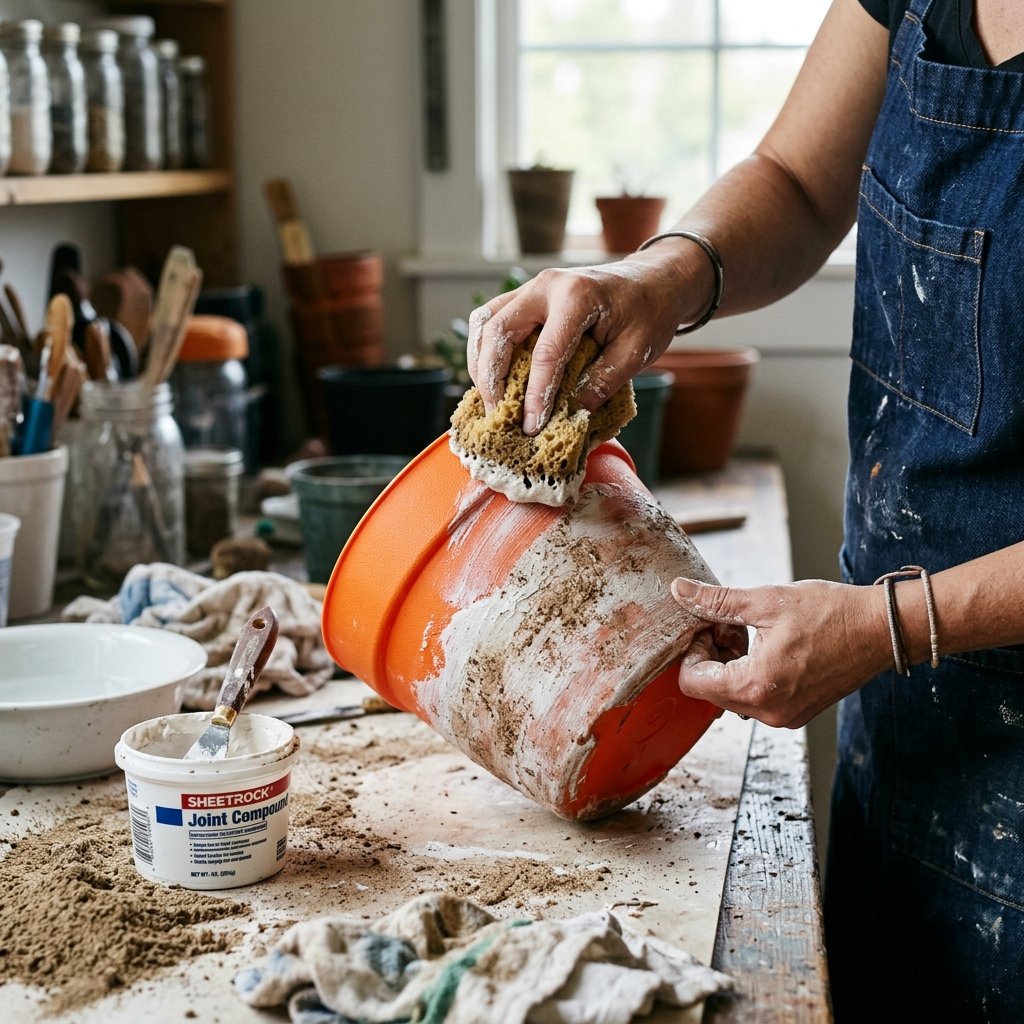
Hack 10: The “Aged Terracotta” Mud Painting Technique
Brand new terracotta pots (even plastic ones) look bright orange and artificial. To give them that coveted, centuries-old European garden aesthetic, we are going to use literal mud and joint compound.
- The Base Coat: Take a cheap plastic pot and paint it with a mix of burnt orange and brown acrylic paint. Let it dry completely.
- The Aging Compound: Take a small amount of Dollar Tree spackle or drywall joint compound. Using a damp sponge, dab the white compound randomly over the pot, focusing on the rim and crevices.
- The Smudge: Before the spackle dries, use a dry rag to aggressively wipe most of it off. You want it to leave behind a dusty, chalky residue that mimics hard water stains and calcium buildup.
- The Dirt: For ultimate realism, rub actual dry garden dirt into the wet paint/spackle mixture. Seal with a matte spray. It will look like an antique pot excavated from a Tuscan villa.
“The secret to an authentic vintage look is imperfection. Do not overthink the spackle application. Nature ages things asymmetrically, and so should you.”
| Detail Item | Store-Bought Price | DIY Upcycle Price | Visual Impact |
|---|---|---|---|
| Custom Address Plaque | $65.00 | $12.00 | High Curb Appeal |
| Aged Vintage Terracotta Pot | $35.00 | $2.50 | Subtle Elegance |
Conclusion
And there you have it, frugal DIYers! A complete, floor-to-ceiling front porch makeover that looks like it belongs in an expensive home decor catalog, all achieved with cleverness, elbow grease, and a handful of $1.25 items from Dollar Tree. By utilizing texture tricks like the baking soda paint method, structural hacks like the tension rod garden, and lighting innovations like the solar wire chandelier, you have completely bypassed the retail markup.
Remember, true style is never about how much money you spend; it is about how much creativity you are willing to invest. Your porch is the handshake of your home—it is the first thing guests see and the last thing they remember. Now, you can welcome them into a space that is rugged, elegant, deeply personal, and fiercely budget-savvy.
So grab your hot glue gun, head to your local dollar store, and start looking at cheap plastic bins and wire baskets not for what they are, but for what they can become. Happy crafting, and enjoy your beautiful new outdoor oasis!

Makenzie is the founder and lead writer at MoneyHackTips.com — a personal finance blog dedicated to delivering street-smart financial wisdom for real people on real budgets. With 300+ published articles covering everything from debt management to investing fundamentals, Makenzie’s mission is to make every dollar work harder. When not writing about money hacks, Makenzie is testing frugal living strategies, optimizing side hustles, and helping readers build financial freedom from scratch.