
Turning Trash into a Front-Row Seat
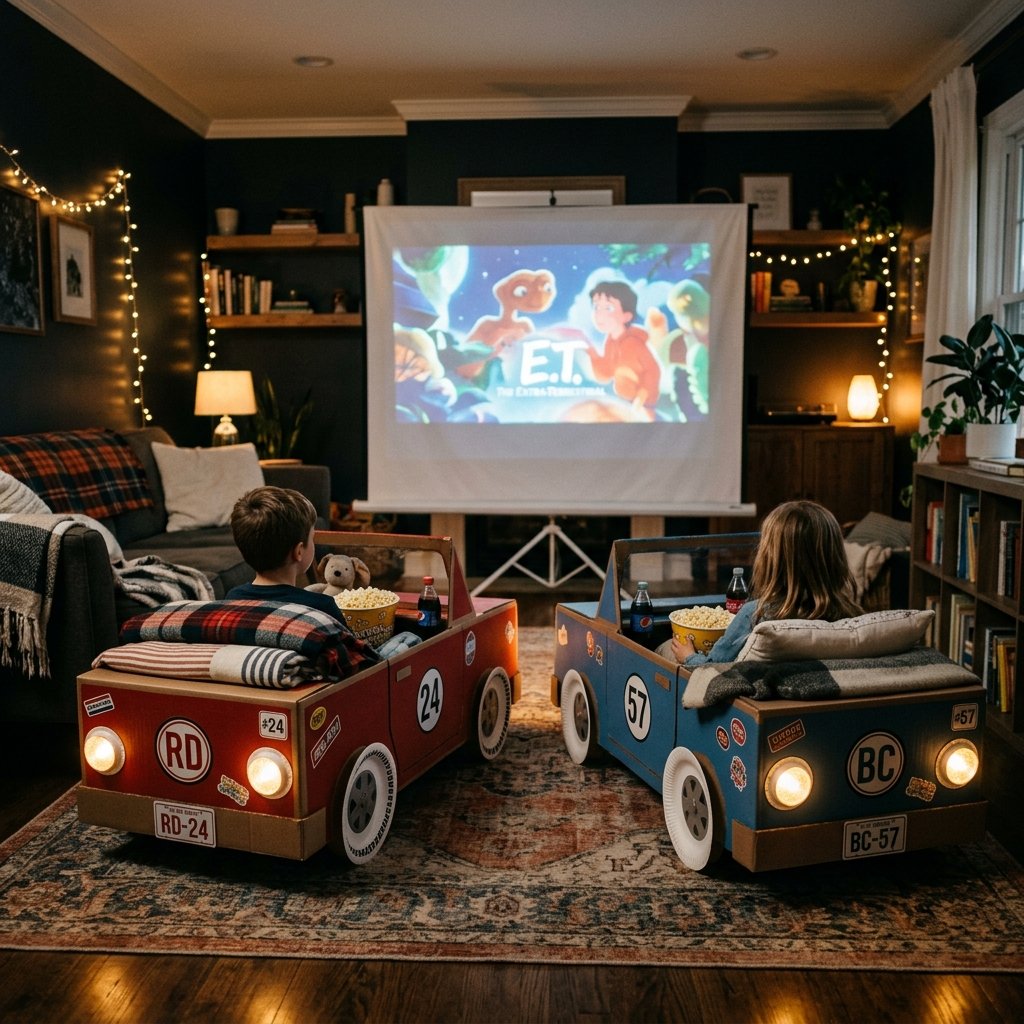
In a world of expensive plastic toys and digital distractions, there is something profoundly satisfying about the humble cardboard box. To a child, it is never just a box; it is a rocket ship, a castle, or in this case, a sleek 1950s convertible ready for the drive-in. As a frugal DIYer, you know that the best memories aren’t bought—they are engineered at the kitchen table with a roll of masking tape and a vivid imagination. This project is the pinnacle of resourceful creativity, allowing you to upcycle those mounting shipping boxes into a high-octane experience that costs $0 to $10 but delivers a million dollars in smiles. We aren’t just making a toy; we are building a vessel for family tradition. Grab your utility knife and let’s get to work on the ultimate ‘trash-to-treasure’ masterpiece.
The Inventory: Sourcing Your Materials for Pennies

Before we start the assembly line, we need to scavenge for parts. The beauty of this project is that most of your ‘high-end’ components are currently sitting in your recycling bin. To achieve a masculine-elegant finish that doesn’t look like a crumpled mess, we need to be selective with our cardboard. Look for double-walled boxes for the main chassis to ensure structural integrity during those high-speed snack runs.
| Material | Upcycled Source | Estimated Cost |
|---|---|---|
| Main Car Body | Large Moving Box or Appliance Box | $0.00 |
| Wheels (4) | Paper Plates or Cardboard Circles | $1.25 |
| Headlights | Plastic Cups or Foil Pie Tins | $0.00 |
| Steering Wheel | Small Pizza Box or Paper Plate | $0.00 |
| Adhesive | Packing Tape & Hot Glue | $2.00 |
| Finish | Leftover House Paint or Dollar Tree Acrylics | $3.00 |
The Pro-Crafter’s Toolkit
- Heavy-duty Utility Knife: For clean, crisp lines (Safety first!).
- Metal Straight Edge: Essential for those straight ‘fender’ cuts.
- Hot Glue Gun: The ‘welder’ of the cardboard world.
- Measuring Tape: Because even a cardboard Cadillac needs symmetry.
Budget Guru Mantra: “Waste not, want not. If it’s brown and sturdy, it’s a building block for adventure.”
Structural Engineering: Building the Chassis
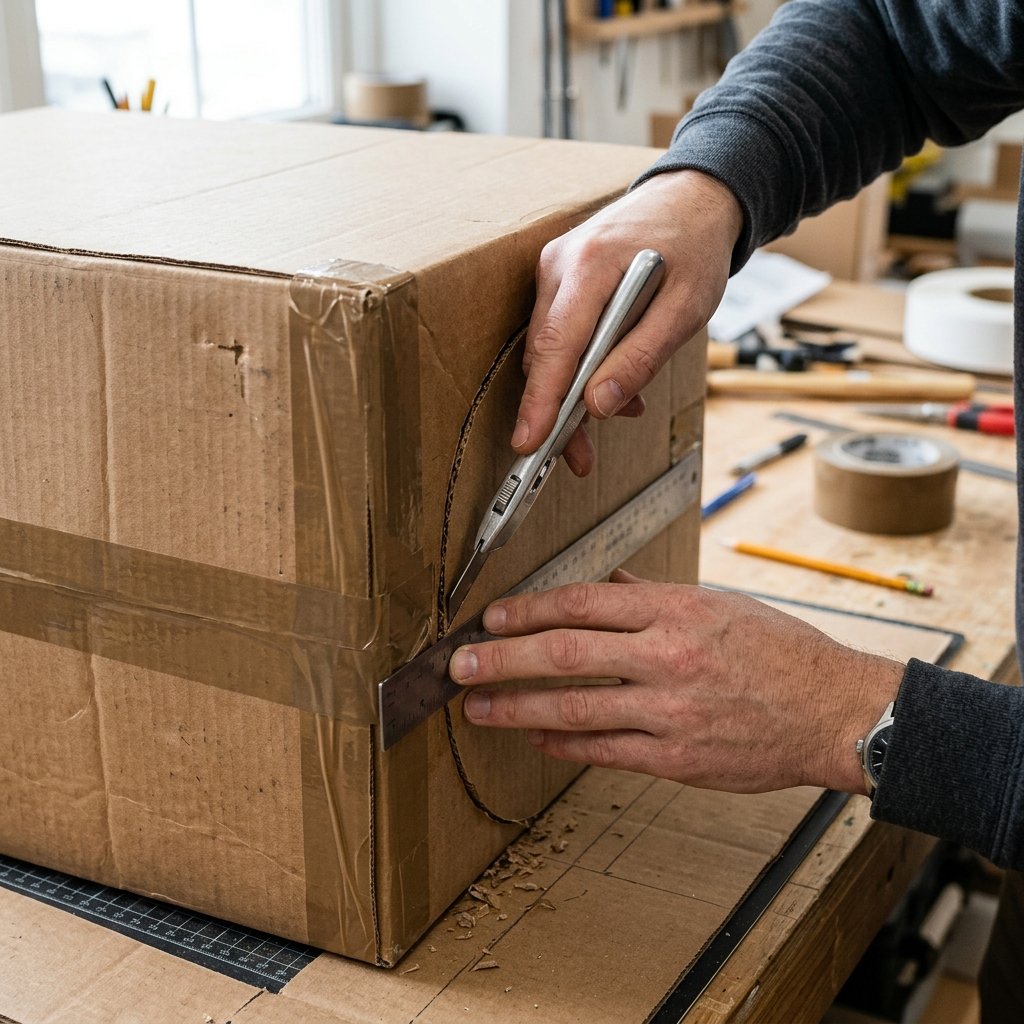
Now we begin the ‘rugged’ phase of construction. We want a car that can withstand a double-feature without collapsing. Start by selecting a box that fits your child comfortably. A standard 18x18x24 inch moving box is usually the ‘sweet spot’ for toddlers and young children.
Step-by-Step Body Work
- Seal the Bottom: Use heavy-duty packing tape to secure the bottom flaps. This is your floorboard.
- The Hood and Trunk: On the top of the box, fold the two shorter flaps down inside the box. These provide extra wall strength.
- The Windshield: Take one of the long top flaps and fold it up at a 90-degree angle. Leave the other long flap to be folded down inside or cut off to create the ‘cockpit’ opening.
- The Door Cutouts: Measure 6 inches from the front and back on the sides. Cut a shallow ‘U’ shape to create low-profile doors that make it easy for little legs to climb in and out.
Safety Note: Always use a fresh blade in your utility knife. A dull blade is more likely to slip and cause injury. Adults should handle all cutting tasks while the ‘designers’ (kids) focus on the aesthetics.
The Paint Shop: High-End Finishes on a Dollar Tree Budget
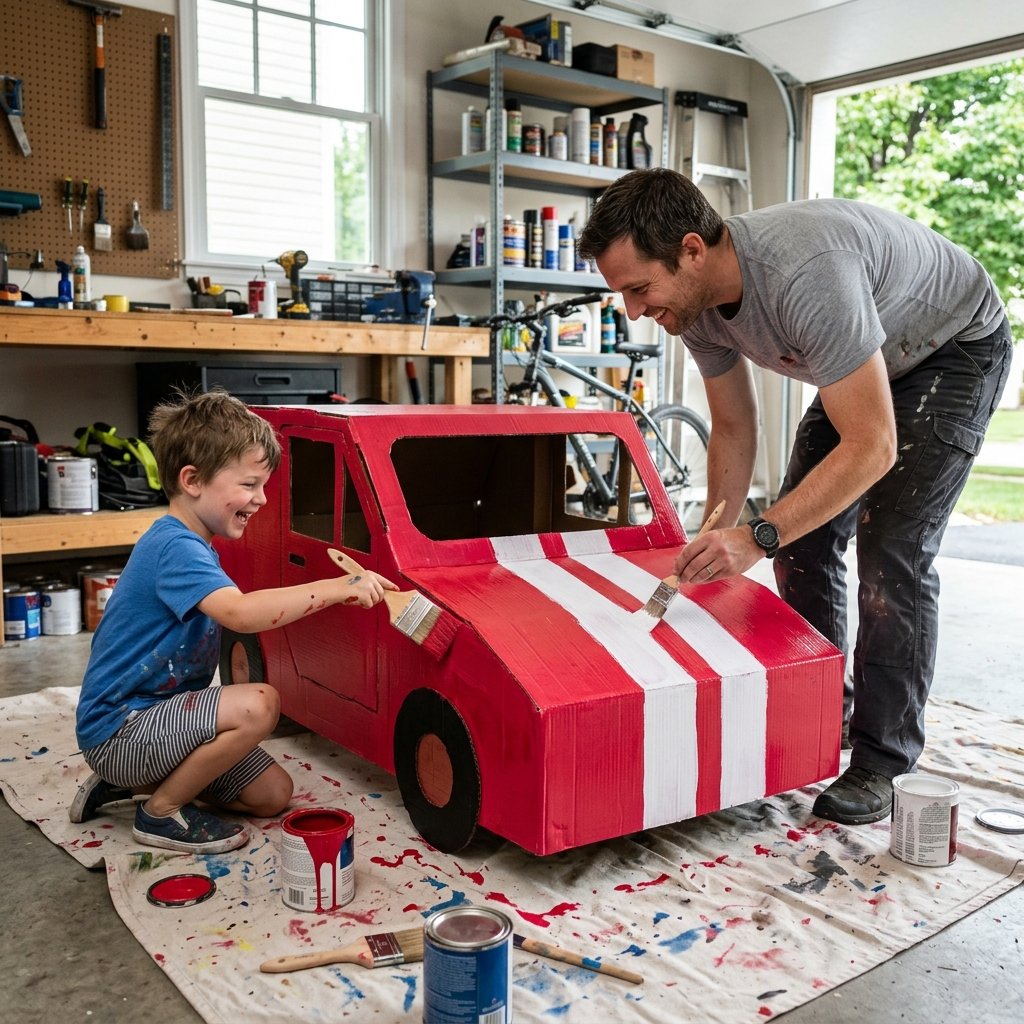
This is where the magic happens. We want to move away from ‘shipping box’ and toward ‘vintage roadster.’ If you have leftover wall paint in the garage, now is the time to use it. A satin or semi-gloss finish gives the car a metallic sheen that looks incredible under movie lights.
Creative Detailing Techniques
- The ‘Baking Soda’ Trick: Mix a little baking soda into your acrylic paint to create a thick, matte texture that hides cardboard seams and imperfections perfectly.
- Racing Stripes: Use 1-inch masking tape to mask off two stripes down the center of the hood. Paint over them with a contrasting color (white or silver) and peel back for a professional ‘factory’ look.
- Chrome Accents: Use aluminum foil or silver duct tape to wrap the top edge of the box, creating a ‘chrome’ trim that screams luxury.
Allow the paint to dry for at least 2 hours before moving on to the dashboard. If you are in a rush, a hair dryer on a cool setting can speed up the process. Remember, two thin coats are always better than one thick, drippy mess.
Interior Design: Dashboards, Dials, and Comfort
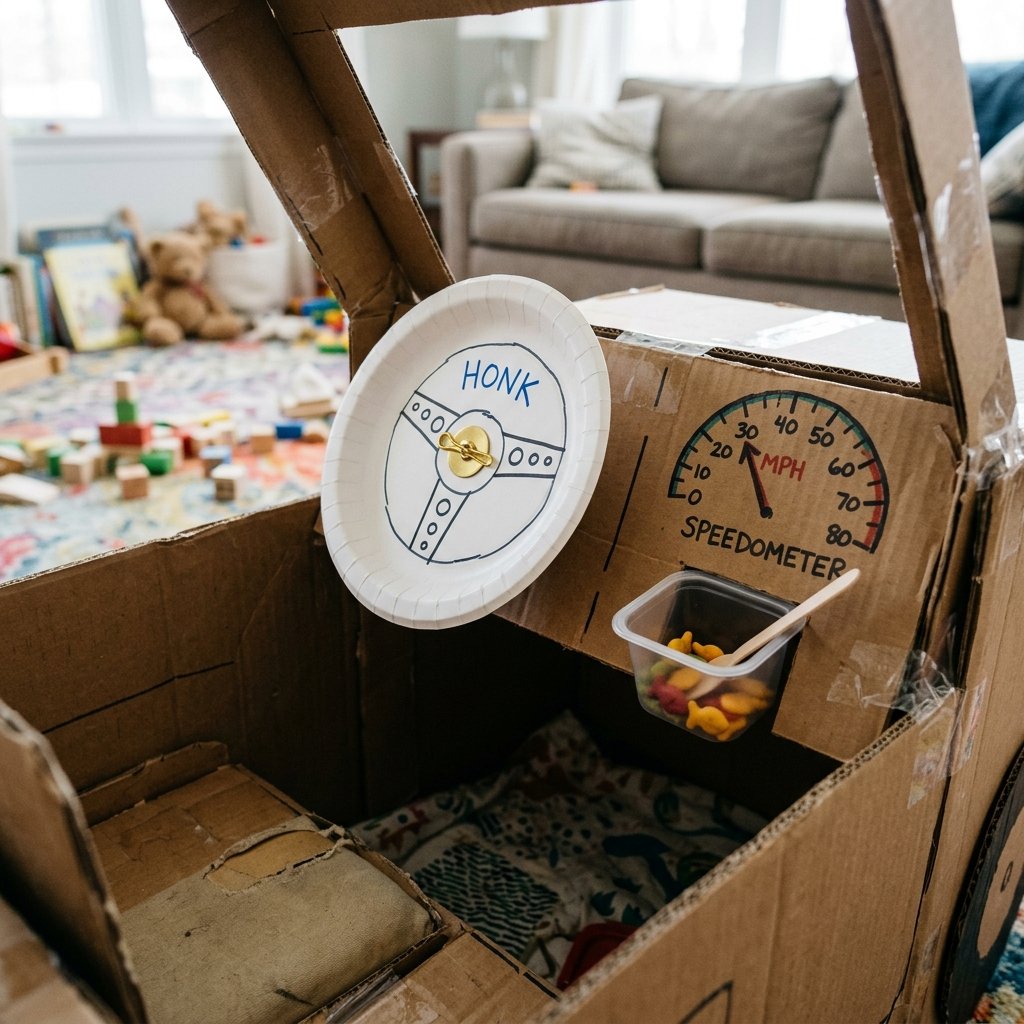
A true drive-in experience requires a cockpit that feels functional. We are going to use resourceful creativity to build a dashboard that keeps the ‘driver’ engaged during the opening credits.
The Component Guide
| Component | Creative Solution | Attachment Method |
|---|---|---|
| Steering Wheel | Plastic Lid or Paper Plate | Large Brad Fastener (so it spins!) |
| Speedometer | Printed template or Hand-drawn circle | Glue Stick |
| Gear Shift | Empty Paper Towel Roll + Tennis Ball | Hot Glue |
| Cup Holder | Cleaned Yogurt Container | Cut a hole in the ‘dash’ and drop in |
To make the interior ‘masculine-elegant’ and cozy, line the bottom of the box with a folded fleece blanket or a small pillow. This isn’t just for comfort; it provides weight to the box so it doesn’t slide around when the movie gets exciting.
Pro Tip: Glue a small ‘glove box’ (a small jewelry box) to the side so your child has a dedicated spot for their ‘license’ and some emergency gummy bears.
The Grand Opening: Setting Up the Home Drive-In

The cars are built, the paint is dry, and the ‘engines’ are idling. Now you need to transform your living room or backyard into a cinematic wonderland. Lighting is key here. Dim the main lights and use string lights or ‘fairy lights’ to create a perimeter around the cars.
The Ultimate Setup Checklist
- The Screen: A flat white sheet pulled taut against a wall or a blank garage door works perfectly.
- The Sound: If using a laptop, connect a Bluetooth speaker and place it near the cars to mimic the old-school drive-in speaker poles.
- The Concession Stand: Set up a small folding table with $1.00 boxes of theater candy, a large bowl of popcorn, and juice boxes.
- The Tickets: Use scrap cardboard to cut out small rectangles. Have the kids ‘decorate’ their tickets and ‘pay’ you at the door before parking their cars.
By creating this ritual, you are teaching your children that luxury is a state of mind, not a price tag. You’ve saved roughly $40-$60 by not going to a commercial theater, and you’ve gained a permanent toy for future rainy days.
Conclusion
The Finish Line
Building a cardboard drive-in car is more than just a clever upcycling project; it is an exercise in intentional parenting and budget-savvy brilliance. You have taken items destined for the landfill and turned them into a vehicle for joy. Whether you built a sleek red racer or a rugged off-road jeep, the result is the same: a night of magic that your kids will remember long after the cardboard has finally been recycled. So, dim the lights, start the film, and enjoy the ride. You’ve earned it, Master Maker.

Makenzie is the founder and lead writer at MoneyHackTips.com — a personal finance blog dedicated to delivering street-smart financial wisdom for real people on real budgets. With 300+ published articles covering everything from debt management to investing fundamentals, Makenzie’s mission is to make every dollar work harder. When not writing about money hacks, Makenzie is testing frugal living strategies, optimizing side hustles, and helping readers build financial freedom from scratch.