
The Art of the Cardboard Economy
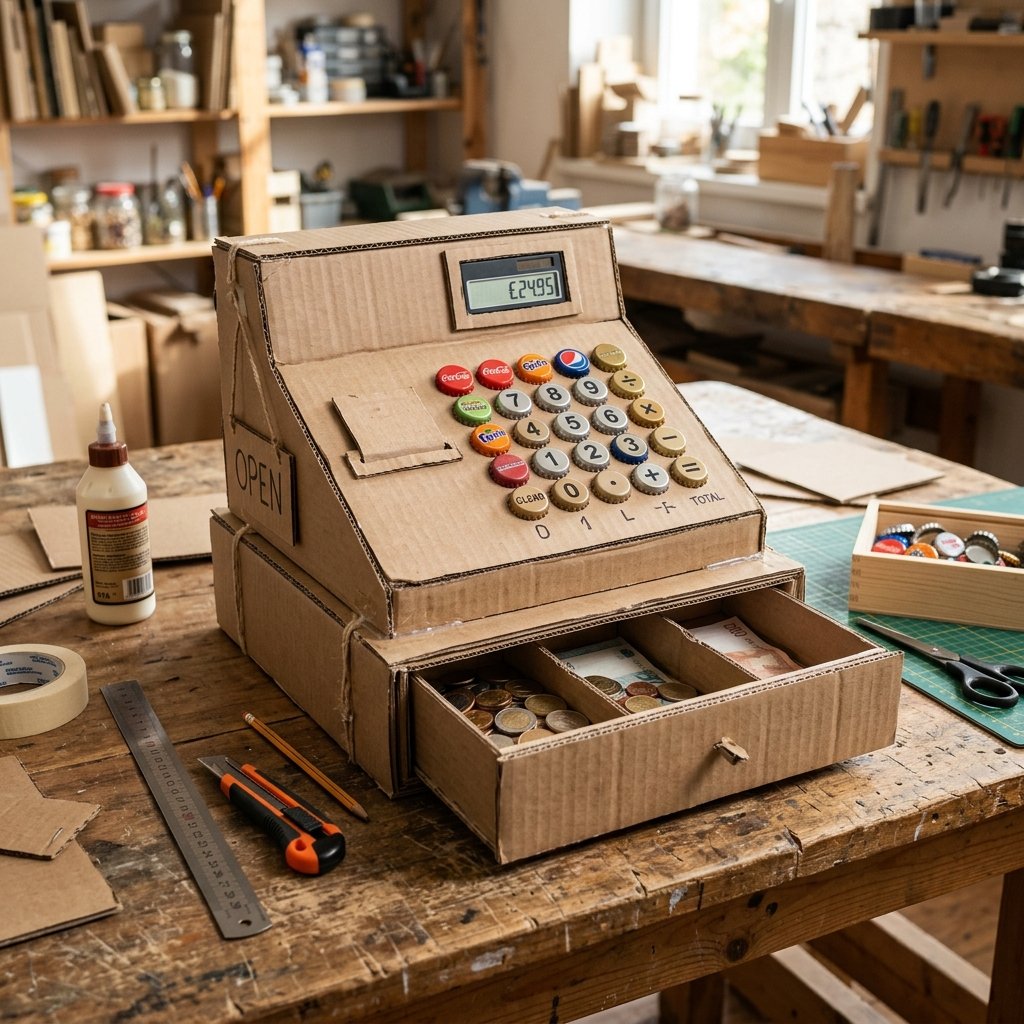
In an era where plastic toys dominate store shelves and drain wallets, there is something profoundly satisfying about the ‘Trash-to-Treasure’ philosophy. As a frugal DIYer, you know that a simple shipping box isn’t just waste—it is a structural masterpiece waiting for a second life. Today, we are diving into a project that combines rugged engineering with budget-savvy creativity: the DIY Cardboard Cash Register. This isn’t just a box; it’s a fully functional, tactile tool designed to ignite the imagination of young entrepreneurs while keeping your bank account intact. Why spend $45 on a flimsy plastic model when you can build a sturdier, more realistic version for under $2? Let’s roll up our sleeves and turn that recycling bin into a marketplace.
Raiding the Recycling Bin: The Ultimate Materials List
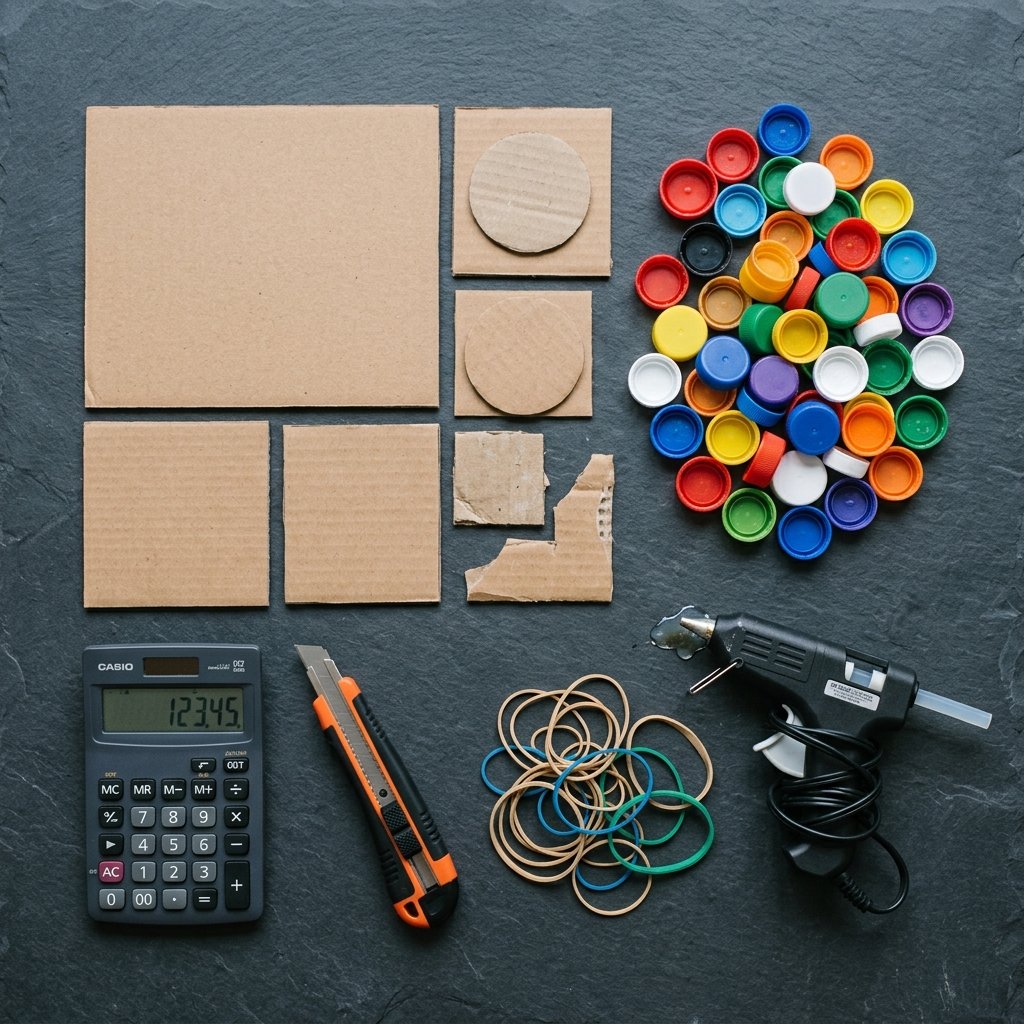
Before we start cutting, we need to gather our ‘raw materials.’ The beauty of this project lies in its resourcefulness. We aren’t looking for expensive specialty items; we are hunting for household scraps that have hidden potential. To achieve that masculine-elegant aesthetic—think industrial-chic meets playroom-functional—look for clean, double-walled cardboard for the base. It provides the durability needed for hours of aggressive ‘checking out.’
The Budget Breakdown
Let’s look at how the costs stack up when you choose the upcycled route versus the big-box store alternative.
| Material | Source | Estimated Cost |
|---|---|---|
| Main Chassis | Shipping Box (Amazon/Grocery) | $0.00 |
| Buttons | Plastic Bottle Caps (Milk/Soda) | $0.00 |
| Spring Mechanism | Thick Rubber Bands | $0.10 |
| Display Screen | Old Calculator or Clear Plastic | $1.00 |
| Adhesive | Hot Glue / Wood Glue | $0.50 |
| Total Project Cost | DIY Mastery | $1.60 |
The Frugal Mantra: If it can be glued, it can be renewed. Never buy what you can build with a bit of grit and a hot glue gun.
Structural Integrity: Engineering the Main Chassis
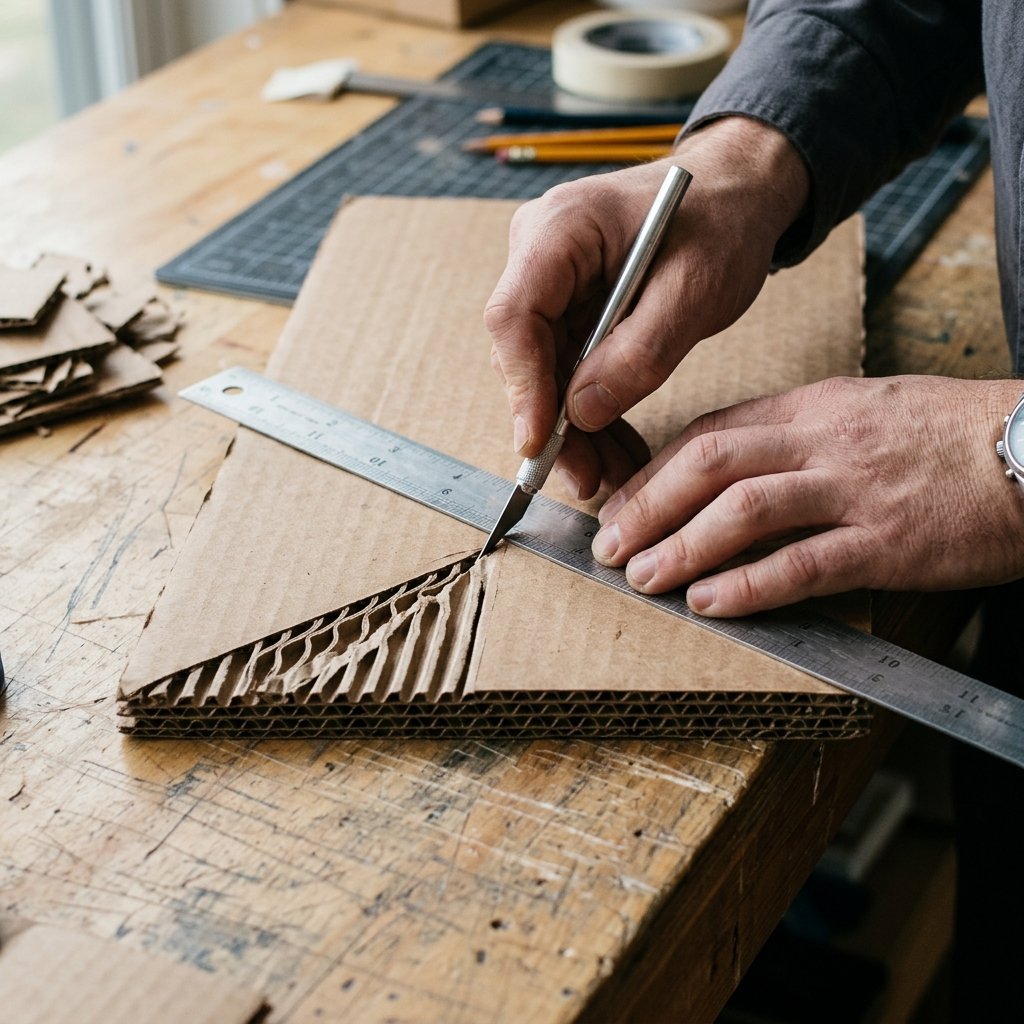
A realistic cash register needs a solid foundation. We aren’t just taping boxes together; we are building a chassis. Start by selecting a medium-sized box for the base. This will house the drawer and the internal mechanics. To ensure it stands up to the ‘rugged’ play of a toddler, we will use a triangular reinforcement technique in the corners.
Step-by-Step Base Construction
- Measure the Frame: Cut your primary box to a height of 6 inches, a width of 10 inches, and a depth of 8 inches.
- The Angled Face: Create the iconic cash register slope by cutting two side panels at a 45-degree angle. This is where your keypad will eventually sit.
- Reinforce the Floor: Glue an extra layer of cardboard to the bottom of the box. This prevents the unit from sliding when the drawer is slammed shut.
- The Internal Track: Cut two long strips of cardboard and glue them 1 inch from the side walls on the inside. These will act as guide rails for your cash drawer.
By focusing on the internal skeleton, you ensure the toy feels substantial and high-end, rather than flimsy. Precision cutting is your best friend here—use a fresh blade in your utility knife for those crisp, professional edges.
The Magic Pop-Out Drawer: Engineering with Rubber Bands
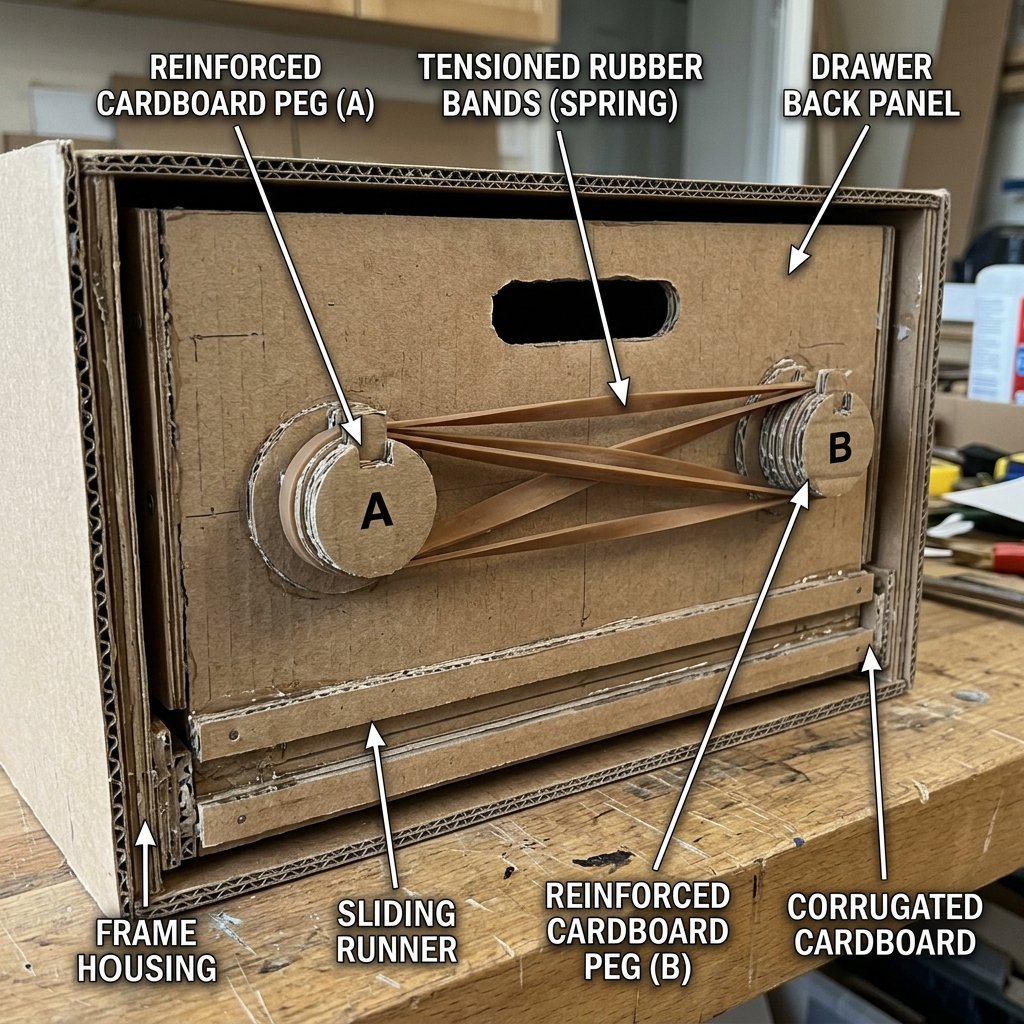
The most satisfying part of any cash register is the ‘ding’ and the drawer that slides out. While we might skip the bell (unless you have an old bicycle bell lying around), we can certainly master the spring-loaded action using nothing but tension and clever geometry.
Building the Drawer Mechanism
- The Drawer Box: Construct a shallow box that is 1/4 inch narrower than your main chassis. It should slide in and out with minimal friction.
- The Tension Hook: Glue a small cardboard ‘hook’ or a sturdy toothpick to the back of the drawer and a corresponding hook to the back of the main chassis.
- The Rubber Band Engine: Loop two thick rubber bands between these hooks. When you push the drawer in, it will create tension.
- The Latch: This is the clever bit. Create a simple cardboard lever on the side of the chassis that hooks into a notch on the drawer. When you press a specific ‘button,’ it lifts the lever and the drawer pops out.
Safety Note: When working with high-tension rubber bands, ensure your cardboard hooks are reinforced with extra glue and a secondary layer of cardboard to prevent ‘snap-back’ failures.
Tactile Tech: Crafting Buttons and a Realistic Scanner
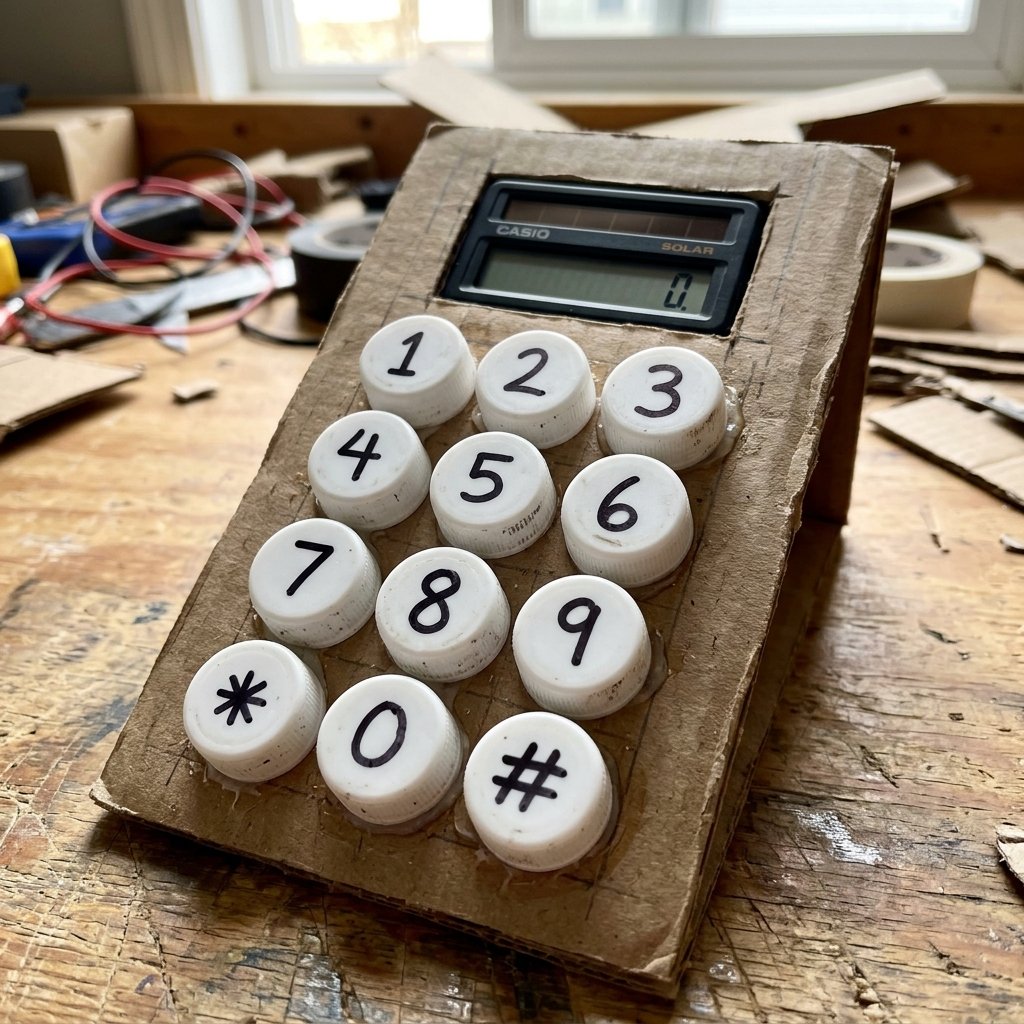
To make this truly ‘realistic,’ we need tactile elements that mimic a modern POS system. This is where your collection of bottle caps and old electronics comes into play. We want the buttons to feel ‘clickable’ and the screen to look like it’s actually calculating totals.
Creating the Keypad and Display
| Component | DIY Method | Visual Impact |
|---|---|---|
| Number Keys | 20 Plastic Bottle Caps | High-Tactile, 3D effect |
| Total Screen | Recycled Calculator | Functional Math Tool |
| Barcode Scanner | Toilet Paper Roll + Red Marker | Interactive Play |
| Credit Card Slot | Thin Slit + Old Gift Card | Realistic Transaction |
For the keypad, glue the bottle caps in a 3×4 grid. Use a permanent marker to write the numbers 0-9, plus ‘Clear’ and ‘Total.’ If you want to be extra crafty, place a small piece of foam under each cap before gluing only the edges; this gives the buttons a slight ‘squish’ factor when pressed. For the display, if you don’t have an old calculator, use a piece of clear plastic from a fruit container and slide a piece of paper with ‘$19.99‘ written in digital-style font behind it.
From Trash to Treasure: The Masculine-Elegant Finish
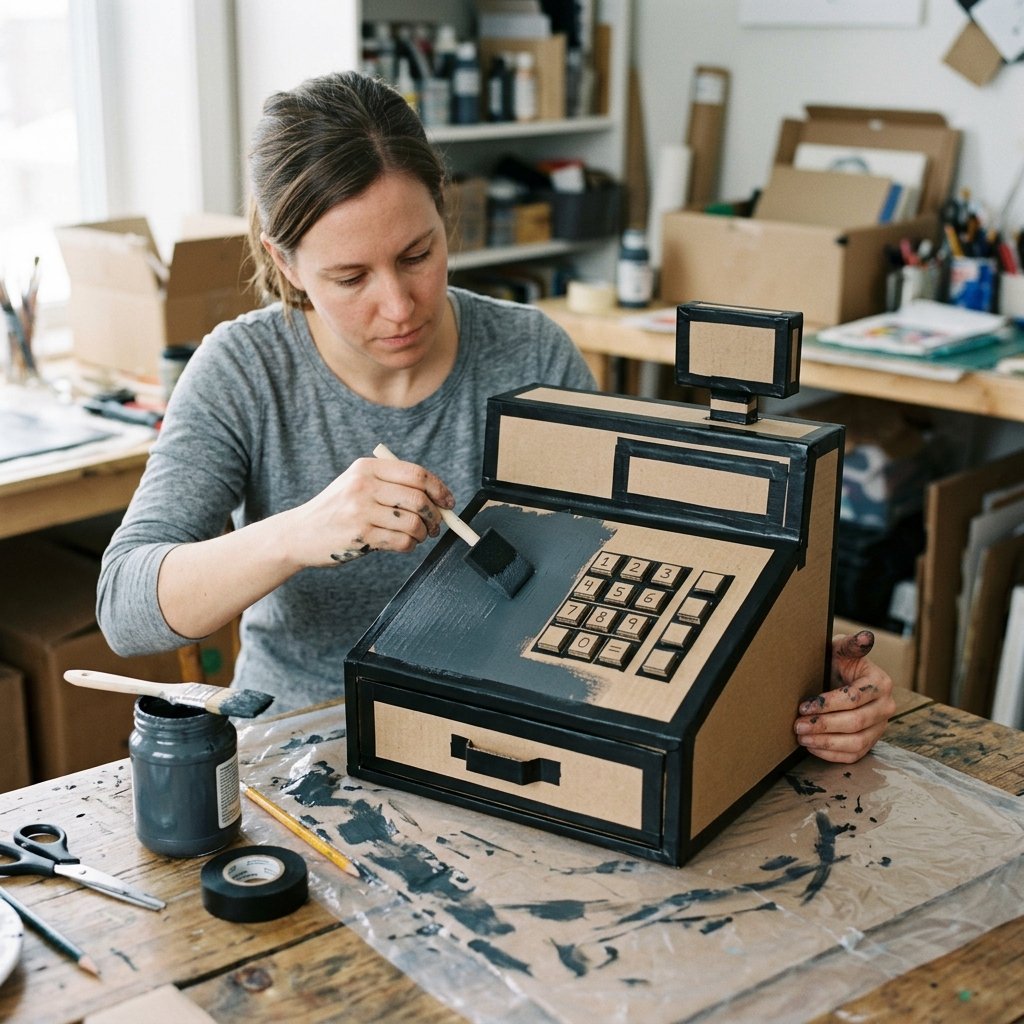
The difference between a ‘cardboard box’ and a ‘bespoke toy’ is the finish. We want this to look like a piece of equipment, not just a recycling project. We will use a rugged-elegant color palette: charcoal grays, matte blacks, or even a ‘faux-metal’ look using silver spray paint.
The Finishing Touches
- The Paint Job: Use a ‘baking soda paint’ trick—mix 1 part baking soda with 2 parts acrylic paint. This creates a textured, stone-like finish that hides the cardboard grain and looks incredibly high-end.
- Edge Banding: Cover the raw ‘corrugated’ edges of the cardboard with black electrical tape or duct tape. This not only hides the ‘trash’ origins but also reinforces the joints for heavy use.
- The Branding: Create a logo for your ‘store.’ Use a stencil to spray a name like ‘The Frugal Market’ or ‘Junior’s General Store’ on the side.
- Currency: Don’t forget the cash! Use money origami techniques to fold realistic-looking bills from green construction paper to fill the drawer.
By taking the time to paint and tape the edges, you elevate the project from a 5-minute craft to a heirloom-quality toy that parents would be proud to display in a living room.
The Frugal Marketplace: Teaching Literacy Through Play
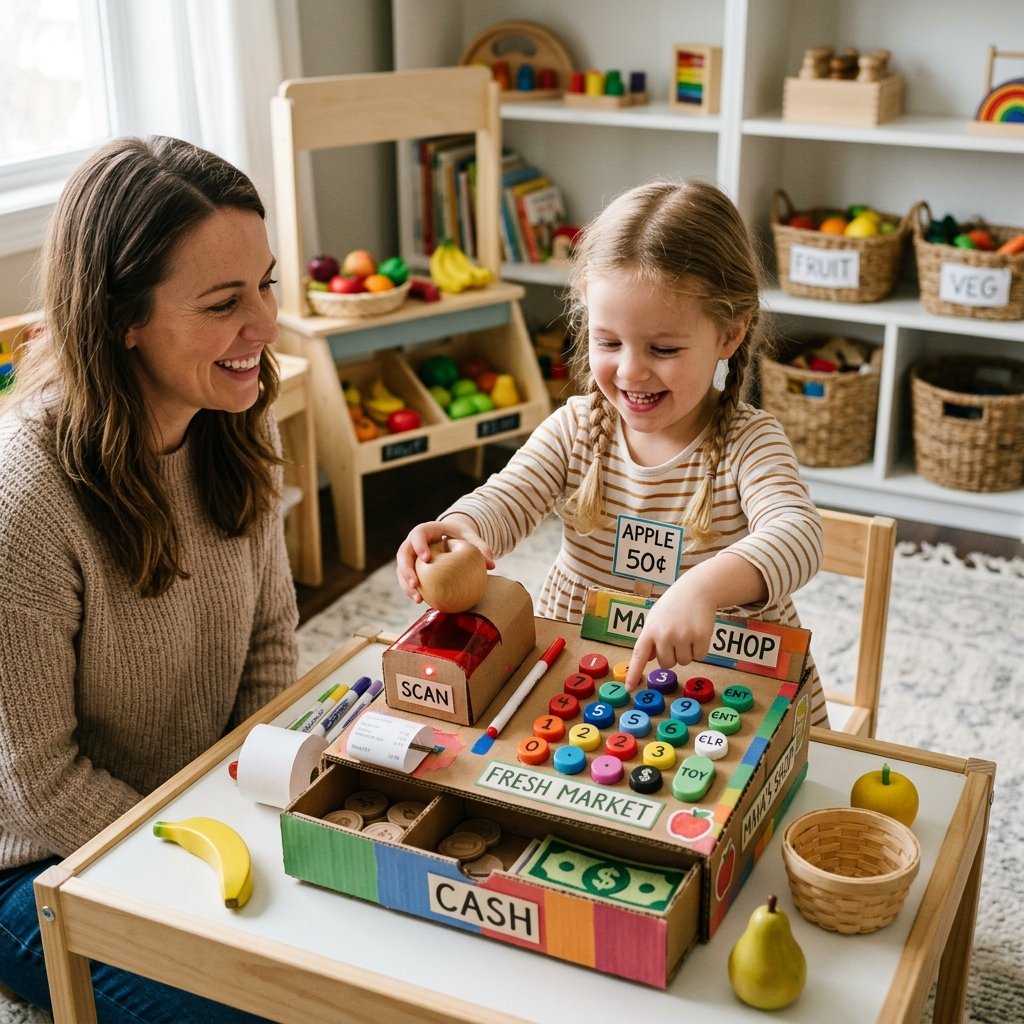
Now that the build is complete, it’s time to put it to work. This DIY cash register is more than a toy; it’s a financial literacy laboratory. For the handy parent, this is the perfect opportunity to teach the value of a dollar and basic arithmetic without the boredom of a worksheet.
Educational Play Scenarios
- The Grocery Run: Set up a ‘pantry store’ where kids have to ‘buy’ their snacks. This teaches them to read price tags and calculate change.
- The Inventory Manager: Have the child count how many ‘items’ are in stock, helping with grouping and multiplication.
- The Entrepreneur: Encourage them to set up a lemonade stand or a craft sale using their new register. It builds confidence and social skills.
Pro-Tip: Use real coins in the drawer. The weight and sound of real metal against the cardboard drawer add a level of sensory realism that plastic coins simply cannot match. It also helps children learn to identify different denominations by size and weight.
Conclusion
The Reward of Resourcefulness
Building a realistic DIY cardboard cash register is about more than just saving $40 at the toy store. It is about demonstrating to the next generation that creativity, grit, and a sharp utility knife can solve problems and create joy. You’ve taken items destined for the landfill and engineered a functional piece of play equipment that rivals any store-bought alternative. Whether you are a budget-savvy dad building a birthday gift or a crafty educator setting up a classroom, remember that the most valuable toys aren’t the ones with the highest price tags—they are the ones built with intention and imagination. Now, go forth and open your market!

Makenzie is the founder and lead writer at MoneyHackTips.com — a personal finance blog dedicated to delivering street-smart financial wisdom for real people on real budgets. With 300+ published articles covering everything from debt management to investing fundamentals, Makenzie’s mission is to make every dollar work harder. When not writing about money hacks, Makenzie is testing frugal living strategies, optimizing side hustles, and helping readers build financial freedom from scratch.