
The Sticker Shock of Wedding Decor and the Ultimate DIY Solution
Let us talk about the elephant in the bridal suite: wedding decor is astronomically expensive. When you are planning the biggest day of your life, the last thing you want is to compromise on your aesthetic because a florist quoted you $3,500 just for table centerpieces. If you are a frugal DIYer, a handy parent helping out with wedding prep, or a budget-savvy couple determined to host an unforgettable event without mortgaging your future, you need a secret weapon. Enter the faux terrazzo centerpiece hack. This isn’t just another generic craft project; it is a rugged, resourceful, and incredibly elegant upcycling masterclass that turns literal trash into high-end, architectural art.
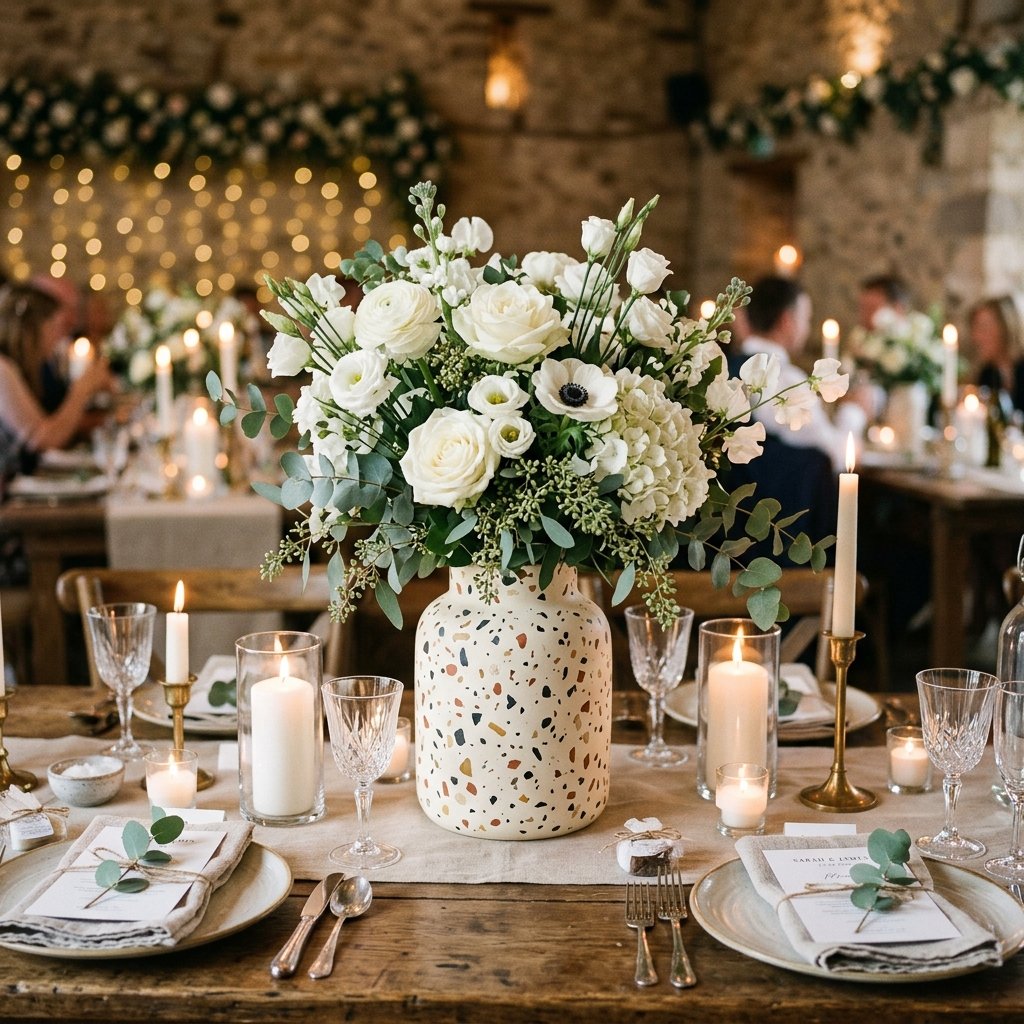
Terrazzo has made a massive comeback in modern interior design and luxury event styling. Authentic terrazzo—a composite material poured in place or precast, consisting of marble, quartz, granite, or glass chips poured with a cementitious binder—is stunning, heavy, and notoriously pricey. Renting authentic terrazzo vessels for a wedding can easily cost $30 to $50 per table. But what if I told you that you could replicate this exact million-dollar look for less than $4 a centerpiece? By utilizing polymer clay scraps, basic plaster of Paris, and mismatched thrift store glassware, you can handcraft bespoke, heavyweight centerpieces that will have your guests convinced you hired a luxury event stylist.
“True elegance isn’t about how much money you spend; it is about the resourcefulness, creativity, and craftsmanship you pour into the details.”
In this comprehensive, step-by-step masterclass, we are going to roll up our sleeves, break out the sandpaper, and build something beautiful. We will cover everything from sourcing cheap structural bases and mixing the perfect plaster consistency to custom-blending polymer clay to match your exact wedding color palette. Get ready to transform your wedding tablescape on a dime.
The Million-Dollar Illusion: Why Faux Terrazzo is the Ultimate Budget Bride’s Secret Weapon
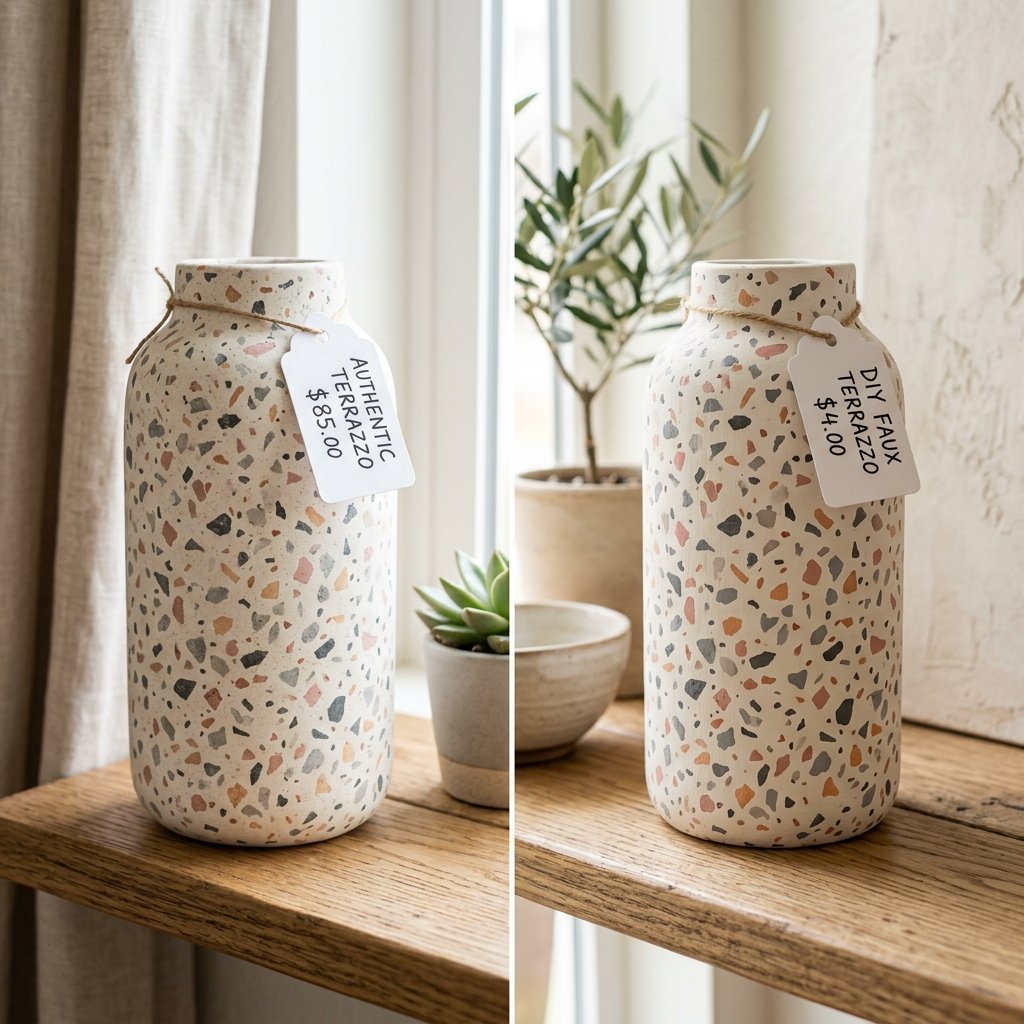
Understanding the Terrazzo Aesthetic
Before we dive into the dirt and dust of crafting, it is important to understand why this hack works so well. Historically, terrazzo was actually invented by Venetian mosaic workers in the 15th century as a budget-savvy way to upcycle discarded marble chips. They would sweep up the scraps, mix them with clay, and grind them flat. In a beautiful twist of irony, we are returning to terrazzo’s frugal, upcycled roots to save your wedding budget! The beauty of terrazzo lies in its organic, scattered geometry. It is forgiving, highly customizable, and naturally looks like heavy, expensive stone.
The Economics of DIY Faux Terrazzo
When you buy or rent high-end modern centerpieces, you are paying for the designer label, the shipping weight, and the markup. By taking control of the manufacturing process, you bypass all of these costs. Let us look at the hard numbers. Below is a breakdown of what you might expect to pay for traditional wedding centerpieces versus our clever, crafty approach.
| Centerpiece Option (Per Table) | Estimated Cost | Customization Level | Post-Wedding Value |
|---|---|---|---|
| Florist Rental (Glass/Metal) | $25 – $60 | Low (Standard Inventory) | None (Must be returned) |
| Purchased Authentic Terrazzo | $45 – $90 | Medium (Store Colors) | High (Can be kept/sold) |
| Our DIY Faux Terrazzo Hack | $3 – $5 | Limitless (Custom Colors) | High (Heirloom quality) |
As you can see, the savings are staggering. If you have 15 tables at your reception, opting for this DIY hack could save you upwards of $700—money that can be reallocated to your honeymoon, your food budget, or simply kept in your savings account where it belongs.
Gathering Your Arsenal: High-End Materials on a Dollar Store Budget
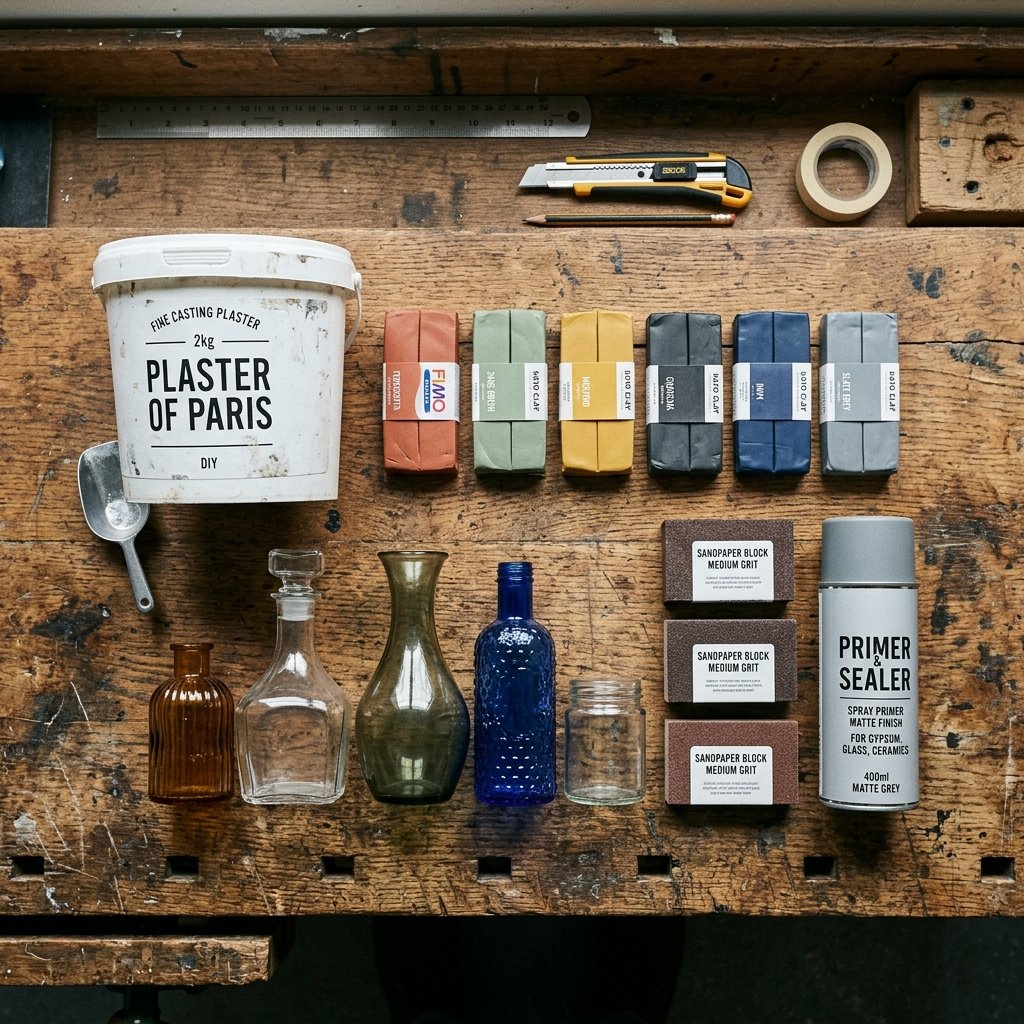
The Master Crafter’s Shopping List
To pull off this illusion, you need the right tools and materials. The goal is to build a rugged, durable finish that doesn’t chip or flake during transport. We are avoiding cheap-looking spray paints and instead opting for structural materials like plaster and polymer clay to give our centerpieces authentic weight and texture. Here is exactly what you need to hunt down at your local craft store, hardware store, and thrift shop.
The Core Materials
- The Base Vessels: Hit your local thrift stores, Goodwill, or Dollar Tree. Look for glass vases, old ceramic pitchers, or even sturdy plastic containers. The color and current pattern do not matter—only the silhouette. You want varied heights and interesting shapes. Cost: $1.00 to $2.00 each.
- Polymer Clay: This is for our “terrazzo chips.” Brands like Sculpey or Fimo work perfectly. Buy small blocks in your specific wedding colors (e.g., terracotta, sage green, mustard, charcoal, and white). Cost: $10.00 total for enough clay to do 20 vases.
- Plaster of Paris or Joint Compound: This is the binder. Plaster of Paris cures harder and faster, while drywall joint compound gives a slightly more rustic, matte finish and gives you a longer working time. A massive bucket at the hardware store costs about $12.00 and will cover dozens of vases.
- Bonding Primer: Crucial for ensuring your plaster sticks to slick glass. A spray primer like Zinsser or Kilz is perfect. Cost: $6.00.
- Sandpaper Assortment: You will need rough (80-grit) to reveal the chips, medium (120-grit) to smooth, and fine (220-grit) for a polished finish. Cost: $5.00.
- Matte Clear Coat: To seal the final product and protect it from water spills on the big day. Cost: $5.00.
| Material Category | Sourcing Location | Total Project Budget (20 Vases) |
|---|---|---|
| Vases / Glassware Bases | Thrift Stores / Dollar Tree | $25.00 |
| Polymer Clay (Various Colors) | Craft Store (Use Coupons!) | $10.00 |
| Plaster / Joint Compound | Local Hardware Store | $12.00 |
| Primer, Sandpaper, Sealant | Hardware Store | $16.00 |
| Total Estimated Cost | For 20 Centerpieces | $63.00 (Just $3.15 each!) |
“A resourceful crafter doesn’t see a stained, outdated thrift-store vase; they see the structural foundation for a masterpiece. Look past the ugly surface and focus on the silhouette.”
Phase One: Prepping the Base (Turning Thrift Store Trash into a Blank Canvas)
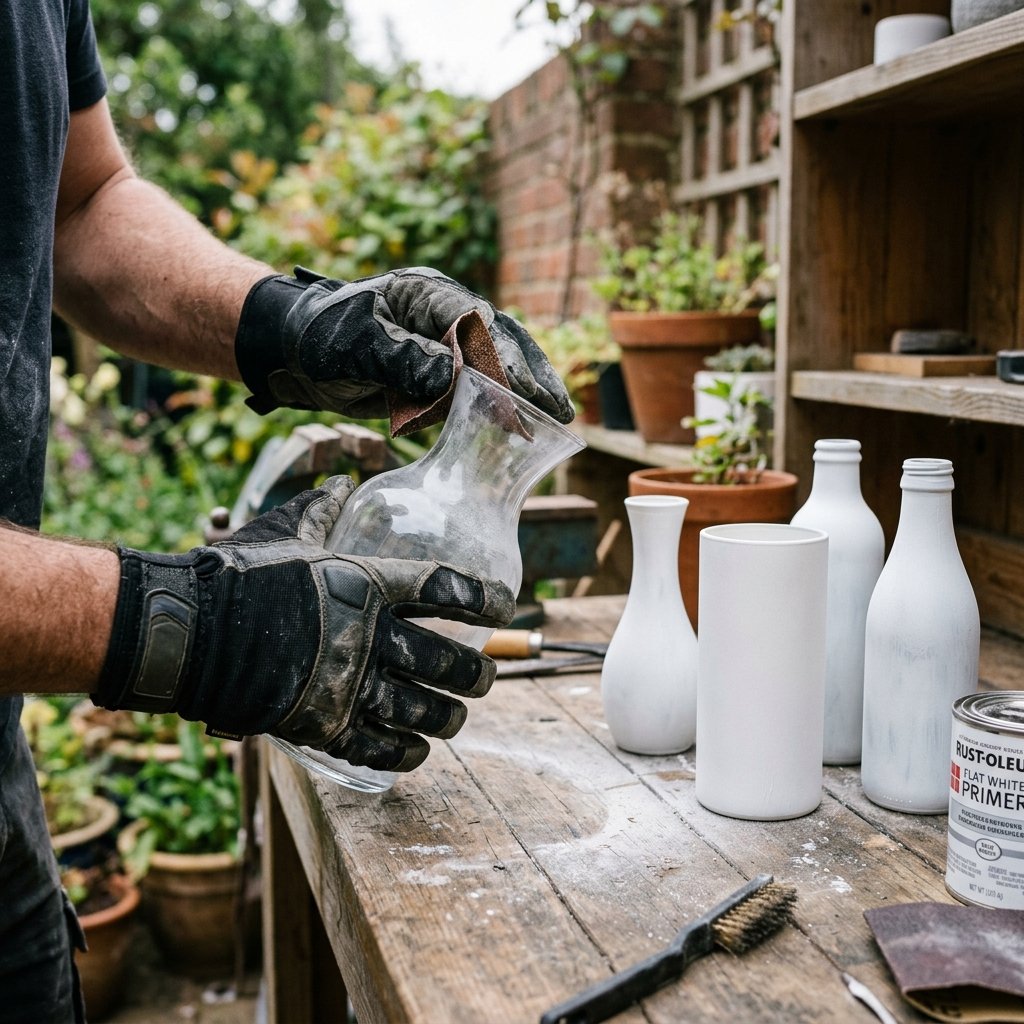
The Importance of Ruthless Preparation
If there is one thing a master tailor, a seasoned woodworker, and a professional crafter all agree on, it is this: your finish is only as good as your preparation. You cannot apply heavy plaster directly to dirty, slick glass and expect it to survive a car ride to your wedding venue. We need to create a “tooth” for our materials to grip onto.
Step-by-Step Base Preparation
- The Deep Clean: Start by stripping your thrifted vases of all price tags. Use a mixture of hot water, dish soap, and a splash of white vinegar to scrub away decades of grime, dust, and oily fingerprints. Rinse thoroughly and let them air dry completely. For stubborn adhesive, use a bit of rubbing alcohol or an adhesive remover.
- The Scuff Sand: Take a piece of 120-grit sandpaper and vigorously scuff the entire exterior of the glass or ceramic vase. You do not need to scratch it deeply, but you want to remove the glossy sheen. This micro-abrasion gives the primer something to physically interlock with.
- The Chemical Bond (Priming): Take your vases outside or to a well-ventilated area. Apply a thin, even coat of high-adhesion bonding primer. Hold the can about 10 to 12 inches away from the surface and use sweeping motions. Do not flood the surface; two light coats are vastly superior to one thick, drippy coat. Allow the primer to cure for at least 2 hours (or according to the manufacturer’s instructions).
“Safety Note: Always wear a well-fitting particulate mask when sanding glass or ceramic, and ensure you are in a highly ventilated area when using aerosol spray primers. Protect your lungs as fiercely as you protect your budget!”
Once your vases are primed and dry to the touch, they will look like uniform, matte silhouettes. This is your blank canvas. The mismatched thrift store junk has now been unified into a cohesive collection, ready for the terrazzo transformation.
Phase Two: Crafting the Terrazzo ‘Chips’ (The Polymer Clay Hack)
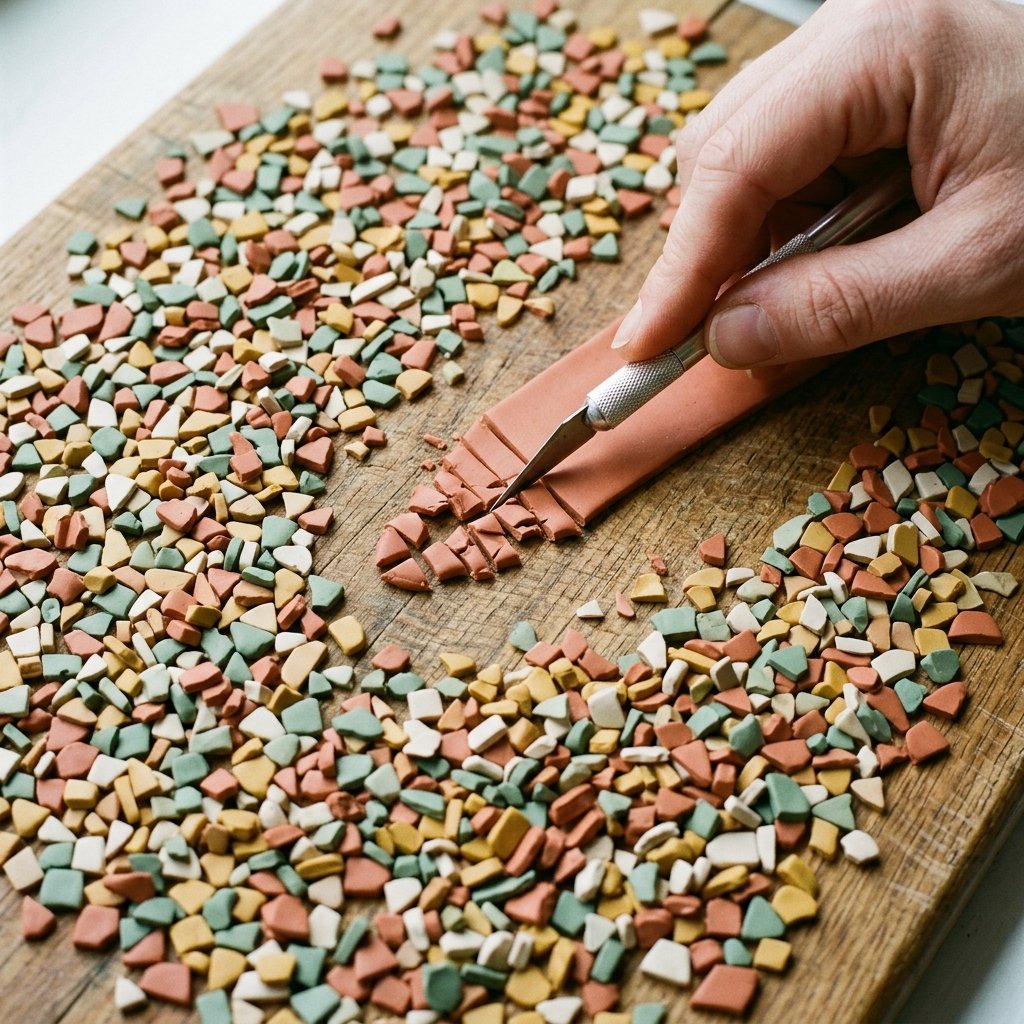
Customizing Your Wedding Color Palette
This is where the magic happens and where you get to play designer. Authentic terrazzo uses chips of marble or glass, but those are heavy, sharp, and incredibly difficult to sand down at home. Our clever hack? Polymer clay. When baked, polymer clay becomes hard, durable, and waterproof, but it remains just soft enough to sand down beautifully alongside our plaster binder.
Designing the Perfect Chip Ratio
To make your faux terrazzo look authentic, you need a mix of chip sizes and a balanced color palette. A good rule of thumb is to choose one dominant color (usually a neutral like white, cream, or charcoal), two secondary colors (your main wedding colors, like terracotta and sage), and one accent color (a pop of mustard yellow or metallic gold).
| Color Role | Percentage of Mix | Example Palette (Sunset Boho) |
|---|---|---|
| Dominant Base Chip | 50% | Warm Cream / Ivory |
| Secondary Color 1 | 20% | Deep Terracotta |
| Secondary Color 2 | 20% | Muted Sage Green |
| Accent Color | 10% | Mustard Yellow or Black |
The Baking and Chopping Process
- Condition the Clay: Take your blocks of polymer clay and knead them in your hands until they are soft and pliable. This warms up the polymers and prevents cracking.
- Roll it Out: Using an acrylic roller or a smooth glass bottle, roll each color of clay out into flat sheets. You want them to be exceptionally thin—aim for roughly 1/16 of an inch thick. The thinner the sheet, the easier it will be to sand later.
- Bake to Cure: Place your thin clay sheets on a baking tray lined with parchment paper. Bake according to the package directions (typically 275°F for about 15 minutes). Let them cool completely. They should be hard and slightly flexible.
- The Chop: Once cooled, take a pair of heavy-duty craft scissors or a craft knife and start chopping the sheets into random, irregular shards. You want a chaotic mix of tiny specks, medium triangles, and a few larger statement chunks. Avoid making them look like perfect squares; authentic stone shatters organically. Mix all your chopped colors together in a large bowl.
“Pro Tip: To make your centerpieces look truly high-end, add a tiny amount of translucent polymer clay or clay with metallic flakes to your chip mixture. When the light hits the final piece, it will mimic the natural sparkle of quartz and mica found in real stone.”
Phase Three: The Plaster Pour and the Magic Reveal
Building the Stone Facade
Now we bring the elements together. This phase is messy, creative, and incredibly satisfying. We are going to coat our primed vases in our plaster binder and embed our custom clay chips. Whether you chose Plaster of Paris or joint compound, the application method is similar, though plaster requires you to work much faster.
Step-by-Step Application and Sanding
- Mix the Binder: If using Plaster of Paris, mix it in small batches. Use a ratio of roughly 2 parts plaster to 1 part cold water. Stir until it reaches the consistency of thick pancake batter or Greek yogurt. If it is too runny, it will slide right off the vase; if it is too thick, it will dry before you can add the chips. If using joint compound, simply scoop it straight from the tub.
- Frost the Vase: Using a palette knife, a putty knife, or even a gloved hand, apply a generous layer of the plaster mixture all over the primed vase. Aim for a thickness of about 1/8 to 1/4 of an inch. You want it thick enough to hold the chips, but not so thick that it alters the elegant shape of the vessel.
- Embed the Chips: Working quickly while the plaster is still wet, take handfuls of your mixed polymer clay chips and press them firmly into the surface. Do not worry about being perfectly neat; just ensure an even distribution. Press them deep enough so they are well-anchored, but leave them slightly protruding.
- The Cure: Let the vases dry completely. Plaster of Paris will heat up and harden in about 1 to 2 hours, but wait a full 24 hours for the moisture to fully evaporate. Joint compound may take 24 to 48 hours to dry completely rock-hard.
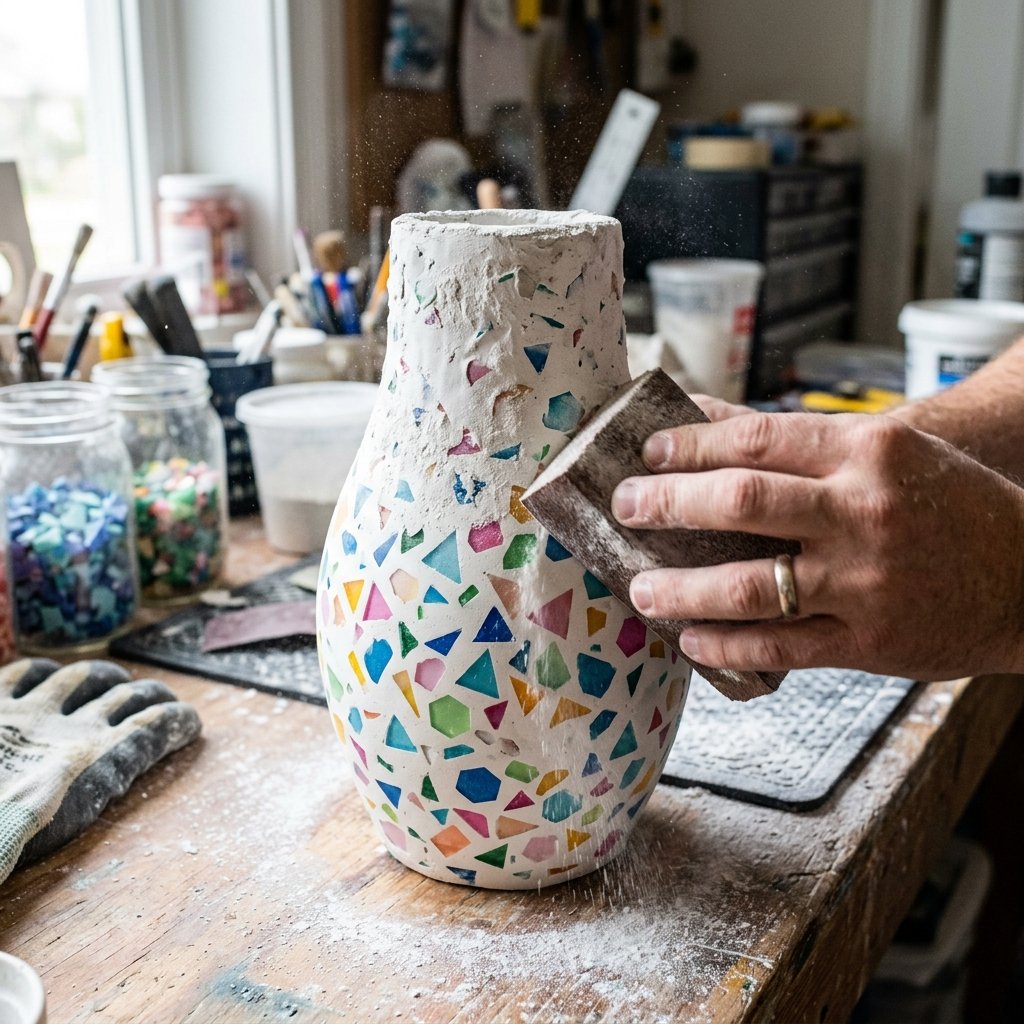
- The Magic Reveal (Sanding): This is the most crucial step. Take your vase outside. Using 80-grit sandpaper, begin sanding the entire surface. At first, it will just look like a messy, lumpy disaster. But as you sand away the top layer of plaster, you will begin to shave down the polymer clay chips, revealing smooth, flat, colorful geometric cross-sections flush with the white plaster. It is pure magic. Once the pattern is revealed, switch to 120-grit to smooth out the scratches, and finish with 220-grit for a buttery, stone-like finish.
- Seal the Deal: Wipe away all the dust with a slightly damp microfiber cloth. Once dry, spray the vase with two coats of a premium matte clear sealant. This protects the water-soluble plaster from humidity, spilled drinks, and floral water, ensuring your centerpieces look flawless all night long.
“The sanding phase is where the amateur gives up and the master craftsman pushes through. It takes elbow grease, but watching that high-end terrazzo pattern emerge from the dust is the ultimate DIY reward.”
Styling the Table: Elevating Your Centerpieces to Art Installations
Maximizing Visual Impact on a Shoestring Floral Budget
You have just spent your weekend crafting a fleet of stunning, heavy, architectural faux terrazzo vases. Now, how do you style them for the reception without blowing the budget you just saved on expensive floral arrangements? The secret is that when your vessel is a work of art, the florals can be minimalist, modern, and cheap.
Resourceful Floral Pairing Strategies
Because the faux terrazzo pattern is visually busy and highly textured, you do not want to overwhelm it with massive, complex bouquets. Simple, structural, and monochromatic florals work best and cost a fraction of the price of traditional mixed arrangements.
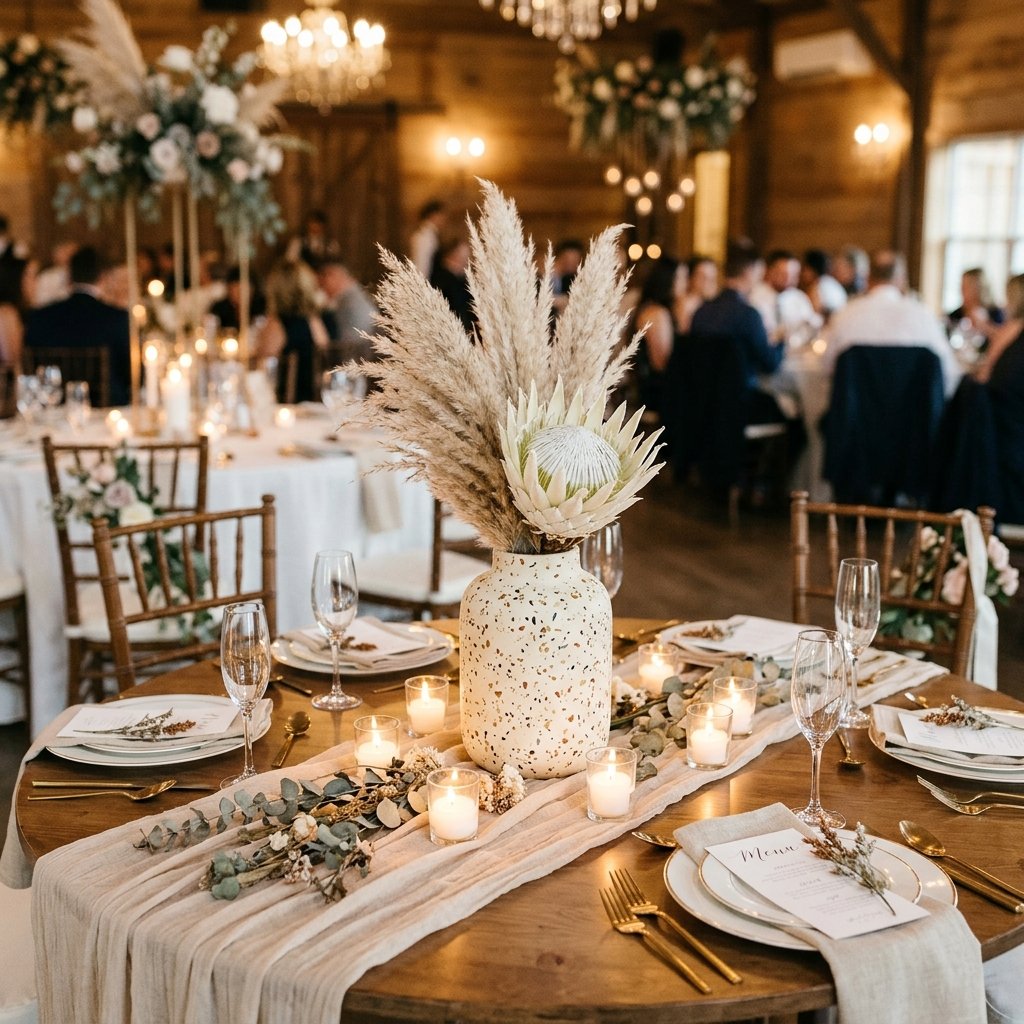
- The Single Stem Statement: Buy large, structural tropical leaves (like Monstera or Bird of Paradise) or single, massive blooms (like King Protea or large Dahlias). Placing just one or two dramatic stems in your terrazzo vase looks incredibly high-end and modern. Cost: $3 to $5 per table.
- Foraged and Dried Botanicals: Lean into the earthy, rugged look by foraging dried branches, pampas grass, or dried bunny tails. Spray paint some branches gold or matte black to match your accent chips. Cost: 100% Free to $2 per table.
- The Baby’s Breath Cloud: Baby’s breath (Gypsophila) is incredibly cheap. When bunched together tightly in a large mass, it creates a modern, ethereal “cloud” that contrasts beautifully with the heavy, masculine stone look of the terrazzo. Cost: $4 to $6 per table.
| Floral Styling Approach | Vibe / Aesthetic | Estimated Floral Cost (Per Table) |
|---|---|---|
| Single Monstera Leaf | Modern, Tropical, Minimalist | $3.00 |
| Dried Pampas & Branches | Boho, Rugged, Earthy | $0.00 – $4.00 |
| Massed Baby’s Breath | Ethereal, Chic, Contemporary | $5.00 |
| Eucalyptus Greenery Cascade | Classic, Romantic, Fresh | $6.00 |
Lighting the Canvas
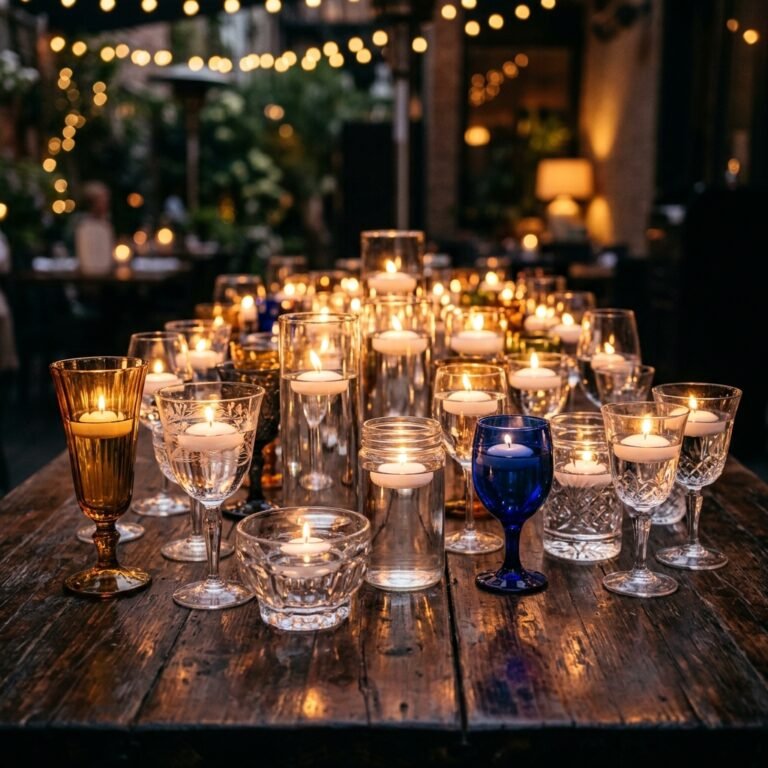
To truly make your centerpieces look like a million dollars, surround them with strategic, budget-friendly lighting. Buy bulk packs of cheap glass votives from the dollar store and fill them with inexpensive tealights. The flickering candlelight will catch the subtle metallic or colorful flecks in your faux terrazzo chips, adding depth and romance to the tablescape. By combining your handcrafted vessels with minimalist florals and warm candlelight, you create an immersive, luxury dining experience that completely defies its humble, thrift-store origins.
Conclusion
Your Million-Dollar Day, Built by Your Own Two Hands
Planning a wedding on a budget does not mean you have to settle for basic, uninspired decor. By tapping into your inner craftsman, embracing the rugged beauty of raw materials like plaster and clay, and putting in a little elbow grease, you have created something truly extraordinary. These faux terrazzo centerpieces are more than just a clever budget hack; they are a testament to your resourcefulness and creativity.
When your guests sit down at their tables and marvel at the heavy, stone-like vessels holding your florals, they will assume you spent thousands of dollars on a luxury rental company. Only you (and perhaps your very dusty crafting clothes) will know that the entire look was achieved for less than the cost of a cup of coffee per table. Best of all, unlike rented glass vases that must be returned the next morning, these durable, bespoke art pieces belong to you. Gift them to your bridal party, use them to decorate your new home together, or sell them to another budget-savvy bride to recoup your minor investment. You didn’t just save money; you built a beautiful foundation for your celebration. Now, go wash that plaster off your hands, pour yourself a well-deserved drink, and enjoy the million-dollar wedding you built from scratch!

Makenzie is the founder and lead writer at MoneyHackTips.com — a personal finance blog dedicated to delivering street-smart financial wisdom for real people on real budgets. With 300+ published articles covering everything from debt management to investing fundamentals, Makenzie’s mission is to make every dollar work harder. When not writing about money hacks, Makenzie is testing frugal living strategies, optimizing side hustles, and helping readers build financial freedom from scratch.