Grow Your Own Food For Pennies: The Fail-Proof Seed Starting Guide
Let’s be real: your grocery bill is a monster. You walk in for a few things and walk out $100 lighter, clutching a sad-looking head of lettuce and some tomatoes that taste like cardboard. The so-called ‘fresh’ produce section is a highway robbery scene, and the garden center isn’t much better. They charge you $5 for a single tomato plant that you could have grown yourself for less than a dime. It’s time to stop playing their game. This isn’t just about gardening; it’s about taking back control. It’s a rebellion against inflation that you can start on your windowsill. This guide is your blueprint to growing an abundance of food for pennies, cutting your grocery bill, and maybe even pocketing some extra cash. No fluff, no complicated science—just a fail-proof plan to turn tiny seeds into a wallet-fattening harvest.
Why You’re Getting Ripped Off (And How to Stop)

Ever wonder why that tiny basil plant costs $4.99 at the store? It’s not because it’s grown in volcanic soil by artisanal farmers. It’s because you’re paying for the pot, the soil, the greenhouse, the shipping, the store’s overhead, and about five different layers of profit. A single packet of basil seeds costs maybe $2 and contains over 100 seeds. That’s 100 potential plants. The math is insulting once you see it. Commercial growers have mastered the art of upselling convenience. They bet on you being too busy or too intimidated to do it yourself. We’re calling their bluff. By starting your own seeds, you’re not just growing food; you’re cutting out every single middleman. You’re paying the ‘producer price’—a few cents per plant—instead of the inflated retail price. This is the single biggest hack to slash your summer food budget. You gain access to way more interesting and delicious varieties than the boring, mass-market stuff they stock on shelves. Think purple carrots, striped tomatoes, and lemon-flavored cucumbers. Your garden—and your meals—are about to get a serious upgrade.
Your Dirt-Cheap Arsenal: The Ultimate Seed Starting Shopping List
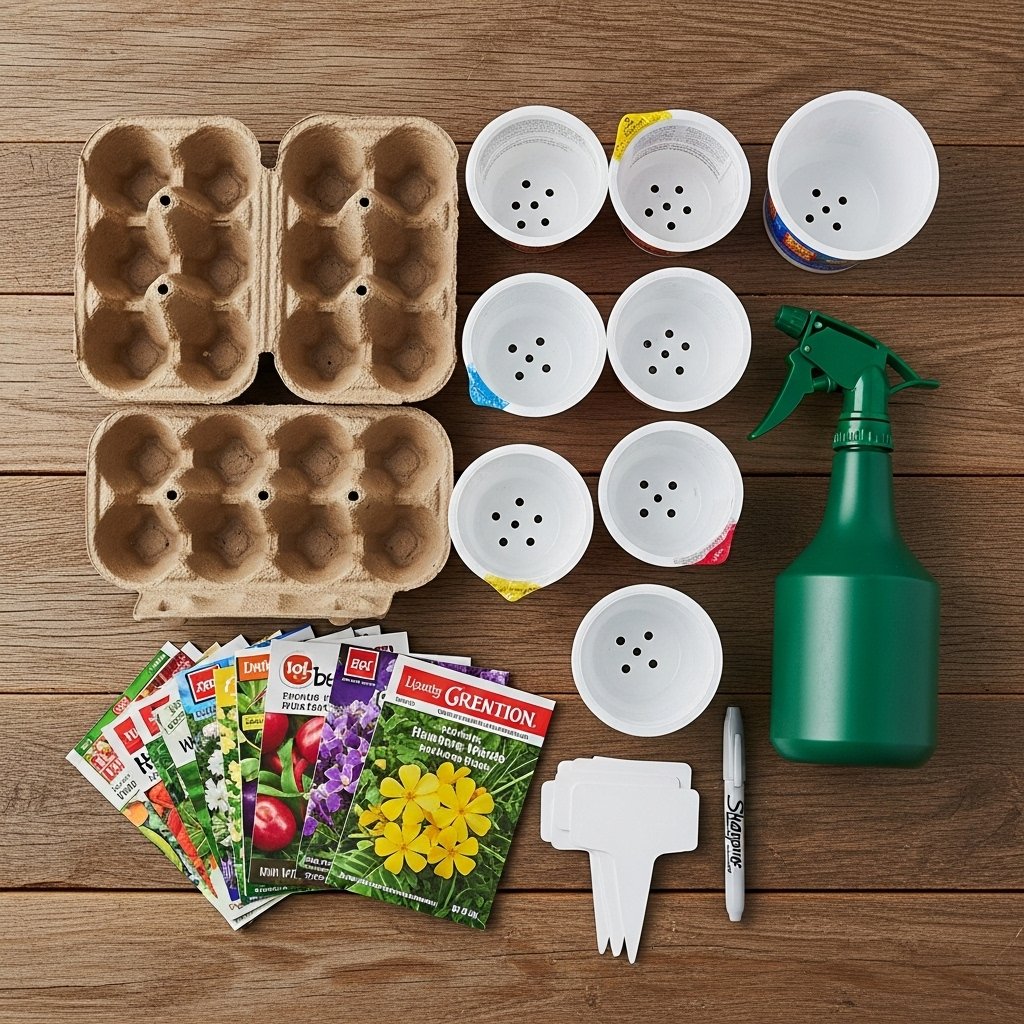
Forget those fancy, overpriced seed starting kits. Most of what you need is probably already in your recycling bin. The goal here is maximum results for minimum cash. Here’s the no-nonsense list of what you actually need.
What to Scavenge for Free:
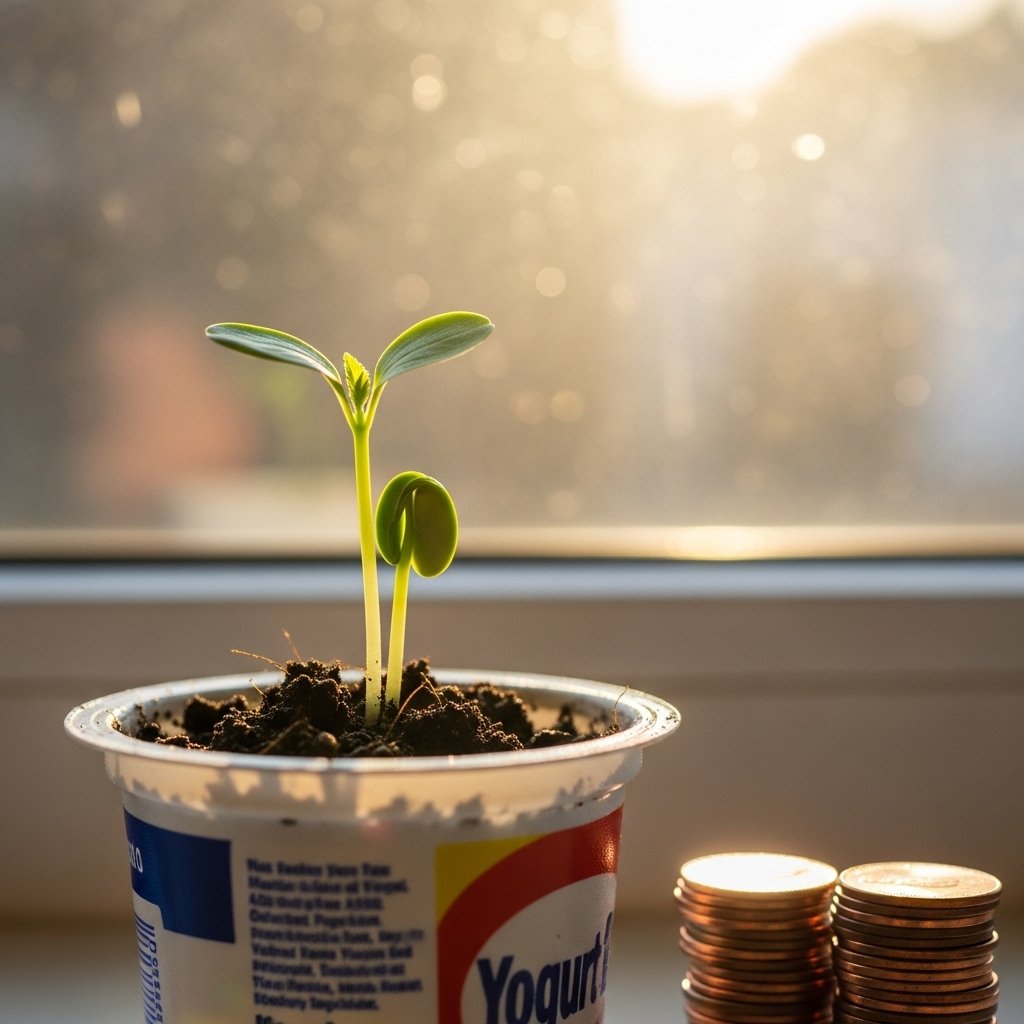
- Containers: Yogurt cups, sour cream containers, plastic salad boxes, and egg cartons are perfect. Just poke some drainage holes in the bottom with a nail or a screwdriver. Free is your favorite price.
- Watering Can: A plastic milk jug with holes poked in the lid works just as well as a $20 watering can.
- Plant Labels: Cut up an old plastic container (like a milk jug) into strips. Write on them with a permanent marker. Boom, free labels that won’t rot like popsicle sticks.
What to Actually Buy (The Smart Investments):
- Seed Starting Mix: Don’t just use dirt from your yard. It’s too heavy and can contain pests. A bag of sterile seed starting mix is light, fluffy, and gives your seeds the best shot. One big bag costs about $15 and will last you ages. This is non-negotiable.
- Seeds: This is where the fun begins. Look for sales at the end of the season or check out seed swaps online. A packet usually costs between $1.50 and $3.50 and contains dozens, sometimes hundreds, of seeds.
- A Light Source: This is the one place you might need to spend a little, but it pays for itself. While a sunny south-facing window can work, your seedlings can get ‘leggy’ (long and weak) stretching for light. A simple, cheap LED shop light from a hardware store for $20-$30 hung a few inches above your seedlings will give you strong, stocky plants every time. It’s a game-changer.
The Fail-Proof Method: From Seed to Seedling in 7 Steps
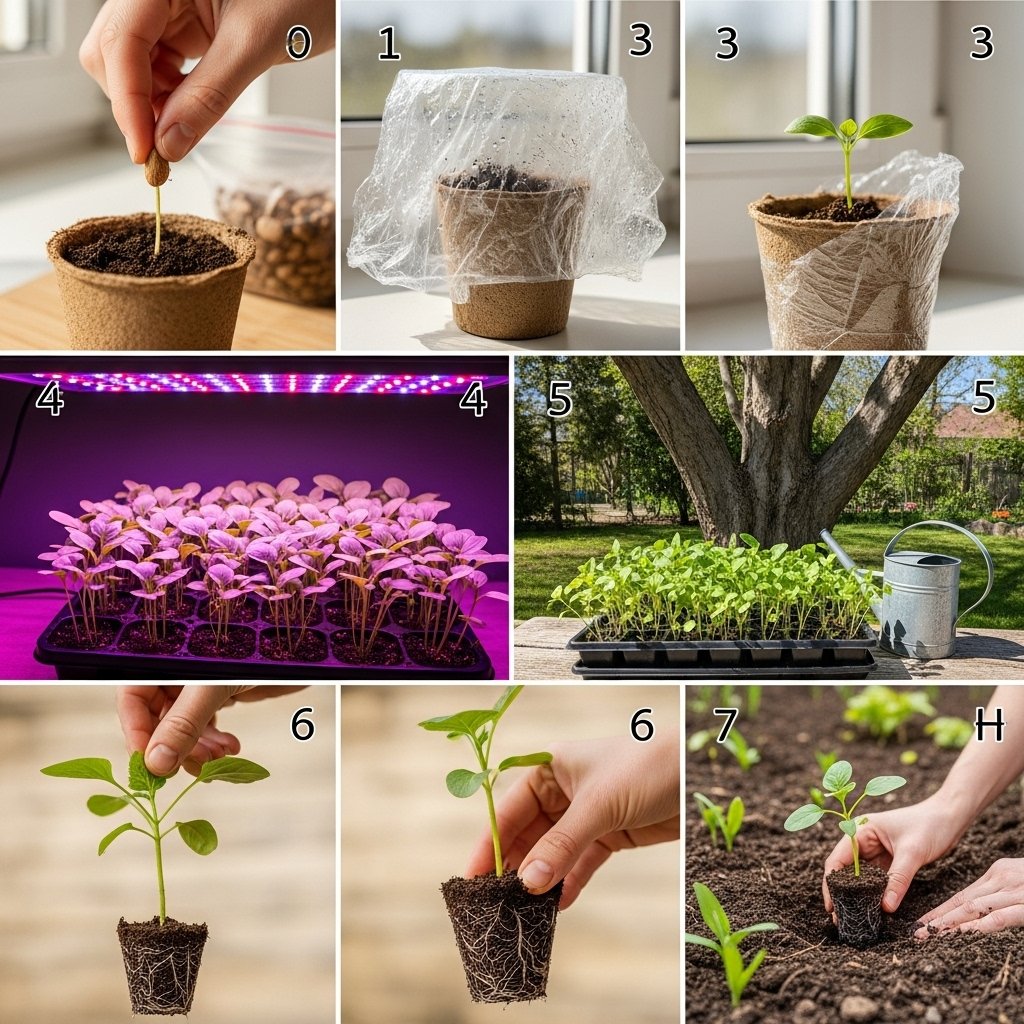
This is where the magic happens. Follow these steps exactly, and you’ll have a jungle of seedlings before you know it. No ‘green thumb’ required, just the ability to follow directions.
- Prep Your Station: Moisten your seed starting mix in a bucket. You want it to feel like a damp sponge, not a muddy mess. Fill your scavenged containers, tapping them gently to settle the mix. Don’t pack it down hard.
- Plant with Precision: Check your seed packet. It’s your bible. It tells you how deep to plant. A good rule of thumb is to plant a seed twice as deep as it is wide. For tiny seeds like lettuce, just sprinkle them on top and barely cover them with mix. Plant 2-3 seeds per container in case one doesn’t sprout. You can thin out the weaker ones later.
- Water Wisely: After planting, water gently. A spray bottle is perfect for this so you don’t wash the seeds away. The key is to keep the soil consistently moist, but never waterlogged. Water from the bottom by placing your containers in a tray of water for 30 minutes. This encourages strong root growth.
- Bring the Heat (and Humidity): Seeds need warmth to germinate. You can cover your containers with a clear plastic lid (like from a salad box) or plastic wrap to create a mini-greenhouse. Place them in a warm spot, like on top of your refrigerator. They don’t need light yet.
- Let There Be Light: As soon as you see the first green sprout, whip off the cover and get them under your light source immediately. Position the light 2-3 inches above the seedlings and keep it on for 14-16 hours a day. A cheap outlet timer ($10) automates this. As the plants grow, raise the light.
- Toughen Them Up (‘Hardening Off’): About 1-2 weeks before you plan to plant them outside, you need to acclimate them. This is the most skipped—and most critical—step. Start by placing them in a shady, protected spot outside for an hour on a calm day. Each day, gradually increase their time outside and introduce them to more direct sun. After a week or two, they’ll be tough enough to handle the great outdoors.
- Planting Day: Once the danger of frost has passed, it’s time to plant your strong, healthy seedlings in your garden or containers. Water them well after planting and give yourself a high-five. You did it.
The Math Doesn’t Lie: DIY Seedlings vs. Store-Bought Plants

Still not convinced? Let’s run the numbers. Talk is cheap, but store-bought plants aren’t. We’ll compare the cost of starting 6 tomato plants, 6 bell pepper plants, and 6 basil plants yourself versus buying them from a typical garden center.
| Item | DIY Seed Starting Cost | Store-Bought Plant Cost |
|---|---|---|
| 6 Tomato Plants | Seed Packet (50+ seeds): $3.00. Your cost for 6 plants: ~$0.36 | 6 Plants at $4.50/each: $27.00 |
| 6 Bell Pepper Plants | Seed Packet (25+ seeds): $2.50. Your cost for 6 plants: ~$0.60 | 6 Plants at $4.50/each: $27.00 |
| 6 Basil Plants | Seed Packet (100+ seeds): $2.00. Your cost for 6 plants: ~$0.12 | 6 Plants at $4.99/each: $29.94 |
| Shared Supplies (Soil, Light) | Prorated cost for these 18 plants: ~$5.00 | Included in plant price |
| TOTAL COST | $8.08 | $83.94 |
| TOTAL SAVINGS | $75.86 | |
You read that right. You save nearly $76 on just 18 plants. And you have tons of seeds and supplies left over to grow more or for next year. The savings compound ridiculously fast. Imagine a full garden. We’re talking hundreds of dollars back in your pocket before you’ve even harvested your first tomato.
Level Up: Turn Your Green Thumb into Greenbacks

Once you’ve mastered this, you’ll realize you have way more seedlings than you have space for. Don’t throw them away—sell them! This is an incredibly easy and profitable side hustle that frugal enthusiasts and neighbors love.
The Game Plan:
- Identify Your Winners: Notice which plants grow the strongest and what varieties are popular. Heirloom tomatoes, unique hot peppers, and culinary herbs are always big sellers.
- Price Smart: You grew them for pennies, so you can easily undercut the big stores. Selling healthy seedlings for $2.00 – $3.00 each is a steal for your customers and pure profit for you.
- Market Like a Pro (For Free): Post on Facebook Marketplace, local gardening groups, and Nextdoor. Put a simple sign at the end of your driveway. Word of mouth travels fast when you’re selling quality plants for cheap.
- The Setup: You don’t need a fancy stall. A simple folding table and a cash box (or just your Venmo QR code) is all it takes. Be ready to offer advice—your customers will appreciate it.
You could easily make back the cost of your entire garden setup in one weekend and pocket an extra $100-$300 with very little effort. It’s the ultimate frugal hack: a hobby that saves you money and makes you money at the same time.
Scam Warning: Be wary of any ‘opportunities’ that ask you to buy into a special gardening club or seed distribution program to sell plants. These are often multi-level marketing (MLM) schemes in disguise. You don’t need to pay anyone for the right to sell your own plants. Just grow them and sell them. It’s that simple.
Conclusion
You now have the complete playbook to fight back against insane food prices. Starting seeds isn’t some mystical art reserved for master gardeners; it’s a simple, repeatable process that saves you an obscene amount of money. You’ve seen the math. For the cost of a couple of fancy coffees, you can grow a garden’s worth of food. You’re not just planting seeds; you’re planting the seeds of financial independence and self-sufficiency. So grab a yogurt cup, get some soil, and start your rebellion. Your wallet—and your dinner plate—will thank you.