Grow Fresh Herbs In A Dark Apartment On A Tiny Budget
Let’s be real: those little plastic clamshells of herbs at the grocery store are a total rip-off. You pay $4 for a few sad-looking sprigs of basil that wilt before you even get home. It’s a waste of money and a flavor tragedy. But what if you could have an endless supply of fresh, potent herbs right in your kitchen, even if you live in a dark apartment with zero natural light? It’s not just possible; it’s a straight-up power move for anyone serious about saving money and eating well.
Forget fancy, expensive hydroponic systems. We’re talking about a down-and-dirty, street-smart setup that costs less than a few trips to the grocery store. This is your blueprint for creating a personal herb factory on a shoestring budget. Get ready to transform your meals, slash your grocery bill, and maybe even start a low-key side hustle. This isn’t just gardening; it’s hacking your food system.
The Game Plan: Gear You Need on the Cheap

The Game Plan: Gear You Need on the Cheap
Before you start, you need to assemble your toolkit. But we’re not dropping serious cash at a fancy garden center. We’re hacking the system with smart, frugal choices. This is about being resourceful, not rich.
Lighting: The Non-Negotiable Game-Changer
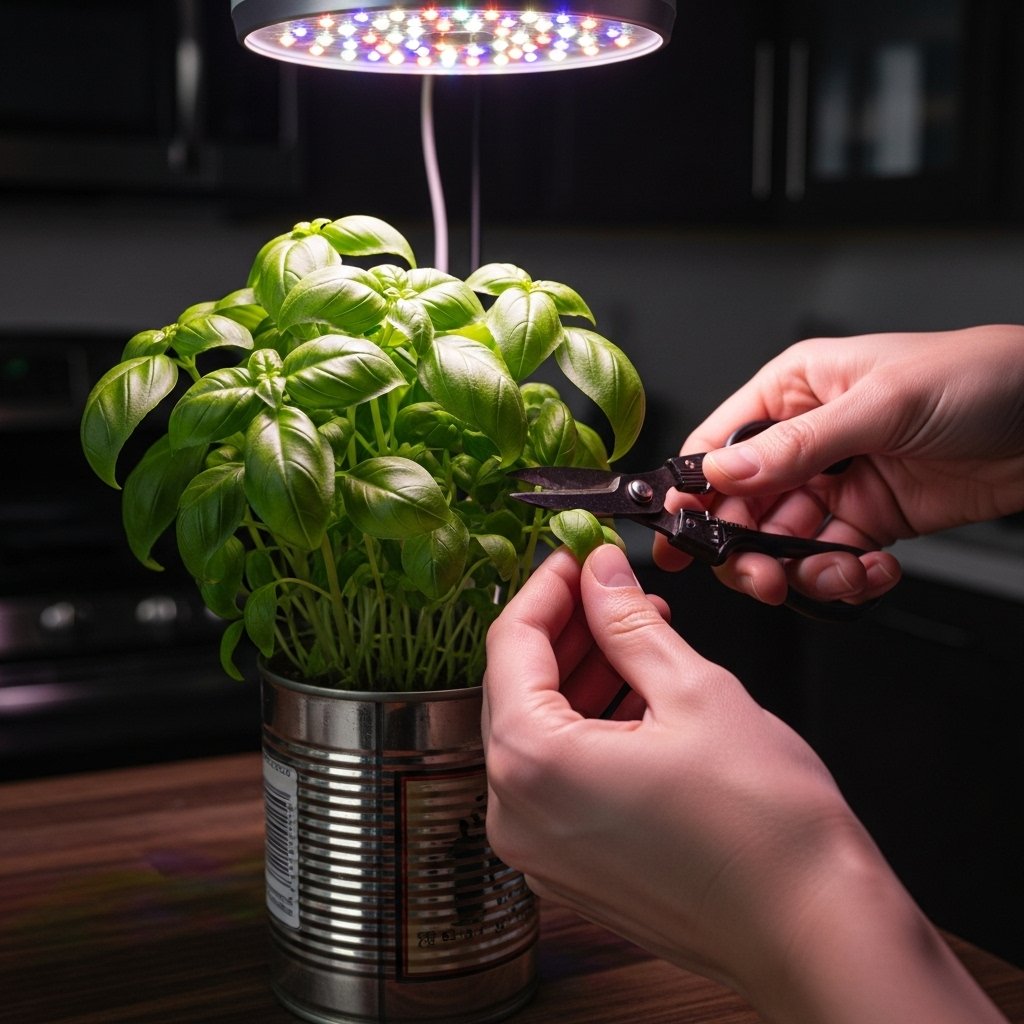
In a dark apartment, the right light isn’t just important—it’s everything. This is the one area where you’ll spend a little money, but it’s a one-time investment that pays for itself. Forget ‘sunny windowsill’ advice; we’re creating our own sun. You need an LED grow light. Look for full-spectrum LED light strips or clip-on lamps. You can find killer options online for $20-$30. Make sure it has a built-in timer; automating your ‘sunlight’ for 12-16 hours a day is key to making this a set-it-and-forget-it system.
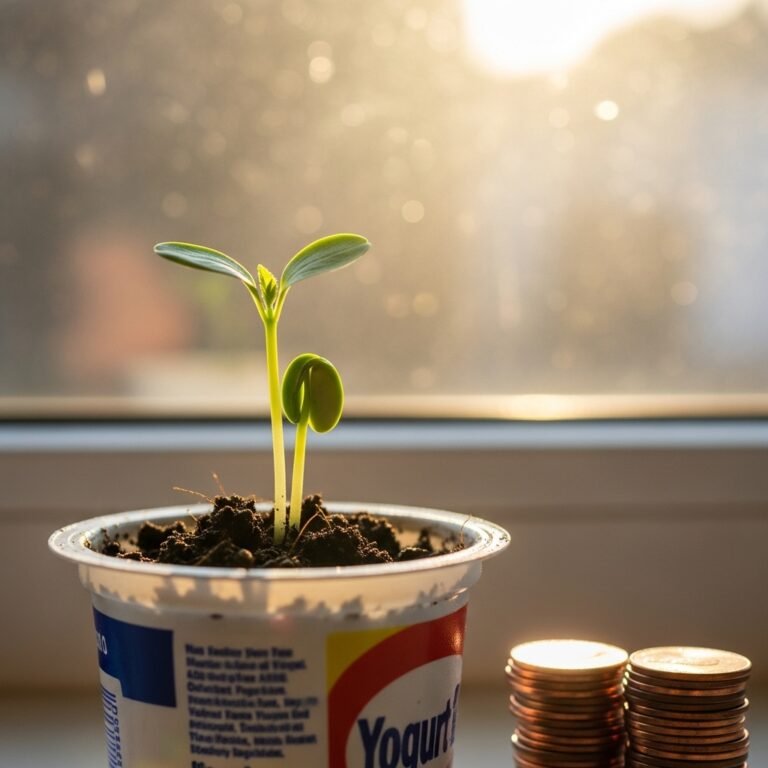
Containers: Raid Your Recycling Bin
Don’t you dare buy new pots. Your recycling bin is a goldmine. Yogurt cups, sour cream containers, plastic takeout boxes, even old coffee mugs will work. The only rule is it must have drainage. No exceptions. Grab a drill, a screwdriver, or even a hammer and nail and punch 3-4 holes in the bottom of whatever you’re using. Stagnant water is the #1 killer of baby herbs.
Growing Medium & Seeds: The Foundation
You have two main choices for what to grow your herbs in:
- Potting Mix: This is the easiest route. Grab a bag of indoor potting mix. Don’t just use dirt from outside—it’s too dense and can have pests. A decent-sized bag will cost around $10 and fill dozens of small containers.
- Seeds vs. Cuttings: Seeds are incredibly cheap, often $1-$2 a packet. For a near-zero cost start, try rooting cuttings. Buy one bunch of mint or basil from the store, stick a few healthy stems in a glass of water, and in a week or two, they’ll grow roots. Free plants. It’s the ultimate frugal hack.
| Item | Frugal DIY Cost | Traditional Store-Bought Cost (Per Plant) |
|---|---|---|
| Herbs (e.g., Basil) | $2 for a seed packet (yields 20+ plants) | $4.99 for one small, sad plant |
| Containers | $0 (recycled yogurt cups) | $5.00+ per decorative pot |
| Lighting | $25 one-time for a grow light | N/A (Relies on a sunny window you don’t have) |
| Total First-Year Cost | Approx. $37 for an endless supply | $250+ (buying herbs weekly) |
The math is a no-brainer. Your initial investment pays for itself in about two months, and then you’re basically printing free herbs for life.
The Step-by-Step Grow-Op: From Seed to Harvest
The Step-by-Step Grow-Op: From Seed to Harvest
Alright, you’ve got your gear. Now it’s time to get your hands dirty and bring this herb factory to life. Follow these steps exactly, and you can’t go wrong.
- Container Prep: Make sure every single container has drainage holes. Place a small coffee filter or piece of paper towel at the bottom to stop soil from falling out.
- Fill ‘Em Up: Add your potting mix to the containers, leaving about an inch of space at the top. Lightly moisten the soil with a spray bottle or a gentle trickle of water. You want it damp, not a swamp.
- Planting Time: Read your seed packet. It will tell you how deep to plant. A good rule of thumb for most herbs is about 1/4 inch deep. Drop 2-3 seeds per container. Don’t overcrowd them; they need room to breathe.
- The Germination Hack: To speed up sprouting, create a mini-greenhouse. Loosely cover the top of your containers with plastic wrap or a clear plastic bag. This traps humidity. Place them somewhere warm (like on top of your fridge) and wait. Check daily.
- First Light: As soon as you see the first tiny green sprout, whip off the plastic cover and get them under the grow light immediately. Position the light 2-4 inches above the seedlings. This is critical to prevent them from getting tall and weak. Set your timer for 14-16 hours of light per day.
- Watering 101: This is where most people mess up. Do not overwater. Stick your finger an inch into the soil. If it feels dry, it’s time to water. If it feels damp, leave it alone. Water the soil, not the leaves.
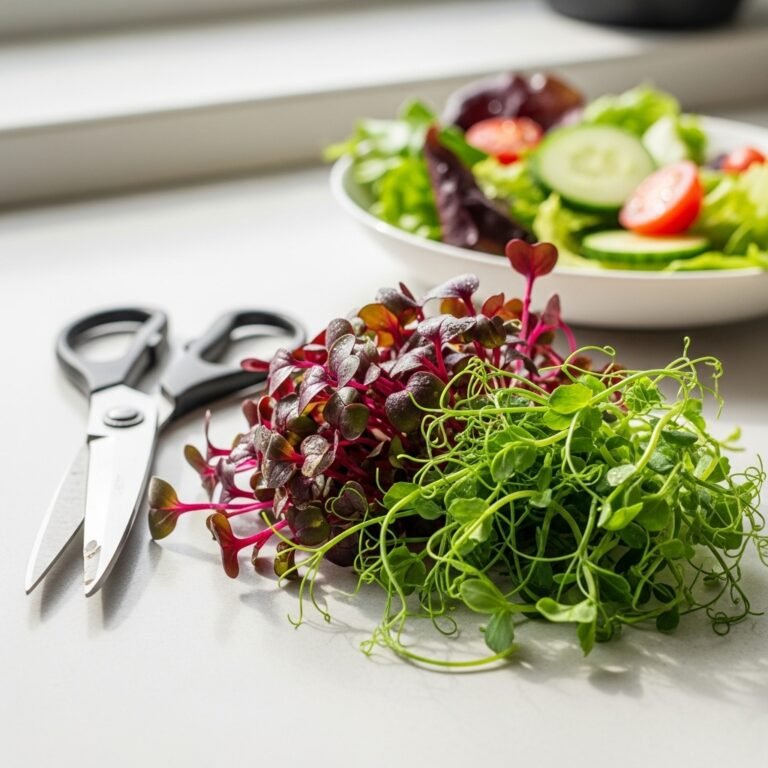
- Harvesting for Growth: Once your plants have several sets of leaves, it’s time to start harvesting. The more you trim them, the bushier and more productive they’ll become. For herbs like basil, pinch off the top set of leaves right above a node (where two leaves branch off). This encourages the plant to grow outwards, not just upwards. Never take more than one-third of the plant at a time.
Level Up: Turning Your Herb Garden into a Side Hustle

Level Up: Turning Your Herb Garden into a Side Hustle
Once your herb garden is cranking, you’ll likely have more than you can use. That’s not a problem; it’s an opportunity. Your frugal hobby can easily become a micro-side hustle that puts cash back in your pocket.
Selling Fresh-Cut Herbs
Your neighbors are probably still buying those sad, overpriced herb packages. Be their solution. Bundle up your fresh-cut basil, mint, or rosemary with a rubber band and a simple tag. You can sell these for $2-$3 a bundle. Post on your local neighborhood Facebook group, Nextdoor, or just put up a sign in your apartment building’s community space. People love buying local, and it doesn’t get more local than this.
Creating Value-Added Products
This is where the real money is. A little effort can turn your $0.10 worth of herbs into a $10 product.
- Dried Herb Blends: Got too much oregano, thyme, and rosemary? Dry them (in an oven on low heat or just by hanging them) and create your own ‘Italian Seasoning’ or ‘Herbs de Provence’ blends. Package them in small, cheap jars from the dollar store.
- Infused Oils & Vinegars: This sounds fancy, but it’s ridiculously easy. Gently heat some olive oil, add a few sprigs of clean, dry rosemary and a clove of garlic. Let it steep. Bottle it up. You’ve just created a gourmet product people pay big money for.
- Herb Salts: In a food processor, blend a cup of coarse sea salt with a half-cup of fresh, packed herbs like rosemary or basil. Spread it on a baking sheet to dry out. Boom. Gourmet finishing salt.
| Side Hustle Idea | Estimated Cost to Make | Potential Selling Price | Profit Margin |
|---|---|---|---|
| Fresh Herb Bundle (e.g., Basil) | ~$0.15 | $2.50 | Insanely High |
| DIY Infused Olive Oil (250ml) | $3.00 (oil + bottle) | $10.00 | Over 200% |
| Gourmet Herb Salt (4oz jar) | $1.50 (salt + jar) | $8.00 | Over 400% |
Start small at a local farmer’s market, craft fair, or even just selling to friends and family. Your initial grow light investment can be paid back with the profits from a single weekend of sales.
Troubleshooting Your Grow: Don’t Let Problems Kill Your Vibe
Troubleshooting Your Grow: Don’t Let Problems Kill Your Vibe
Even the best hustlers hit a snag. Plants can be fussy, but most problems have simple, cheap fixes. Here’s how to deal with the most common issues without freaking out.
Problem: My Seedlings are Tall, Pale, and Spindly.
This is called getting ‘leggy’. It’s a classic sign they’re desperately stretching for light. The Fix: Your grow light is too far away. Lower the light so it’s just 2-3 inches above the tops of your plants. They need intense light to grow strong and stocky, not weak and flimsy.
Problem: The Leaves are Turning Yellow.
Yellow leaves are a cry for help. It’s usually one of two things.
- Overwatering: This is the most common killer. The roots are drowning and can’t absorb nutrients. Let the soil dry out completely before watering again.
- Nutrient Deficiency: After a month or two, your plants might have used up all the food in the potting soil. The Fix: Get a simple, all-purpose liquid fertilizer. Dilute it to half-strength and feed your plants once every 2-3 weeks. A single bottle costs about $8 and will last you for years.
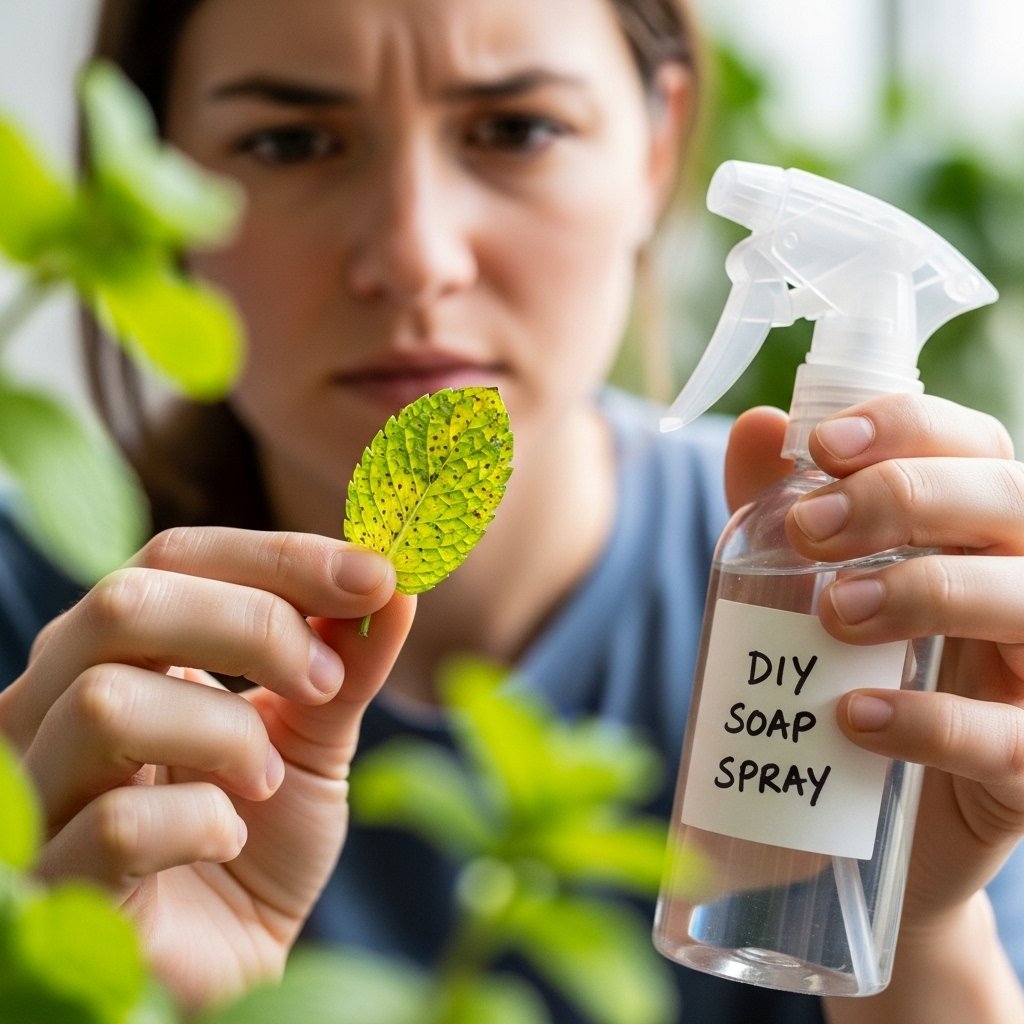
Problem: I See Tiny Bugs or Fine Webs on My Plants.
Pests like aphids or spider mites can show up, even indoors. Don’t panic and don’t use harsh chemicals.
The Ultimate Frugal Pest Solution: Mix a few drops of plain dish soap (no bleach or degreaser) into a spray bottle filled with water. Shake it up and thoroughly spray your plants, making sure to get the undersides of the leaves. This soap spray smothers the pests without harming your herbs. Repeat every few days until they’re gone.
Conclusion
You now have the complete playbook. Growing fresh herbs in a dark apartment isn’t some aspirational fantasy; it’s a practical, achievable hustle that saves you serious money and gives you access to flavor you just can’t buy. You’ve seen how a small, one-time investment of under $40 can yield hundreds of dollars in value, whether you’re just using the herbs yourself or leveling up to a side hustle.
This is about more than just gardening. It’s about taking control, being resourceful, and refusing to pay inflated prices for mediocre products. You don’t need a yard, a balcony, or a trust fund to eat well. You just need a little space, a cheap grow light, and the hustle to make it happen. So what are you waiting for? Go get your hands dirty and start your own personal flavor factory.