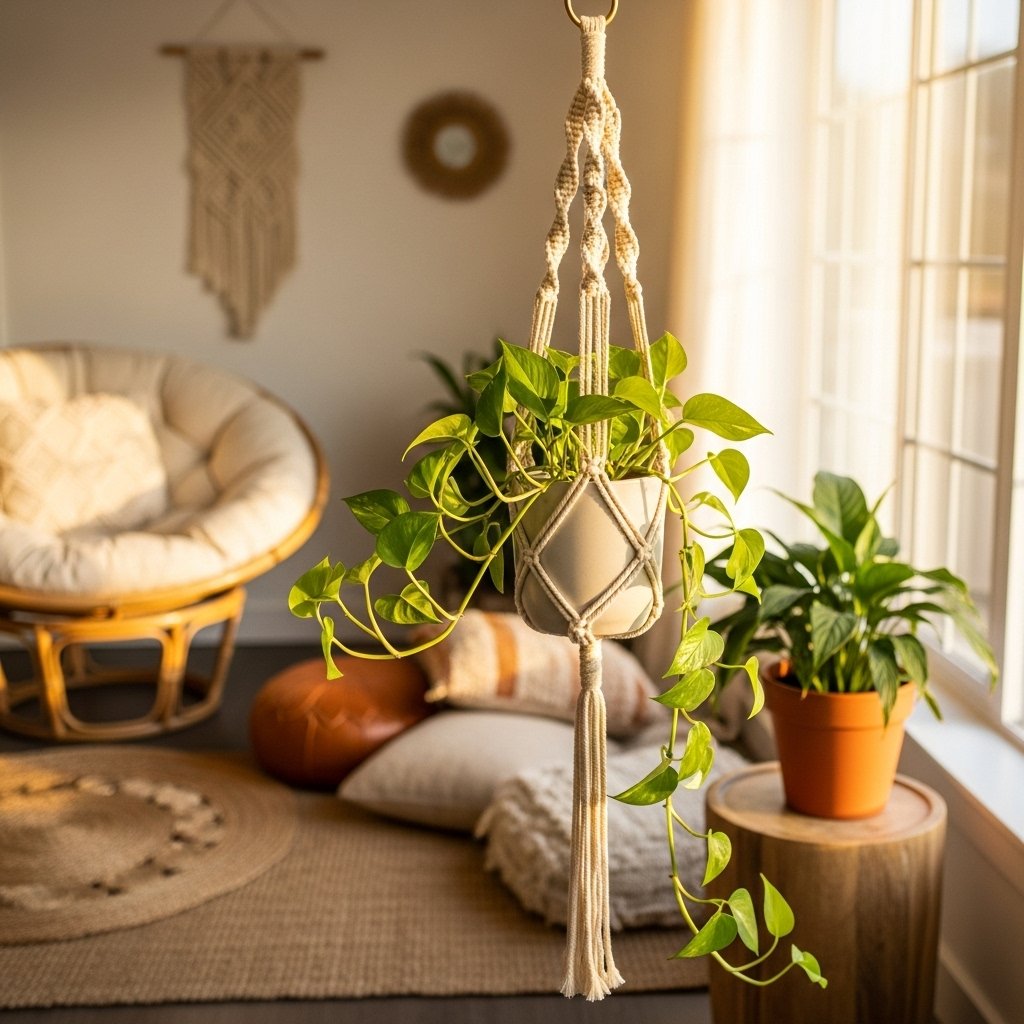
Easy DIY Macrame Plant Hanger: A Boho Decor Project for Under $5
Let’s get real. You’ve seen those gorgeous, woven macrame plant hangers in boutiques, on Instagram, and all over Pinterest. They scream ‘I have my life together and my home is a sanctuary.’ Then you see the price tag—$40, $50, even $70 for some rope and a few knots. That’s not a vibe; that’s a ripoff. Forget that. We’re hacking the system. For less than $5 and an hour of your time, you can create the exact same high-end boho look yourself. This isn’t just about saving money; it’s about taking control, learning a skill, and making your space look amazing on your own terms. Ready to turn some cheap cord into a home decor masterpiece? Let’s get to it.
The Gear Up: What You *Actually* Need (for Under $5)

Don’t let complicated craft store aisles intimidate you. To pull this off, you only need a few basic items. The key is knowing where to look to keep the cost ridiculously low. We’re talking dollar store and craft store clearance bin low. Here’s your shopping list:
- Macrame Cord: This is your main expense. Look for 3mm or 4mm 100% cotton cord. You don’t need a giant roll. Many craft stores sell smaller bundles for a few bucks, which is more than enough for one hanger. A 50-yard roll can often be found for under $4 with a coupon and will make multiple hangers.
- A Wooden or Metal Ring: This is for the top loop. You can find these in the craft section for about $1. Pro hack: you can also salvage a sturdy ring from an old keychain or even use a small, sturdy shower curtain ring.
- Scissors: You already have these. If not, a pair from the dollar store is perfect.
- Measuring Tape or a Ruler: Again, you probably have one. Precision isn’t life-or-death here, so don’t sweat it.
That’s it. Seriously. No fancy tools, no expensive kits. We’re keeping this simple, cheap, and effective. The goal is maximum style for minimum cash.
The Cost Breakdown: DIY vs. Store-Bought Insanity

This is where the frugal magic happens. Seeing the numbers laid out black and white proves why DIY is the ultimate power move for your wallet. The markup on trendy home goods is astronomical. By investing a little time, you’re basically paying yourself back dozens of dollars. Check out this head-to-head comparison:
| Item | Your DIY Cost | Trendy Store Price |
|---|---|---|
| Macrame Cord (for one hanger) | ~$2.50 | $45.00 + tax & shipping |
| Wooden Ring | ~$1.00 | |
| Your Time & Effort | ~1 Hour (Priceless Skill) | |
| TOTAL | Under $5.00 | ~$50.00 |
You’re looking at a savings of over 90%. That’s not just a discount; it’s a total win. For the price of one store-bought hanger, you could buy enough supplies to make ten of your own. You could fill your entire house with boho charm or, better yet, start selling them and turn a profit. This is what smart, frugal living looks like.
The Step-by-Step Hustle: Tying Your Way to Boho Glory
Alright, it’s go-time. Put on some music, clear a little space, and let’s get knotting. We’ll stick to the most basic, foundational knots that look incredible and are easy to master. Follow these steps, and you can’t go wrong.
Step 1: Cut Your Cords
Measure and cut 8 pieces of macrame cord, each 10 feet long. Yes, it sounds like a lot, but knotting uses up length fast. It’s always better to have too much and trim it than to run out mid-project.
Step 2: Attach Cords to the Ring
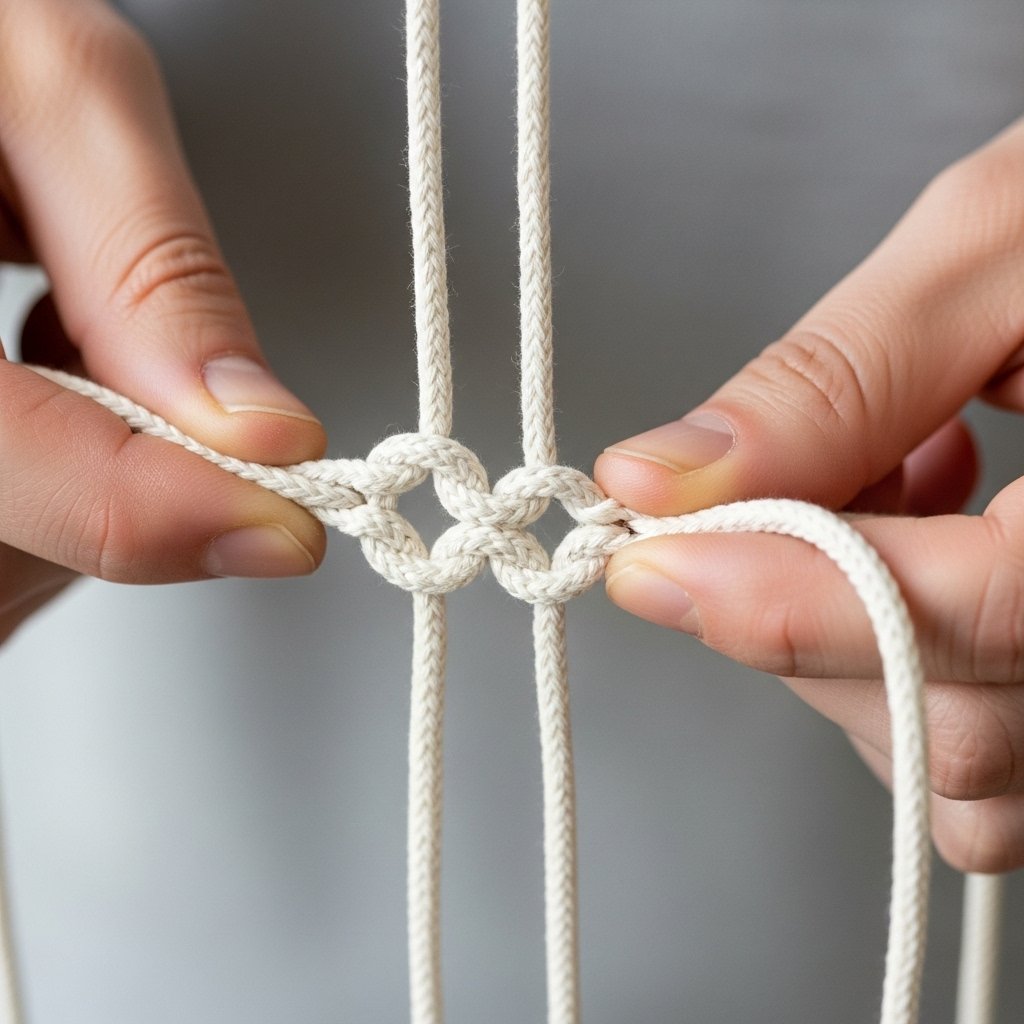
Take two pieces of cord, fold them exactly in half, and pull the folded loop through your wooden ring. Then, pull the four loose ends through that loop to create what’s called a Lark’s Head Knot. It’s a simple, secure way to attach the cords. Repeat this with your remaining 6 cords (in three more pairs of two) until all 8 cords (now 16 hanging strands) are attached to the ring.
Step 3: The Wrapping Knot
To create that clean, professional look at the top, we’ll make a wrapping knot (or gathering knot). Cut an extra piece of cord about 2 feet long. Make a ‘U’ shape with it against your main bundle of cords, just below the ring, with the loop of the ‘U’ pointing down. Holding the top tail of the ‘U’ in place, take the long bottom tail and wrap it tightly around the main bundle of cords (and the other tail of the ‘U’) about 8-10 times. When you’re done wrapping, thread the end of the cord through the loop at the bottom. Now, pull the tail at the top until the bottom loop and the end you just threaded disappear up into the middle of the wraps. Trim the top and bottom ends close to the knot. It’s a magic trick that looks super sleek.
Step 4: The Main Event – Square Knots!
Now, separate your 16 hanging cords into four groups of four. We’re going to work with one group at a time. The Square Knot is the bread and butter of macrame. Here’s how to do it:
- Take one group of 4 cords. The two middle cords are your ‘fillers’—they stay straight. The left and right cords are your ‘working’ cords.
- Take the left cord and make a ‘4’ shape over the two middle cords.
- Take the right cord, pass it over the tail of the left cord, then pass it behind the two middle cords, and pull it through the loop of the ‘4’.
- Pull both working cords to tighten the knot up. That’s the first half.
- Now do the reverse. Take the right cord and make a backwards ‘4’ over the middle two cords.
- Take the left cord, pass it over the tail of the right cord, then behind the two middle cords, and pull it through the backwards ‘4’ loop.
- Pull tight. That’s one full Square Knot!
Create a pattern you like. Do 10-12 square knots in a row on each of the four sections.
Step 5: Creating the Basket
Let’s form the net that will hold your pot. Move down about 4-5 inches from your last row of knots. Now, you’re going to make another row of square knots, but this time you’ll connect the sections. Take two cords from one section and two cords from the section next to it. Use these four cords to tie a new square knot. Repeat this all the way around, connecting all four sections. Drop down another 3-4 inches and repeat this process one more time to create a second row of alternating square knots. This creates the diamond pattern that forms the basket.
Step 6: The Final Knot
Gather all 16 cords together about 4-6 inches below your last row of knots (you can place your pot inside to test the size). Using the same technique as the wrapping knot from Step 3, tie a big, secure gathering knot around all the cords to form the bottom of the hanger. Make this one tight and wrap it at least 10-12 times. Trim the excess cords at the bottom to create a tassel. You can leave them all one length or cut them at an angle for a different look. And you’re done!
The Side Hustle Angle: From Craft to Cash
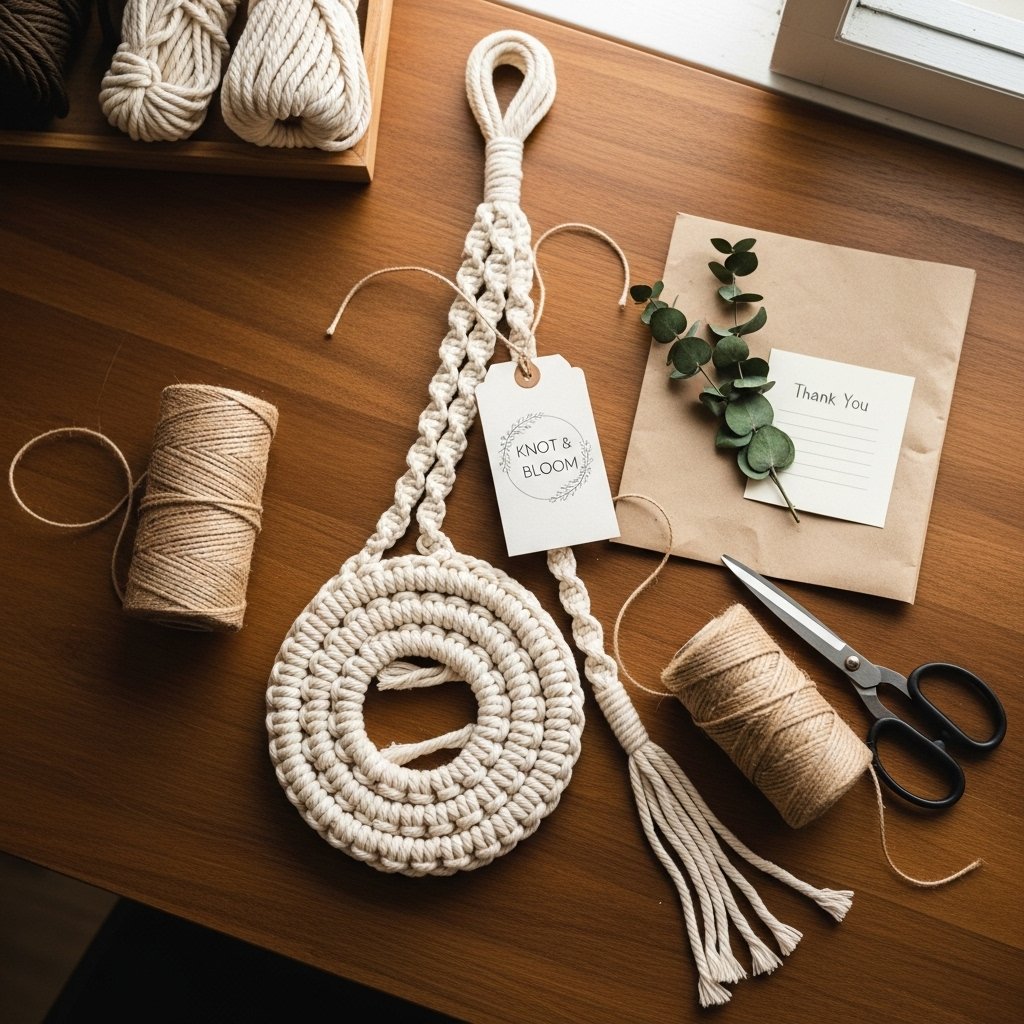
You didn’t just make a plant hanger; you just learned a marketable skill. People pay good money for handmade, quality decor. Turning this into a side hustle is easier than you think. You’ve already proven you can make one for under $5, so the profit margins are huge.
Where to Sell Your Stuff:
- Etsy: The most obvious choice for handmade goods. The key is great photography. Use natural light, show the hanger with a plant in it, and take pictures from multiple angles.
- Local Craft Markets: People love buying local. Renting a small table at a weekend market can be a great way to make sales and get your name out there.
- Facebook Marketplace & Instagram: Use your personal network. Post great photos on Instagram using relevant hashtags (#macrameforsale, #bohohomedecor, #handmade) and list them on Marketplace for local, no-shipping-required sales.
How to Price Your Work:
Don’t undervalue your time! A common formula is: (Cost of Supplies) + (Your Hourly Wage x Hours to Make) = Wholesale Price. Then, Wholesale Price x 2 = Retail Price. Even if it only takes you an hour, you should be charging for that labor.
| Item | Example Cost/Price | Notes |
|---|---|---|
| Cost of Supplies | $4.00 | This is your cost per hanger. |
| Labor (1 hour @ $15/hr) | $15.00 | Your time is valuable. Pay yourself. |
| Wholesale Price | $19.00 | This is your break-even + labor cost. |
| Suggested Retail Price | $38.00 | This is a competitive price that still nets you a great profit. |
Scam Warning: Be wary of ‘crafting opportunities’ that require you to buy an expensive starter kit or promise guaranteed sales if you use their specific, overpriced materials. The real hustle is you, your skills, and affordable supplies. Don’t pay to play.
Conclusion
Look at what you did. For less than the price of a fancy coffee, you created a piece of high-end decor that breathes life into your space. You didn’t just save $45; you gained a skill, a sense of accomplishment, and a potential income stream. This is the core of the frugal hacker mindset: seeing the hidden value and potential all around you. Whether you make one for yourself or a hundred to sell, you’ve officially cracked the code on expensive decor. Now, go find a plant for that masterpiece you just made. You’ve earned it.