Zero Maintenance Curb Appeal: DIY Rock Landscaping That Looks Professional
Let’s be real: your time is money. Every hour you spend mowing, weeding, and watering a thirsty lawn is an hour you’re not spending on your side hustle, with your family, or just decompressing. A pristine green lawn is the old-school American dream, but it’s a resource-sucking nightmare for anyone trying to live smart and build wealth. It demands constant work and a steady cash drip for water, fertilizer, and equipment. That’s not a smart asset; it’s a liability.
Forget that noise. The ultimate frugal hack for your home’s exterior is right under your feet: rocks. We’re talking about a one-and-done, high-impact, ‘set it and forget it’ solution that looks like you paid a pro thousands. A DIY rock landscape is a boss move that not only saves you a fortune in upkeep but actively increases your property value. This isn’t just about gardening; it’s about making a strategic investment in your biggest asset. In this guide, we’ll break down the exact game plan to transform your yard from a money pit into a modern, maintenance-free masterpiece.
The Game Plan: Why Rocks Beat Grass Every Time

The Financial Knockout: Rocks vs. Grass
Before you lift a single shovel, you need to understand the numbers. This isn’t just about aesthetics; it’s a cold, hard financial decision. A traditional lawn is a subscription service you can’t cancel. You’re paying for water, fertilizer, seed, pesticides, and the depreciation and fuel for a mower. A rock landscape is a one-time capital investment that pays you back for years. You buy the materials once, and you’re done. The ongoing cost is virtually zero. Think of all the money you’ll save on your water bill alone, especially if you live in a dry climate. That’s cash that goes directly back into your pocket, ready to be invested or used to pay down debt.
Let’s look at the raw data for a typical 500-square-foot front yard. The difference is staggering.
| Expense Category | DIY Rock Landscaping (Year 1) | Professional Landscaping (Year 1) | Traditional Lawn (Annual Cost) |
|---|---|---|---|
| Materials (Rocks, Fabric, Edging) | $500 – $800 | Included in Labor | $150 (Seed, Fertilizer, etc.) |
| Labor | Your Sweat Equity ($0) | $2,500 – $4,000+ | Your Time (or $500+ for services) |
| Tools (Rental/Purchase) | $50 – $100 | Included | $50 (Gas, Maintenance) |
| Water Bill (Annual) | ~$0 | ~$0 | $200 – $600+ |
| Total First-Year Cost | $550 – $900 | $3,000 – $5,000+ | $400 – $800 |
| 5-Year Total Cost | $550 – $900 | $3,000 – $5,000+ | $2,000 – $4,000+ |
The table doesn’t lie. By going DIY, you’re getting a $3,000+ professional look for under $1,000. And over five years, you’re saving thousands compared to the constant upkeep of a lawn. That’s a no-brainer.
The Groundwork: Prepping Your Yard Like a Pro
Don’t Skip Leg Day: The Prep Work
You can’t build a mansion on a swamp, and you can’t get zero-maintenance curb appeal by dumping rocks on weedy soil. The pros spend 80% of their time on preparation, and so should you. Cutting corners here is a rookie mistake that guarantees you’ll be pulling weeds in a year, defeating the whole purpose. Do it right once, and you’ll never have to do it again.
Your Step-by-Step Prep Protocol:
- Obliterate the Old Lawn: Your first mission is total annihilation of the existing grass and weeds. You have a few options. The fastest is renting a sod cutter. For about $100 a day, you can peel your old lawn off like a carpet. The frugal (but slower) method is ‘sheet mulching’—covering the area with cardboard and letting it sit for several weeks to smother everything. Don’t just spray weed killer; you need to remove the organic matter.
- Level the Battlefield: Once the area is cleared, get a hard garden rake and a shovel. Your goal is to create a smooth, level surface. You also want to create a slight grade sloping away from your house’s foundation to ensure proper water drainage. This is critical to prevent water issues down the line.
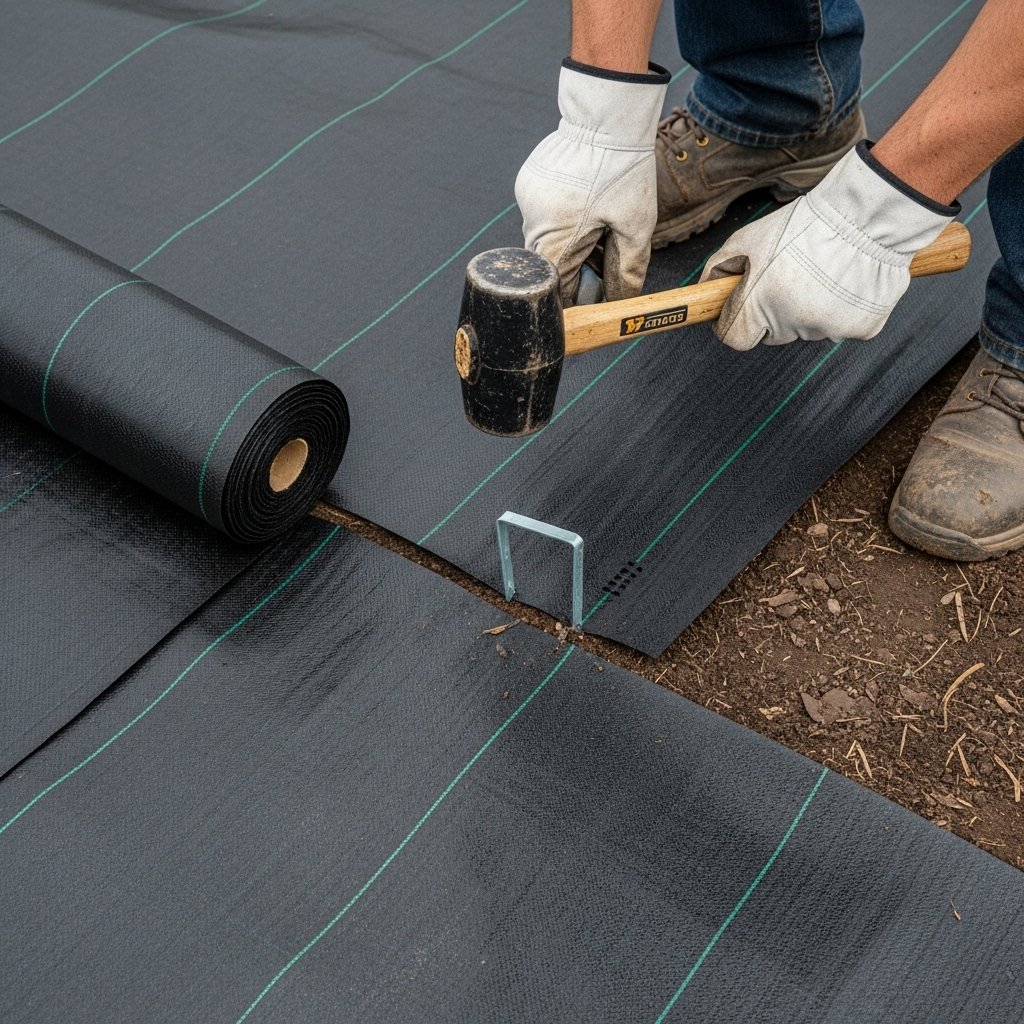
- Install the Weed Barrier Armor: This is the most important step. Buy the best quality, professional-grade woven landscape fabric you can afford. Don’t cheap out on the thin plastic stuff—sunlight will degrade it and weeds will punch right through it. Roll it out, overlapping the seams by at least 6 inches. Use landscape staples every few feet to pin it down securely, especially around the edges.
Key Rule: Overlap your landscape fabric seams by at least 6 inches. Weeds are relentless opportunists. Any gap is an invitation for them to set up shop. Don’t give them an inch.
The Design Blueprint: Choosing Your Rocks & Layout
Architect Your Empire: Rocks, Borders, and Flow
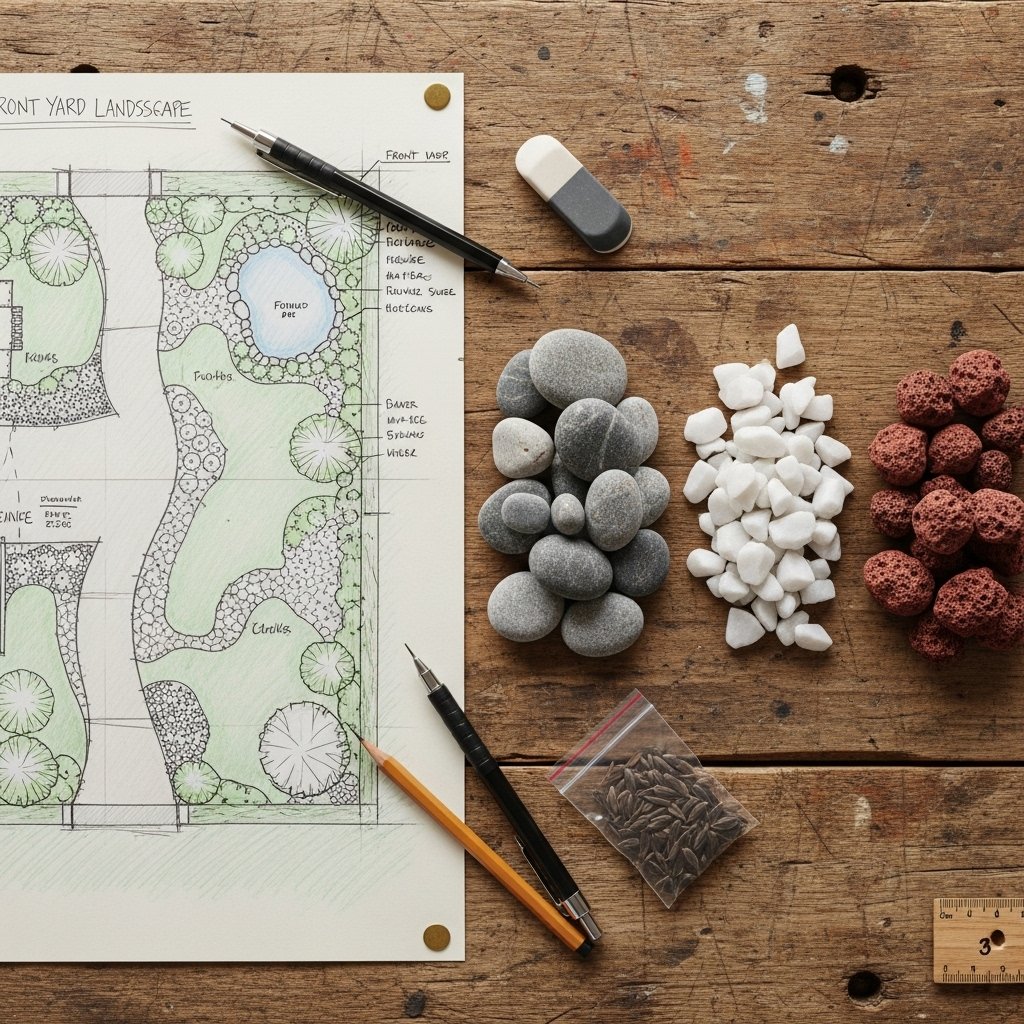
Now for the fun part. Designing your rockscape is where you get to be creative, but you still need a plan. Don’t just start dumping rocks. Think like a designer to create visual interest and a look that feels intentional and expensive.
Rock & Material Selection:
- Field Rocks vs. River Rocks: Field rocks are angular and create a more textured, modern look. River rocks are smooth and rounded, giving a softer, more natural feel. Cost-wise, they’re often comparable. Get samples and see what looks best with your home’s exterior.
- Pea Gravel & Decomposed Granite: These are great for pathways or smaller areas. They are typically the cheapest options but can travel, so they need solid edging.
- Lava Rock: Lightweight and porous, it’s great for covering large areas and comes in colors like red and black. It offers a bold, dramatic look.
- Statement Boulders: A few strategically placed large boulders (one to three is usually enough for a small yard) can act as focal points and anchor your design. They add dimension and make the whole project look more professional. Check local landscape suppliers; sometimes you can find them for a decent price.
Layout & Edging:
Before you order a single rock, lay out your design. Use a garden hose or spray paint to outline the borders of your rock beds and any pathways. This helps you visualize the flow. For edging, you have options. Flexible plastic edging is cheap and easy to install. Steel or aluminum edging gives a razor-sharp modern line but costs more. Poured concrete or paver stones offer a classic, high-end border.
Street-Smart Tip: Call local landscape supply yards and ask for prices on rocks per ‘yard’ (a cubic yard). It is infinitely cheaper to have a truck dump a yard of rock in your driveway than to buy it in little bags from a big-box home improvement store. You’ll save 50-75% on material costs this way.
The Heavy Lifting: Your Step-by-Step Installation Guide

Execution Phase: Building Your Rockscape
Alright, the prep is done, the design is locked in. Time to build. Get a good pair of gloves, stay hydrated, and put on some music. This is pure physical work, but every shovelful is building equity.
- Install Your Edging: Following the lines you laid out, install your chosen edging first. This creates the container for your rocks and is much harder to do after the rocks are in place. Dig a small trench, set the edging in place, and backfill to hold it firm.
- Place the Anchors: If you’re using large statement boulders, now is the time to place them. You’ll likely need a dolly or a friend to help. Dig a shallow depression for each boulder so about one-third of it is below grade. This makes it look like it’s a natural part of the landscape, not just sitting on top.
- Add Drought-Resistant Plants (Optional): If you want some greenery, plant it now. Cut an ‘X’ in the landscape fabric, dig your hole, and place your plant. Choose tough, drought-tolerant options like succulents, ornamental grasses, or yuccas that thrive on neglect. Once they’re in, fold the fabric flaps back around the base of the plant.
- Move the Rock: This is the most labor-intensive part. Use a wheelbarrow to transport the rocks from the main pile to your prepared beds. Don’t just dump it all in one spot. Dump smaller piles throughout the area.
- Spread and Level: Use a hard garden rake (the kind with stiff metal tines) to spread the rocks to a consistent depth of about 2-3 inches. You want enough to completely hide the landscape fabric, but not so much that you’re wasting material. For a perfectly smooth finish, you can use a flat board to screed the rocks level.
The Finishing Touches: High-End Hacks for a Low-Budget Look

Level Up: The Details That Sell the Look
You’ve done the hard work. Now it’s time for the small, cheap details that make your project look like it was done by a high-end design firm. These are the finishing touches that scream ‘professional’.
- Solar-Powered Uplighting: This is the number one hack for making your project look expensive. For less than $50, you can get a set of solar-powered spotlights. Aim them at your statement boulders, interesting plants, or up the front of your house. The shadows and highlights they create at night add incredible drama and depth.
- Create Contrast: Use rocks of contrasting colors or sizes to create interest. For example, use a border of black lava rock around a bed of light grey river rock. Or create a ‘dry river bed’ feature by arranging rocks in a winding path.
- Modern House Numbers: Ditch the cheap, builder-grade house numbers. For $30 – $60, you can get a set of large, modern, floating-mount house numbers. It’s a tiny change that has a huge impact on your home’s modern aesthetic.
- Keep it Clean: The beauty of a rock garden is its cleanliness. Use a leaf blower a few times a year to blow out any leaves or debris that accumulate. A clean rockscape looks sharp and intentional.
By layering these simple, low-cost elements on top of your solid foundation, you elevate the entire project from a simple DIY job to a piece of professional-grade landscape design.
Conclusion
Step back and admire what you’ve built. You didn’t just move some rocks around; you executed a strategic financial and lifestyle upgrade. You’ve reclaimed your weekends from the tyranny of lawn care and funneled what would have been hundreds of dollars in upkeep back into your own pocket. You’ve single-handedly boosted your home’s curb appeal and property value with a project that will look amazing for years with almost zero effort.
This is what frugal, smart living is all about: identifying the money pits in your life and replacing them with efficient, value-adding systems. You put in the sweat equity upfront to create a passive improvement that pays dividends in time and money forever. Now, take the cash you saved, pay down a bill, invest it, and enjoy your new, stress-free, professional-looking yard. You’ve earned it.