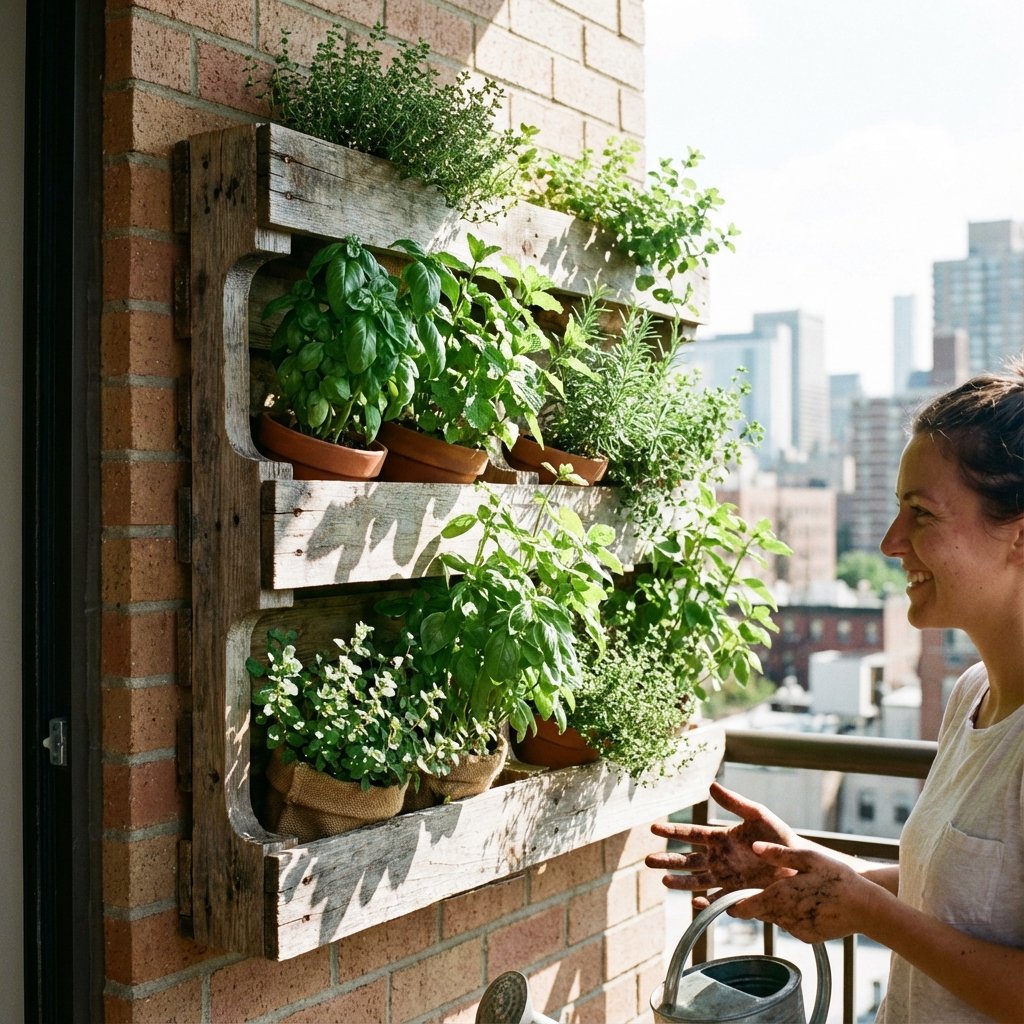
Turn Free Pallets into a Vertical Herb Garden This Weekend
Let’s be real: those tiny plastic clamshells of fresh herbs at the grocery store are a total rip-off. You pay $4 for a handful of basil that wilts in two days. It’s a cycle of wasted food and wasted money. But what if you could have an endless supply of fresh basil, mint, rosemary, and thyme right outside your door for practically nothing? That’s not a fantasy; that’s the power of upcycling.
This guide is your ticket to breaking up with the produce aisle. We’re going to take a humble, discarded wooden pallet—the kind you see stacked up behind stores—and turn it into a stylish and productive vertical herb garden. This isn’t just about gardening; it’s a power move. It’s about taking something free and making it valuable. It’s about eating better, saving serious cash, and getting the satisfaction of building something awesome with your own two hands. Forget paying a premium for a store-bought planter. This weekend, you’re building your own fresh-herb factory for less than the cost of a few fancy coffees.
The Score: How to Find Safe, Free Pallets (and Avoid the Toxic Ones)

First things first, you need your primary material: the pallet. The word ‘free’ is key here. Never pay for a pallet for this kind of project. The whole point is to be resourceful. But not all pallets are created equal. Some are treated with nasty chemicals you definitely don’t want leaching into your future mojito’s mint leaves. You need to be a pallet detective.
Where to Look:
- Small, Local Businesses: Think garden centers, pet food stores, or hardware stores. They often have stacks of pallets they’re happy to get rid of. Just walk in and ask the manager politely. The worst they can say is no.
- Craigslist & Facebook Marketplace: Check the ‘free’ section. Businesses and individuals regularly post free pallets for pickup. Set up an alert so you get notified first.
- Construction Sites: New housing developments or commercial construction sites often have piles of pallets from material deliveries. IMPORTANT: Always find the site foreman and ask for permission before taking anything. Don’t just grab and go.
The Pallet Code: How to Read the Stamp
This is the most critical part. Look on the side of the pallet for a stamp. It’s your cheat sheet to safety. You’re looking for two letters:
- HT (Heat Treated): This is the golden ticket. It means the wood was heated to kill pests, with no chemicals involved. This is the only type you should use for a garden.
- DB (Debarked): This just means the bark was removed and is usually found alongside the HT stamp. It’s safe.
Now, for the one you must avoid at all costs:
Scam Warning: The Toxic Pallet Trap
If you see a stamp with the letters MB (Methyl Bromide), walk away. This is a highly toxic pesticide used to fumigate the wood. It can be harmful to your health and has been phased out in many places, but older pallets might still have it. Never, ever use an MB pallet for a garden, indoor furniture, or anything that involves regular human contact. Also, be wary of brightly colored pallets (often blue or red), as these are typically owned by pallet rental companies and aren’t yours to take. Stick to the clean, HT-stamped wood.
The Gear: Tools & Supplies to Get the Job Done
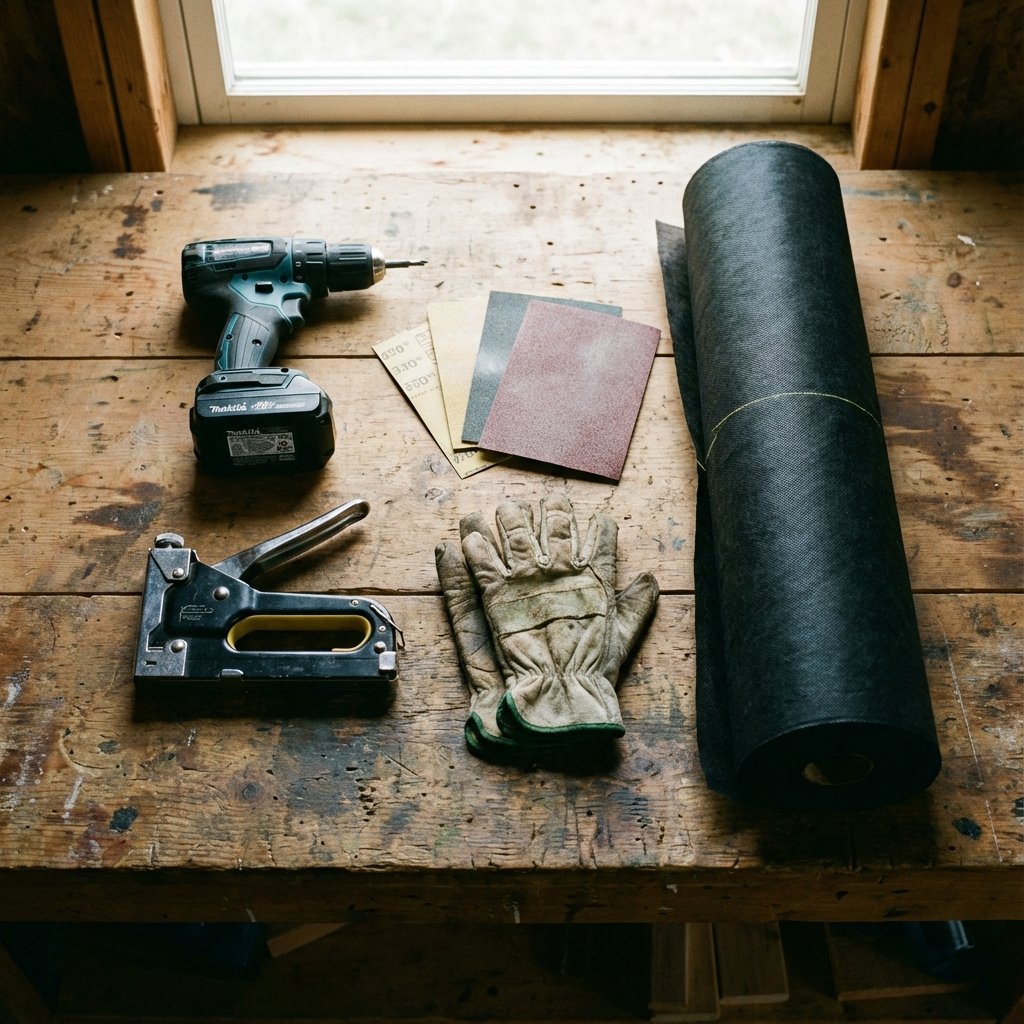
You don’t need a pro-level workshop for this. Most of this stuff you might already have cluttering up your garage or a junk drawer. The goal is to spend as little as possible on the setup so the savings on herbs feel even bigger.
Your Arsenal:
- The Pallet: One standard, HT-stamped pallet.
- Safety Gear: Work gloves and safety glasses are non-negotiable. Splinters are no joke.
- Cleaning Tools: A stiff brush, soap, and water. A pressure washer is a luxury, not a necessity.
- Sander: An orbital sander will make your life way easier, but a sanding block and some 80-grit sandpaper will get the job done with a bit more elbow grease.
- Pry Bar or Crowbar: Optional, but helpful if you want to remove any boards to customize the spacing.
- Drill with bits: For creating drainage holes and securing the pallet.
- Heavy-Duty Staple Gun: This is your best friend for attaching the fabric. Don’t cheap out on a flimsy office stapler.
- Landscape Fabric: You’ll need a roll of this to create the pockets for your soil. It’s cheap and found at any garden or hardware store.
- Scissors: For cutting the fabric.
- Potting Soil: Two large bags should be plenty. Get one specifically for containers for best results.
- Herb Seedlings: Choose your favorites! Basil, mint, parsley, cilantro, rosemary, and thyme are all great starters.
The Build: Your Step-by-Step Guide to Pallet Garden Glory
Alright, it’s go time. Put on some music, grab a drink, and let’s turn that pile of wood into a living wall of flavor. Follow these steps, and you can’t go wrong.
- Clean It Up: Your pallet has been on a journey. Give it a thorough scrub with soap and water to get rid of any dirt, grime, or spiderwebs. Let it dry completely in the sun. This is a crucial step for a healthy garden.
- Sand It Down: This isn’t about getting a fine furniture finish; it’s about removing splinters and rough patches. Give the whole thing a once-over with your sander or sandpaper, focusing on the front-facing boards and edges.
- Decide on Orientation: Stand the pallet up. You’ll be planting in the openings. Decide which side will be the ‘back’ (the one against the wall) and which will be the ‘front.’ You’ll be creating pockets on the front side.
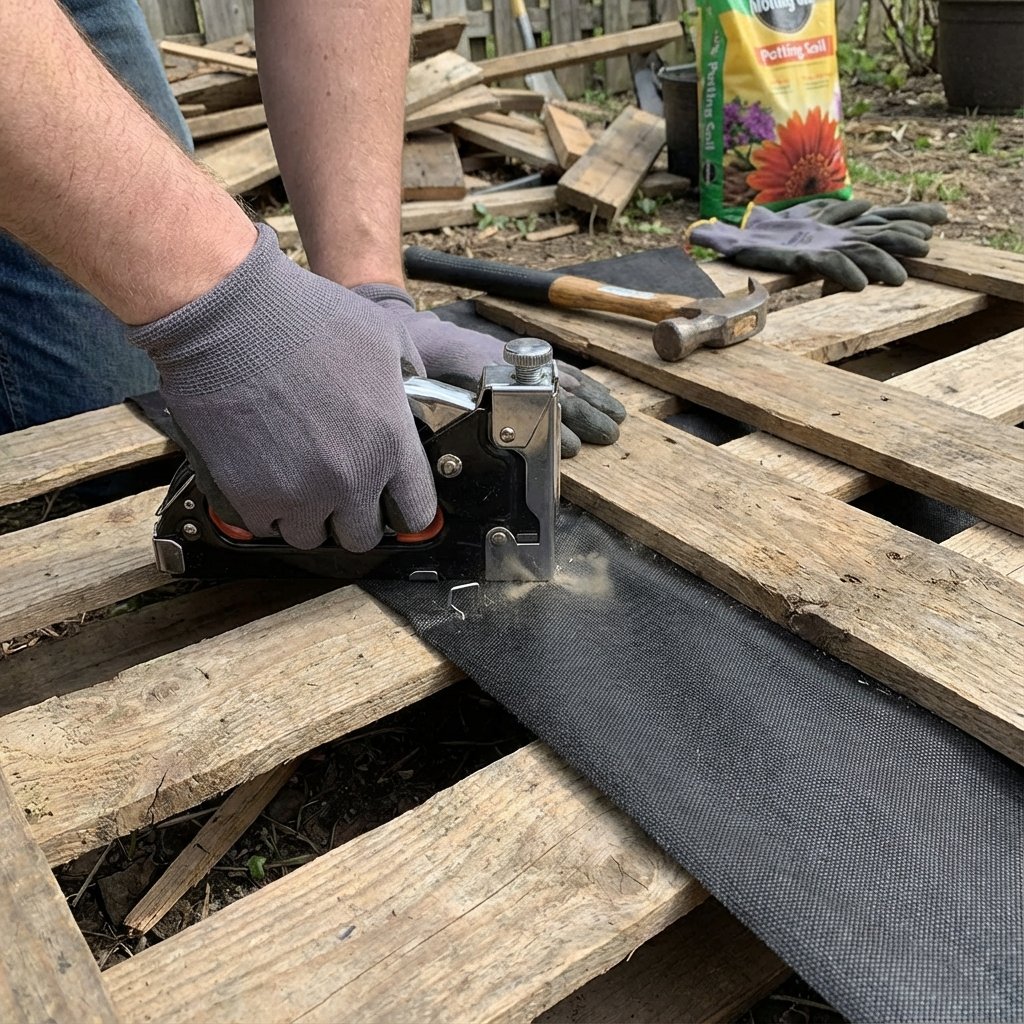
- Create the Pockets: This is where the magic happens. Cut a piece of landscape fabric that is long enough to line the inside of one of the planting sections and wide enough to be folded in half. Double it up for strength. Starting with the bottom-most opening on the front, push the folded fabric into the opening to form a sling or a pocket. The bottom of your pocket will rest on the center support board of the pallet.
- Staple Like a Pro: Pull the fabric taut. Using your heavy-duty staple gun, staple the front edge of the fabric to the inside of the front board and the back edge of the fabric to the inside of the back board. Use a lot of staples—every inch or two. You want this to be secure enough to hold the weight of wet soil.
- Repeat for All Pockets: Work your way up the pallet, creating a fabric pocket for each section you want to plant in. The very top opening can be left open like a traditional planter box.
- Drill for Drainage: If any of your fabric pockets look like they won’t drain well, you can poke a few small holes in the bottom with your scissors. For the boards that will form the bottom of each pocket, drill a few small drainage holes to prevent water from pooling and causing root rot.
- Fill ‘er Up: Lean the pallet against its final wall or lay it flat for now. Fill each pocket with your potting soil. Don’t pack it down too tightly.
- Plant Your Herbs: Gently remove your herb seedlings from their containers, loosen the roots a bit, and plant them in the soil pockets. Give them some space to grow. Consider putting trailing herbs like mint or oregano in the lower sections.
- Water Thoroughly: Give your new garden a good, gentle watering. The soil will settle a bit, so you may need to top it off.
- Mount It (Optional but Recommended): For stability and safety, secure the top of the pallet to the wall or fence using L-brackets or other heavy-duty mounting hardware. This prevents it from tipping over, especially if you have kids or pets.
The Payoff: Cost Breakdown vs. Store-Bought
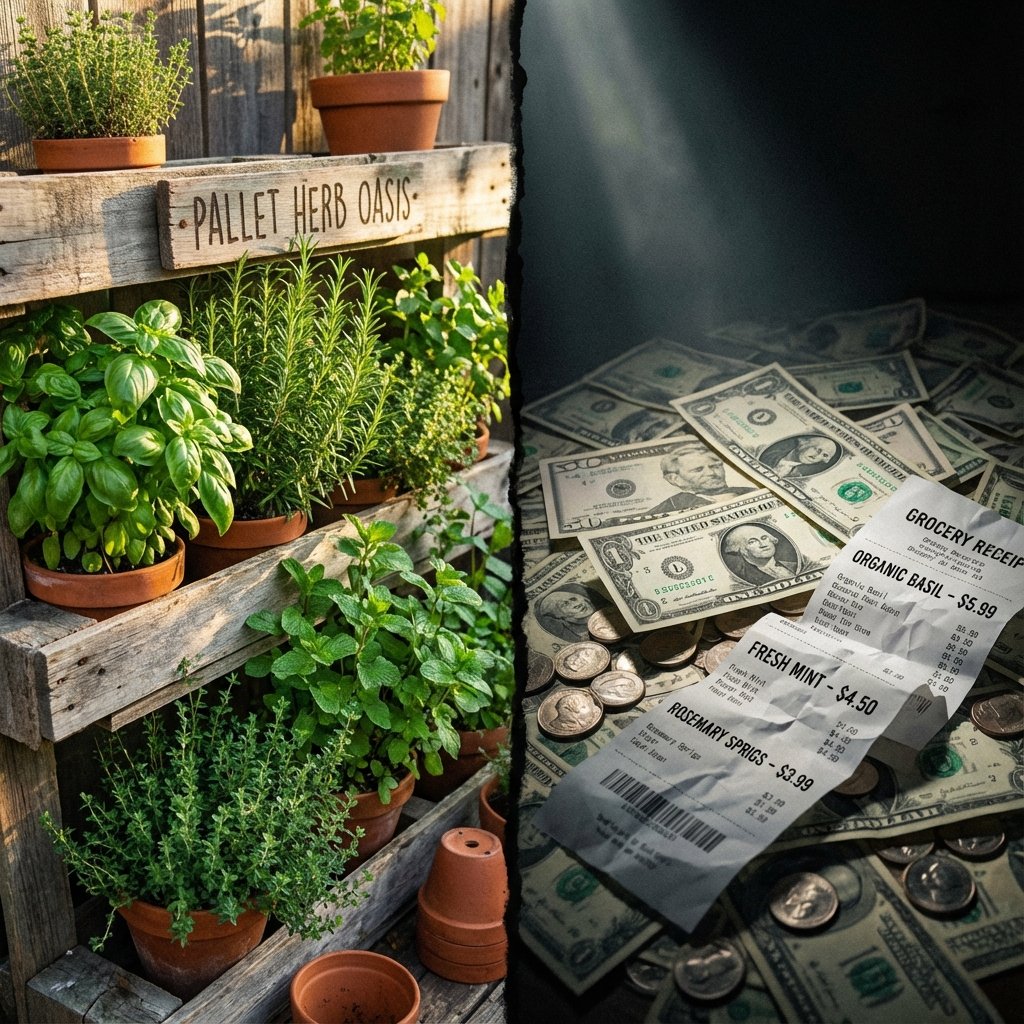
So, you put in a little work. What’s the actual return on your investment of time and a few bucks? Let’s run the numbers. The results aren’t just good; they’re a total game-changer for your budget.
| Item | DIY Pallet Garden Cost | Store-Bought Equivalent Cost |
|---|---|---|
| Vertical Planter Structure | $0 (Free Pallet) | $120.00 (Mid-range wooden planter) |
| Landscape Fabric | $10.00 | N/A |
| Potting Soil (2 bags) | $15.00 | $15.00 |
| Herb Seedlings (6 plants) | $24.00 | $24.00 |
| TOTAL UPFRONT COST | $49.00 | $159.00 |
| IMMEDIATE SAVINGS | $110.00 |
The upfront savings are massive, but the real win is the long-term value. Let’s say your family buys one $4 clamshell of fresh herbs per week. That’s $208 per year. Your DIY garden, which costs about $49 to set up, will produce herbs for months, if not years, with minimal upkeep. You make back your initial investment in just over three months. After that, every sprig of rosemary and every basil leaf is pure profit, straight from your garden into your kitchen. You’re not just saving money; you’re building a money-saving asset.
Level Up: Pro Tips for a Thriving Herb Garden
You built it, now make it flourish. A few smart moves will keep your herb garden pumping out fresh flavors all season long.
- Location, Location, Location: Most herbs are sun-worshippers. Find a spot that gets at least 6 hours of direct sunlight per day. Your herbs will thank you with explosive growth.
- Water Wisely: Vertical gardens can dry out faster than traditional beds. Check the soil daily by sticking your finger in an inch deep. If it’s dry, it’s time to water. Water the soil, not the leaves, to prevent fungus.
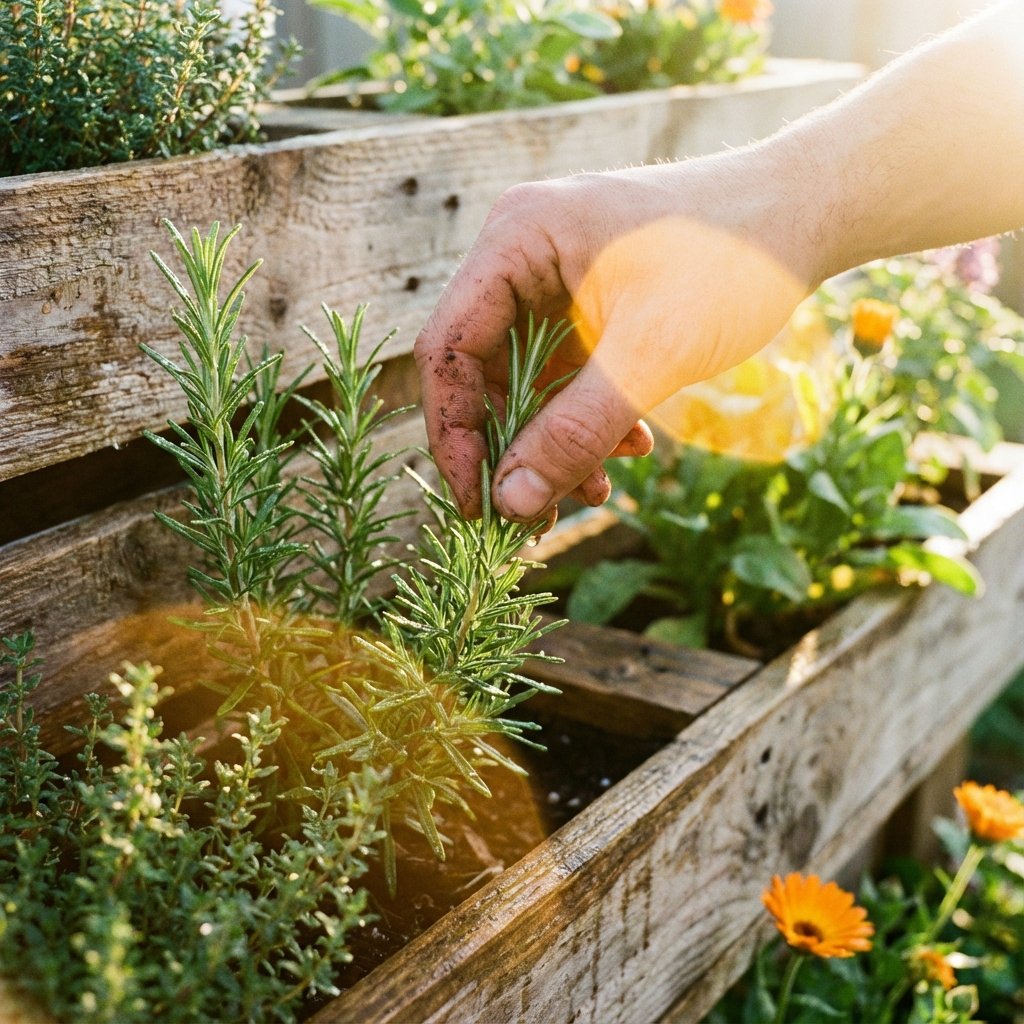
- The Haircut Rule (Harvesting): Don’t be shy about harvesting. The more you trim your herbs (from the top), the bushier and more productive they’ll become. It’s a ‘use it or lose it’ situation. Aim to never take more than one-third of the plant at a time.
- Know Your Neighbors: Some herbs play better together than others. Mint is a notorious bully and will try to take over, so giving it its own pocket is a smart move. Basil, parsley, and oregano are generally friendly neighbors.
- Feed Your Friends: Every few weeks during the growing season, give your herbs a drink of diluted liquid fertilizer (like a fish emulsion or a balanced organic feed) to replenish the nutrients in the soil.
- Add Some Style: Who says a pallet can’t be chic? Before you plant, consider painting your pallet with non-toxic, outdoor paint to match your patio furniture or staining it for a richer wood look. You can even use chalkboard paint on the front slats to label your herbs.
Conclusion
There you have it. For the cost of a couple of pizzas, you’ve built a beautiful, functional, and ridiculously frugal vertical herb garden. You took a piece of ‘trash’ and transformed it into an asset that will pay you back in fresh flavors and real-dollar savings week after week. This project is the ultimate frugal hack: it’s resourceful, it’s practical, and it puts you in control. Every time you snip some fresh basil for your pasta or mint for your tea, you’ll get a reminder of the smart, capable person who built it. Now go find that pallet and get to work. Your wallet and your taste buds are about to thank you.