Make Luxury Wedding Invites At Home With Your Cricut
Let’s get real: the wedding industry is designed to make you feel like you have to spend a fortune to have a beautiful day. And invitations? They’re the first hit to your wallet. A piece of paper that costs $5, $8, even $15 *each*? That’s highway robbery. But what if you could not only dodge that bullet but create something even more stunning, more personal, and for pennies on the dollar? What if you could take that same skill and turn it into a legit side hustle that pays for the honeymoon and then some?
That’s not a fantasy. It’s the power of that Cricut machine you either have collecting dust or have been dreaming of buying. This isn’t just about saving money; it’s about taking control. It’s about building a skill that serves you, whether you’re planning your own wedding or starting a small empire from your kitchen table. Forget the gatekeepers and the overpriced boutiques. We’re going to show you exactly how to design, cut, and assemble wedding invitations that look like they came from a high-end stationer, and then how to package that skill and sell it. Get ready to turn cardstock into cash.
The Gear You Actually Need (No Fluff)
Stop Overspending Before You Start
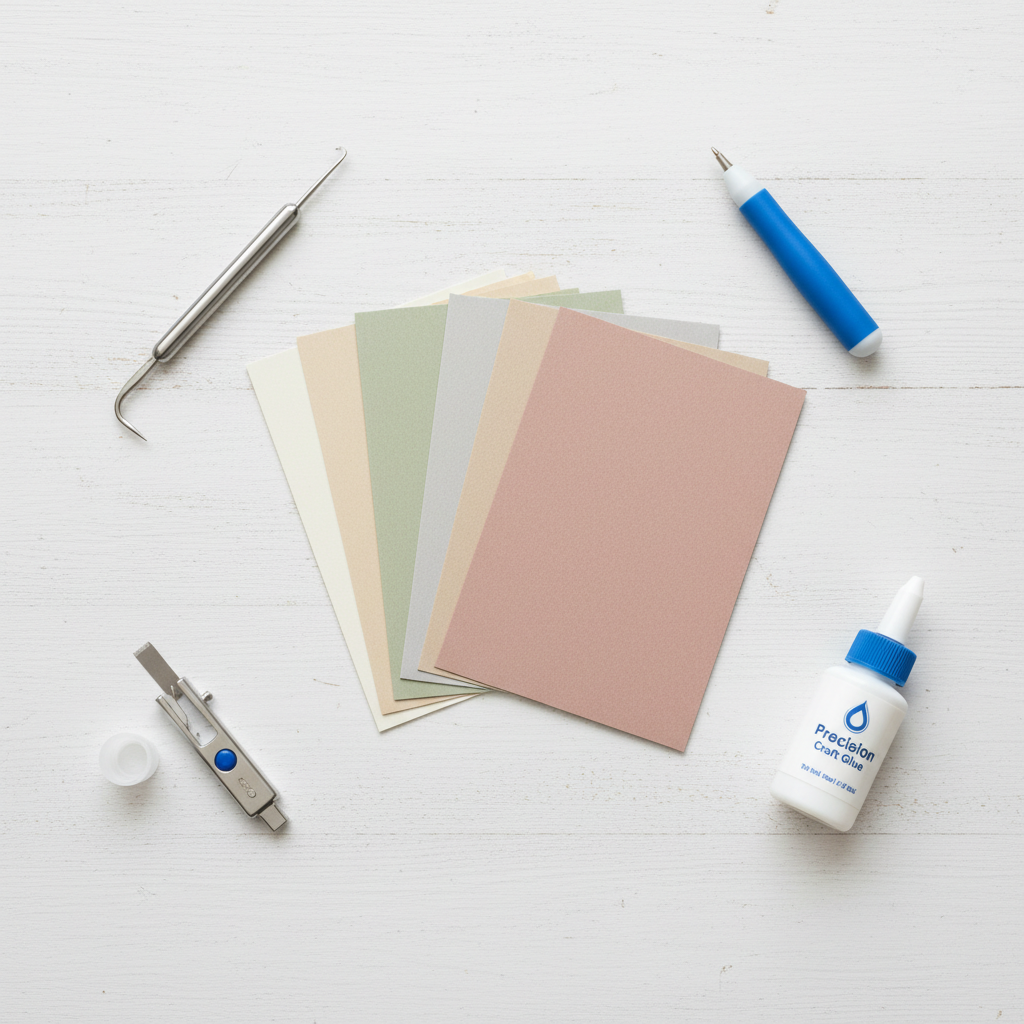
Walk into any craft store and you’ll be hit with a wall of gadgets and supplies, all screaming that you ‘need’ them. That’s a trap. To start making professional-quality invites, you only need a core set of tools. Everything else is a ‘nice-to-have’ you can get later when your side hustle starts paying for it. Here’s the lean and mean list to get you started.
- A Cricut Machine: The star of the show. A Cricut Explore series machine is perfectly fine for cutting cardstock and vinyl. The Cricut Maker series is the upgrade, offering more power and the ability to use tools like the scoring wheel and engraving tip, which are fantastic for high-end details. If you’re serious about the hustle, the Maker is a worthy investment.
- The Right Blades: You’ll live and die by your blades. Start with the Fine-Point Blade (it comes with the machine) for cardstock. A separate, dedicated blade for paper will keep your cuts cleaner for longer. A Deep-Point Blade is great for thicker materials like chipboard if you want to get fancy with backers.
- Scoring Tool: Non-negotiable for professional-looking folds. You can use the Scoring Stylus (cheaper) or the Scoring Wheel (for Maker machines, gives a crisper line). Folds are the difference between ‘homemade’ and ‘handcrafted.’
- Quality Cardstock: This is where you don’t cheap out. The feel of the paper is half the luxury. Look for 80 lb. to 110 lb. weight. Brands like Cards of Paper, Neenah, and even Recollections from Michaels offer great quality. Buy in bulk packs online to slash costs. Start with classic white, ivory, and a few accent colors.
- Adhesive: Your choice here affects your speed and final look. A tape runner is fast and clean for basic layers. For intricate cuts, a fine-tip liquid glue like Bearly Art Precision Craft Glue is essential to avoid smudges.
- Essential Tools: A good self-healing cutting mat, a metal ruler, and a craft knife (X-Acto) are your best friends for trimming and assembly. A weeding tool is a must for picking out tiny cut pieces.
That’s it. That’s your startup kit. Resist the urge to buy every color of vinyl and every specialty tool. Master the basics, make some money, and then reinvest in your craft. Smart business owners build their toolkit with profits, not debt.
The Frugal Tutorial: Crafting Your First Luxury Invite
From Blank Screen to ‘Wow’
Theory is great, but execution is everything. We’re going to walk through the creation of a classic, layered invitation. No complex foiling or vellum wraps yet—this is about nailing the fundamentals that form the base of almost every luxury design.
- Step 1: The Design Phase in Cricut Design Space. Start simple. Create a new project. Use the ‘Shapes’ tool to make a rectangle for your main invitation. A standard A7 invite is 5″ x 7″. Now, create another rectangle for your backing layer, making it slightly larger, say 5.25″ x 7.25″. This creates a clean, professional border.
- Step 2: Choosing Your Fonts. This is critical for a luxury feel. Avoid cheesy, overused fonts. Pair a clean, modern sans-serif font (like Montserrat or Lato) for the details with an elegant script font (like ‘Amarillo’ or ‘The Signature’) for the names. Use the ‘Text’ tool to type out your wording. Pay attention to kerning (the spacing between letters) to make it look polished.
- Step 3: The ‘Attach’ Command is Your Best Friend. Once your text is perfectly placed on your 5″x7″ rectangle, select both the text and the rectangle and click ‘Attach’. This tells the Cricut to write or cut the text *on* the rectangle, not as a separate element. If you’re using a Cricut pen, set the text layer to ‘Draw’. If you’re cutting the text out of a top layer, leave it as ‘Cut’.
- Step 4: Prepare Your Mats. Lay your cardstock on your Cricut mat. A blue LightGrip mat is ideal for standard cardstock to prevent tearing. Use a brayer or even a gift card to smooth it down firmly, removing any air bubbles. This prevents snags and mis-cuts.
- Step 5: The Cut. Load your mat into the machine. In Design Space, select the correct material setting (e.g., ‘Medium Cardstock – 80 lb’). The machine will prompt you to load the necessary tool (like the fine-point blade or a pen). Hit the flashing ‘Go’ button and watch the magic happen.
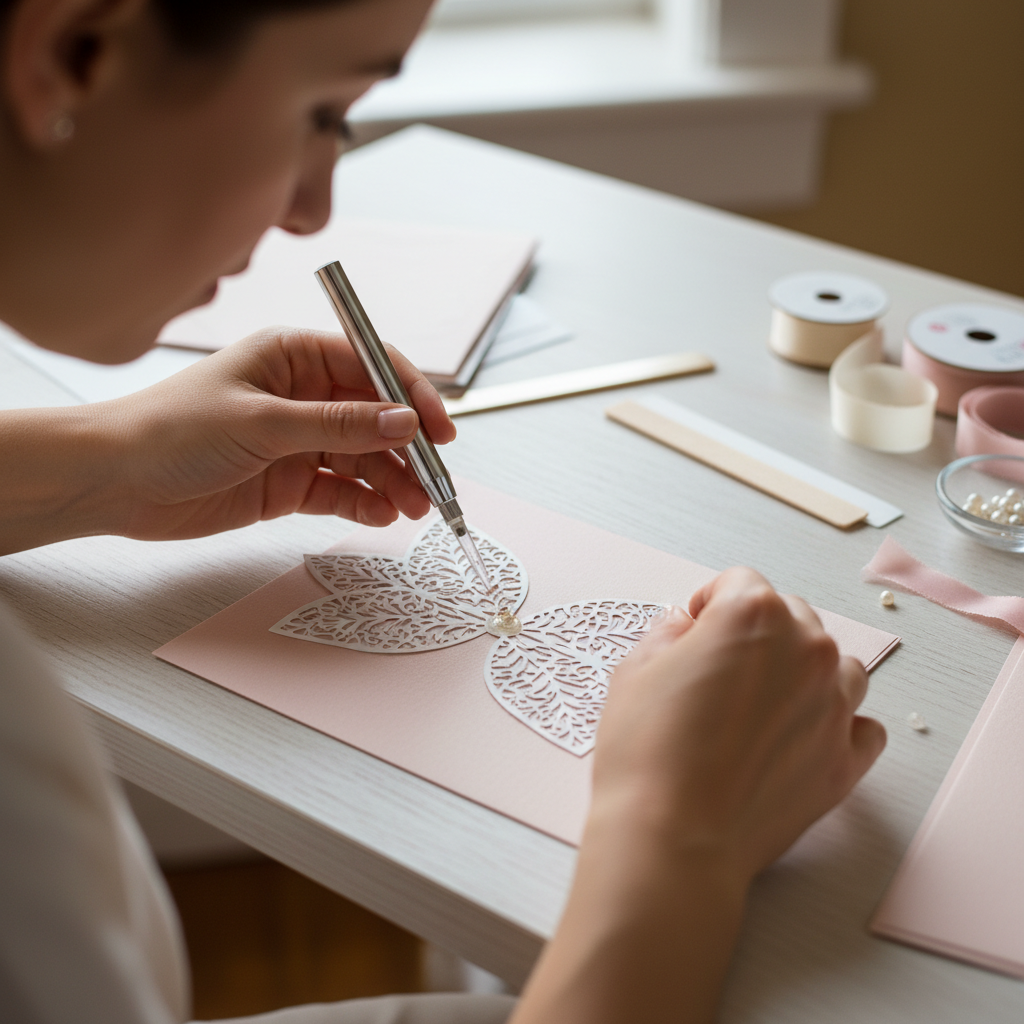
- Step 6: Weeding and Assembly. Once cut, carefully peel the mat away from the cardstock (not the other way around!) to prevent curling. Use your weeding tool to remove any tiny negative space pieces. Now, apply your adhesive to the back of the smaller invitation piece and carefully center it on the larger backing layer. Press down firmly.
Congratulations. You just made a professional-grade invitation. Repeat this process for all your pieces—RSVP cards, details cards, etc. The key is precision and patience. Your first one might take 30 minutes. Your tenth one will take five. It’s a skill, and you’re building it.
The Cost Breakdown: DIY vs. Pro Printers
The Math Doesn’t Lie
Ready to see why this is such a game-changer? Let’s break down the real-world costs for 100 invitations. We’ll compare a typical mid-range online printer to your new DIY hustle. We’re assuming a simple, elegant design: a layered invitation card, an RSVP card, and outer envelopes.
| Item / Service | Professional Printer (Mid-Range) | DIY with Cricut (Smart Shopping) |
|---|---|---|
| 100 Layered Invitations | $450.00 (avg. $4.50 each) | $40.00 (Cardstock: 2 packs @ $20 each) |
| 100 RSVP Cards | $150.00 (avg. $1.50 each) | $15.00 (Cardstock: 1 pack, cut 4 per sheet) |
| 100 Outer Envelopes | $75.00 (avg. $0.75 each) | $25.00 (Bulk pack from Amazon) |
| Design & Assembly Fee | Included in price (but you’re paying for it!) | $0 (Your time & skill) |
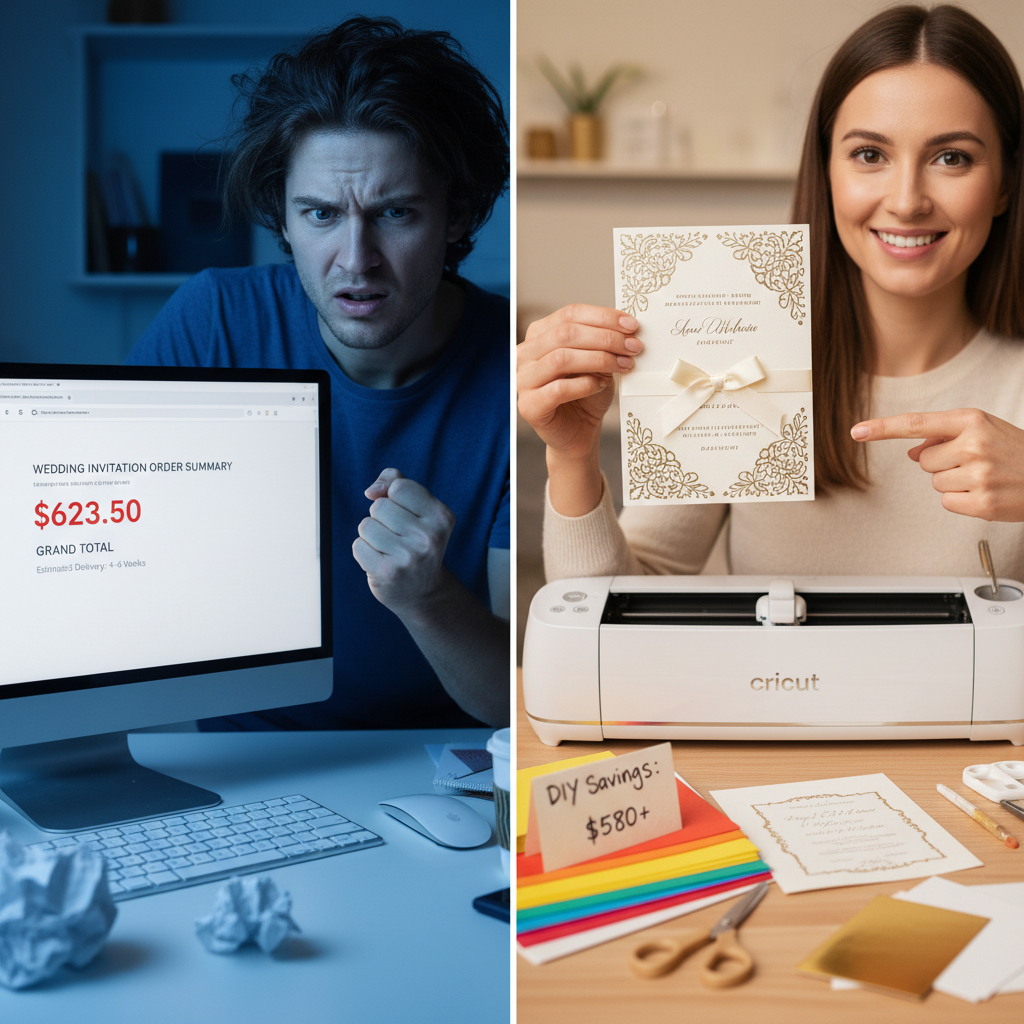
| TOTAL COST | $675.00 | $80.00 |
| TOTAL SAVINGS | $595.00 | |
Look at that number. You’re saving nearly $600. That’s not chump change. That’s your wedding photographer’s deposit. That’s a flight for your honeymoon. And this is for a *basic* design. The more complex you get with belly bands, foil, and custom shapes, the more that savings gap widens. The initial cost of the Cricut machine (around $250-$400) pays for itself on this one project alone. This is the power of cutting out the middleman and investing in a skill.
Flipping Your Skill: The Side Hustle Action Plan
From Saving Money to Making Money
Okay, you’ve mastered the craft and saved a bundle on your own invites. Now it’s time to get paid. Don’t just think of this as a hobby; think of it as a business. Here’s your roadmap to launching your invitation side hustle.
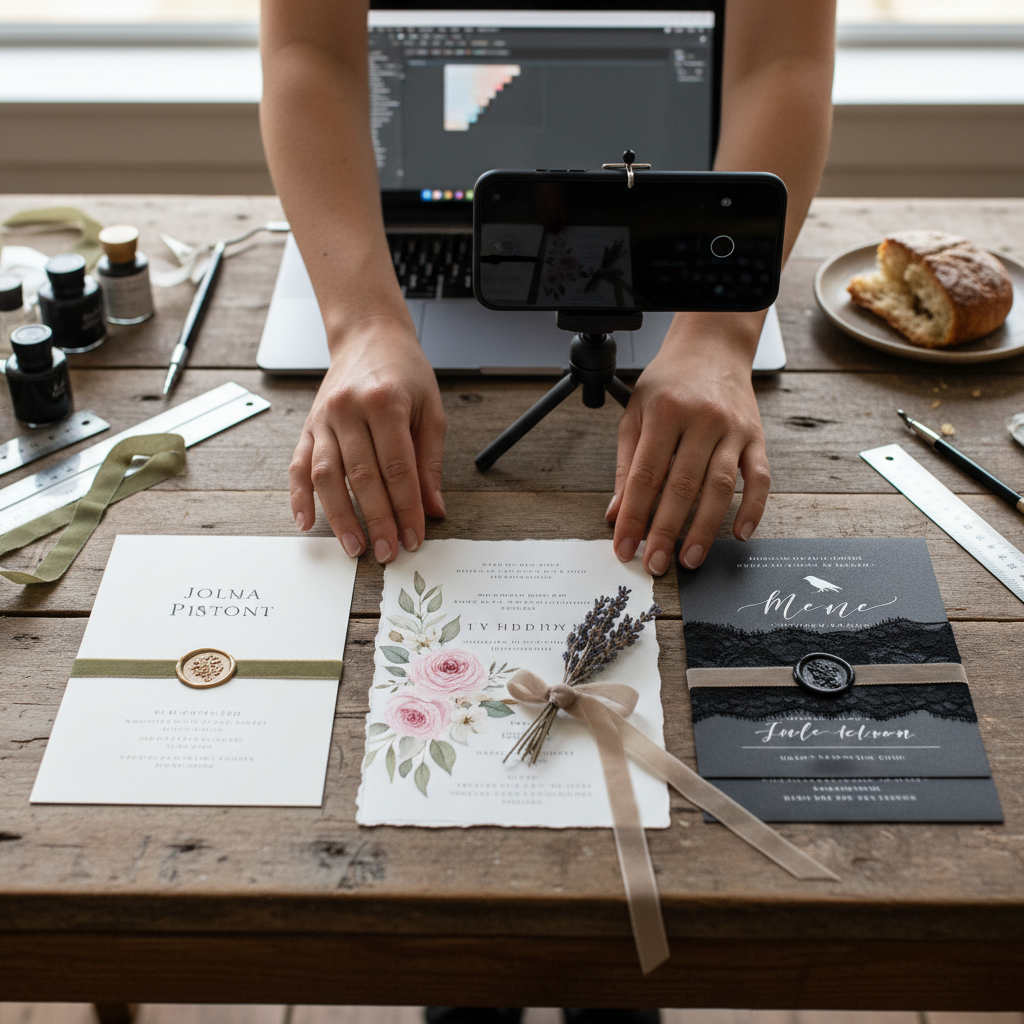
Step 1: Build Your Portfolio
Nobody buys from an empty shop. You need to create 3-5 distinct invitation suites. Don’t just make the same design in different colors. Create different styles: one minimalist and modern, one rustic with faux woodgrain paper, one classic and elegant with a script font. Take high-quality photos in good natural light. This is your storefront—make it look amazing.
Step 2: Find Your Marketplace
Where will your customers find you? You have options:
- Etsy: The most obvious choice. It’s a massive marketplace for handcrafted goods. The fees can be a pain, but the built-in audience is huge. Optimize your listings with keywords like ‘custom wedding invitations,’ ‘Cricut wedding invites,’ and ‘modern minimalist invitations.’
- Facebook Marketplace & Groups: Go local. Post in local wedding buy/sell groups and community forums. Offer a ‘local discount’ to attract your first few clients. This is great for building word-of-mouth referrals.
- Instagram: Your visual portfolio. Create a dedicated account for your business. Use high-quality photos and videos of your process. Use relevant hashtags (#weddinginvitations #custominvites #bridetobe #[yourcity]weddings) to get discovered.
Step 3: The Legal Stuff (The Boring But Necessary Part)
This is what separates the amateurs from the pros. Register your business name (a simple Sole Proprietorship is usually fine to start). Open a separate bank account to keep your business and personal finances separate. This makes tracking profits and expenses for taxes a thousand times easier. Look into your local laws about small business licenses—it’s usually a simple and cheap form to fill out.
Step 4: Launch and Get Feedback
Open your shop. Announce it to your friends and family. Your first client might be a friend of a friend, and that’s perfect. Offer them a small discount in exchange for a glowing review and permission to use photos of their invitations in your portfolio. Social proof is everything in the beginning.
The Hustler’s Playbook: Pricing, Clients & Scripts

Charge What You’re Worth
The biggest mistake new hustlers make is underpricing their work. You are not just selling paper; you are selling your time, your design skill, and a custom service. A good starting formula is: (Cost of Materials x 2) + (Your Hourly Rate x Hours to Complete) = Price.
For example, if materials for 100 invites cost $80 and it takes you 5 hours to design, cut, and assemble at an hourly rate of $25, the math is: ($80 x 2) + ($25 x 5) = $160 + $125 = $285. That’s your price. It’s still less than half of what the big companies charge, and you’re making a solid profit.
Realistic Earning Potential
Let’s be conservative. If you get just one client a month for a $300 order, that’s an extra $3,600 a year. Land two clients a month, and you’re looking at over $7,000 a year. This is a real, achievable side hustle that can make a significant impact on your finances, all from your craft room.
The Client Communication Script
Dealing with clients can be tricky, especially when it comes to custom work. You need to be clear, confident, and manage expectations from the start. When a potential client reaches out, use a script like this to guide the conversation:
“Hi [Client Name], thanks so much for reaching out about your wedding invitations! I’d love to help bring your vision to life. To get started, could you tell me a bit more about what you’re looking for? Specifically, your wedding date, the number of invitations you’ll need, and any styles or colors you’re drawn to. My process typically involves a design consultation, two rounds of digital proofs for you to approve, and then production. Production time is usually 2-3 weeks after the final design is approved. Looking forward to hearing more about your big day!”
This script does three key things: it shows enthusiasm, it asks for the information you need, and it clearly sets expectations about the process and timeline. This prevents misunderstandings down the road.
Avoiding the Pitfalls: Common Cricut Hustle Mistakes
Stay Sharp: Protect Your Time and Money
Every business has its landmines. In the custom craft world, they can sink you before you even get going. Here are the big ones to watch out for and how to sidestep them.
- The ‘Endless Revisions’ Client: Some clients will ask for change after change, eating up hours of your unpaid time. The Fix: Your contract and initial communication must state that your price includes a set number of revisions (two is standard). Any additional revisions will be billed at your hourly rate. Be polite but firm.
- Material Miscalculations: Wasting expensive cardstock is like setting cash on fire. A mis-cut on the last sheet you need for an order is a nightmare. The Fix: Always order 15-20% more material than you think you need. This buffer covers test cuts, machine errors, and assembly mistakes. Build this cost into your pricing.
- Not Getting a Deposit: Never, ever buy materials or start design work for a client without a deposit. The Fix: Require a 50% non-refundable deposit upfront before any work begins. This protects you if the client ghosts you and covers your initial material costs. The final 50% is due upon completion, before you ship or deliver the final product.
- Ignoring Shipping Costs: Invitations are heavy, and shipping can be expensive. If you don’t account for it, you could wipe out your entire profit. The Fix: Invest in a small shipping scale. Calculate shipping costs based on weight and destination *before* you send the final invoice. Offer different shipping tiers (standard, expedited) and let the client choose.
Running a side hustle means being a business owner. Thinking ahead and creating clear policies isn’t being difficult; it’s being smart. It protects you, ensures you get paid fairly for your work, and lets you focus on the fun part: creating beautiful things.
Conclusion
So there you have it. The complete playbook for turning a simple craft machine into a tool for financial empowerment. Whether you’re a bride-to-be looking to save a serious chunk of change or a budding entrepreneur ready to launch a profitable side hustle, the path is clear. It’s about more than just paper and glue; it’s about recognizing the value in your own skills and creativity. You don’t need a fancy design degree or a massive loan to create luxury products. You need the right knowledge, a little practice, and the hustle to make it happen. Stop paying the wedding tax and start building your own brand. The press of a button on your Cricut could be the start of saving thousands, or earning thousands. The choice is yours.