Don’t Toss Them! 15 Genius Ways to Upcycle Empty Candle Jars
Alright, let’s talk real. You just finished that gorgeous, expensive candle. The scent was a vibe, but now you’re left with an empty glass jar. Most people? They toss it straight into the recycling bin without a second thought. But you’re not most people. You’re a frugal hacker, a side hustler, a creative powerhouse who knows that ’empty’ doesn’t mean ‘useless.’ It means potential.
Throwing away those high-quality glass jars is like throwing away $5 bills. They’re sturdy, often beautiful, and ridiculously versatile. We’re about to turn your candle graveyard into a treasure trove of chic decor, smart organization, and even a potential side hustle that could bankroll your next candle obsession. Forget ‘reduce, reuse, recycle.’ We’re on that ‘repurpose, profit, and level-up’ plan. Let’s get into it.
The Foundation: Cleaning Your Jars Like a Pro
Before you can turn that jar into a masterpiece, you gotta get rid of the gunk. Leftover wax and soot are not the vibe. Don’t scrub for hours and risk scratching the glass. There are two main power moves to get them sparkling clean. Pick your weapon.
Method 1: The Freezer Hack
This is the lazy genius method. It’s a no-brainer for harder waxes like paraffin or soy blends that get brittle when cold.
- Chill Out: Stick the entire candle jar in your freezer for at least a few hours. Overnight is even better.
- The Pop-Out: The cold causes the wax to shrink and harden. Take the jar out and flip it upside down. The wax puck should pop right out. If it’s stubborn, use a butter knife to gently pry an edge—it’ll break apart easily.
- Wipe Down: Use a paper towel and some rubbing alcohol or Goo Gone to wipe out any remaining residue and the metal wick holder at the bottom.
- Final Wash: A quick wash with hot, soapy water, and you’ve got a pristine jar ready for its new life.
Method 2: The Hot Water Hustle
This works great for softer waxes like coconut wax or for jars where the opening is too narrow for the freezer method to be effective.
- Protect Your Sink: Seriously, do not pour wax down your drain unless you want to pay a plumber. Place the jar on a heat-proof surface like a trivet or folded towel.
- Pour It Up: Boil some water and carefully pour it into the jar, leaving about an inch of space at the top. The hot water will melt the remaining wax, which will then float to the surface.
- Cool & Skim: Let the jar cool completely for several hours. The wax will re-harden into a solid layer on top of the water.
- Strain & Clean: Carefully pour out the water through a strainer to catch the wax disc (toss it in the trash, not the sink!). Remove the wick holder, which should be loose now. Wash the jar with hot, soapy water to remove any oily film.
Key Rule: Never, ever microwave a candle jar. The metal wick holder at the bottom can cause sparks and create a serious fire hazard. Work smart, not dangerously.
The Glow-Up: 10-Minute Home & Office Organizers
Clutter costs you time and sanity. These jars are your new secret weapon for creating a high-end, organized look for literally zero dollars. Stop buying plastic containers and start upcycling.
For Your Bathroom Vanity
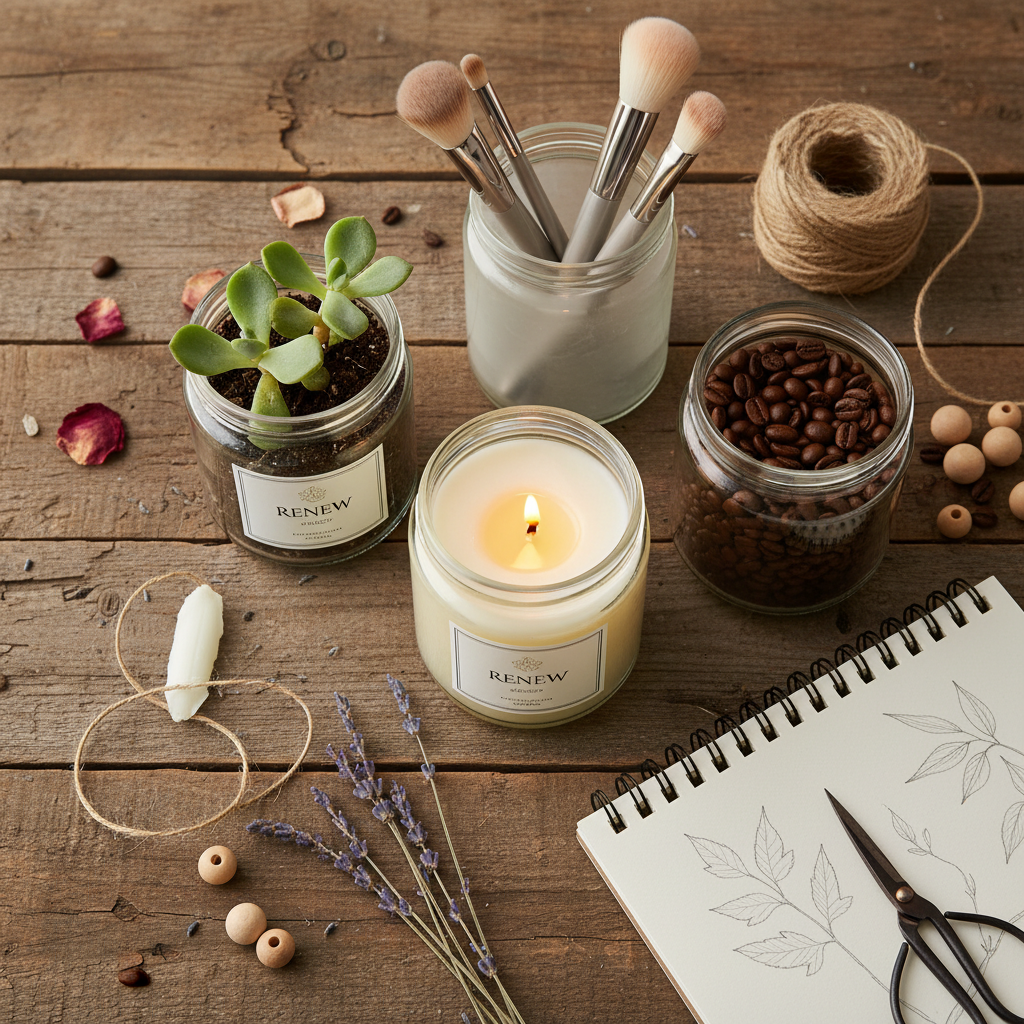
- Makeup Brush Holder: This is the classic for a reason. A medium-sized jar is perfect for keeping your brushes upright and organized. It looks way more chic than a plastic cup. You can even fill the bottom with coffee beans or small pebbles for extra stability and style.
- Cotton Ball & Q-Tip Storage: Use a set of matching jars (especially those with lids) to create a clean, uniform look on your counter. It’s a simple swap that makes your bathroom feel like a spa.
- Toothbrush & Toothpaste Holder: A taller, more slender jar is perfect for keeping your dental supplies contained and off the counter. It’s way easier to clean than a traditional toothbrush holder with all its tiny compartments.
For Your WFH Desk
- Pen & Pencil Cup: Ditch the boring office supply store cup. A sleek black or amber glass candle jar adds a touch of personality to your workspace.
- Catch-All for Small Supplies: Use smaller jars for paper clips, binder clips, USB drives, and all those little things that get lost in your drawers.
For General Home Decor
- Chic Match Holder: Fill a small jar with long matches. Glue a match striker strip (you can buy these online for cheap) to the bottom or side of the jar for a functional and stylish piece. Perfect for your coffee table or bookshelf.
- Vase for Small Bouquets: Don’t underestimate the power of a simple bud vase. A single stem or a small handful of wildflowers in a repurposed candle jar can brighten any corner of your home.
The Green Thumb Hustle: Planters & Propagation Stations
Houseplants are expensive. So are the pots they come in. Use your empty candle jars to grow your plant collection for free. This is a game-changer for frugal plant parents.
1. The Perfect Succulent Planter
Succulents and cacti are ideal for candle jars because they don’t require a lot of water and prefer drier conditions. Since most jars don’t have drainage holes, the key is proper layering.
- Add a Drainage Layer: Place a one-inch layer of small pebbles, gravel, or LECA at the bottom of the jar. This creates a space for excess water to go so your plant’s roots don’t rot.
- Add Activated Charcoal: A thin layer on top of the rocks helps keep the soil fresh and prevents bacteria from building up. You can get a bag for a few bucks that will last you forever.
- Pot It Up: Add succulent or cactus soil mix, and plant your little green friend.
- Water Smart: Water sparingly, only when the soil is completely dry to the touch. Remember that drainage layer is your only safety net!
2. The Mini Herb Garden
Got a sunny windowsill? You’ve got space for an herb garden. Use a few matching jars to plant herbs like basil, mint, or rosemary. They look amazing, and you’ll save money on buying fresh herbs from the store. Use the same layering technique as for succulents.
3. The Free Plant Factory: Propagation Station
Propagation is the ultimate frugal hack—it’s literally making new plants from cuttings of plants you already own. Candle jars are perfect for this.
- Take a Cutting: Snip a healthy piece of a plant like a Pothos, Philodendron, or Monstera Adansonii. Make sure the cutting has at least one or two nodes (the little bumps on the stem where leaves grow).
- Just Add Water: Place the cutting in your clean candle jar and fill it with enough water to cover the node(s).
- Wait for Roots: Place it in a spot with bright, indirect light and watch the roots grow over the next few weeks. Change the water weekly to keep it fresh. Once the roots are a few inches long, you can plant it in soil!
The Side Hustle: Turning Glass Jars into Cash
This is where we move from saving money to making money. People pay a premium for custom, handmade goods with a personal touch. Your collection of empty candle jars is your starting inventory for a low-cost, high-profit side hustle.
The Product: Small-Batch Luxury Candles
Don’t just upcycle the jar—refill it. The market for artisanal candles is huge. You can create unique scent combinations that you can’t find in big-box stores. You can sell them at local craft markets, on Etsy, or through your own Instagram page.
The Game Plan:
- Source Your Supplies: You’ll need soy wax flakes (beginner-friendly and eco-conscious), wicks with metal bases, high-quality fragrance oils, and your collection of cleaned jars. You can buy starter kits online for under $50.
- Master the Craft: Making a candle is simple. Melt the wax in a double boiler (or a pot inside a larger pot of water). Once melted, let it cool slightly before stirring in your fragrance oil. Secure the wick to the bottom of your jar, pour the wax, and use a clothespin or wick holder to keep the wick centered while it cools and hardens.
- Brand It: This is key. Design a simple, cool label. Give your scents creative names. Maybe your brand is all about eco-friendly, upcycled materials. Tell that story!
- Price for Profit: Don’t undervalue your work. Factor in the cost of all your materials (wax, oil, wick, label) and your time. A well-made 8oz candle in a premium upcycled jar can easily sell for $18-$25.
The Math: Cost Breakdown
Still think it’s not worth it? Let’s run the numbers on making one premium candle versus buying one from a boutique.
| Item | DIY Cost (per candle) | Store-Bought Luxury Candle |
|---|---|---|
| The Jar | $0.00 (You upcycled it!) | Part of final price |
| Soy Wax (approx. 8oz) | $2.50 | Part of final price |
| Fragrance Oil (high quality) | $2.00 | Part of final price |
| Wick & Label | $0.50 | Part of final price |
| Total Cost to You | ~$5.00 | $30.00 – $50.00 |
| Potential Profit Per Candle | $13.00 – $20.00 | N/A |
The numbers don’t lie. With a startup cost of less than $50, you could make your money back by selling just 3 or 4 candles. Everything after that is pure profit, built on the back of something you were going to throw away.
The Kitchen & Pantry Overhaul
The kitchen is ground zero for frugal living. Stop paying for expensive, matching storage containers when you have a free supply waiting for you. This is about efficiency and saving cash on groceries.
1. Bulk Spice & Herb Jars
Buying spices in bags from the bulk section is way cheaper than buying them in tiny, branded glass jars. Use your smaller upcycled candle jars to store them. Get a label maker or some chalkboard labels, and your spice rack will look like a million bucks for pennies on the dollar.
2. Loose-Leaf Tea & Coffee Bean Canisters
If you’re a tea or coffee aficionado, you know that proper storage is key to keeping things fresh. Candle jars with snug-fitting lids are perfect for keeping your favorite blends airtight and ready to brew.
3. Individual Dessert Cups
This is a great hack for portion control and presentation. Use smaller jars to serve things like pudding, mousse, overnight oats, or no-bake cheesecake. It’s perfect for dinner parties or just making your Tuesday night dessert feel a little fancier.
4. DIY Gift Jars
Fill a jar with homemade hot cocoa mix, a cookie recipe’s dry ingredients, or homemade spice rubs. Add a ribbon and a tag, and you have a thoughtful, beautiful, and incredibly frugal gift for holidays, teachers, or hosts.
Conclusion
So there you have it. That empty glass jar sitting on your counter isn’t trash—it’s a blank canvas. It’s a chic planter, a desk organizer, a gift, or even the foundation of a new side hustle. Every jar you upcycle is a win: you save money, you reduce waste, and you add a custom, personal touch to your life that you can’t buy in a store.
The next time you blow out a candle, don’t just see the end of a fragrance. See the beginning of your next project. This is the essence of the frugal hacker mindset: looking at the world around you and seeing not just what things are, but what they could be. Now go raid your recycling bin and start creating.