Stop Paying For Tailoring! How To Hem Jeans At Home In 5 Minutes
Let’s be real. That feeling when you find the perfect pair of jeans, only to realize they’re a few inches too long, is a major buzzkill. Your options? Let them drag on the ground and get shredded, or shell out $15 to $25 at a tailor for a job that takes them ten minutes. It’s a racket. You’re paying a premium for a skill that is shockingly easy to master. We’re talking about keeping hundreds of dollars in your pocket over a lifetime for something you can do during a commercial break. This guide isn’t just about saving money; it’s about empowerment. It’s about learning a valuable, practical skill that puts you in control of your style and your budget. Forget the tailor tax. Today, you learn how to handle it yourself and get that perfect fit every single time, for pennies.
The Real Cost: Why You’re Getting Played by Tailors

You might think, ‘It’s just $20, what’s the big deal?’ But let’s run the numbers like the savvy hustlers we are. The average person buys a few pairs of jeans a year. If you and your partner both need two pairs hemmed annually, you’re looking at a recurring expense that adds up fast. This isn’t a one-time cost; it’s a subscription fee you didn’t even realize you were paying for your own clothes to fit properly. Look at this breakdown. The numbers don’t lie.
| Service | Typical Tailor Cost (Per Pair) | DIY Cost (Per Pair) | Lifetime Savings (Estimate over 20 pairs) |
|---|---|---|---|
| Standard Jean Hem | $15 – $25 | ~$0.50 (Using hemming tape) | $290 – $490 |
| Original Hem (Keeping original stitching) | $25 – $40 | ~$1.00 (Thread + time) | $480 – $780 |
Seeing it in black and white is a gut punch, right? You’re spending hundreds, potentially thousands over a lifetime, on a simple straight line. That money could be an emergency fund contribution, a stock investment, or a weekend trip. By investing less than $10 in some basic supplies, you buy yourself a lifetime of savings. It’s one of the highest-return investments you can make in your frugal living toolkit.
Your Arsenal: The Dirt-Cheap Gear You Need
Forget fancy, expensive sewing machines and complicated gear. For the fastest and easiest method, you need a few basic items that you probably already have, or can get for less than the cost of one trip to the tailor. This is your one-time investment for a lifetime of perfect-fitting pants.
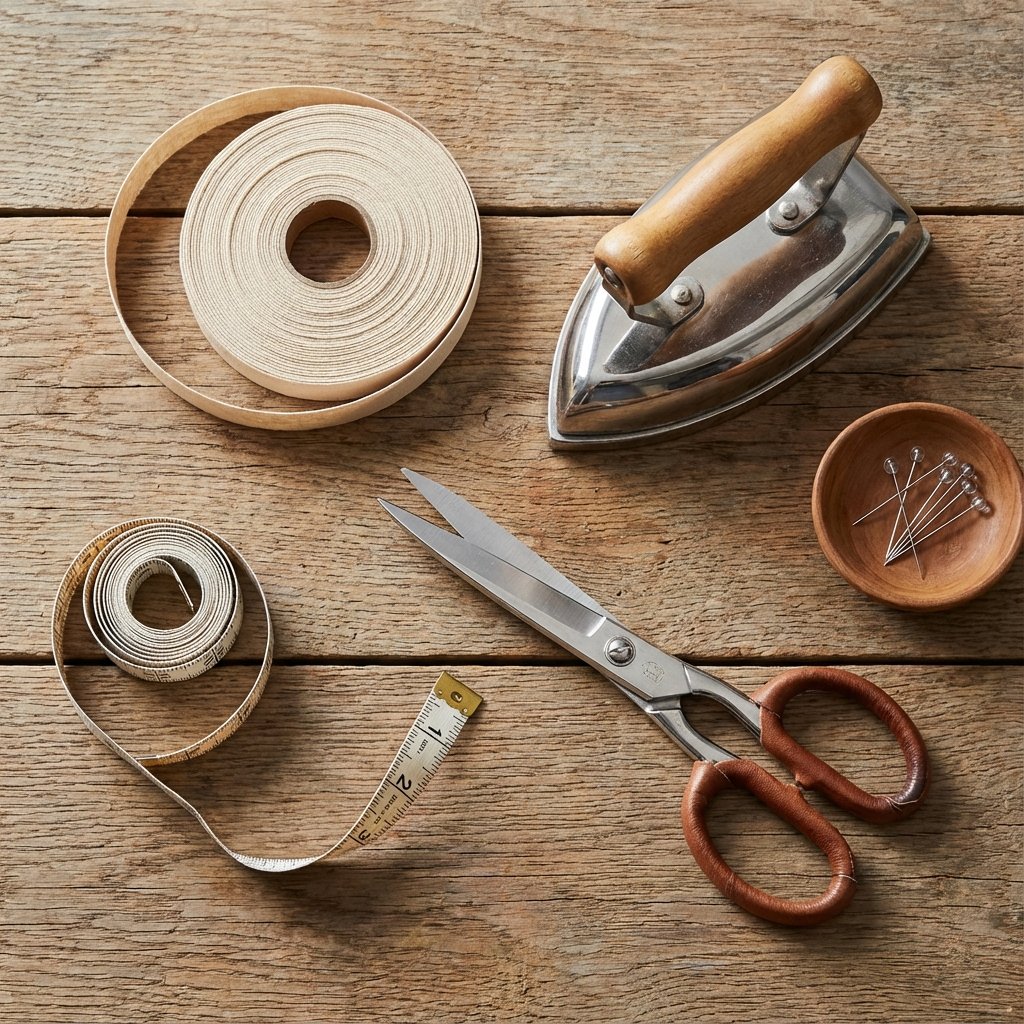
The No-Sew Hustler’s Kit:
- Fabric/Hemming Tape: This is the magic ingredient. Get the iron-on kind. A roll costs about $5 and will last you for dozens of pairs of pants. It’s strong, durable, and machine-washable.
- An Iron: Any basic iron will do. You don’t need a $100 steam machine. The one you use for your shirts is perfect.
- Sharp Scissors: Don’t use your kitchen scissors that you use to open junk mail. A decent pair of fabric scissors (around $8-$12) is a great investment, but any sharp, clean pair will work in a pinch.
- Measuring Tape: Precision is key. A flexible tailor’s measuring tape is best.
- Pins or Fabric Clips: To hold your fold in place before you commit with the iron. Straight pins are cheap and effective.
That’s it. For a total investment of around $15 (and you likely have an iron and scissors already), you’re set. You break even on your very first pair of jeans and are pure profit from then on.
The 5-Minute No-Sew Hem: Your First Win
Alright, it’s go time. No more excuses. This method is so fast you can do it while your coffee brews. We’re using iron-on hemming tape, the frugal hacker’s secret weapon for fast, clean alterations without a single stitch.
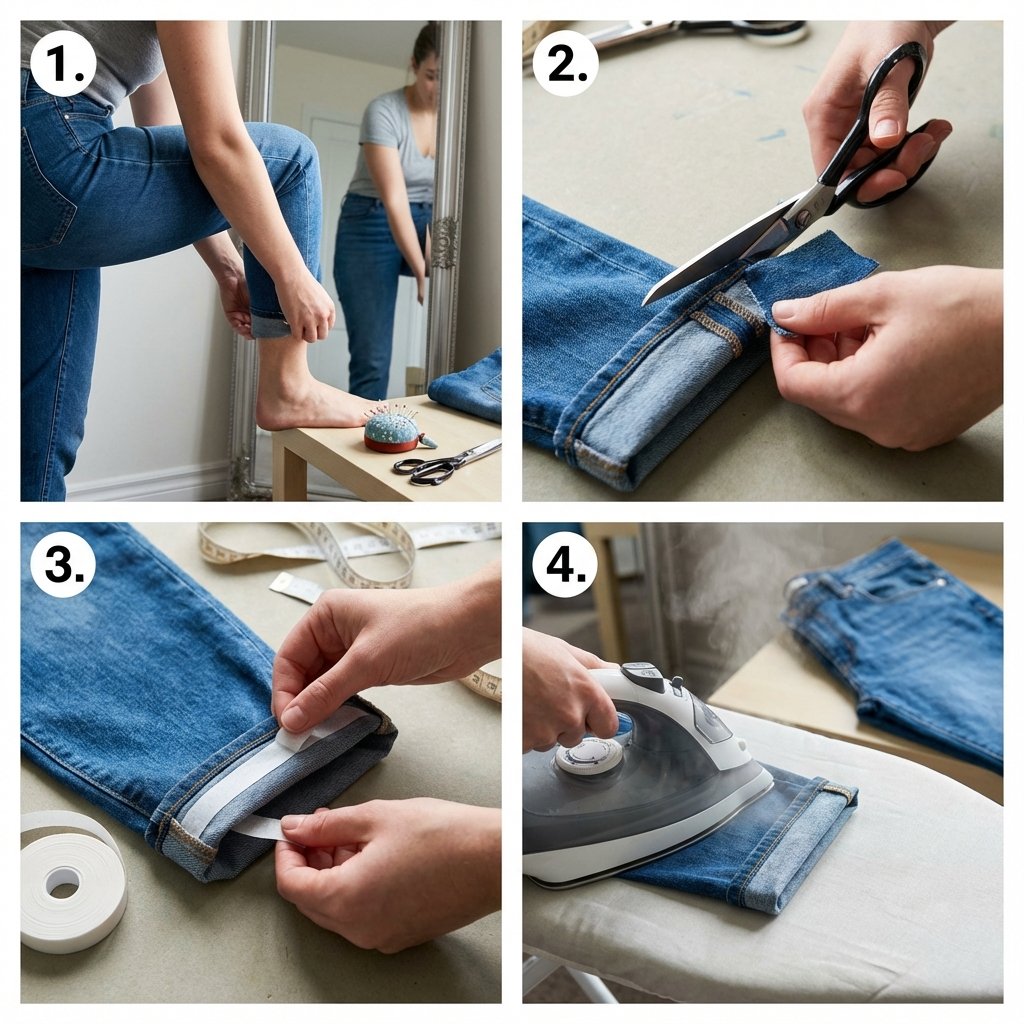
- Measure and Mark: Put on the jeans with the shoes you’ll most likely wear with them. This is critical—hemming for heels is different than hemming for sneakers. Look in a mirror, fold the excess fabric under to your desired length, and pin it in place. Take the jeans off carefully. Use the measuring tape to ensure the cuff is even all the way around. For example, if you folded up 2 inches, make sure it’s 2 inches everywhere.
- Cut the Excess: Lay the jeans flat. Now, here’s the key: DO NOT cut right at your fold line. You need to leave about 1 to 1.5 inches of fabric below your desired final length to create the new hem. Measure this allowance from your pin line and mark it. Cut off the rest of the excess fabric with your sharp scissors. A straight, clean cut is what you’re after.
- Prepare the Tape: Turn the jeans inside out. Fold that 1-1.5 inch flap of fabric up to create your new hem, so the cut edge is hidden inside. Press it flat with your fingers. Now, take your hemming tape and place it inside the fold, between the two layers of fabric. Cut the tape to circle the entire leg opening.
- Iron and Bond: Set your iron to the setting recommended for denim (usually high heat, no steam). Press the iron firmly onto the hem area for about 8-10 seconds per section. Don’t slide the iron; press and lift. Work your way all around the cuff. The heat activates the adhesive on the tape, bonding the fabric together permanently.
- Cool and Repeat: Let it cool down for a minute to ensure the bond is set. Turn the jeans right-side out. Repeat the whole process on the other leg, using the first leg as your measurement guide to guarantee they’re identical. Bam. You’re done.
Key Rule: Always wash and dry new jeans at least once before hemming. They can shrink, and you don’t want to end up with high-waters after all your hard work.
Level Up: The ‘Original Hem’ Method for Denim Snobs

Okay, so the no-sew method is clutch for speed and ease. But what if you’re a denim purist? You love that specific, factory-worn fade and stitching at the bottom of your expensive jeans and don’t want to lose it. Paying a tailor $35 for this is criminal. Good news: you can do this yourself, too. It requires a sewing machine, but it’s a straightforward trick that preserves that coveted original hem.
The Pro-Level Gear:
- A basic sewing machine
- Thread that matches your denim (blue or black)
- Gold or orange thread for the topstitch (optional, but looks pro)
- The same measuring/cutting tools from before
The Original Hem Walkthrough:
- Measure and Fold: Just like before, put on the jeans and shoes, and figure out your perfect length. Let’s say you need to shorten them by 3 inches. Take them off, lay them flat.
- The Magic Fold: Here’s the trick. Measure HALF of the amount you need to remove (in our example, 1.5 inches) up from the bottom of the original hem. Fold the leg up at that point, so the original hem is now touching the leg fabric 3 inches higher than it was. Pin this fold in place. You’ve essentially created a tuck with the original hem at the very bottom.
- Sew the Seam: Take it to your sewing machine. You are going to sew a new seam RIGHT up against the bottom edge of the original hem, stitching through the folded layers of fabric. Get as close as you possibly can to that thick original seam. Backstitch at the beginning and end to lock it in.
- Cut and Finish: Now you have this flap of excess fabric on the inside. You can simply cut it off about a half-inch from your new stitch line. For a cleaner look, you can use a serger or a zigzag stitch on the raw edge to prevent fraying over time.
- Press It Down: Flip the original hem down into its new, shorter position. Go to your ironing board and press the seam allowance you just created upwards, towards the leg of the jeans. This makes it lay flat and look clean from the outside. You’ve just reattached the original hem at a new length. You’re a pro.
From Saving Money to Making Money: The Hemming Side Hustle

Once you’ve mastered this skill, a lightbulb should go off. People everywhere are overpaying for this exact service. You can become the go-to person in your neighborhood, dorm, or office for quick, affordable alterations. You have almost zero overhead, and the profit margins are insane.
Your Pitch Script:
“Hey, I noticed you cuffing your jeans. I actually do quick hems for way cheaper than a tailor. I can do a standard hem for $10 or keep the original hem for $15, and I can have them back to you by tomorrow. Stop paying tailor prices!”
Post on local Facebook groups, Nextdoor, or just put up a flyer on a community bulletin board. Your prices will be so competitive, the work will find you. You can easily do a few pairs an evening while watching TV.
Realistic Earning Potential:
| Hems Per Week | Your Price (Avg. $12.50) | Weekly Profit (Minus ~$.50 supplies) | Annual Extra Income |
|---|---|---|---|
| 4 (Super Casual) | $50.00 | $48.00 | ~$2,496 |
| 10 (Consistent Hustle) | $125.00 | $120.00 | ~$6,240 |
| 20 (Serious Business) | $250.00 | $240.00 | ~$12,480 |
Scam Warning: Watch out for the ‘gurus’ selling expensive courses on starting a ‘sewing empire’. You don’t need them. The skill is simple, the business model is straightforward. Start small, build a reputation for quality work and fast turnaround, and let word-of-mouth be your best marketing tool. Don’t overcomplicate it.
Conclusion
You came here looking for a way to save $20, but you’re leaving with so much more. You’ve got the blueprint to save hundreds of dollars, the confidence to alter your own clothes for a perfect fit, and a legitimate, high-profit side hustle you can start tonight. This is what frugal living is all about: identifying where you’re being overcharged and taking back the power. It’s not about being cheap; it’s about being smart with your money and your time. So grab that pair of too-long jeans from your closet. Your first project, your first savings, your first step towards a new skill is waiting. Stop paying. Start doing.