Organize Your Desk For Free Using Cereal Boxes (Look How Chic!)
Let’s be real: a chaotic desk is a chaotic mind. When you’re trying to build an empire from your kitchen table or just get through your to-do list, clutter is the enemy. It kills your focus, wastes your time, and honestly, it can make you feel broke and overwhelmed. The stores want you to drop $20, $30, or even $50 on some plastic box to hold your pens. No thanks. We’re not about spending money to organize our money-making space. That’s just bad business.
Forget dropping cash on overpriced desk sets. You’ve got everything you need sitting in your recycling bin right now. This isn’t about being cheap; it’s about being smart, resourceful, and in total control of your space and your finances. We’re going to turn that empty box of Cheerios into a custom, stylish organizer that looks like it came from a high-end boutique. Ready to reclaim your desk and your cash? Let’s get to work.
The Game Plan: What You’ll Need (Spoiler: It’s Mostly Trash)
Before we dive in, let’s gather the tools for this zero-dollar operation. You don’t need to buy a single thing. Scour your house, check that junk drawer, and raid the recycling. This is about using what you’ve got to get what you want.
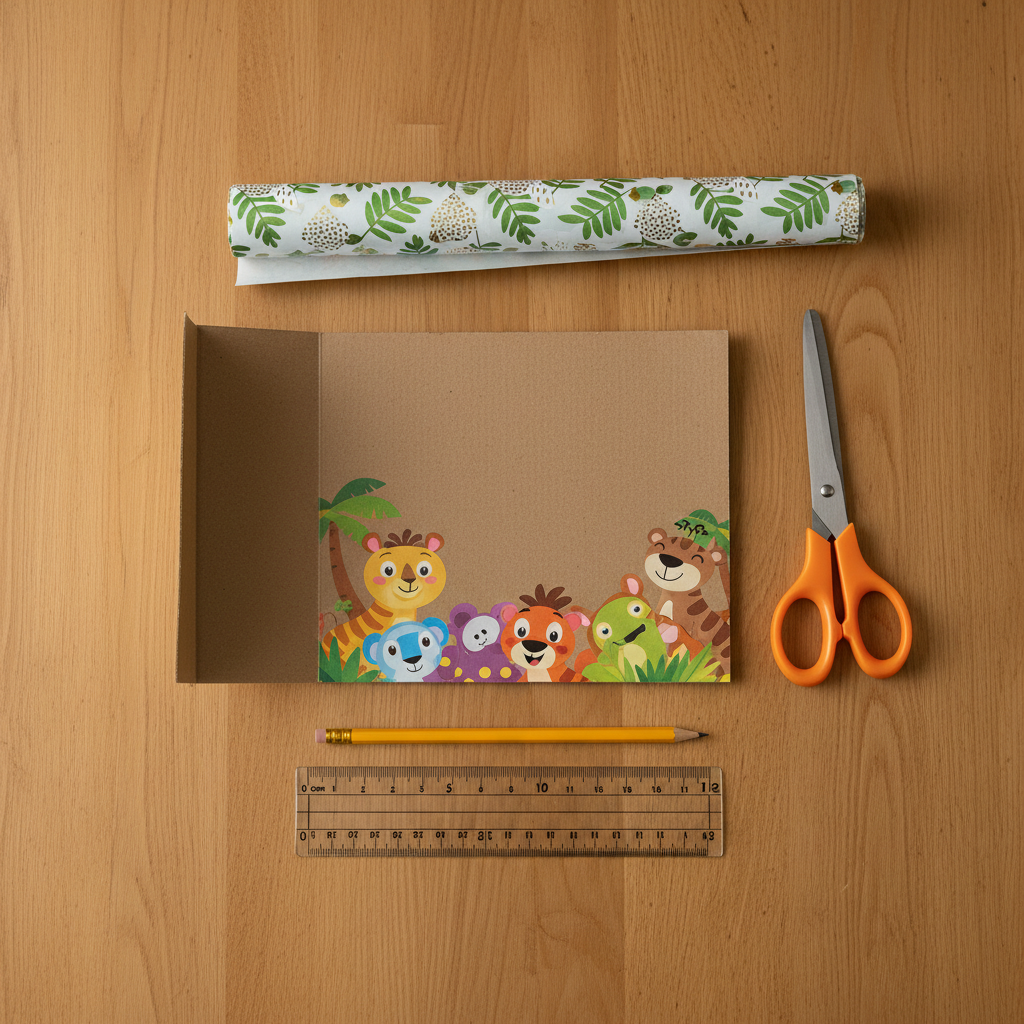
Your Arsenal of Free Supplies:
- The Star Player: An empty cereal box (or any similar cardboard box from crackers, pasta, etc.). Taller boxes give you more to work with.
- The Blade: A sharp pair of scissors or a box cutter. Be smart, be safe—if you’re using a box cutter, cut away from yourself on a protected surface.
- The Marker: A pen, pencil, or Sharpie. Anything that’ll make a mark on cardboard.
- The Straight Edge: A ruler. If you don’t have one, grab a hardcover book or another piece of stiff cardboard. No excuses.
Optional ‘Glow-Up’ Materials (Also Free):
- The Wrap: Leftover wrapping paper, old maps, pages from a magazine, fabric scraps, or even brown paper bags for a rustic look.
- The Stick’um: Glue (a glue stick, school glue, or a hot glue gun if you have one) or tape. Double-sided tape is a ninja move here.
- The Color: Any leftover paint, craft paint samples, or even nail polish for small details.
Key Rule: Do NOT go out and buy anything for this project. The entire point is to use what’s already around you. Get creative and challenge yourself to stick to a $0 budget.
The Step-by-Step Hustle: Building Your Chic Organizer
Alright, it’s time to transform that trash into treasure. Follow these steps, and you’ll have a custom organizer in less time than it takes to watch an episode of your favorite show. No complicated instructions, just a straightforward plan.
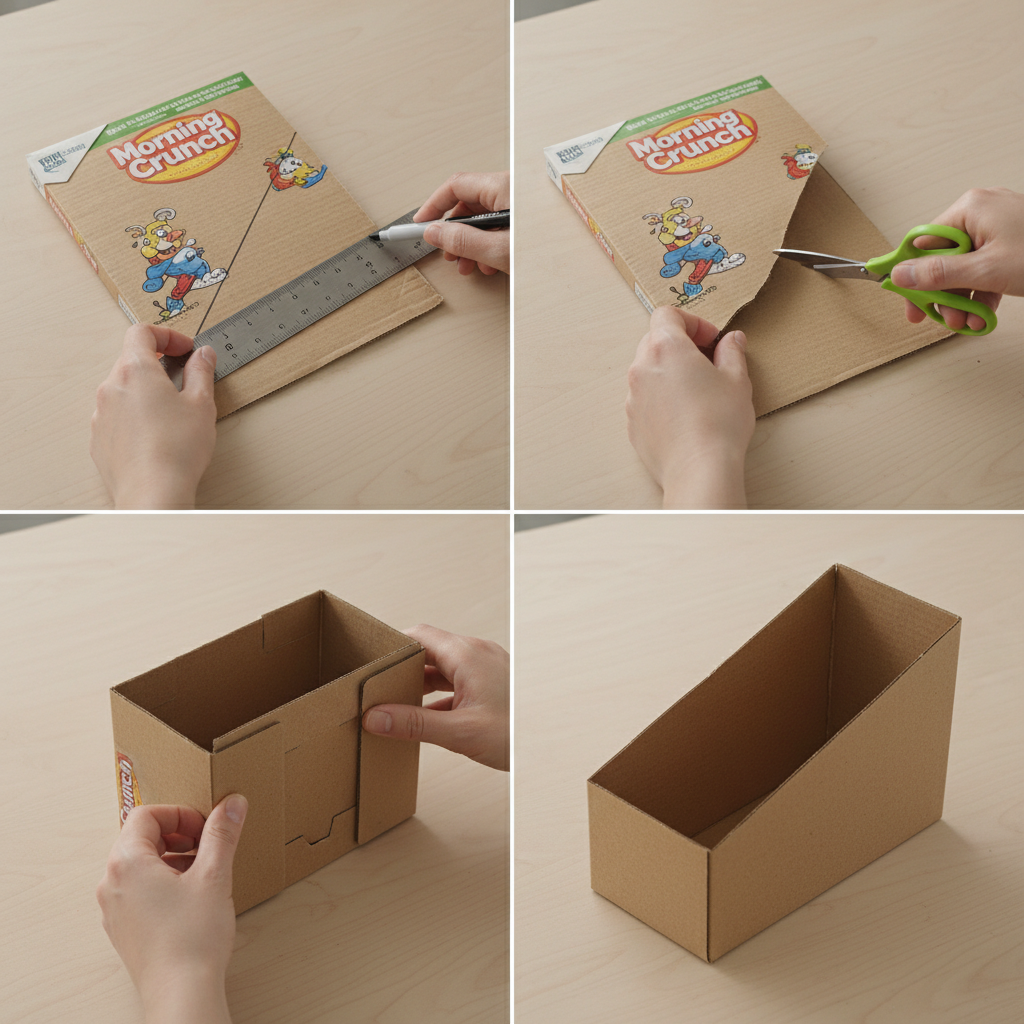
Step 1: Deconstruct and Plan
First, carefully open up your cereal box along the seams so it lays flat. This makes it way easier to measure and cut cleanly. Decide what you need to organize. Pens and pencils? Mail? Sticky notes? This will determine the size and shape of your compartments. For a simple pen holder and mail sorter, we’ll make an angled cut.
Step 2: Measure and Mark
Place the box with the plain cardboard side facing up. Using your ruler or straight edge, draw a diagonal line from one of the top corners down to the side. A good starting point is to mark about 4 inches up from the bottom on one side, and about 8 inches up on the other. Connect those two points with your straight edge. This angled line is what gives it that modern, professional look. Repeat on the opposite side.
Step 3: The Cut
This is where the magic happens. Using your sharp scissors or box cutter, carefully cut along the lines you drew. You should now have two identical side pieces and a front and back. Cut the front piece to match the height of your lowest point (4 inches in our example) and the back piece to match the highest (8 inches). You’re essentially creating a slanted box.
Step 4: Reassemble and Secure
Now, fold the box back into its original shape, with your new angled top. Use tape or glue along the inside seams to secure it firmly. If you have a hot glue gun, a few dabs will make this thing rock-solid. Make sure the bottom is sealed up tight. You now have the basic structure of your organizer!
- Lay Box Flat: Carefully undo the glued seams to flatten the box.
- Mark Your Cut: Draw a diagonal line across the front panel of the box. A higher back and lower front makes it easy to see your stuff.
- Cut It Out: Using a box cutter or sharp scissors, cut along your marked line through the front and two sides. Leave the back panel at its full height.
- Reassemble: Fold the box back into shape and use strong tape or glue on the inside flaps to hold it together. Your basic structure is now complete.
The Glow-Up: Pimp Your Organizer on a Zero-Dollar Budget
Your organizer is functional, but now it’s time to make it chic. This is how you take it from ‘recycled box’ to ‘stylish desk accessory.’ Raid your craft supplies, junk drawer, or that closet where you shove old gift wrap.
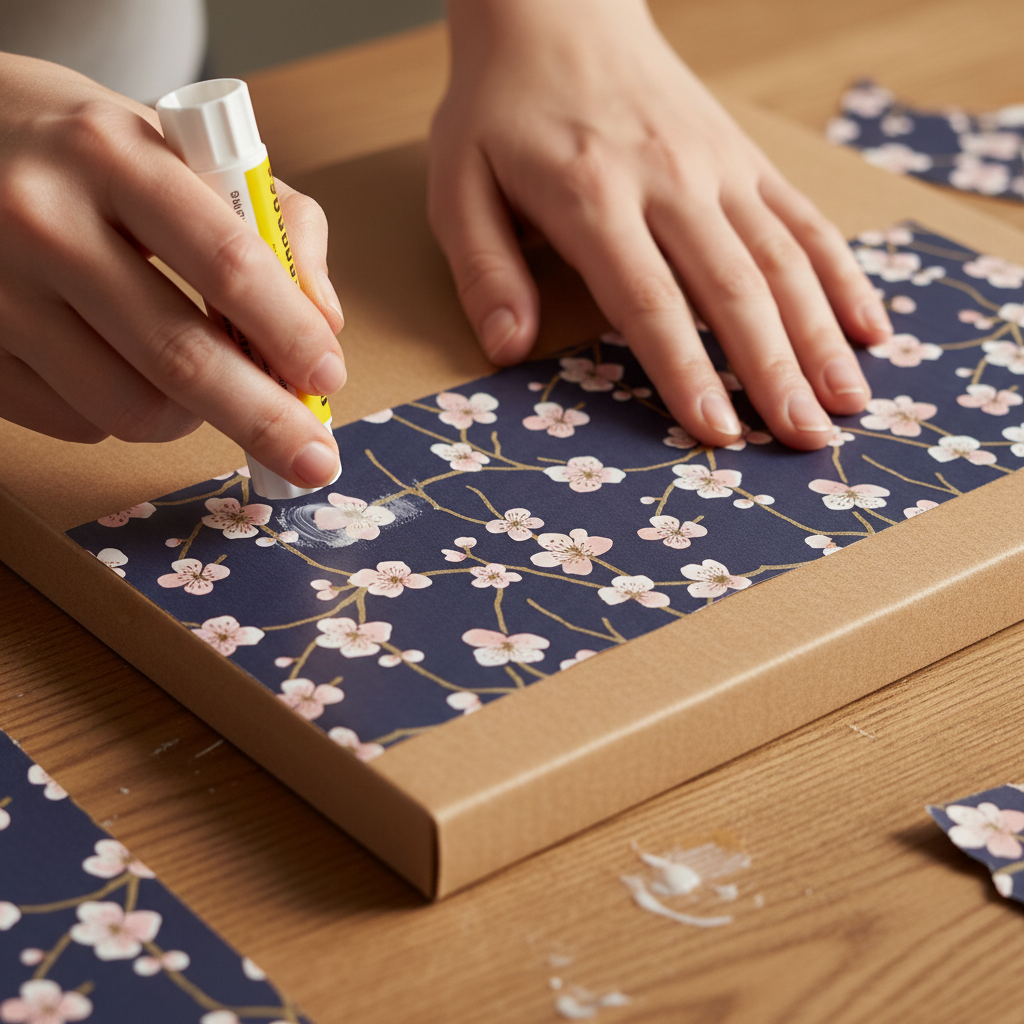
Cover It Up
The easiest way to make your organizer look expensive is to cover the cardboard. Measure and cut your chosen material (wrapping paper, fabric, magazine pages) to fit each side. A simple glue stick works perfectly. Apply a thin layer of glue to the cardboard and smooth the paper on carefully to avoid bubbles. For a super clean look, wrap it like a present, folding the edges neatly over the top and into the inside of the box.
Paint It On
Got some leftover wall paint or a few half-empty bottles of craft paint? Perfect. Give your organizer a solid coat of color. A neutral like white, black, or gray can look incredibly sleek. Let it dry completely, then add a second coat if needed. You can even use painter’s tape to create stripes or geometric patterns for a custom design.
Add The Details
Small touches make a big difference. Use a Sharpie to draw your own patterns. If you have washi tape, use it to accent the top edges. You can even glue on buttons, ribbon, or twine for a different texture. The goal is to make it look intentional and uniquely yours.
The Math: DIY vs. Store-Bought Smackdown
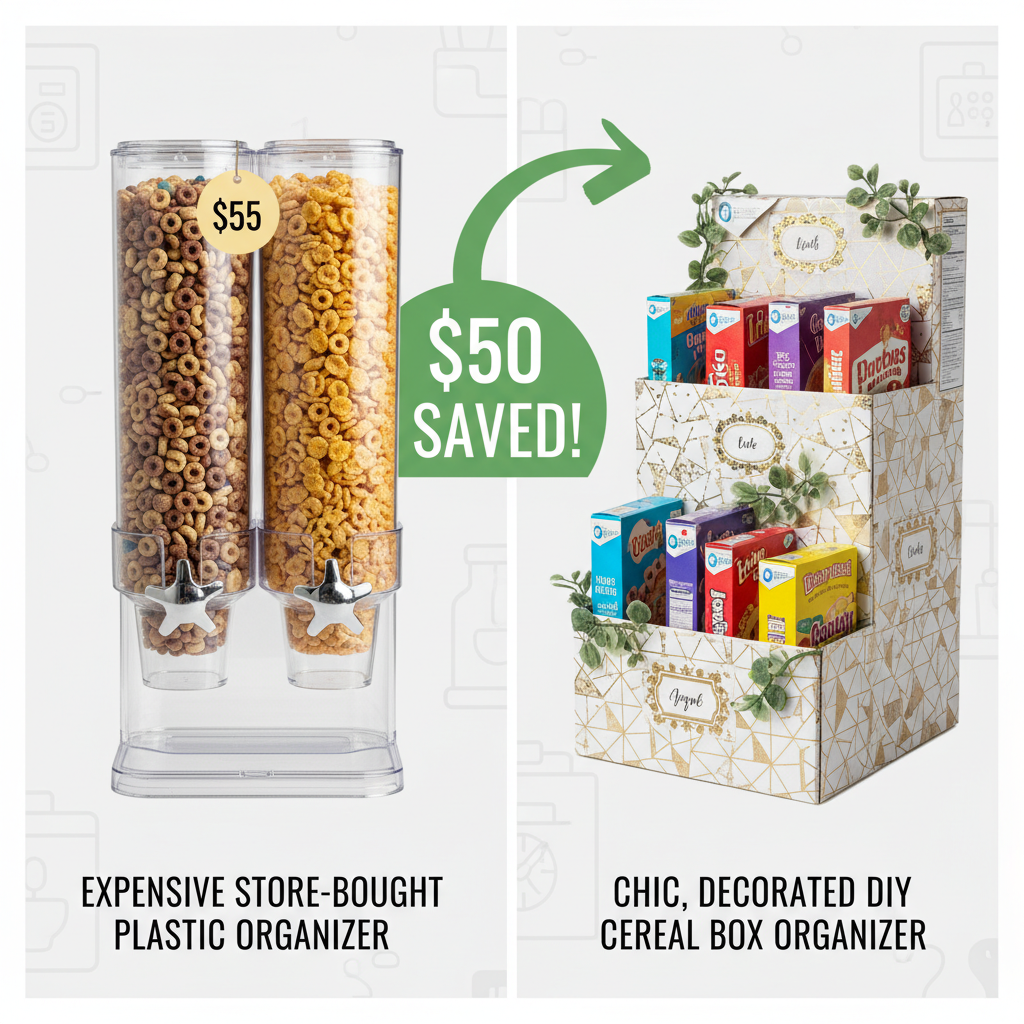
Still thinking about just buying one? Let’s run the numbers. This is the part that should make your frugal heart sing. We’re not just saving a few cents; we’re talking about real money you can put toward debt, savings, or your next side hustle investment.
Look at what you’re NOT spending. That money is a direct win. It’s a payment you just made to yourself for being resourceful. Over time, these small, smart choices compound into significant savings.
| Item | Typical Store Cost | Your DIY Cost | Total Savings |
|---|---|---|---|
| Basic Plastic Pen Holder | $8.00 – $15.00 | $0.00 | $15.00 |
| Stylish 3-Slot Mail Sorter | $18.00 – $25.00 | $0.00 | $25.00 |
| Designer Desk Organizer Set | $30.00 – $50.00+ | $0.00 | $50.00+ |
| The Frugal Hacker’s Choice | Potentially $50+ | $0.00 (Just your time & creativity) | 100% SAVINGS |
Conclusion
There you have it. For zero dollars and a little bit of your time, you’ve created a custom, stylish desk organizer that gets the job done and looks damn good doing it. You’ve decluttered your workspace, which will boost your focus and productivity, and you kept your hard-earned cash where it belongs—in your pocket.
This is more than just a craft project. It’s a mindset. It’s about looking at a piece of ‘trash’ and seeing potential. It’s about solving a problem without throwing money at it. Every time you reach for a pen, you’ll be reminded that you are resourceful, creative, and in control. Now, take that $20 you just saved and put it towards something that really matters. That’s the ultimate frugal hack.