My $50 Bathroom Remodel: DIY Bathtub Refinishing Results
Let’s be real. That old, stained, avocado-green or peeling-beige bathtub is the elephant in your bathroom. It doesn’t matter how clean the rest of the room is; that tub screams ‘dungeon’ and single-handedly drags down your home’s entire vibe. You’ve probably looked into fixing it. You got a quote from a pro and nearly choked when they said $500, $800, or even more for a ‘professional refinish.’ And replacing it? We’re talking thousands. So you live with it, scrubbing endlessly at stains that are literally etched into the surface, feeling defeated.
Well, it’s time to stop accepting defeat. What if I told you that you could get a gleaming, glossy, looks-like-new bathtub for less than the cost of a fancy dinner out? I’m talking about a total transformation for under $50. This isn’t a fantasy from some high-budget home renovation show. This is a gritty, real-world, roll-up-your-sleeves hack that will save you hundreds of dollars and give you a massive dose of DIY pride. I did it, and now I’m giving you the complete playbook—the good, the bad, and the smelly—so you can do it too. Get ready to reclaim your bathroom from that ugly tub, once and for all.
The Reality Check: Why Your Tub Is So Grim (And Why Pros Charge a Fortune)

Before we get into the fix, you need to understand the problem. That grime isn’t just surface-level dirt. Over the years, the original porcelain or enamel glaze on your tub gets worn down by abrasive cleaners, hard water minerals, and general wear and tear. Microscopic scratches and pores open up, trapping soap scum and dirt, leading to stains that no amount of bleach can touch. Sometimes, the finish itself starts to peel and flake away. It’s not a cleaning problem; it’s a surface problem.
So, why does a professional job cost so much? They aren’t just slapping on some paint. A pro will typically use heavy-duty acid to chemically etch the surface, creating a porous foundation. Then they spray on multiple coats of industrial-grade acrylic urethane or polymer coatings—stuff that requires serious ventilation and expertise to apply evenly. You’re paying for their specialized equipment, their hazardous materials, and their labor to do a job that can take the better part of a day. Their results are incredibly durable, but the price tag of $400 to $800+ is a budget-killer for most of us. Understanding this is key: our $50 DIY method is a hack that delivers 85% of the visual result for 10% of the cost. It’s the ultimate frugal workaround.
The Arsenal: Your Under-$50 Shopping List
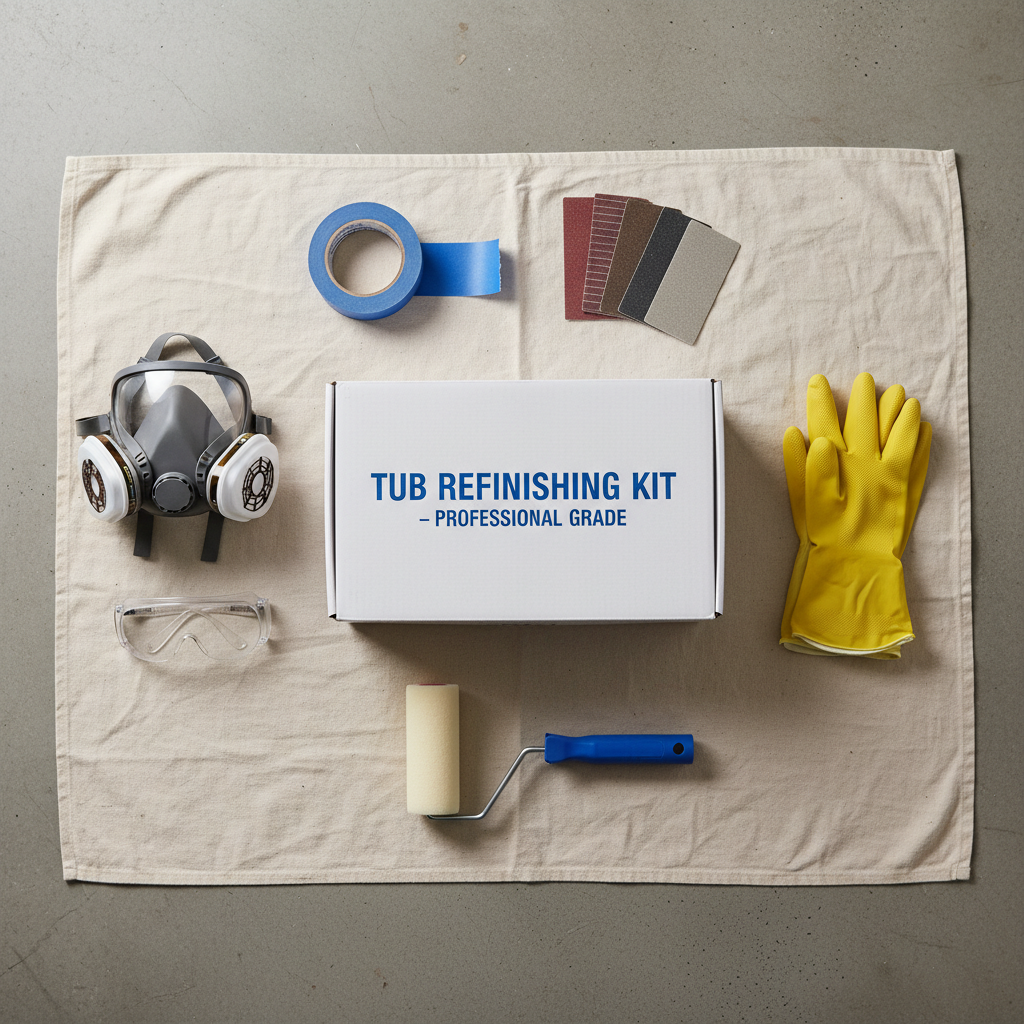
This is where the magic happens. You don’t need a contractor’s truck full of gear. You just need a smart, targeted shopping list. The hero of this project is a two-part epoxy Tub & Tile Refinishing Kit, which you can find at any major hardware store. Don’t cheap out on the prep supplies—they’re the difference between a finish that lasts for years and one that peels in months.
Your Shopping List:
- Tub & Tile Refinishing Kit: Look for brands like Rust-Oleum. This is the core of your budget, usually around $30-$40.
- Safety Gear (Non-negotiable!): A high-quality respirator mask rated for organic vapors (NOT a flimsy dust mask), chemical-resistant gloves, and safety goggles. The fumes from the epoxy are no joke.
- Prep & Cleaning Supplies: Abrasive cleaner (like Comet or Ajax), a scouring pad, tack cloth, and paper towels.
- Tools: A 4-inch foam roller with extra roller covers (epoxy will destroy them), a small paint brush for corners, a paint tray, and painter’s tape.
- Repair Supplies: 220-grit and 400-grit wet/dry sandpaper, and a tube of 100% silicone bathroom caulk for the finishing touch.
Now, let’s look at the numbers. This is where you’ll really feel the power of this hack.
| Item | DIY Cost | Professional Cost |
|---|---|---|
| Refinishing Product/Service | $35 (for the kit) | $500 |
| Supplies (Tape, Roller, Safety) | $15 | Included |
| Labor | Your own sweat equity | Included |
| Total Estimated Cost | ~$50 | $500 – $800+ |
| Total Savings | $450+ | N/A |
The Game Plan: Step-by-Step to a Like-New Tub
Alright, this is the main event. Follow these steps religiously. Do not cut corners, especially on the prep work. 90% of a pro-level result comes from amateur-level patience during prep. Block out a weekend for this: one day for prep and painting, and two more days for the tub to cure untouched.
-
Step 1: The Brutal Prep Work (Don’t You Dare Skip This!)
First, remove all the old, nasty caulk around the tub. Use a utility knife and a caulk removal tool. Next, scrub the tub like you’ve never scrubbed before with an abrasive cleaner. Your goal is to remove every trace of soap scum, body oil, and grime. Rinse it thoroughly. Then, attack any rust spots or chips with your 220-grit sandpaper until they are smooth. Clean and rinse again. The surface has to be surgically clean and completely dry before you move on.
-
Step 2: Sanding & Etching – Getting Gritty
Your kit might come with an etching powder, or it might instruct you to sand. Either way, the goal is to rough up the old surface so the new coating has something to grip. If sanding, use 400-grit wet/dry sandpaper and lightly sand EVERY square inch of the tub. It should feel slightly gritty and look dull, not glossy. This is the most important step for adhesion. Once done, wipe away all the dust with a tack cloth. The tub must be bone dry.
-
Step 3: Masking Off – Protect Your Turf
Use high-quality painter’s tape to meticulously mask off the drain, the faucet, and the tile surrounding the tub. Press the edges down firmly. Lay down a drop cloth to protect your floor. Open every window in the bathroom and set up a box fan pointing outwards to create ventilation.
-
Step 4: The Point of No Return – Mixing the Epoxy
Put on your respirator, gloves, and goggles. This is it. The kit comes with two parts. Follow the instructions precisely for mixing them. You’ll stir them together for a few minutes until fully combined. Once mixed, you have a limited window to work—usually about 4-6 hours before the epoxy starts to harden in the tray. Don’t mix it until you are 100% ready to paint.
-
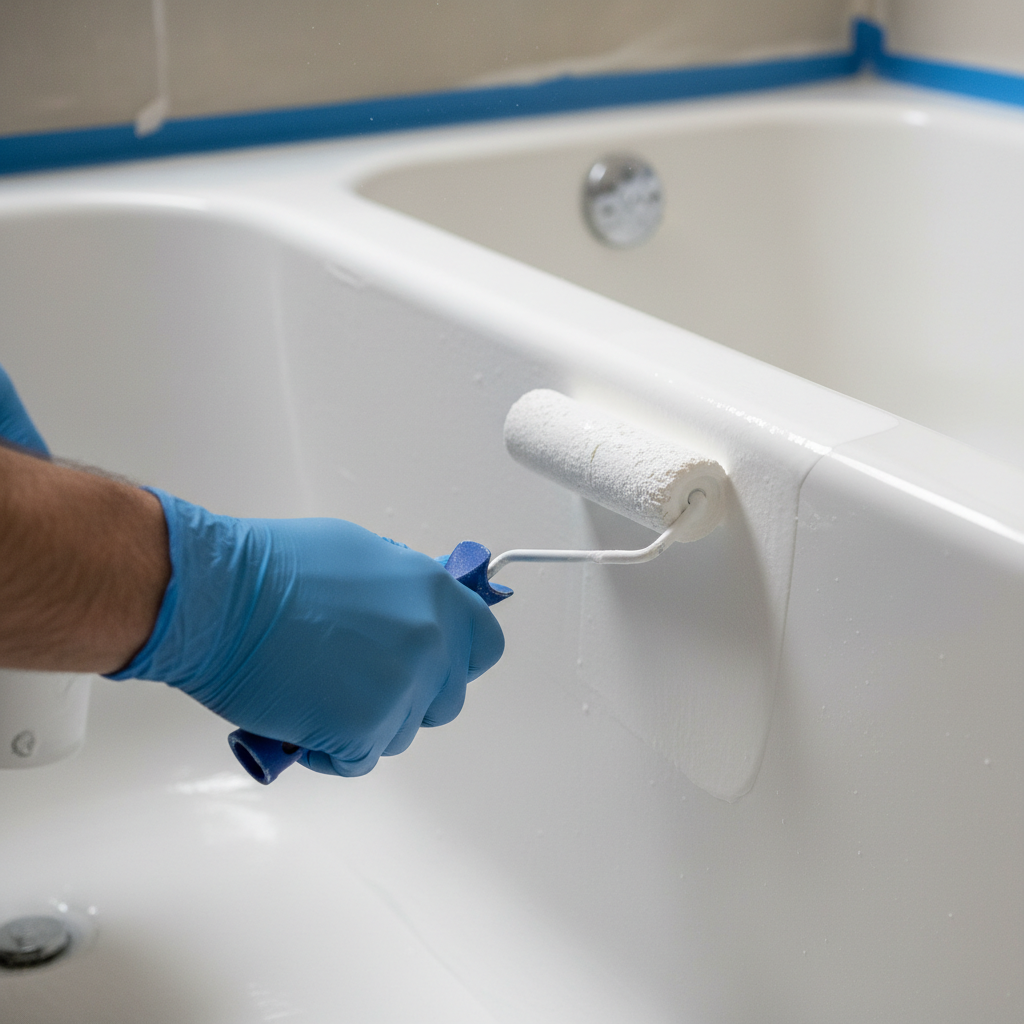
Step 5: Laying It On – The First Coat
Pour some epoxy into your paint tray. Use your small brush to ‘cut in’ around the edges, drain, and faucet. Then, take your foam roller and apply a thin, even coat to the rest of the tub. Work from top to bottom. Don’t try to get full coverage on the first coat—it will look streaky, and that’s okay. Your goal is a thin, even layer with no drips. Overloading the roller will cause runs.
-
Step 6: The Waiting Game & The Second Coat
Check your kit’s instructions for the recoat time, usually about 1-2 hours. The first coat should be tacky but not wet. Apply the second coat exactly like the first, but this time you’re aiming for that beautiful, opaque, solid white finish. Work methodically and check for any missed spots or drips. Once done, carefully remove the painter’s tape while the epoxy is still wet for the cleanest lines.
-
Step 7: Curing – The Hardest Part
Now, you wait. You must let the tub cure, completely untouched, for at least 48-72 hours (check your kit’s directions!). Don’t let it get wet. Don’t touch it. Don’t even look at it wrong. This hardening process is what creates the durable, waterproof shell. After the curing time is up, apply a fresh bead of 100% silicone caulk around the tub, let that dry, and you’re done.
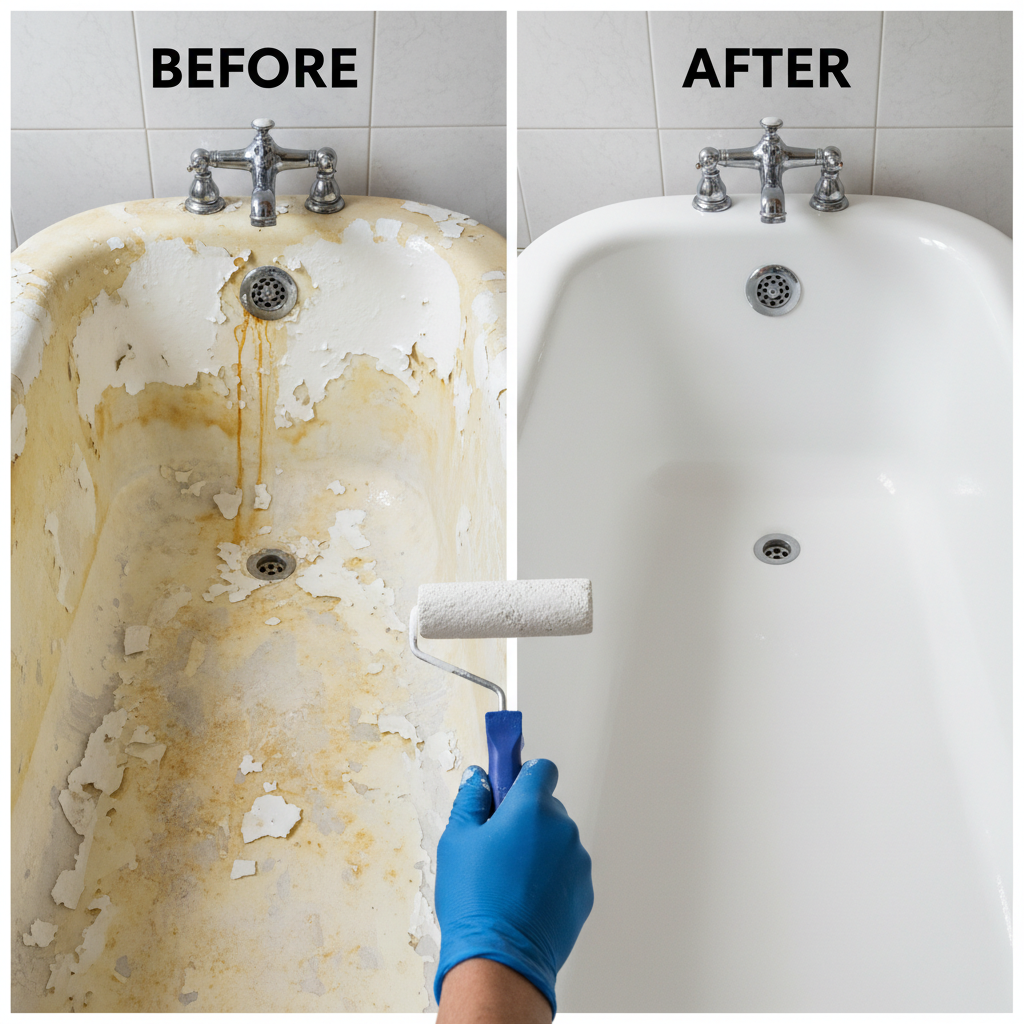
The Reveal: My Real-World Results (The Good, The Bad, and The Fumes)
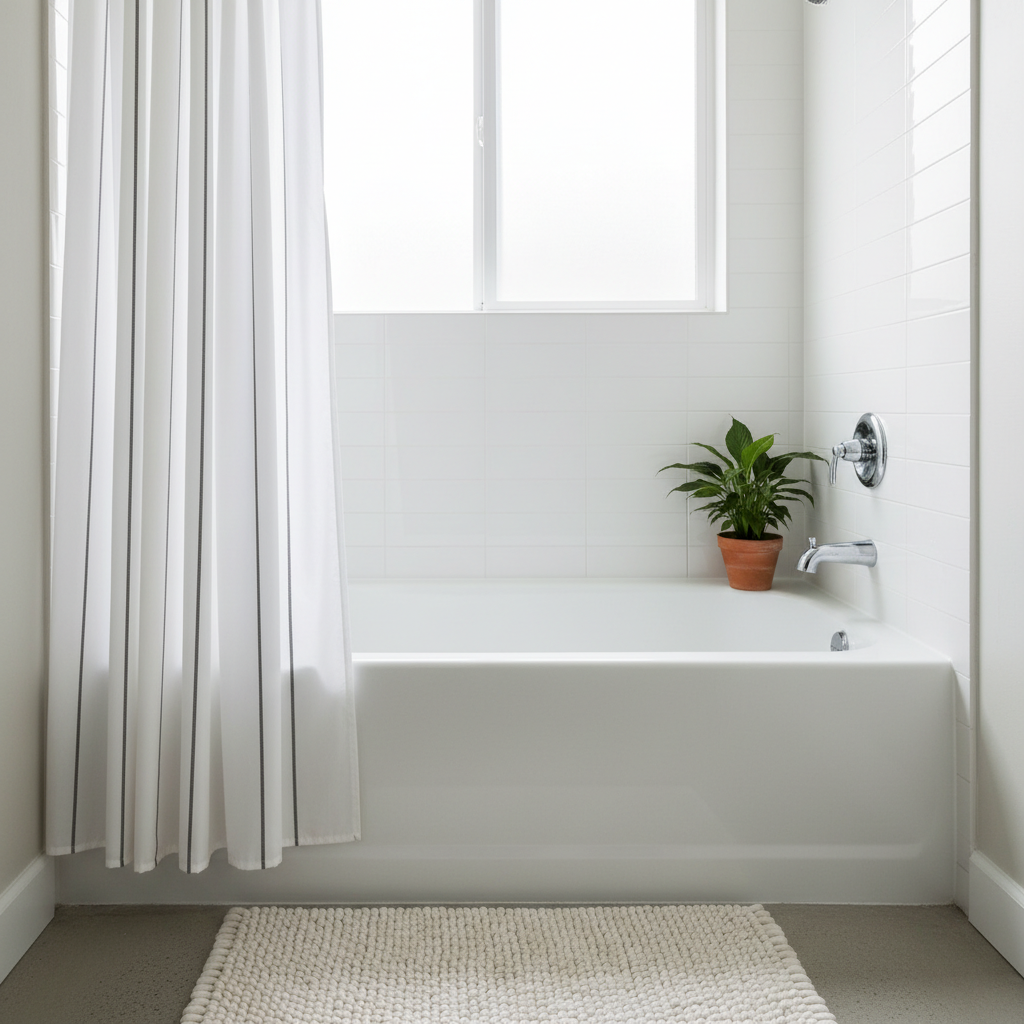
So, was it worth it? Absolutely, one hundred percent, yes. The visual transformation is shocking. My tub went from a peeling, stained embarrassment to a bright, glossy, clean-looking centerpiece of the bathroom. It looks like a brand new tub to the naked eye. The feeling of accomplishment is huge, and the savings are even bigger.
But let’s keep it real. This project isn’t all sunshine and rainbows. First, the fumes. I cannot overstate this: the epoxy fumes are incredibly strong. They are powerful and toxic. You MUST have excellent ventilation and wear a proper respirator. Don’t mess around with this.
Key Rule: Your bathroom should have so much ventilation it feels like a wind tunnel. Open windows, run fans, and keep the door closed to the rest of the house. The smell will linger for a couple of days.
Second, it’s a physically awkward job. You’ll be hunched over in a small space for hours. Your back will ache. Third, perfection is unlikely. If you look closely, you might find a tiny speck of dust that settled while it was drying, or a slight roller mark. But from a normal distance? It looks flawless. Finally, this is not a forever fix like a professionally installed tub. With proper care—no abrasive cleaners, no bath bombs with harsh dyes, fixing leaky faucets immediately—a DIY epoxy finish can last a solid 3-5 years, maybe more. For $50, that is an insane return on investment.
Conclusion
At the end of the day, this $50 project completely erased one of the biggest eyesores in my home. It took a weekend of work, some smelly fumes, and a bit of patience, but the payoff was enormous. I saved at least $450 compared to hiring a pro, and I gained the confidence that comes from tackling a project you thought was out of your league. This isn’t just about refinishing a tub; it’s about rejecting the idea that you have to spend a fortune to love the space you live in. It’s about taking control, getting your hands dirty, and making your money work for you, not the other way around. So if you’re staring at an ugly tub, stop wishing it were different. Grab a kit, block out a weekend, and make it happen. You’ve got this.