How to Preserve Food for Years: Water Bath Canning for Beginners Guide
Let’s be real: watching that beautiful produce you bought wilt in the fridge is like setting a pile of cash on fire. Every strawberry that turns to mush, every tomato that goes soft—that’s your hard-earned money heading straight for the compost bin. With grocery prices going through the roof, we can’t afford to play that game anymore. It’s time to stop being a victim of expiration dates and start taking control of your food supply.
Enter water bath canning. This isn’t some old-fashioned chore your grandma did; it’s a street-smart financial hack for the 21st century. It’s the ultimate way to lock in freshness, fight food waste, and build a pantry that makes you feel like a self-sufficient boss. Whether you’re trying to stretch a tight budget, eat healthier without the processed junk, or even start a killer side hustle, canning is your ticket. This guide will break down everything you need to know, no fluff, just the real deal on how to turn today’s harvest into next year’s meals.
The Gear: How to Build Your Canning Arsenal Without Going Broke
Before you dive in, you need the right tools. But don’t think you need to drop a fortune on brand-new, top-of-the-line equipment. Frugal hackers know where to look. Here’s the essential gear list and how to get it on the cheap.
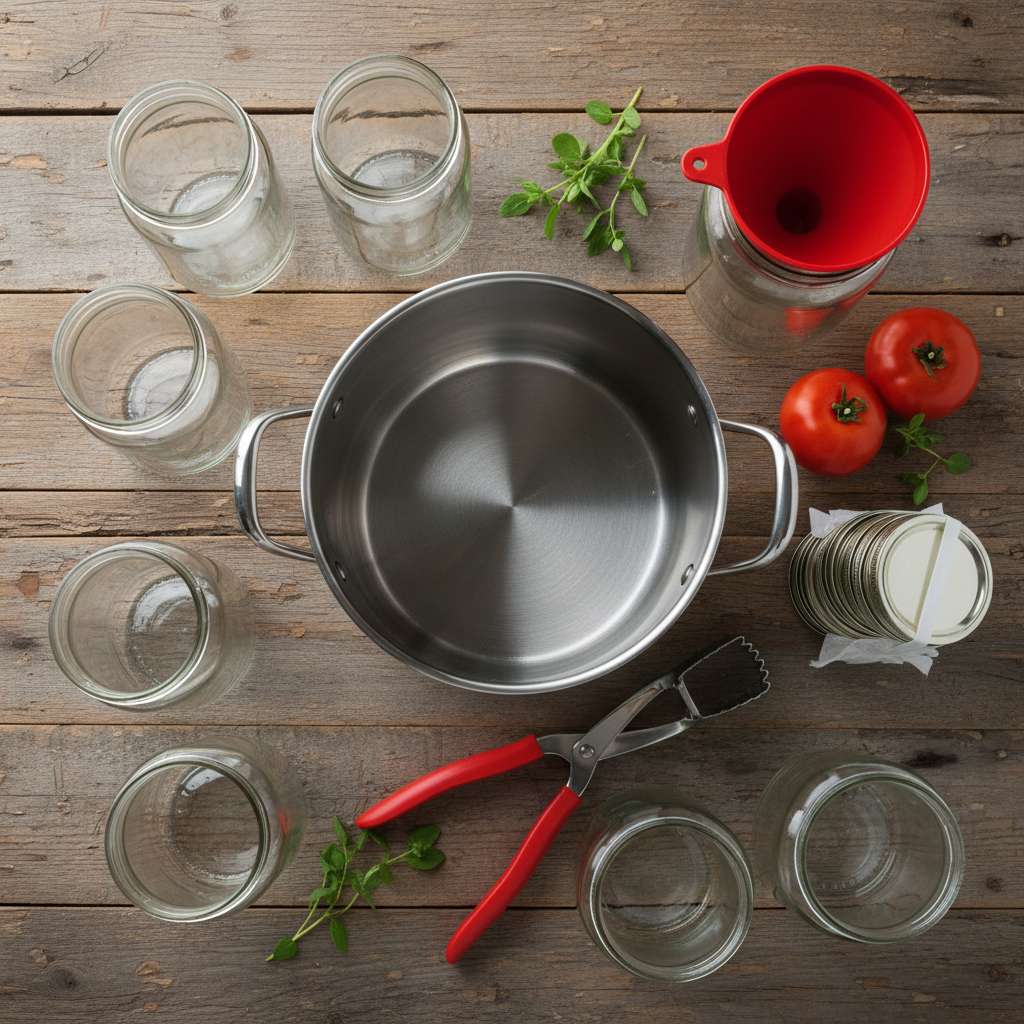
The Must-Haves:
- Water Bath Canner with Rack: This is basically a huge pot with a rack on the bottom to keep jars from touching the direct heat. You can buy a dedicated one, but honestly, any stockpot deep enough to cover your jars with at least one inch of water will work. Frugal Hack: Check thrift stores, garage sales, or Facebook Marketplace. People often offload these kits for cheap.
- Canning Jars: You need glass jars specifically designed for canning (like Ball or Kerr brands). They’re built to withstand the heat. Don’t cheap out and reuse old spaghetti sauce jars—they can and will shatter.
- Lids and Rings (or Bands): The rings are reusable, but the flat lids are one-time use only for a guaranteed safe seal. Always buy new lids. This is non-negotiable for safety.
- Jar Lifter: This weird-looking tong-like tool is your best friend. It grips hot, wet jars securely so you don’t burn yourself or drop your precious work.
- Canning Funnel: A wide-mouthed funnel that fits perfectly into canning jars. It prevents messy spills and keeps your jar rims clean, which is critical for a good seal.
- Bubble Popper / Headspace Tool: This is a simple plastic stick. One end is for poking into the jar to release air bubbles, and the other end is notched to measure ‘headspace’ (the gap between the food and the top of the jar). A simple chopstick can work in a pinch for bubbles, but the measuring tool is clutch.
Key Rule: Never, ever compromise on safety. Use proper canning jars and ALWAYS use new lids for every batch. A bad seal isn’t just a waste of food; it’s a health risk. Don’t play around with botulism.
The Cost Breakdown: DIY Canning vs. The Supermarket
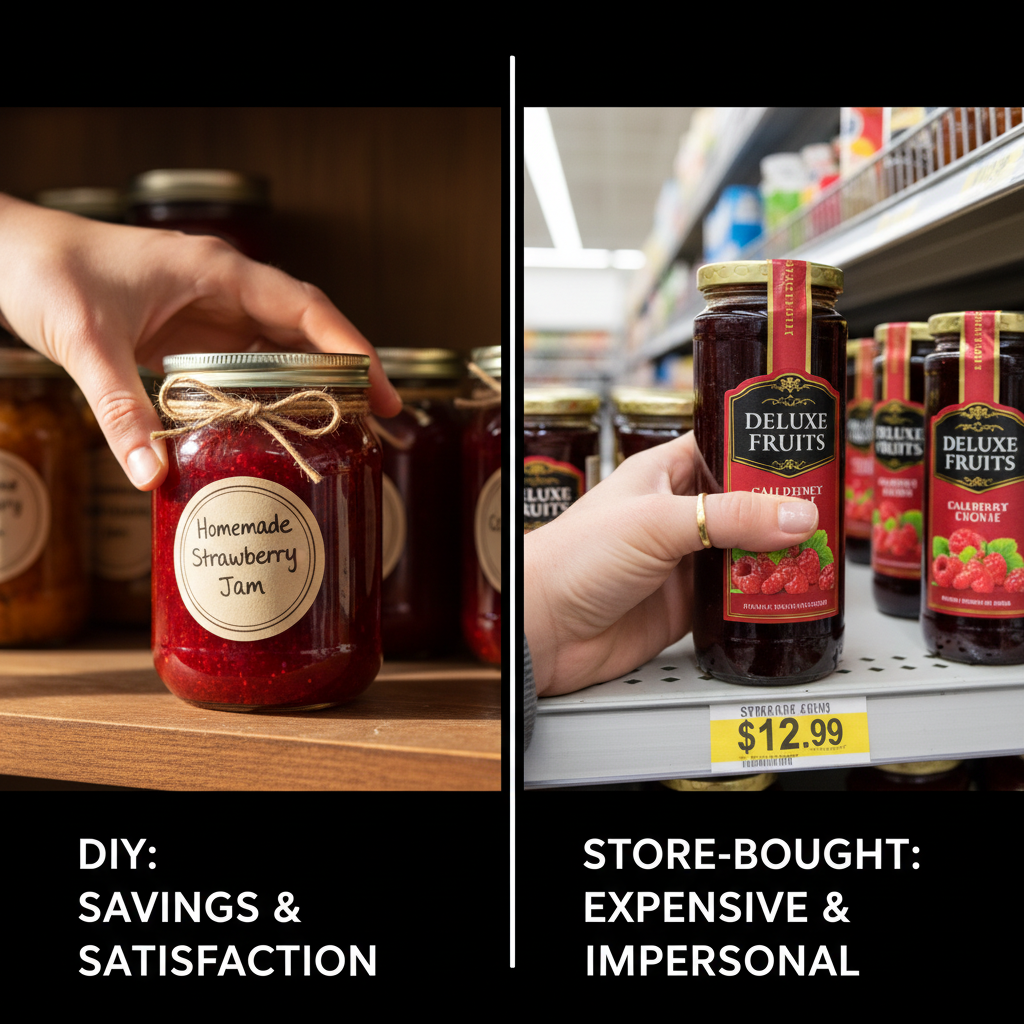
Is all this effort actually worth the money? Let’s run the numbers. We’ll compare making a batch of high-quality strawberry jam at home versus buying a similar ‘artisan’ or ‘organic’ jar from the store. We’re assuming you snagged strawberries on sale during peak season.
| Item | DIY Cost (per 8oz jar) | Store-Bought Cost (per 8oz jar) |
|---|---|---|
| Strawberries (on sale) | $1.50 | $7.00 – $9.00 |
| Sugar/Pectin | $0.40 | |
| Jar & New Lid (reusing jar) | $0.75 | |
| Total Cost | $2.65 |
The savings are crystal clear. You’re saving over $4.00 PER JAR. If your family goes through two jars of jam a month, that’s nearly $100 in savings a year on just one item! Now imagine doing this for pickles, tomato sauce, apple butter, and salsas. The math doesn’t lie. This is a powerful way to reclaim a huge chunk of your grocery budget. You’re not just saving money; you’re investing your time to create a higher quality product for a fraction of the price.
The Step-by-Step Playbook: Canning Your First Batch of Jam
Alright, it’s go-time. We’re going to walk through making a simple, delicious strawberry jam. Read through all the steps first so you know the flow. This process is all about timing and safety.
- Prep Your Station: Clean your kitchen counters. Get your water bath canner on the stove and fill it about halfway with water. Place the rack in the bottom. Turn the heat on high; you want this water simmering by the time your jars are ready.
- Wash and Heat Your Jars: Wash your jars, lids, and rings in hot, soapy water and rinse well. You need to keep the jars hot to prevent them from breaking when you pour hot jam into them. Place the clean jars (without lids) on the rack in your canner. The simmering water will heat them perfectly. Place the flat lids in a small saucepan of water and bring to a bare simmer (do not boil). Keep them hot.
- Make the Jam: While the jars are heating, prepare your fruit. For a small batch, you’ll need about 2 pounds of strawberries, 4 cups of sugar, and 1/4 cup of lemon juice (the acid is crucial for safety and setting). Mash the strawberries in a large pot, add the sugar and lemon juice, and bring to a rolling boil over high heat, stirring constantly. Boil hard until the mixture thickens and a candy thermometer reads 220°F (105°C).
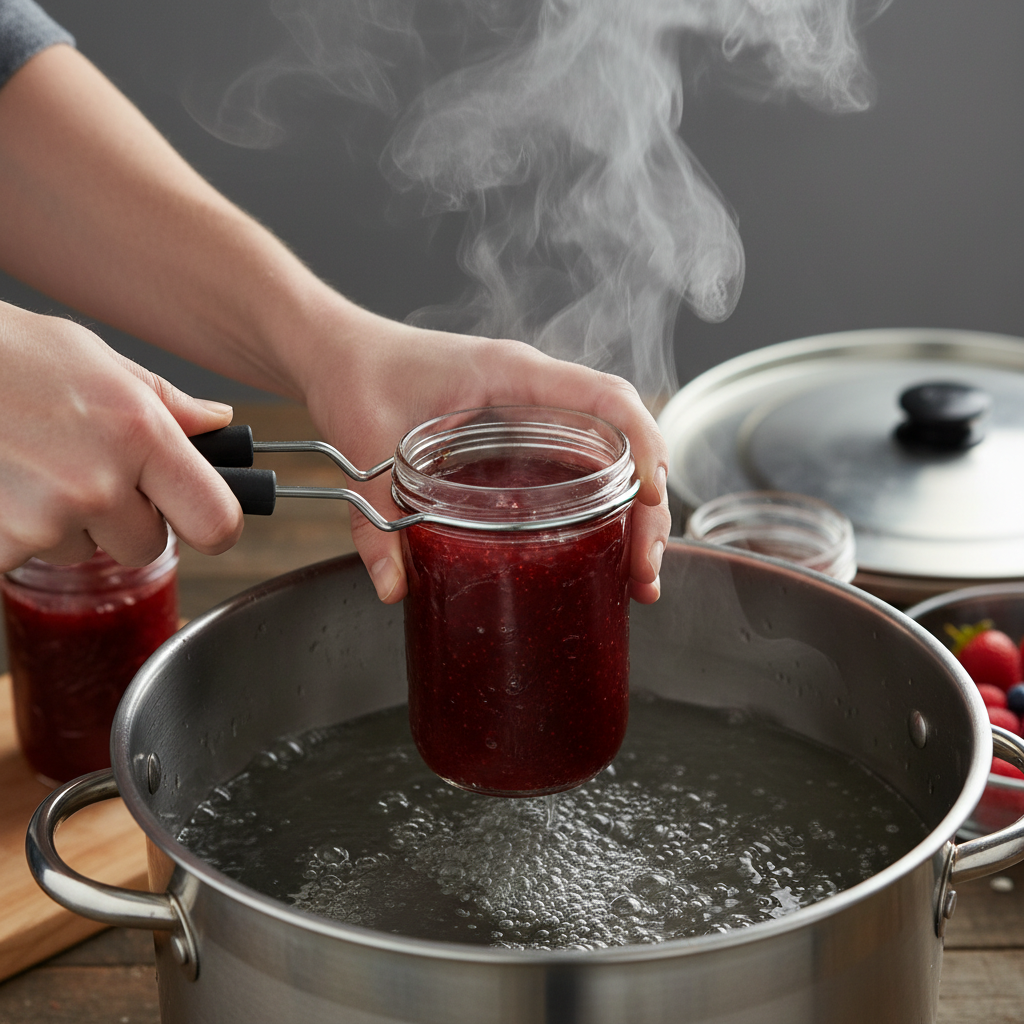
- Fill the Jars: Turn off the heat under the jam. Carefully remove one hot jar from your canner using the jar lifter. Place it on a towel on your counter. Put the canning funnel in the jar and ladle the hot jam in, leaving a 1/4-inch headspace. Use your headspace tool to measure.
- Remove Air Bubbles & Clean Rims: Slide your bubble popper or a chopstick around the inside of the jar to release any trapped air bubbles. Then, take a clean, damp cloth and wipe the rim of the jar. Any speck of food left on the rim can prevent a proper seal.
- Seal the Jars: Using a magnetic lid wand or tongs, lift a hot lid from its water bath and place it on the clean jar rim. Screw on the ring until it’s ‘fingertip tight’. This means you tighten it until you feel resistance, then just a tiny bit more. Don’t crank it down like a gorilla; air needs to escape during processing.
- Process in the Water Bath: Using your jar lifter, place the filled jar back into the canner. Repeat until all jars are filled and in the canner. Make sure the water covers the tops of the jars by at least 1-2 inches. Put the lid on the canner and bring the water to a full, rolling boil. Once it’s boiling, start your timer. For 8oz jam jars, process for 10 minutes (adjust for altitude if necessary).
- Cool and Check the Seal: When the timer goes off, turn off the heat, remove the canner lid, and let the jars sit in the hot water for 5 minutes. Then, use the jar lifter to move them to a towel-lined countertop. Don’t touch them for 12-24 hours. You’ll hear a satisfying ‘PING!’ sound as each jar seals. After 24 hours, press the center of each lid. If it doesn’t move or pop back, it’s sealed. You can remove the rings before storing.
From Pantry Staple to Side Hustle
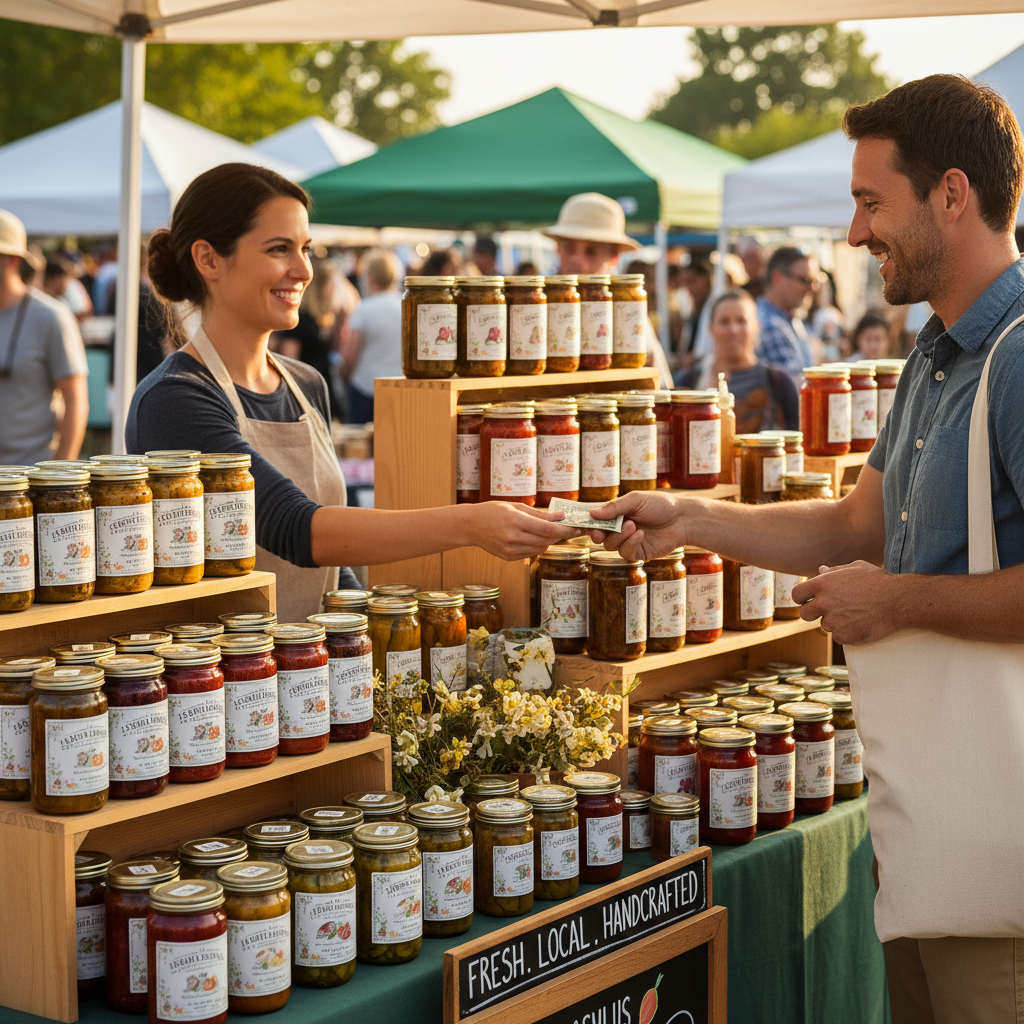
Once you get the hang of this, you’ll have more delicious preserves than you know what to do with. That’s not a problem; it’s an opportunity. Selling your homemade goods at farmers’ markets, craft fairs, or even to friends and neighbors is a classic, legit side hustle.
The Game Plan:
- Check Local Laws: First things first, look up your state’s ‘cottage food laws’. These regulations dictate what you can sell, where you can sell it, and what labeling is required. This is a crucial first step to staying on the right side of the law.
- Niche Down: Don’t just sell ‘jam’. Sell ‘Spicy Peach Bourbon Jam’ or ‘Heirloom Tomato Bruschetta in a Jar’. Find a unique angle. People pay a premium for unique, high-quality flavors they can’t find at the grocery store.
- Branding Matters: Invest in some decent labels. A simple, clean design on kraft paper can look incredibly professional. Name your little operation. ‘Jane’s Jams’ or ‘The Frugal Pantry’ gives your product an identity.
- Price for Profit: Don’t just cover your costs; pay yourself for your time. Calculate the cost of your ingredients, jars, and labels. A good rule of thumb is to price your final product at 3-4 times the cost of goods. If a jar costs you $2.50 to make, you should be selling it for $7.50 – $10.00.
Realistic Earning Potential:
This isn’t a get-rich-quick scheme, but it’s a solid earner. Let’s say you take a Saturday and make 30 jars of your signature apple butter. Your cost is about $3.00 per jar ($90 total). You sell them at a local market for $9.00 each. If you sell out, you’ve grossed $270. Your profit for a day’s work? A cool $180. Do that a couple of times a month, and you’re adding hundreds of tax-free (under the gift limit) or easily-reported dollars to your income stream.
Conclusion
Water bath canning is more than just a kitchen skill—it’s a declaration of independence from the grocery store grind. It’s a way to fight back against inflation, eliminate food waste, and put real, wholesome food on your table for pennies on the dollar. You’ve seen the math, you have the step-by-step playbook, and you know the potential. The only thing left to do is start. So grab a pot, find some fruit that’s on sale, and can your first batch. Take control of your pantry, your budget, and your food. You’ve got this.