Expensive Looking Decor: How to Create a Gallery Wall on a Dollar Store Budget
Let’s get real. You scroll through Pinterest, you see those perfectly curated gallery walls in high-end magazines, and you think, ‘I want that.’ Then you check the price tag on a single framed print and your wallet screams in terror. The dream of a chic, personalized space suddenly feels out of reach. But what if I told you that you could get that same million-dollar look for less than the cost of a pizza delivery? It’s not a fantasy; it’s a strategy. We’re about to turn the dollar store into your personal high-end decor boutique. Forget gatekeeping and overpriced art. This is your step-by-step playbook for creating a stunning gallery wall that looks like it was curated by a professional designer, all on a rock-bottom budget. It’s time to stop pinning and start doing.
The Game Plan: Sourcing Your Supplies Like a Pro
Before you can build your masterpiece, you need to gather your materials. Walking into a dollar store without a plan is a rookie mistake. You need to have a hunter’s mindset, looking past the clutter to see the potential. This is where you separate the amateurs from the pros.
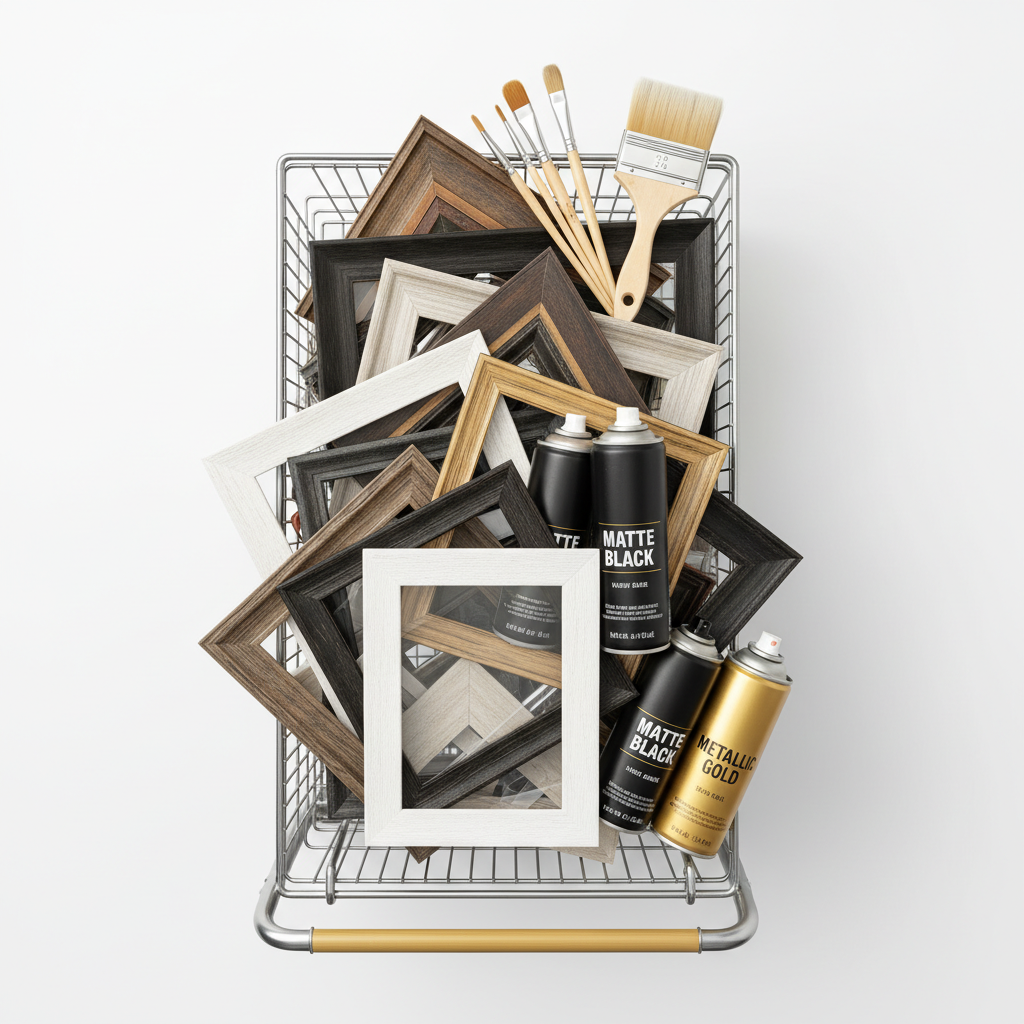
Frames: The Foundation of Your Wall
The frame aisle is your first stop. Don’t be fooled by the cheap plastic or the basic designs. You’re looking for bones, not beauty—yet.
- Look for Variety: Grab a mix of sizes. Document frames (8.5×11), 8x10s, 5x7s, and even small 4x6s. The variety is what will create visual interest.
- Ignore the Color: It doesn’t matter if it’s a hideous faux wood grain or a bright neon color. We’re going to transform it. Focus on the shape and condition of the frame itself.
- Check the Back: Make sure the tabs and backing are intact. A broken frame isn’t a bargain, it’s a hassle.
Tools of Transformation: The Upgrade Kit
Next, head to the craft and hardware aisles. This is where the magic happens. You’ll need a few key items to elevate your cheap frames into chic decor.
- Spray Paint: This is your secret weapon. Always grab a can of matte black and metallic gold. These two colors are timeless and instantly make anything look more expensive. A can of white is also a versatile choice.
- Craft Paint & Brushes: A small bottle of black, white, or gold acrylic paint is perfect for touch-ups or for adding details.
- Sandpaper: A small, fine-grit sanding block is essential for prepping the frames so the paint will stick properly.
- Glue Gun: A must-have for any serious DIYer. You never know when you’ll need to reinforce a corner or add an embellishment.
The Transformation: Turning Cheap Plastic into Chic Masterpieces
This is the fun part—the glow-up. You’re about to take that pile of dollar store finds and turn them into a coordinated, expensive-looking collection. Follow these steps exactly, and you can’t go wrong. No cutting corners.
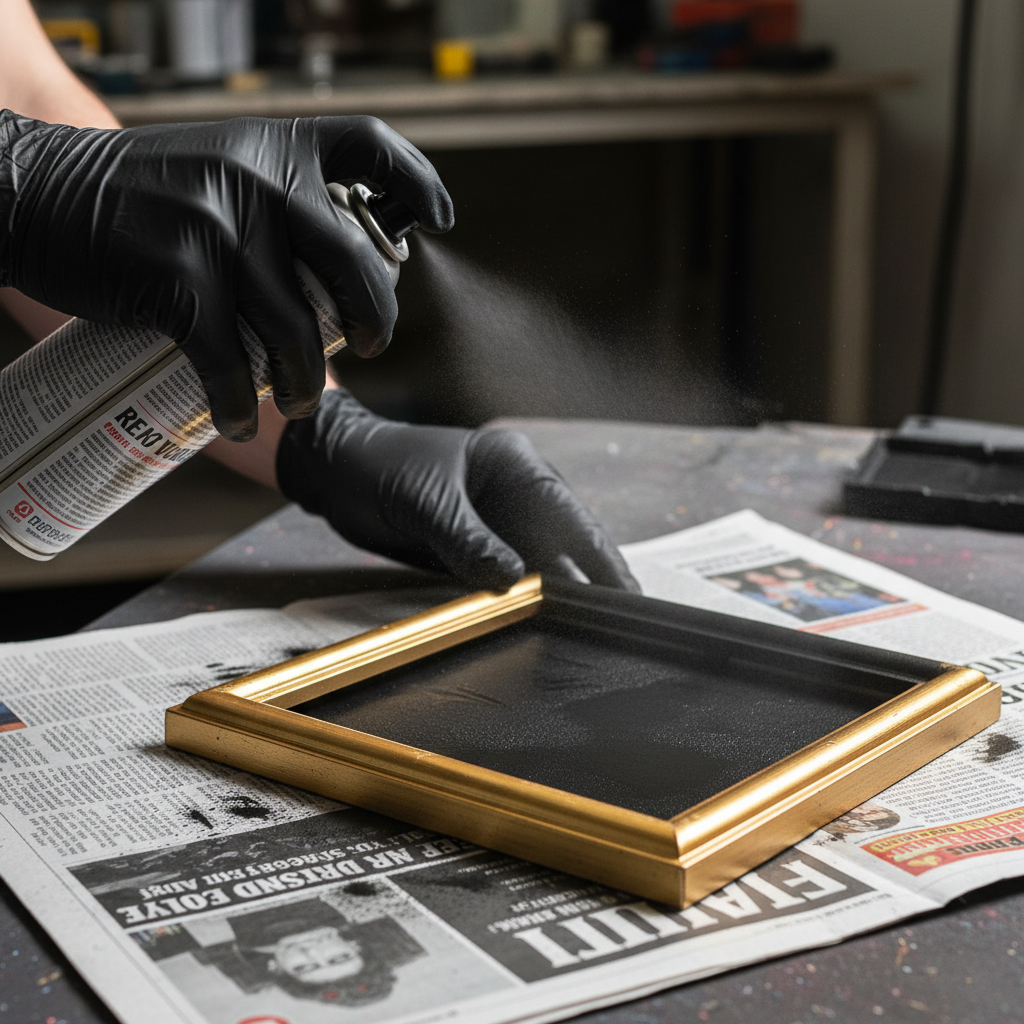
- Prep Your Workspace: Lay down a drop cloth or old newspaper in a well-ventilated area, preferably outside. Spray paint fumes are no joke.
- Disassemble the Frames: Carefully remove the glass and the paper/cardboard backing from each frame. Set them aside somewhere safe where they won’t get scratched or broken.
- The Sanding Step (Don’t Skip This!): Lightly scuff the entire surface of each plastic or wood frame with your fine-grit sandpaper. You’re not trying to remove the finish, just roughing it up a bit. This gives the paint something to grip onto and prevents chipping later. Wipe away any dust with a clean, dry cloth.
- Apply the Paint: Shake your spray paint can for at least a minute. Hold the can about 8-10 inches away from the frame and apply a thin, even coat using a steady sweeping motion. It’s better to do two or three light coats than one thick, drippy one. Let each coat dry for at least 20-30 minutes before applying the next.
- Dry Completely: This is a test of patience. Let the frames cure for at least 24 hours. Don’t touch them, don’t move them. Let the paint harden completely to ensure a durable, professional finish.
- Reassemble with Care: Once fully dry, carefully place your glass back in, followed by your chosen artwork and the backing. Your cheap frames are now unrecognizable.
The Art of the Steal: Finding or Creating Free & Cheap Artwork

An expensive-looking gallery wall needs more than just nice frames; it needs compelling art. But you don’t need to spend a fortune to fill them. You just need to know where to look.
Digital & Printable Art
The internet is your free-for-all art gallery.
- Public Domain Archives: Websites for museums like The Met, The Art Institute of Chicago, and the Rijksmuseum have vast digital collections of high-resolution artwork that is free for personal use. Search for vintage botanical illustrations, classic sketches, or abstract patterns.
- Free Stock Photo Sites: Unsplash and Pexels aren’t just for bloggers. Search for ‘moody landscape,’ ‘black and white architecture,’ or ‘minimalist texture’ to find stunning photography you can print at home or at a local print shop for a couple of dollars.
- Etsy Digital Downloads: For a few bucks (often $2-$5), you can buy a set of coordinated digital prints from an artist on Etsy. You get the files instantly and can print them as many times as you like.
Get Scrappy: DIY & Unconventional Art
Think outside the box. Not everything has to be a traditional print.
- Your Own Photos: Don’t underestimate your own photography. Print your favorite travel shots or family moments in black and white for a timeless, cohesive look.
- Fabric & Wallpaper Scraps: A beautiful piece of remnant fabric or a sample of high-end wallpaper can look like an abstract masterpiece when framed.
- Greeting Cards & Postcards: Found a card with a cool design? Frame it. It’s an instant, perfectly-sized piece of art.
- DIY Abstract Art: Can’t find what you want? Make it! Get a piece of cardstock and a few craft paints. Create simple brush strokes, lines, or gold leaf patterns. It’s unique, and it’s yours.
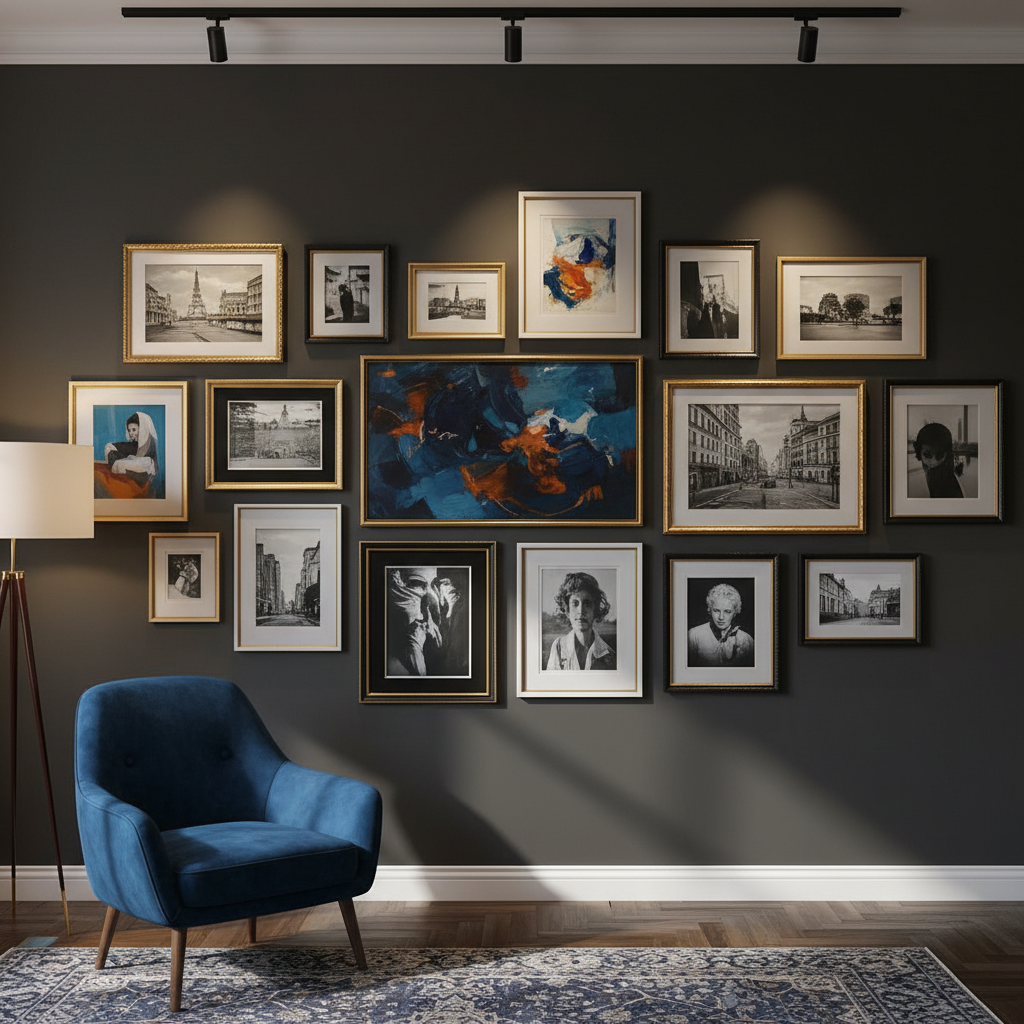
The Layout Blueprint: Designing Your Wall for Maximum Impact
How you arrange your frames is just as important as what’s in them. A haphazard layout will scream ‘amateur.’ A planned, thoughtful layout communicates intention and style. Here’s how to nail it.
The Paper Template Method
This is the single best trick for a perfect layout, and it costs nothing.
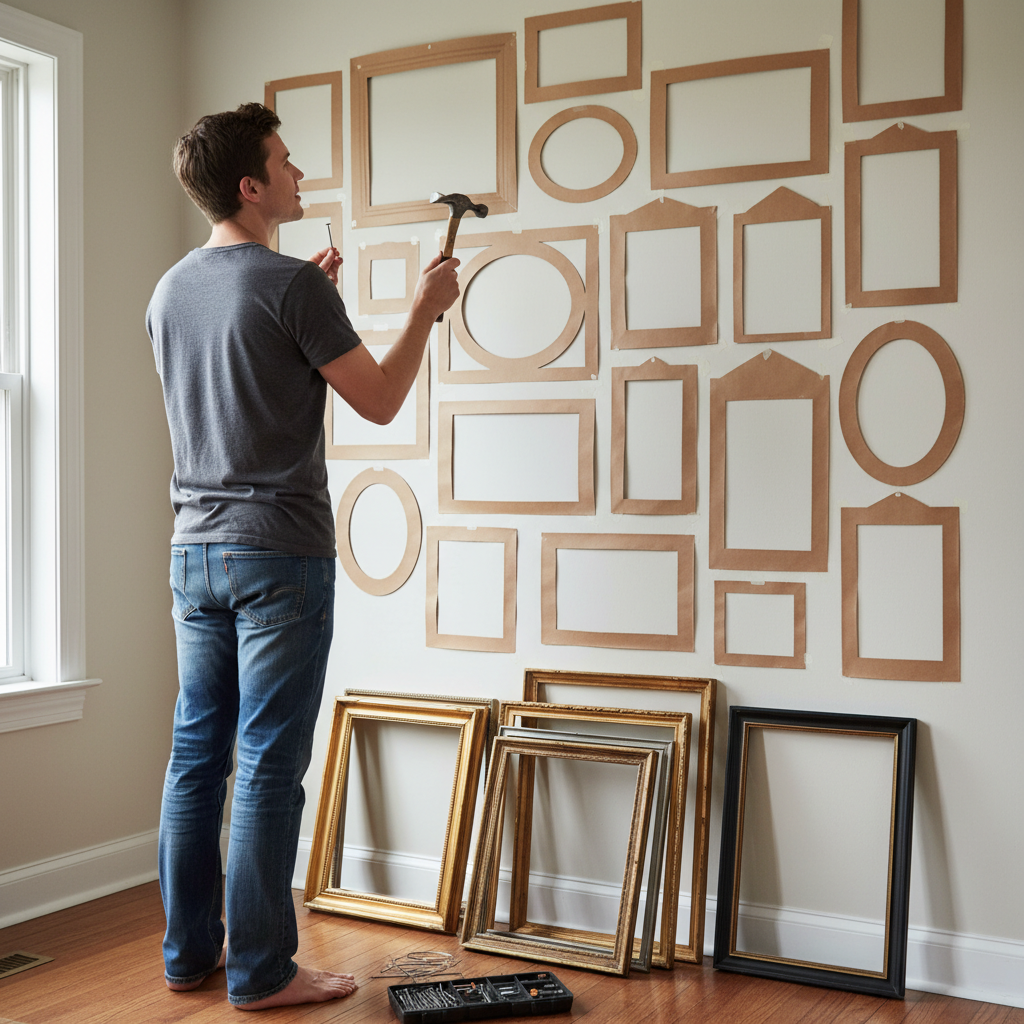
- Trace each of your frames onto craft paper or newspaper and cut them out.
- Label each cutout so you know which frame it represents.
- Using painter’s tape, arrange the paper templates on your wall. You can move them around as much as you want without making a single nail hole.
- Step back, look at the arrangement from different angles, and live with it for a day. Adjust until it feels balanced and looks right to you.
Key Rules for a Cohesive Look
Follow these guidelines to ensure your wall looks curated, not cluttered.
The Golden Rule of Gallery Walls: Keep the spacing between your frames consistent. A gap of 2-3 inches between each piece is the professional standard. It creates rhythm and allows each piece to breathe.
- Start with an Anchor: Place your largest piece of art first, usually slightly off-center, at eye level (about 57 inches from the floor to the center of the art). Then, build the rest of your arrangement around it.
- Mix Orientations: Combine vertical (portrait) and horizontal (landscape) frames to create dynamic energy.
- Balance the ‘Visual Weight’: Don’t cluster all your dark or heavy frames on one side. Distribute them throughout the arrangement to create a sense of balance.
The Cost Breakdown: DIY vs. Store-Bought
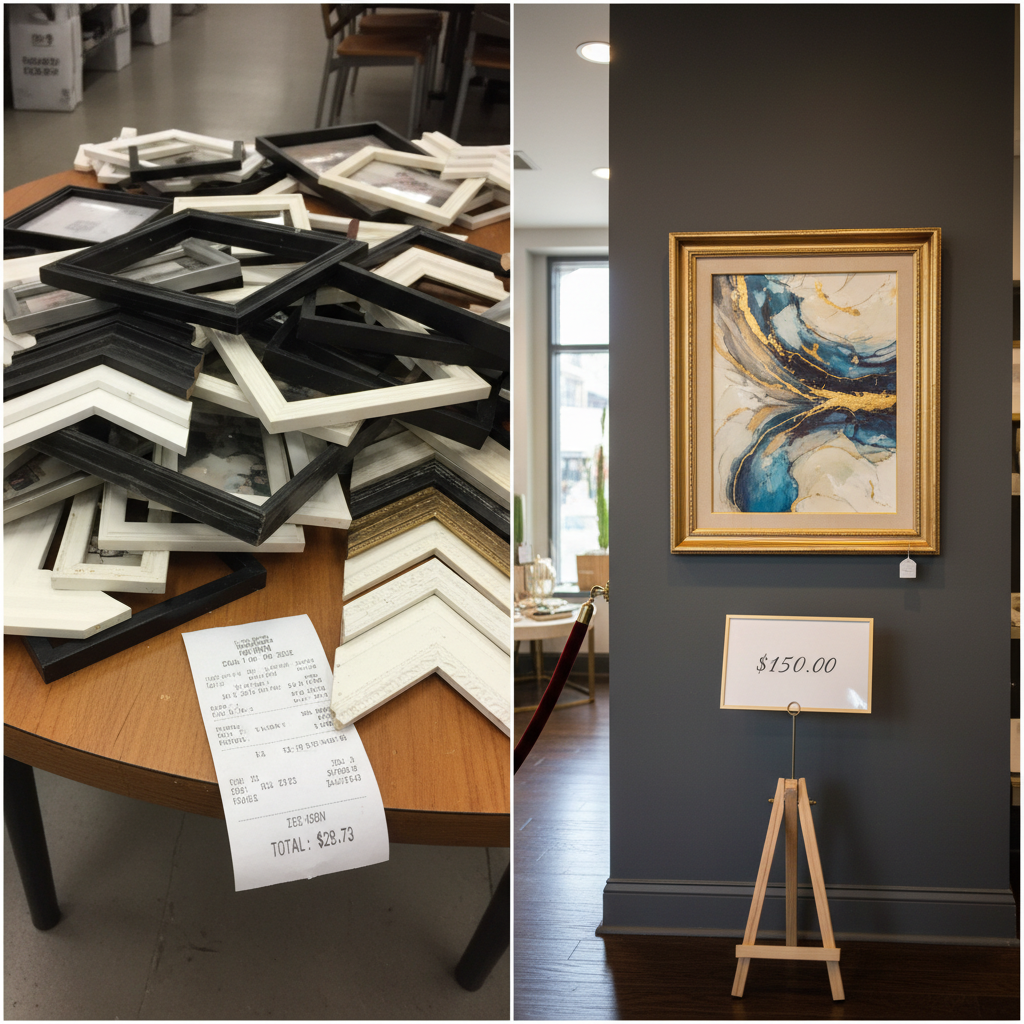
Still not convinced? Let’s do the math. The numbers don’t lie. Seeing the raw data on how much you’re saving is the ultimate motivation. This isn’t just about making something pretty; it’s about being smart with your money and getting a massive return on your small investment of time and effort.
| Item / Service | Your DIY Dollar Store Cost | Typical Retail Cost (e.g., West Elm, Pottery Barn) |
|---|---|---|
| Large Frame (11×14 or similar) | $1.25 + paint | $60 – $100 |
| Medium Frame (8×10) x 3 | $3.75 + paint | $120 – $180 (for 3) |
| Small Frame (5×7) x 4 | $5.00 + paint | $100 – $140 (for 4) |
| Art (Prints/DIY) | $0 – $10 (for digital files) | Included, but inflates frame price |
| Supplies (Spray Paint, etc.) | ~$10.00 | N/A |
| TOTAL ESTIMATED COST | ~$30.00 | $280 – $420+ |
The savings are staggering. You are literally getting a $300+ look for the price of a few cups of coffee. That’s not just frugal; that’s a financial power move. You’ve beaten the system that says beautiful homes are only for the wealthy.
Conclusion
You did it. You took a handful of change, a can of spray paint, and a little bit of hustle and created something truly stunning. Your wall is now a reflection of your personality and your resourcefulness. Every time you look at it, you’ll be reminded that you don’t need a huge budget to live in a beautiful space. You just need a better strategy. This gallery wall is more than just decor; it’s proof that you can achieve a high-end lifestyle on your own terms. So go ahead, pour yourself a drink, stand back, and admire your work. You’ve earned it.