Champagne Taste on a Beer Budget? High-End Decor Hacks for Under $20
Let’s be real. You scroll through Pinterest, you flip through design magazines, and you see these stunning homes that look like they cost more than your car. You’ve got that champagne taste, but your bank account is screaming beer budget. The world wants you to believe that a beautiful home is a luxury reserved for the rich. That’s a lie.
Listen up. Having a home that looks and feels amazing isn’t about how much money you spend. It’s about how smart you are with the money you have. It’s about the hustle, the creativity, and knowing the secrets the high-end stores don’t want you to know. I’m your Ultimate Frugal Hacker, and I’m here to give you the keys to the kingdom. We’re going to bypass the insane markups and the designer price tags with some straight-up clever hacks. Each one of these projects will give you a massive visual bang for your buck, and none will cost you more than a $20 bill. It’s time to stop wishing and start doing. Let’s make your place look expensive AF, on our terms.
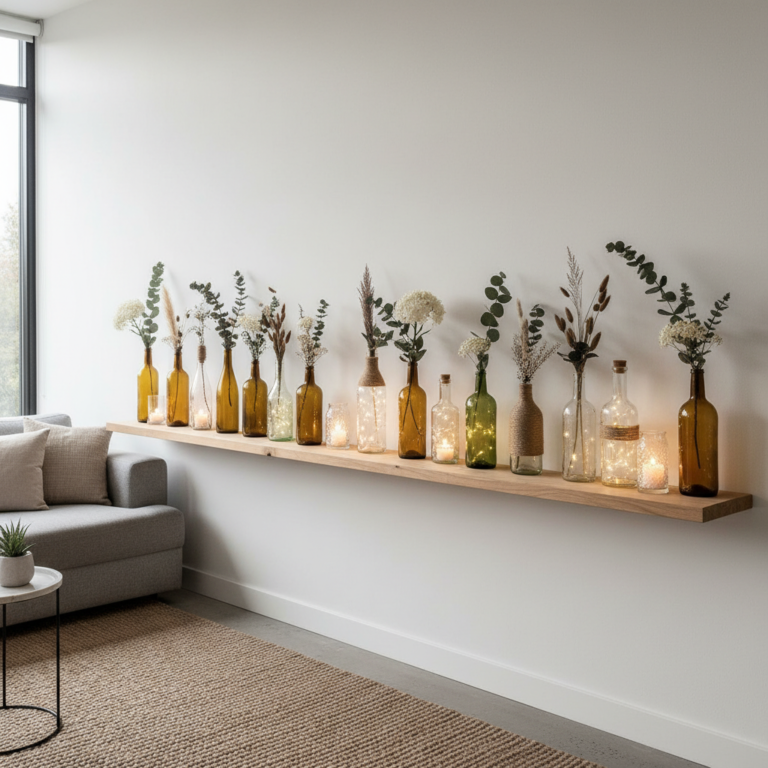
Hack #1: The ‘Aged Pottery’ Illusion – Turn Glass Jars into High-End Vases
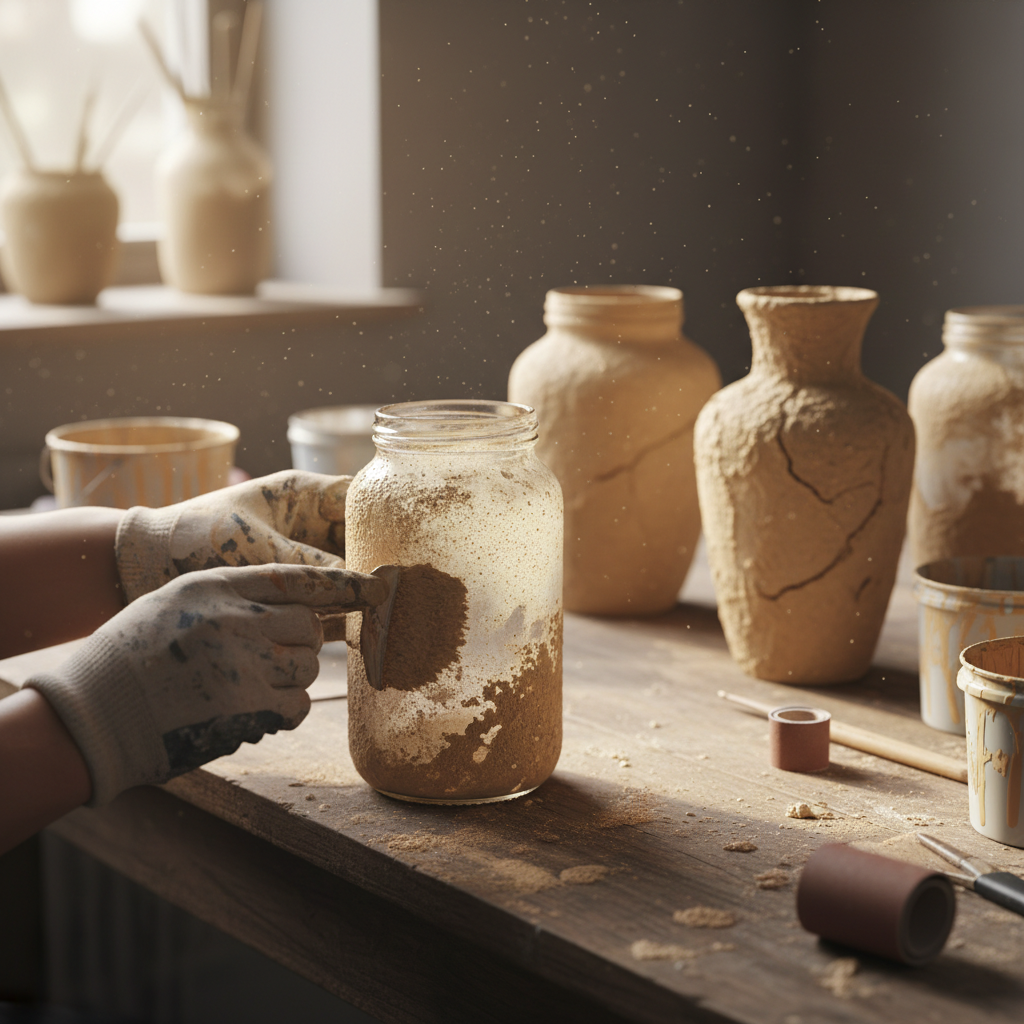
You know those gorgeous, textured, earthy-looking vases you see at places like Pottery Barn or West Elm? The ones that look like they were unearthed from an ancient archaeological dig and cost a cool $150? Forget about them. We’re going to make our own for the price of a coffee and a pastry.
This hack is all about creating texture and faking a high-end finish on something you’d normally toss in the recycling bin: an old glass jar. Spaghetti sauce jars, pickle jars, cheap glass vases from the dollar store—they’re all fair game. With a little bit of paint and a secret ingredient, you can create a decorative piece that looks like it was curated for a design catalog.
The Frugal Tutorial: From Trash to Treasure
- Gather Your Arsenal: You’ll need your glass vessel of choice (cleaned and dry), a can of matte or chalky finish spray paint (any neutral color like beige, black, or terracotta works great), some regular acrylic craft paint in a similar shade, and the secret weapon: baking soda. A small paintbrush and some dirt or instant coffee grounds for ‘aging’ are your finishing touches.
- Create the Texture: In a disposable cup, mix a good amount of your craft paint with a few tablespoons of baking soda. You’re looking for a thick, gritty, pancake-batter-like consistency. There’s no exact science here; add more baking soda for more texture.
- The First Coat: Give your glass jar a light, even coat of the spray paint. This acts as a primer and gives our texture paint something to grip onto. Let it dry completely.
- Get Gritty: Now, using your paintbrush, slather that baking soda paint mixture all over the jar. Don’t be neat about it. Dab, swirl, and stipple to create a rough, uneven, handmade look. The imperfections are what sell the illusion. Let this layer dry for several hours until it’s rock hard.
- The Aging Process (Optional but Recommended): Once dry, you can stop here for a modern textured look. But if you want that ‘ancient artifact’ vibe, grab a handful of dirt or coffee grounds. Lightly rub it over the surface of the vase, working it into the crevices. It’ll give it a subtle, aged patina that screams expensive. Dust off the excess, and you’re done.
The Bottom Line: DIY vs. Designer
| Item | Cost |
|---|---|
| Designer ‘Found’ Pottery Vase | $120.00 – $250.00 |
| DIY ‘Aged’ Vase (Our Hack) | Under $15.00 |
| Savings | $105.00+ |
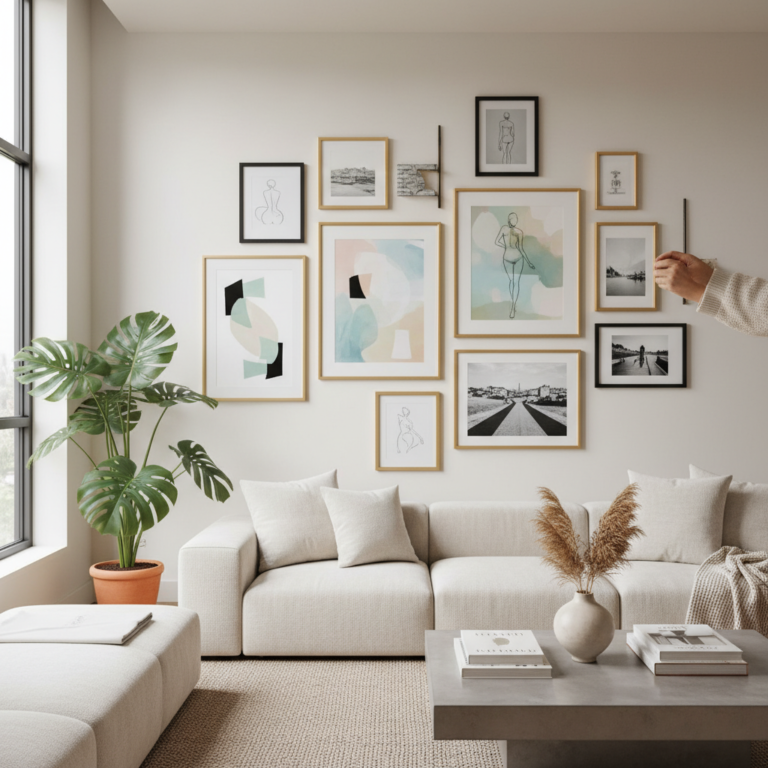
Hack #2: The Luxe Frame Flip – Build a Gallery Wall That Looks Expensive AF
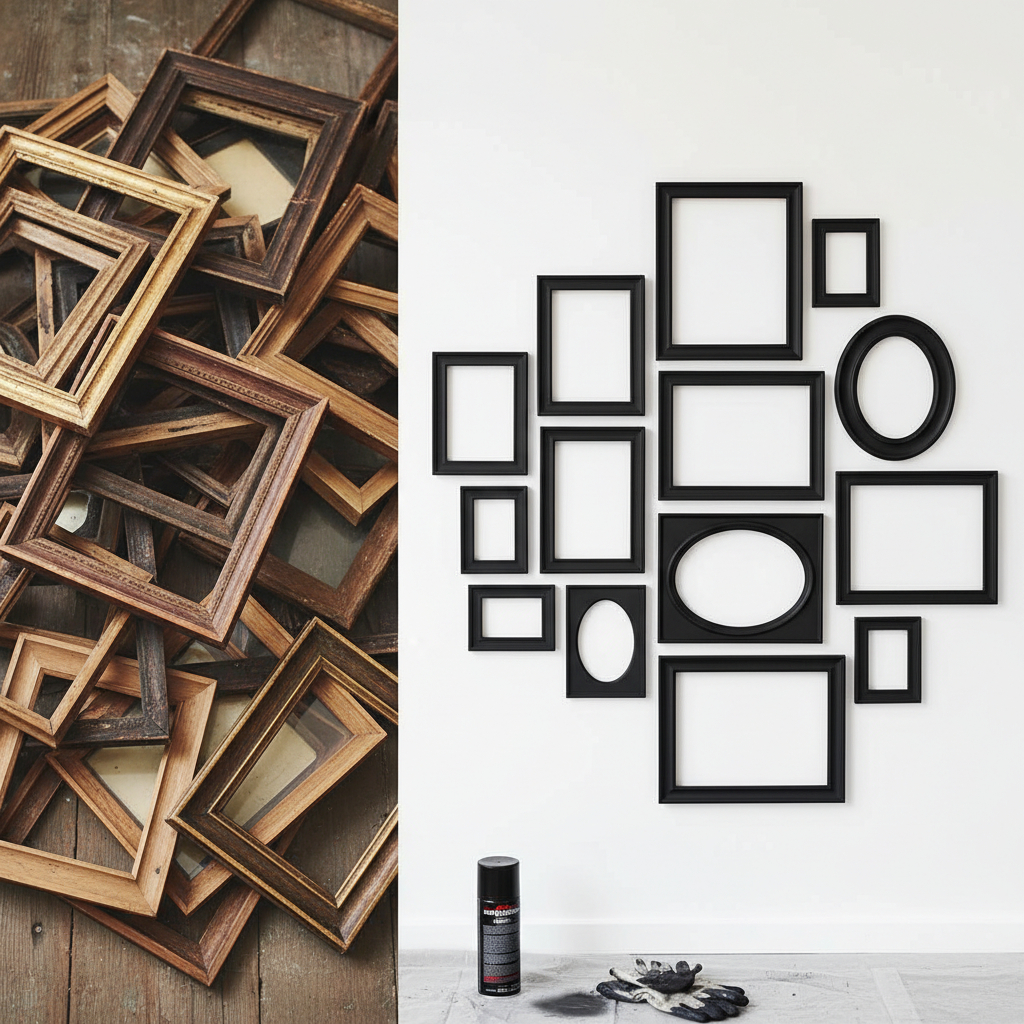
A gallery wall is one of the fastest ways to make a room feel personal and sophisticated. It’s also a black hole for money if you do it the traditional way. Custom framing can cost hundreds, if not thousands, of dollars. Even buying new, matching frames from a big-box store adds up fast. The street-smart approach? The thrift store frame flip.
We’re going on a treasure hunt for mismatched, ugly, beat-up picture frames. The gaudier and more ornate, the better. We don’t care about the color or the terrible art inside. We only care about the shape and the price tag. With a single can of spray paint, we’ll unify them into a cohesive collection that looks like you spent a fortune.
The Frugal Tutorial: Gallery Wall on a Dime
- The Heist: Hit up your local Goodwill, Salvation Army, and neighborhood yard sales. Your mission is to find wooden or metal frames with interesting shapes and details. Ignore the color. Look for different sizes. You should be able to snag frames for $1 to $5 a piece.
- The Prep & Paint: Clean the frames and glass thoroughly. If the frames are glossy, give them a quick scuff with sandpaper so the paint will stick. Lay them all out on a drop cloth and give them two or three light, even coats of spray paint. The key to a high-end look is cohesion. Choose one single color: matte black is dramatic and modern, metallic gold is glam, and crisp white is classic.
- The Art for (Almost) Free: Now for the inside. Don’t buy expensive prints. Get creative. You can print high-resolution public domain art from museum websites for free. Use your own photos, but print them in black and white for a timeless, artistic feel. Find beautiful patterns in high-quality wrapping paper or scraps of wallpaper. Even a cool-looking postcard can look like intentional art in the right frame.
The Layout Secret
Before you start hammering nails, trace each frame onto kraft paper or newspaper. Cut out the templates and arrange them on the wall with painter’s tape. This lets you perfect the layout and spacing without turning your wall into swiss cheese. Once you’ve got an arrangement you love, hammer the nail right through the paper, then tear the paper away. Perfect placement, every time.
Hack #3: The Contact Paper Come-Up – Faking Marble & Wood Grain
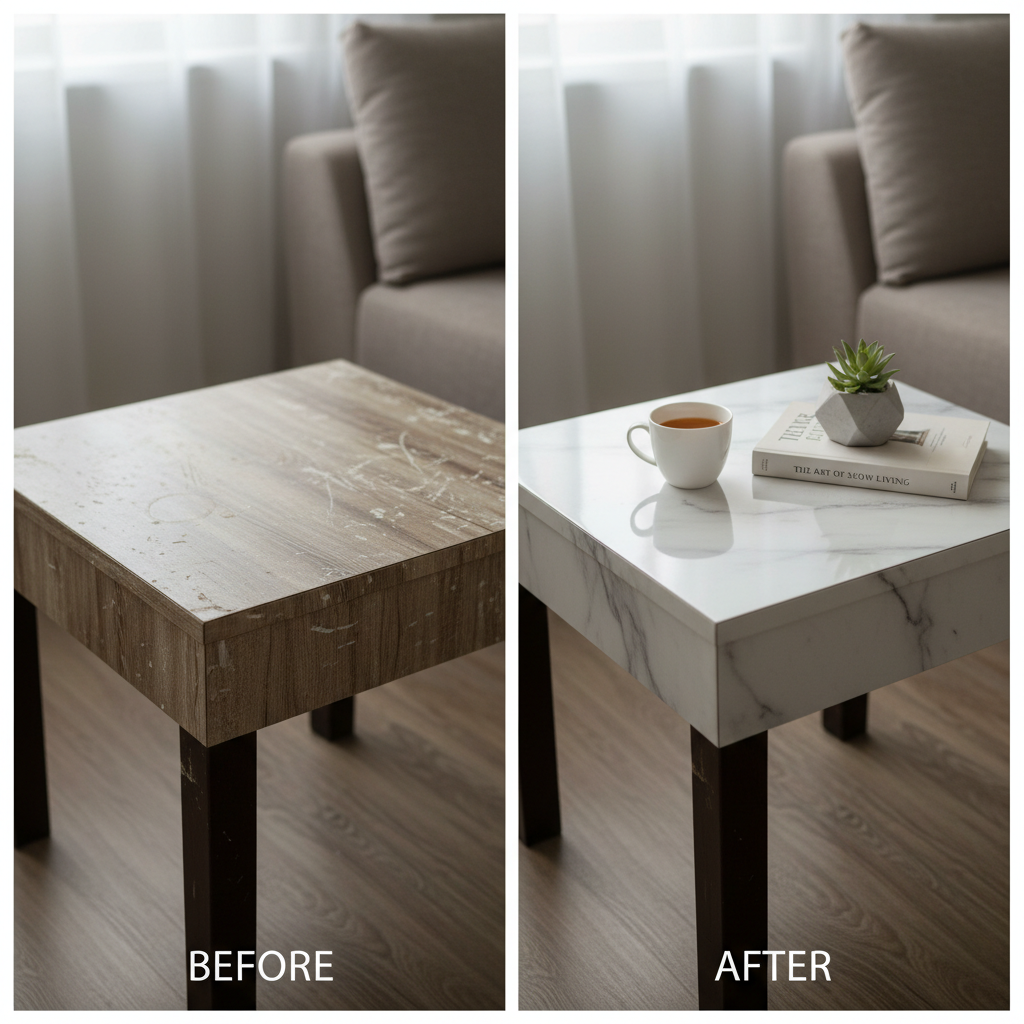
Got a tired-looking coffee table, a boring IKEA dresser, or even a countertop that’s seen better days? Before you kick it to the curb, you need to know about the modern miracle that is high-quality contact paper. This is not your grandma’s flimsy, bubbly shelf liner. Today’s peel-and-stick vinyl is thick, durable, textured, and comes in shockingly realistic finishes like marble, concrete, and rich wood grains.
This is the ultimate hack for renters who can’t make permanent changes or for anyone wanting to test-drive a high-end look before committing. It’s a total game-changer for flipping furniture and hiding imperfections.
The Frugal Tutorial: The Flawless Finish
- Buy the Good Stuff: This is critical. Don’t cheap out. Go online and search for ‘architectural vinyl’ or ‘high-quality DC-Fix contact paper’. Read the reviews. A roll that can cover a small table will cost you about $15-$20, and it’s worth every penny.
- Prep is Everything: Your surface must be impeccably clean, dry, and smooth. Fill any major dings with wood filler and sand them smooth. Any speck of dust or grease will show up as a bubble or prevent the paper from sticking properly.
- The Application: Measure your surface and cut the paper, leaving a few inches of overhang on all sides. Peel back just a few inches of the backing paper and line it up. Using a plastic squeegee (a credit card works in a pinch), slowly smooth the paper onto the surface, working from the center out. Continue to pull off the backing paper a little at a time as you smooth. This slow and steady method is the key to a bubble-free finish. For corners, use a hairdryer to gently heat the vinyl, making it more pliable to wrap around edges. Use a sharp craft knife to trim the excess for a perfect edge.
Scam Warning: Watch out for flimsy, ultra-thin contact paper that rips easily and has a fake-looking, pixelated print. Pay a few extra bucks for the good stuff—it’s the difference between looking chic and looking cheap. The best vinyls have a slight texture you can feel.
The Bottom Line: DIY vs. Designer
| Item | Cost |
|---|---|
| New Marble-Top End Table | $300.00+ |
| Thrifted Table + Contact Paper Hack | Under $20.00 |
| Savings | $280.00+ |
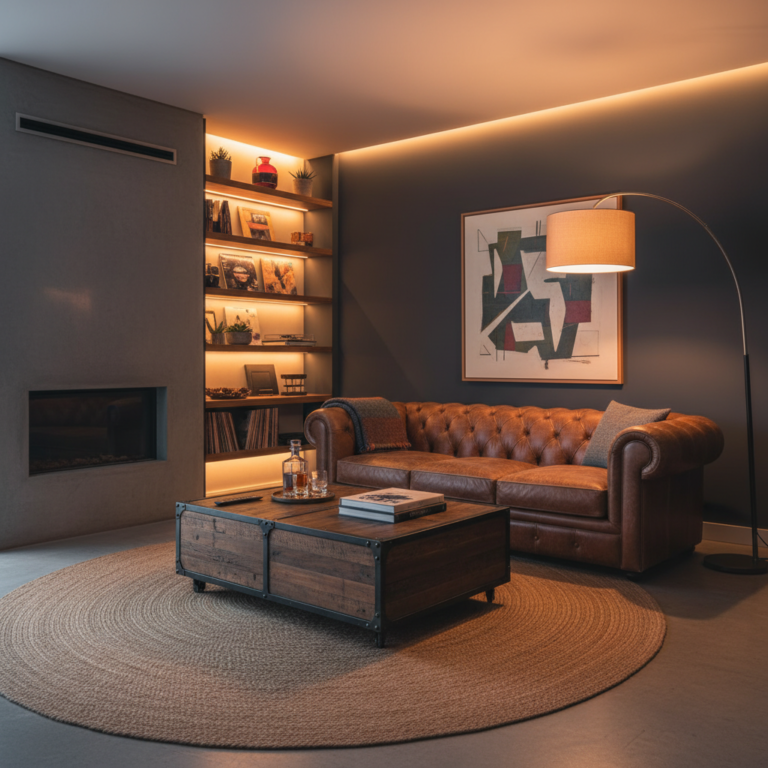
Hack #4: The Hardware Heist – The Easiest Upgrade You’ll Ever Do
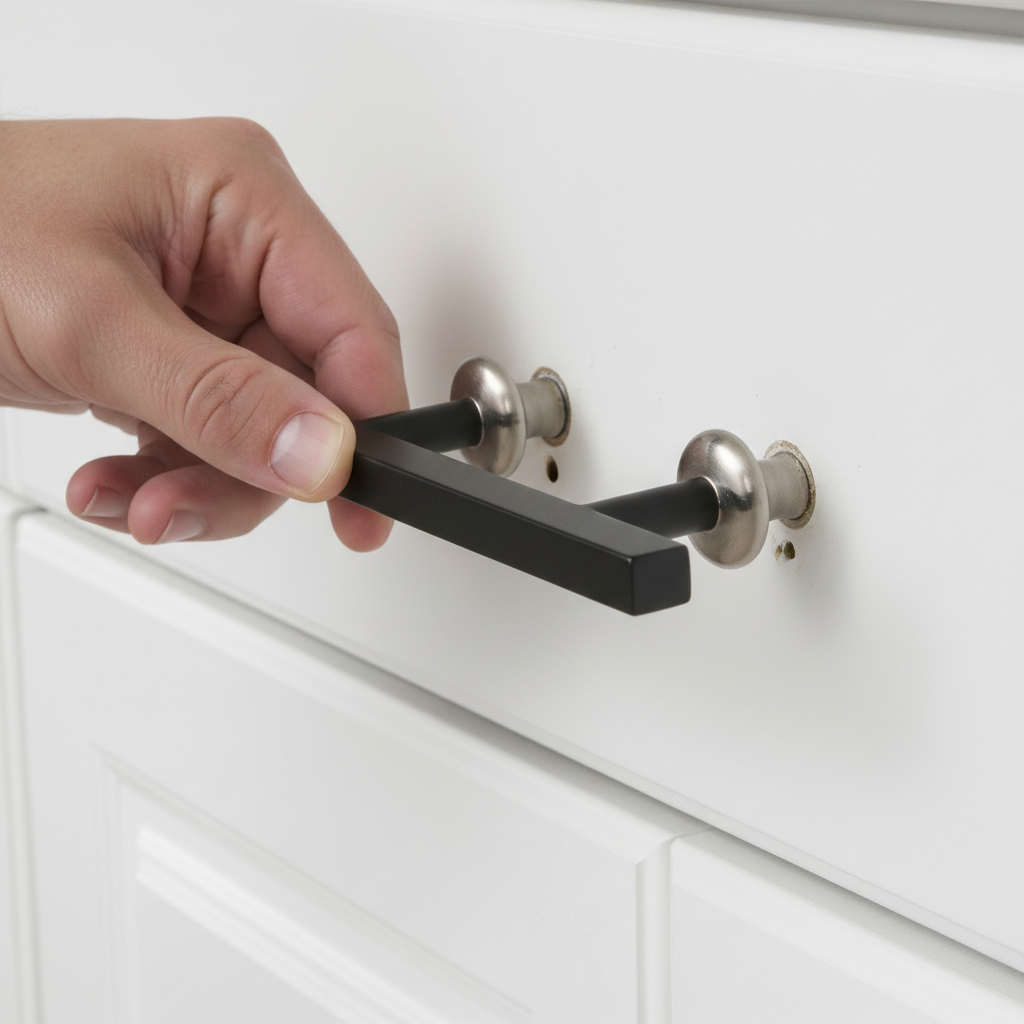
This is probably the highest impact, lowest effort hack in the entire playbook. Builder-grade cabinets, basic dressers, and old furniture are often dragged down by one tiny detail: boring, cheap hardware. Those generic silver knobs or dated brass pulls can make an entire piece look cheap. Swapping them out is a five-minute job that can make your kitchen, bathroom, or furniture look like it just got a custom renovation.
You don’t need to spend a fortune at a specialty hardware store. The internet and craft stores are full of budget-friendly options that look just as good as their high-end counterparts. Think sleek matte black pulls, modern brass knobs, or cool leather tabs.
The Frugal Tutorial: The 5-Minute Facelift
- Source Smartly: Don’t just walk into a big-box hardware store and grab the first thing you see. Check Amazon for bulk packs—you can often get a 10-pack of stylish pulls for under $20. Check the sale bins at stores like Hobby Lobby or HomeGoods. They often have designer-looking knobs for a few bucks each.
- Measure Twice, Buy Once: This is the most important rule. If you’re replacing knobs, it’s easy. If you’re replacing pulls (the ones with two screws), you MUST measure the distance between the center of one screw hole to the center of the other. This ‘center-to-center’ measurement is how pulls are sized. Getting the right size means you won’t have to drill new holes.
- The Swap: This is as easy as it gets. Just use a screwdriver to remove the screw from the inside of the door or drawer. The old hardware comes off. Put the new hardware in its place and tighten the new screw. That’s it. You’re done.
The Midas Touch Method
Have hardware with a great shape but an ugly finish? Don’t even bother buying new ones. Take them all off, clean them, and give them a couple of coats of high-quality metallic spray paint. A can of Rust-Oleum in ‘Aged Brass’ or ‘Flat Black’ costs about $8 and can completely transform every single piece of hardware you own, creating a unified, custom look for pennies.
Hack #5: The ‘Custom’ Curtain Con – How to Fake Expensive Drapes
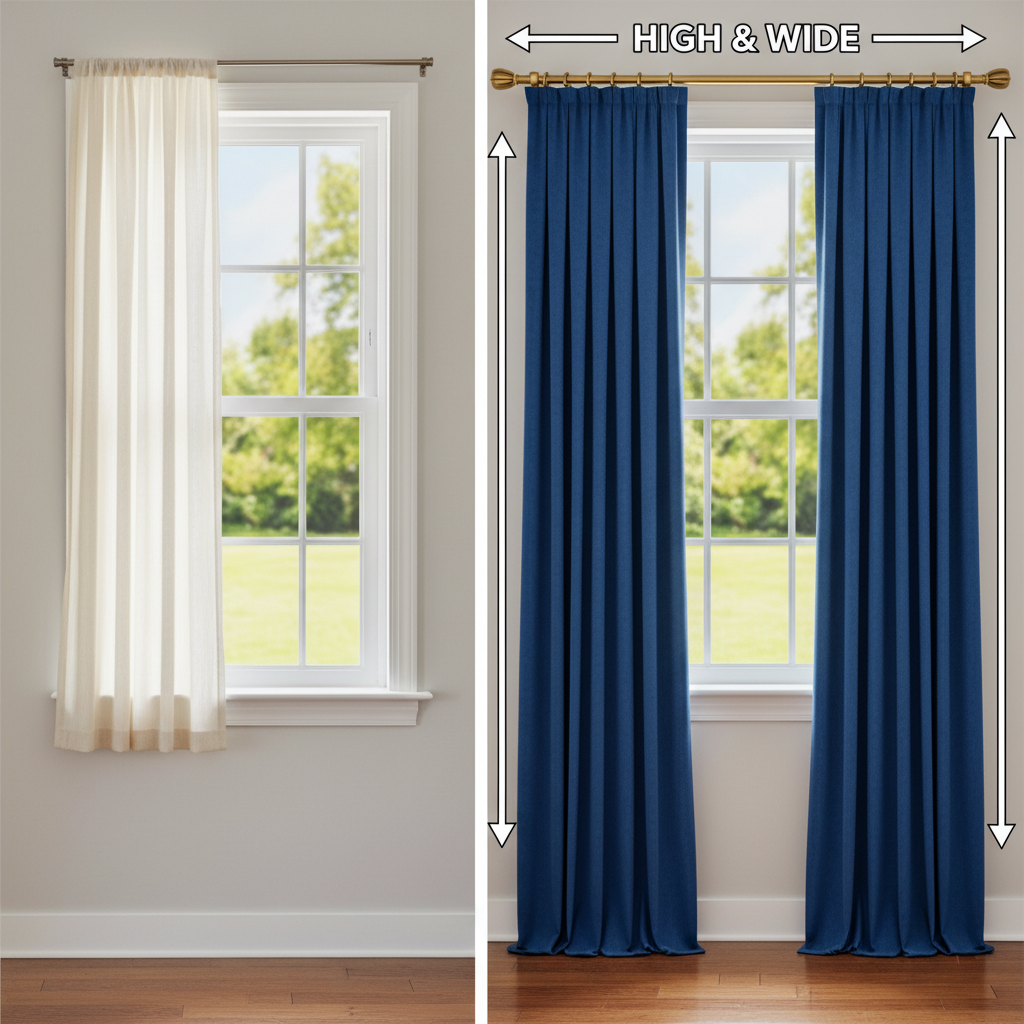
Nothing screams ‘I’m on a budget’ louder than short, flimsy curtains that are hung incorrectly. They’re often called ‘high-waters’ for a reason. Conversely, properly hung, full-looking drapes are a hallmark of a well-designed, expensive-looking room. The secret is that you don’t need custom drapes; you just need to hang cheap ones like a pro.
We’re going to take budget-friendly curtain panels from places like IKEA, Target, or even Walmart and make them look like they were tailor-made for your space. It’s all about placement and fullness.
The Frugal Tutorial: The 4 Rules of Rich-Looking Windows
- Rule #1: Go High and Wide. This is the golden rule. Mount your curtain rod 4-6 inches ABOVE the top of your window frame. This draws the eye upward and creates the illusion of a taller ceiling. Extend the rod 3-6 inches BEYOND the window frame on each side. This allows the curtains to hang beside the window when open, not in front of it, maximizing natural light and making the window appear much larger.
- Rule #2: Kiss the Floor. The length is non-negotiable. Curtains should either just skim the surface of the floor (‘kiss’ it) or puddle slightly for a more dramatic look. They should NEVER be floating inches above the floor. Buy panels that are longer than you need.
- Rule #3: Double Up for Fullness. This is the pro secret. Never use just one panel per side on a standard window. It looks thin and cheap. Always use at least two panels on each side. This creates a lush, full look that screams luxury. A pack of two panels from IKEA might cost $20, so you’re looking at $40 for four panels, but the effect is worth a thousand bucks.
- Rule #4: The No-Sew Hem. So what do you do with those extra-long panels? No sewing machine required. Get yourself a roll of iron-on hem tape (about $4). Figure out your perfect length, fold the bottom of the curtain up, place the tape inside the fold, and press it with a hot iron. You’ve got a perfect, custom-length hem in minutes.
By following these four simple rules, you can make a $20 set of curtain panels look like they cost $500. It’s the most dramatic architectural change you can make for the least amount of money.
Conclusion
There you have it. Five powerful, game-changing hacks that prove style has absolutely nothing to do with a six-figure salary. It’s about vision, hustle, and a little bit of elbow grease. That champagne lifestyle you’re dreaming of isn’t some far-off fantasy; it’s right there, hiding in a thrift store, a can of spray paint, or a roll of contact paper.
Your home should be a reflection of you, not the size of your paycheck. Stop letting a beer budget dictate your taste. Pick one of these projects this weekend—just one—and see what you can accomplish for under $20. You have the power to create a space you’re proud of, a space that feels luxurious and inspiring. Now go out there and build it.