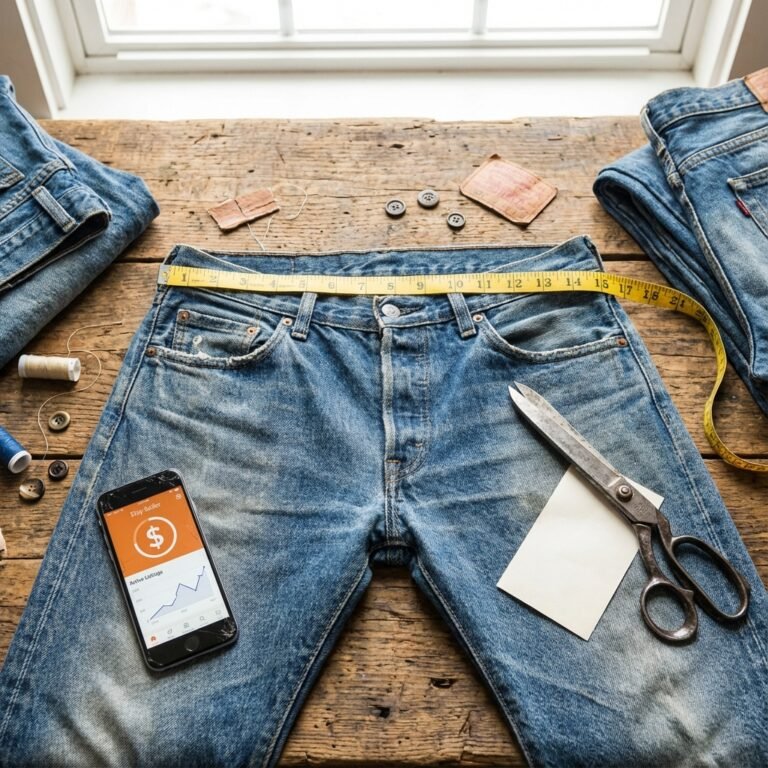
Broken Zipper? Fix It in 2 Minutes With This Free Hack (No Sewing)
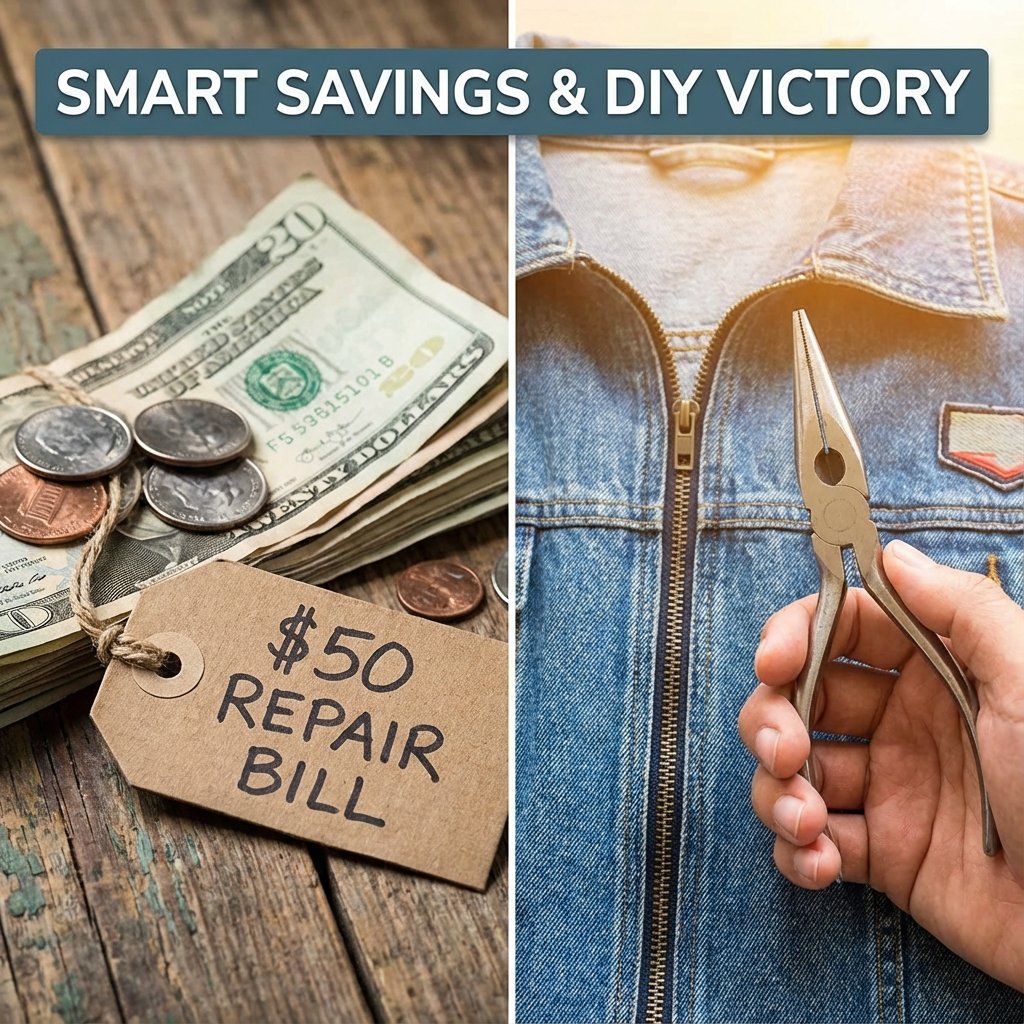
Listen up. That sound – the sickening grind of a zipper that won’t close, or the sight of a slider that’s completely jumped the track – is the sound of your money trying to escape your wallet. It’s the sound of the consumer machine telling you, ‘Welp, it’s broken. Time to buy a new one.’ And most people listen. They sigh, toss a perfectly good $80 jacket into the donation pile, and head to the store. But you’re not most people. You’re smarter than that.
You’re about to learn a hack so simple, so fast, and so effective that it feels like cheating. We’re talking about a two-minute fix for one of the most common wardrobe malfunctions on the planet. Forget about finding a tailor and paying $25 for a ‘professional’ repair. Forget about fumbling with complicated zipper replacement kits. And you can absolutely forget about sewing. All you need is one common household tool and the knowledge to use it. This isn’t just a repair tip; it’s a declaration of independence from disposable culture. It’s you, telling the world that you’re in charge of your stuff, your money, and your style. Let’s get to it.
Why You’re Getting Played by a Tiny Piece of Metal
The Anatomy of the Fail: Why Zippers Break in the First Place
Before you can conquer the enemy, you have to understand it. A zipper seems complex, but it’s a simple machine that’s designed to fail in a few predictable ways. The brands that make your clothes count on you not knowing how it works, so you’ll give up and buy more. That stops today. Let’s break down the hustle.
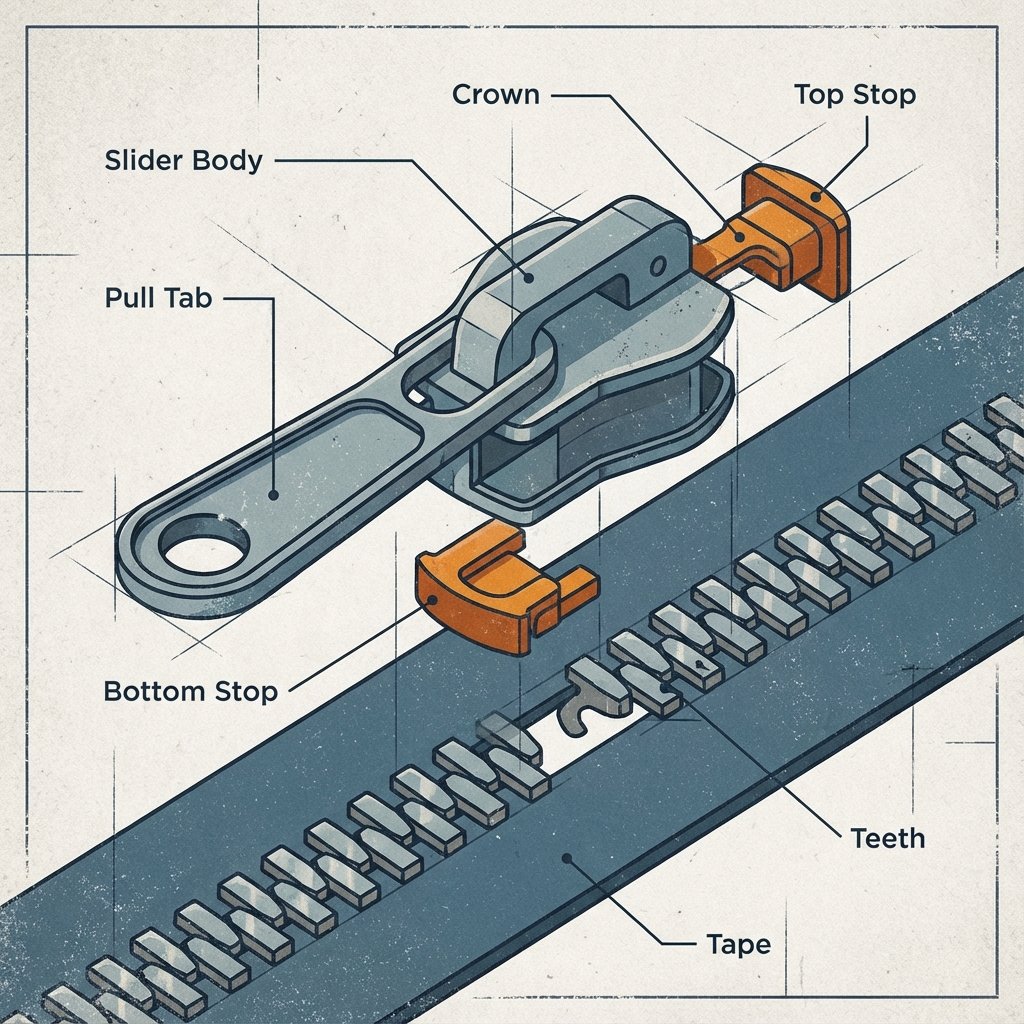
The heart of the operation is the zipper slider. This is the little chariot that pulls the two rows of teeth together or apart. Inside its metal casing are tiny channels that guide the teeth, forcing them to interlock. Over time, with repeated use, yanking, and stress (especially on bags and tight jackets), the metal of the slider can fatigue. The gap inside widens, just by a millimeter or two. Suddenly, it’s too loose to apply the right pressure to lock the teeth. That’s when you get the dreaded ‘open zipper’ behind the slider. It zips up, but the teeth don’t stay locked.
Common Zipper Scams (Breakage Points):
- The Widened Slider: This is culprit number one. The slider’s internal gap has expanded, and it no longer has the grip to lock the teeth. This is the easiest problem to fix, and it’s the focus of our main hack.
- The Track Jumper: This is when the slider pulls completely off one side of the zipper teeth. It usually happens when the ‘box and pin’ at the very bottom of the zipper (on jackets) breaks or when the fabric stop at the top wears away. It looks catastrophic, but it’s often fixable.
- The Toothless Wonder: A zipper is missing one or more of its plastic or metal teeth. Honestly, this is the toughest one. While not impossible, it often requires a more involved repair or replacement. But for today, we’re focusing on the 90% of problems caused by the slider.
Understanding this isn’t just trivia; it’s power. When you see your zipper failing, you’re not seeing a ‘broken’ item anymore. You’re seeing a loose slider. You’re diagnosing the problem like a pro, and you know the fix is just moments away. You’re no longer a victim of faulty hardware; you’re the technician.
The 2-Minute Zipper Rescue: Your Step-by-Step Takedown
The Frugal Tutorial: Your 2-Minute Zipper Rescue
Alright, it’s go-time. No more theory. This is the practical, get-it-done part of the mission. Grab the broken item, find a well-lit spot, and let’s reclaim that piece of gear from the trash heap.
Your Arsenal (What You’ll Need):
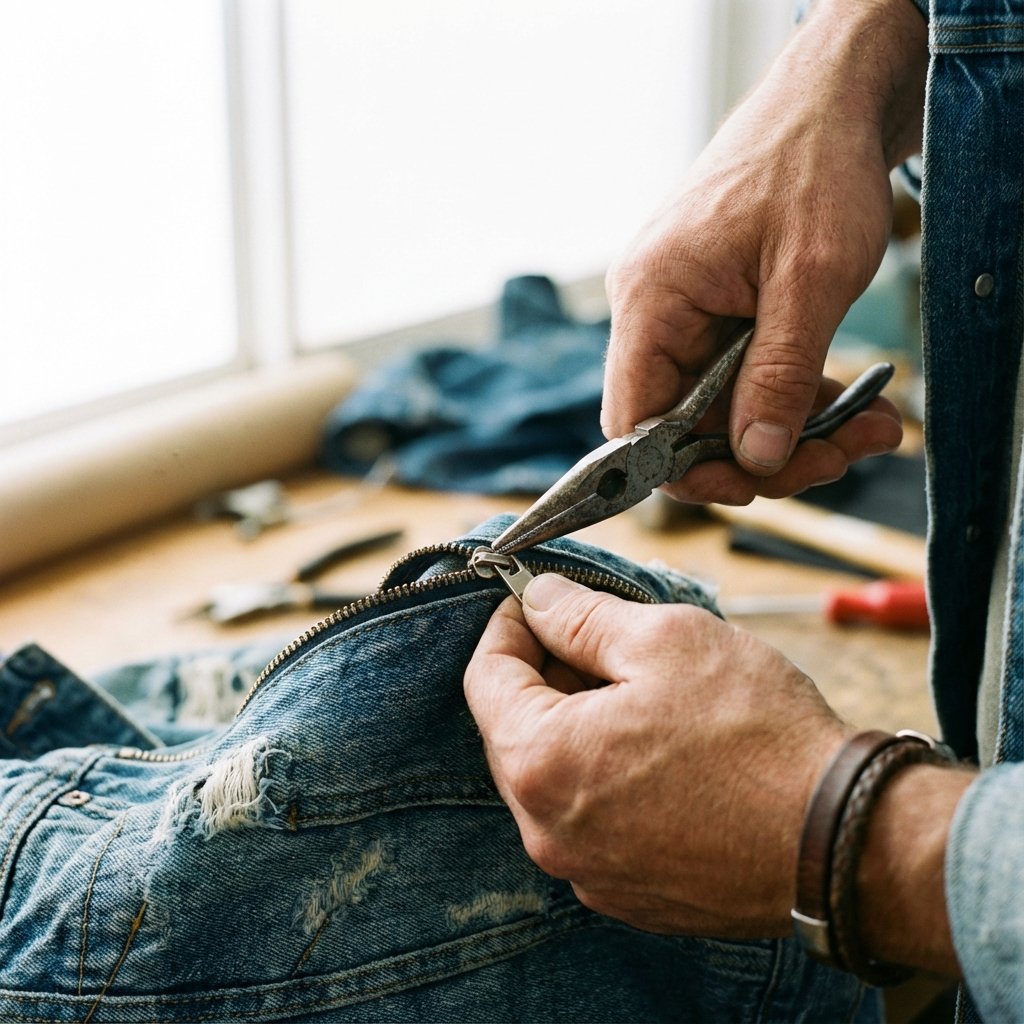
- One Pair of Pliers: Needle-nose pliers are the best weapon for this job because of their precision, but regular pliers will work in a pinch. Just be gentle.
- Your Broken Item: That jacket, backpack, pair of jeans, or duffel bag that’s been mocking you from the corner of your closet.
- Two Minutes of Your Time: Seriously, that’s it.
That’s the list. No glue, no thread, no replacement parts. This is pure, unadulterated hacking.
The Takedown: Step-by-Step Instructions
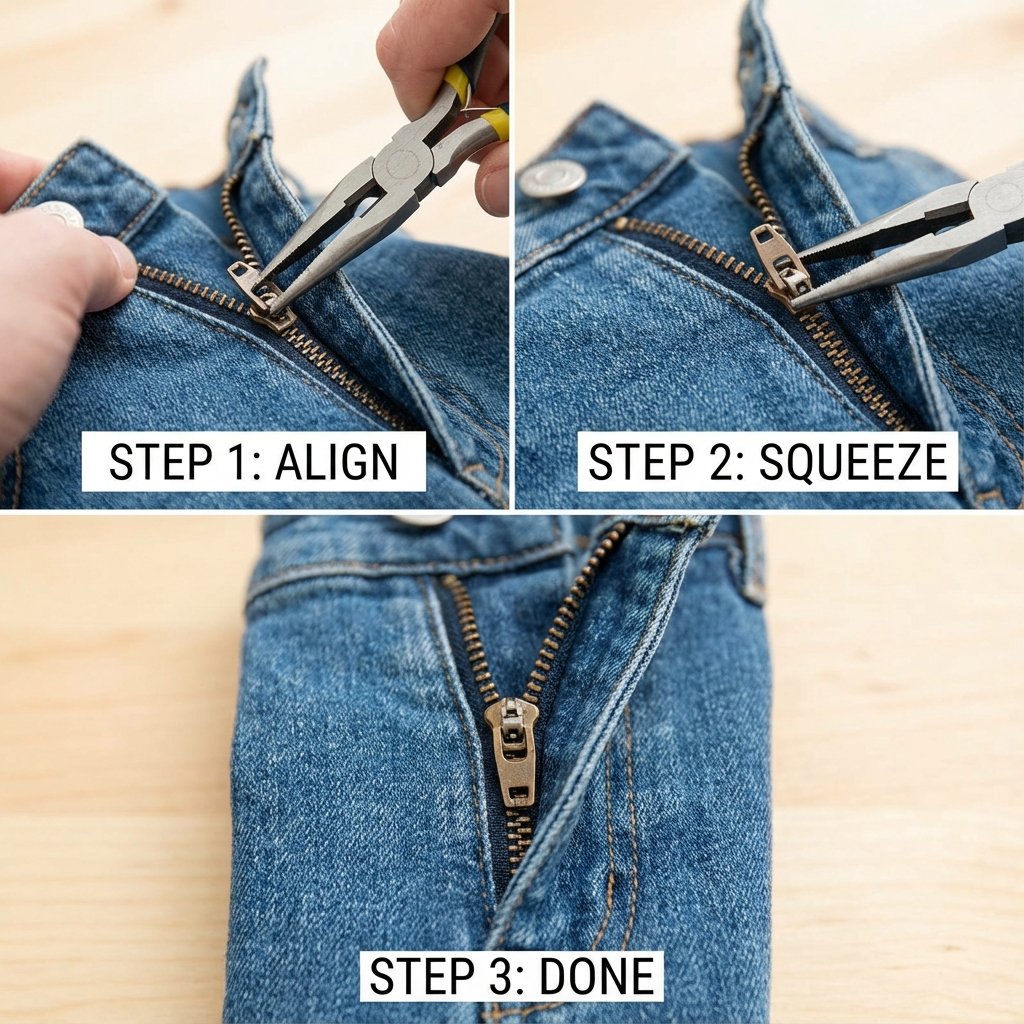
- Move the Slider to the Bottom: First, get the zipper slider all the way to the starting end of the zipper. On a jacket, this is down by the pin and box mechanism. On a bag or jeans, it’s the end where the zipper starts. This gives you a stable base to work from.
- Inspect the Slider: Look at the slider from the side. You’ll see two openings where the teeth pass through. We’re interested in the back end of the slider—the part that’s closer to the pull tab when it’s zipped up. This is the part that applies the final pressure to lock the teeth.
- The Gentle Squeeze: Take your pliers and place one jaw on the top of the slider and one on the bottom, on that back end you just identified. Now, apply a gentle squeeze. We’re talking minimal pressure here. The goal is to slightly narrow the gap inside the slider, not to crush it. Squeeze for a second, then release.
- Test Your Work: After that first gentle squeeze, try zipping it up a few inches. Did the teeth lock? If yes, congratulations, you’re a hero. If not, don’t panic.
- Repeat If Necessary: Move the slider back to the bottom and give it another very gentle squeeze in the same spot. Make the pressure slightly firmer than the first time, but still be cautious. Test it again. Repeat this process of ‘squeeze, test, squeeze, test’ until those teeth lock together perfectly. Usually, it only takes one or two squeezes.
The Golden Rule of Zipper Repair: Go slow. A gentle squeeze is all it takes. You can always add more pressure, but you can’t undo a crushed slider. Patience is your superpower here.
What If The Slider Came Completely Off?
If the slider has jumped the track on one side, you have a slightly different first step. Look at the bottom of the zipper. On some zippers, there’s a metal staple or ‘bottom stop’. You may need to gently pry this off with your pliers. This will allow you to feed the loose zipper tape back into the slider. Once both sides are in, use the pliers to crimp the bottom stop back on, and then proceed with the ‘gentle squeeze’ hack above to ensure it’s tight enough.
The Bottom Line: DIY vs. The System
The Real Money You’re Saving
Feeling good about your new skill? You should. Now let’s translate that feeling into what really matters for frugal living enthusiasts and side hustlers: cold, hard cash. Fixing something for free feels great, but seeing the numbers in black and white is a boss move. It proves you didn’t just fix a jacket; you made a smart financial decision.
The ‘system’ gives you three expensive, time-consuming options when a zipper breaks: pay a professional, buy a new item, or struggle with a replacement kit. Let’s put them head-to-head with your new two-minute hack.
| Repair Option | Cost | Time Investment | Empowerment Level |
|---|---|---|---|
| The 2-Minute Free Hack | $0.00 | 2-5 Minutes | Expert Level |
| Tailor / Seamstress Repair | $20 – $45 | 30-60 minutes (drop-off/pickup) + 2-7 day wait | Beginner Level |
| Buying a New Item (e.g., Jacket) | $60 – $200+ | 1-3 hours (shopping) | Zero (You lost) |
| DIY Zipper Replacement Kit | $8 – $15 | 30-90 minutes (frustrating) | Intermediate (But why?) |
Look at that table. The difference is staggering. A tailor charges you for their time and a new zipper, which you now know you probably didn’t even need. Buying new is the ultimate defeat—letting a tiny metal part dictate a $100 purchase. Even the DIY kits are often a waste of money and time for this specific problem.
The Lifetime Savings Calculation
Now, zoom out. Think about how many zippers you and your family will break over the next decade. Let’s be conservative:
- Your favorite hoodie: $25 saved from a tailor.
- Your kid’s backpack: $40 saved on a new one.
- Your partner’s boots: $35 saved from a cobbler.
- A cushion cover on the sofa: $20 saved.
- That duffel bag for the gym: $50 saved on a replacement.
Just five simple fixes with your pliers have netted you a savings of $170. That’s $170 you can put toward debt, invest in your side hustle, or use for a weekend trip. This isn’t just about being ‘cheap’; it’s about being strategic. Every dollar you save by being resourceful is a dollar you can deploy to build the life you want. That’s the real bottom line.
Level Up: Your Frugal Fix-It Arsenal
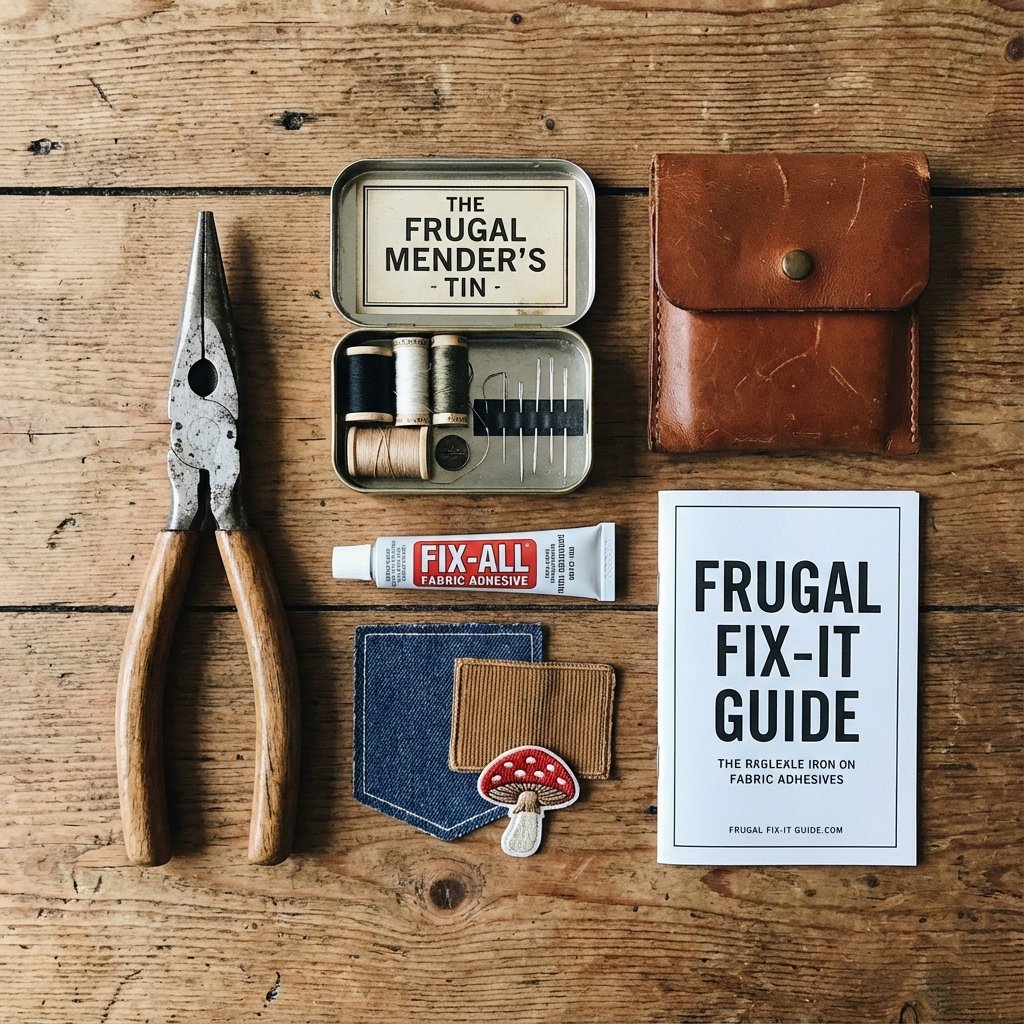
Beyond the Zipper: Your Frugal Fix-It Arsenal
You’ve mastered the zipper. You’ve seen how a little knowledge and the right tool can save you real money. So why stop there? The same mindset you just applied to that jacket can be used all over your house. By investing less than $25 in a basic ‘Frugal Fix-It Arsenal,’ you can handle dozens of common problems that send other people straight to the store or to a repairman. This is about building a system of self-reliance.
Assemble Your Kit:
- Needle-Nose Pliers: You already know this is your MVP for zippers, but it’s also clutch for jewelry repair, pulling out stubborn staples, and bending things back into shape.
- A Basic Sewing Kit: Don’t be intimidated. You don’t need to be a master tailor. Just knowing how to sew on a button can save a $50 shirt. Most kits come with needles, a few colors of thread, a thimble, and a seam ripper. Cost: $5-$10.
- Fabric Glue / Adhesive: This is a no-sew game-changer. Use it to patch small holes from the inside, re-attach emblems on bags, or ‘hem’ pants in an emergency. A good tube costs about $7.
- Iron-On Hem Tape & Patches: The ultimate way to hem pants or a skirt without a single stitch. If you can use an iron, you can use this. Iron-on patches can cover a tear in jeans and add a bit of style at the same time.
- A Quality Multi-Tool: For a bit more of an investment, a Leatherman or Gerber-style tool combines pliers, screwdrivers, and more into one compact package. It’s the Swiss Army knife of frugal repair.
Other Simple Fixes to Master:
- The Loose Button: A 5-minute fix with a needle and thread that saves an entire garment. There are thousands of video tutorials online. It’s a life skill.
- The Scuffed Shoe: A little bit of polish (or even a marker in the right color for small scuffs) can make worn-out shoes look new again, extending their life for months or years.
- The Pilled Sweater: Don’t throw out a sweater because it’s fuzzy. A cheap fabric shaver or even a disposable razor gently scraped over the surface will remove the pills and make it look brand new.
Building this arsenal and learning these skills isn’t about adding chores to your life. It’s about removing expenses. It’s about building a fortress around your wallet, protecting it from the slow leaks of everyday life that add up to a fortune over time.
The Mindset Shift: Stop Buying, Start Owning

The Mindset Shift: From Consumer to Creator
What you did with that zipper was more profound than you might think. You didn’t just perform a mechanical action; you engaged in an act of rebellion. We live in a world that screams at us from every angle to consume. Your TV, your phone, the billboards you drive past—they all carry the same message: ‘What you have is not enough. It’s old. It’s broken. Buy a new one. Buy a better one.’ This cycle of wanting, buying, and discarding is the engine of a multi-trillion dollar economy, and it’s designed to keep you spending.
When you choose to repair something, you throw a wrench in that engine. You make a conscious decision to step outside that cycle. You transform from a passive consumer into an active owner. An owner doesn’t just use a thing; they understand it, they maintain it, they value it. They see a broken zipper not as a dead end, but as a puzzle to be solved.
This mindset shift has powerful ripple effects on your financial life:
- It cultivates gratitude: When you invest time and skill into maintaining your possessions, you value them more. That jacket isn’t just a piece of cloth; it’s the jacket you saved. This increased appreciation reduces the urge to constantly seek out new things.
- It builds confidence: Successfully fixing something, no matter how small, provides a jolt of self-reliance. If you can fix a zipper, what else can you learn to fix? A leaky faucet? A wobbly chair? This confidence spills over into other areas of your life, like negotiating a bill or starting a side hustle. You start to see problems everywhere as opportunities.
- It frees up capital: As we saw in the cost breakdown, the money is real. Every dollar not spent on replacing a fixable item is a dollar that can be put to work. It can become an extra debt payment, a share of an index fund, or the startup capital for your business idea. Frugal living isn’t about deprivation; it’s about resource allocation. You’re choosing to allocate your money toward your freedom, not toward a landfill.
So the next time you fix something, take a moment to appreciate the act. You’re not just saving a few bucks. You’re rewiring your brain. You’re rejecting a system that wants you to be a helpless consumer and embracing a new identity as a capable, resourceful creator. That’s a power no corporation can sell you.
Conclusion
You came here looking for a simple hack, and you got it. You now possess the skill to conquer 90% of zipper failures with a tool you already own, in less time than it takes to brew a cup of coffee. No more frustration, no more wasted money, no more perfectly good clothes being retired early. That knowledge alone is a huge win.
But the real takeaway is bigger than that. It’s the realization that you have more power than you think. You have the power to challenge the ‘disposable’ mindset, to keep your hard-earned cash in your pocket, and to be the go-to problem solver. This zipper was just the beginning. You’ve now adopted the frugal hacker’s mentality: see a problem, understand its weakness, and execute a smart, efficient solution.
So go on. Dig that broken jacket, bag, or pair of pants out of your closet. Look that broken zipper in the eye, grab your pliers, and show it who’s boss. You’re not just fixing a zipper; you’re taking back control, one squeeze at a time.