Don’t Toss It! 5 Simple Sewing Hacks To Save Your Ruined Clothes
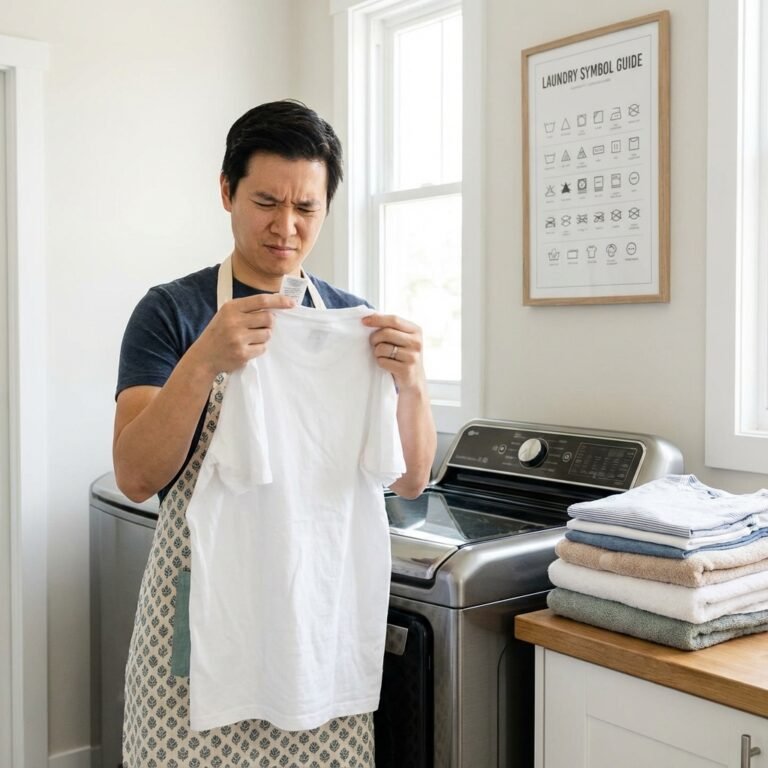
We’ve all been there. You pull on your favorite pair of jeans, and your toe rips a small hole into a giant one. Or you snag that perfect sweater on a door handle, leaving an ugly, unforgivable pull. Your first instinct? A sigh, a curse, and a trip to the trash can. That’s what the fast-fashion giants want you to do. They want you to see every little flaw as a reason to spend more money.
But we’re not playing their game. Your wallet is not their personal ATM. That ‘ruined’ piece of clothing isn’t garbage; it’s an opportunity. An opportunity to save cash, learn a valuable skill, and tell consumer culture to take a hike. You don’t need a fancy sewing machine or years of experience. All you need is a needle, some thread, and about 10 minutes. These five simple sewing hacks are your new secret weapons in the war against waste. Let’s get that money back in your pocket where it belongs.
Hack #1: Master the Invisible Stitch for Busted Seams
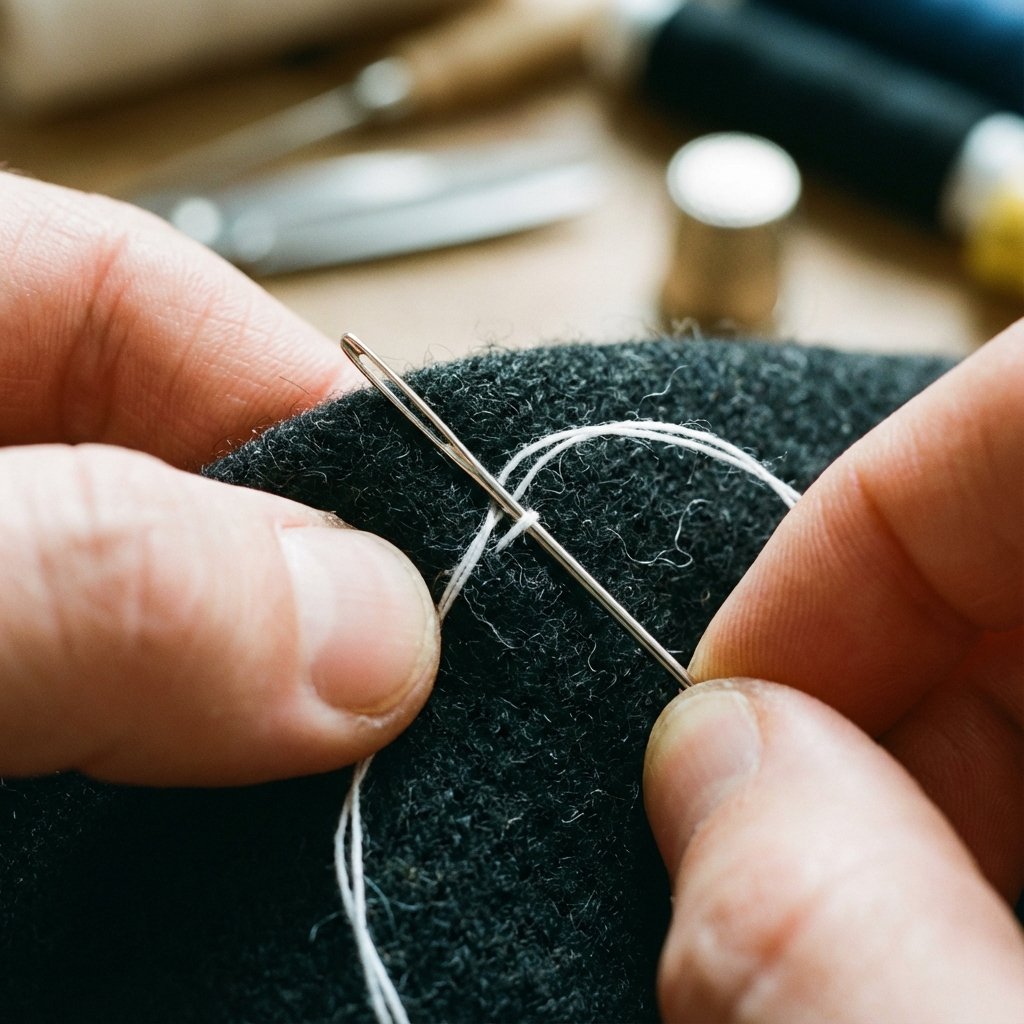
A split seam on a shirt, a pillow, or the lining of a jacket feels like a major wardrobe malfunction. It looks sloppy and can quickly unravel into a much bigger problem. Most people think this is a job for a tailor, which means spending $10-$20 for a five-minute fix. Forget that. The ladder stitch, also known as the invisible stitch, is a game-changer. It pulls the two sides of the fabric together from the inside, making your repair practically undetectable. It’s the ultimate ‘fake it ’til you make it’ of the sewing world, and it’s ridiculously easy to learn.
What You’ll Need:
- A needle
- Thread that matches the color of your fabric (or is close enough)
- A pair of small scissors
The Step-by-Step Takedown:
- Thread Your Needle and Knot It: Cut a piece of thread about 18 inches long—any longer and it’s likely to tangle. Thread it through the eye of the needle and tie a solid knot at the very end of the thread. Trim any excess tail after the knot.
- Start from the Inside: Turn the garment inside out if you can. If not, no sweat. Poke your needle from the inside of the seam, right where the original stitching ended, and pull it through. The knot will anchor your thread on the inside, so it’s hidden.
- Create the ‘Ladder’: Now, this is the magic part. Go directly across from where your thread came out and pick up just a tiny bit of fabric with your needle on the opposite fold. Pull the thread through. Now, go back to the first side, directly across from your last stitch, and pick up another tiny bit of fabric. You’re creating straight ‘rungs’ of a ladder across the open seam.
- Keep It Loose (At First): Continue making these small, straight stitches back and forth. Don’t pull the thread tight just yet. You should see a pattern that looks like, well, a ladder. Go about an inch at a time.
- Cinch It Shut: Once you have about an inch of ‘ladder rungs,’ gently but firmly pull on your thread. Like a drawstring, it will pull the two folded edges of the fabric together, and your stitches will disappear inside the seam. It’s pure magic.
- Secure and Finish: Continue this process until the entire seam is closed. To finish, make a couple of tiny stitches in the same spot at the very end of the seam to create a small loop. Pass your needle through the loop twice and pull tight to create a secure knot. Poke the needle back into the seam and out an inch away, then snip the thread flush with the fabric. The tail will disappear inside, and your repair is complete and invisible.
Hack #2: The 2-Minute Button Fix That Actually Lasts
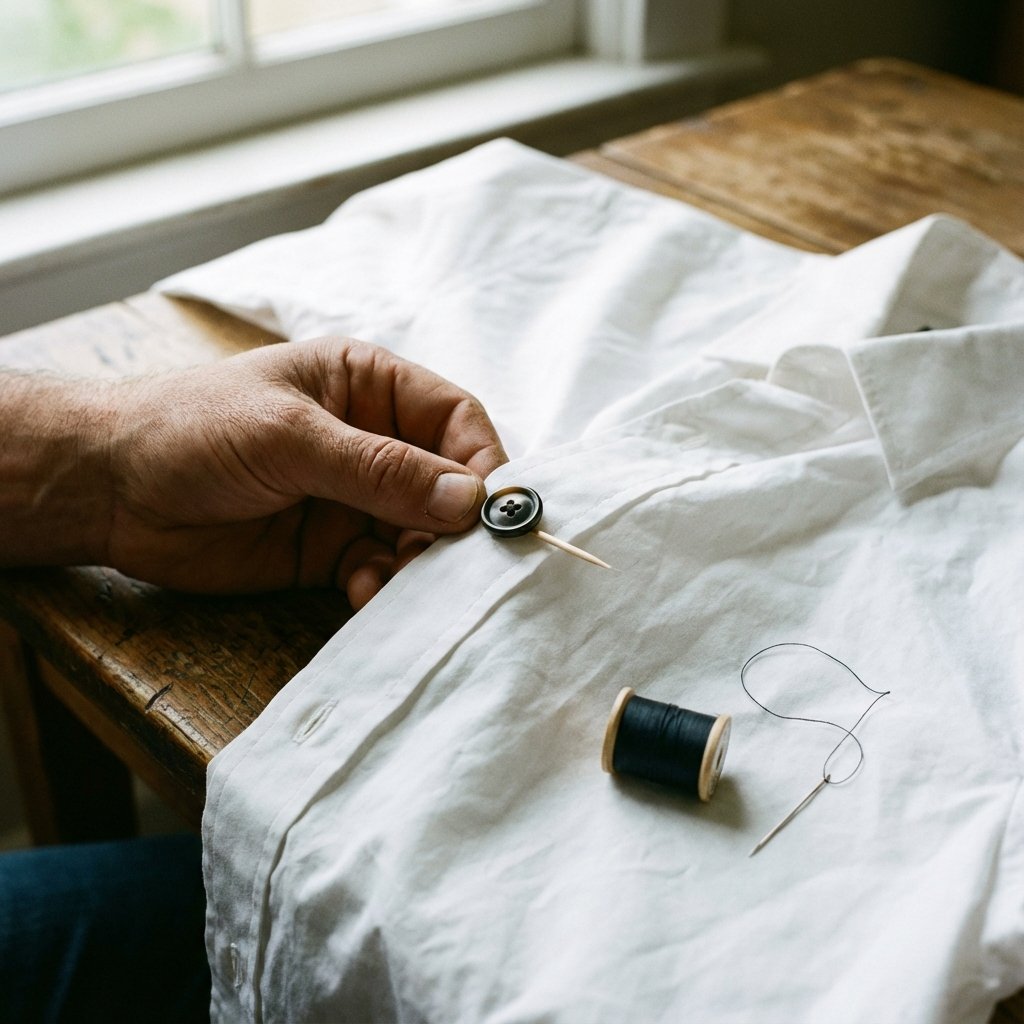
A missing button is the universal sign of ‘I don’t have my life together.’ It makes an expensive shirt look cheap and can render a pair of pants unwearable. Paying someone to fix this is laughable. You can do it yourself in less time than it takes to brew a cup of coffee. The key isn’t just sewing it on; it’s sewing it on so it never comes off again. We’re not doing temporary fixes here; we’re doing permanent solutions.
What You’ll Need:
- The original button (or a close match)
- Needle and matching thread
- A toothpick or a pin
- Scissors
The Step-by-Step Takedown:
- Prep Your Thread: Use a double thread for strength. Cut a 24-inch piece of thread, fold it in half, and thread the two cut ends through the needle’s eye. You’ll now have a loop at the other end. This trick makes knotting a breeze.
- Make Your Mark: Place the button where it needs to go. Use a pencil or chalk to make a tiny dot on the fabric through one of the buttonholes. This is your starting point.
- The First Stitch: Push your needle up from the back of the fabric at your mark, but don’t pull it all the way through. Pull it until just the loop at the end of your thread is showing. Pass your needle through that loop and pull tight. Boom. You’ve just made an instant, secure knot without any fumbling.
- Create the Shank: This is the pro move. Place your toothpick or pin on top of the button, between the holes. Start sewing the button on, passing the needle up and down through the holes and over the toothpick. The toothpick creates a small gap between the button and the fabric. This gap, called a ‘shank,’ gives the button flexibility and prevents fabric from puckering. Do this 4-5 times for a four-hole button (in an X pattern) or 6-8 times for a two-hole button.
- Wrap the Shank: Once the button feels secure, bring the needle up through the fabric but not through a buttonhole. Remove the toothpick. Now, wrap the thread tightly around the stitches underneath the button 5-6 times. This reinforces the shank and makes the repair incredibly durable.
- Knot and Snip: Push the needle back to the underside of the fabric. Make a small stitch, catching a few threads of the fabric, and pass your needle through the loop to create a knot. Do this twice for good measure. Snip the thread. That button isn’t going anywhere.
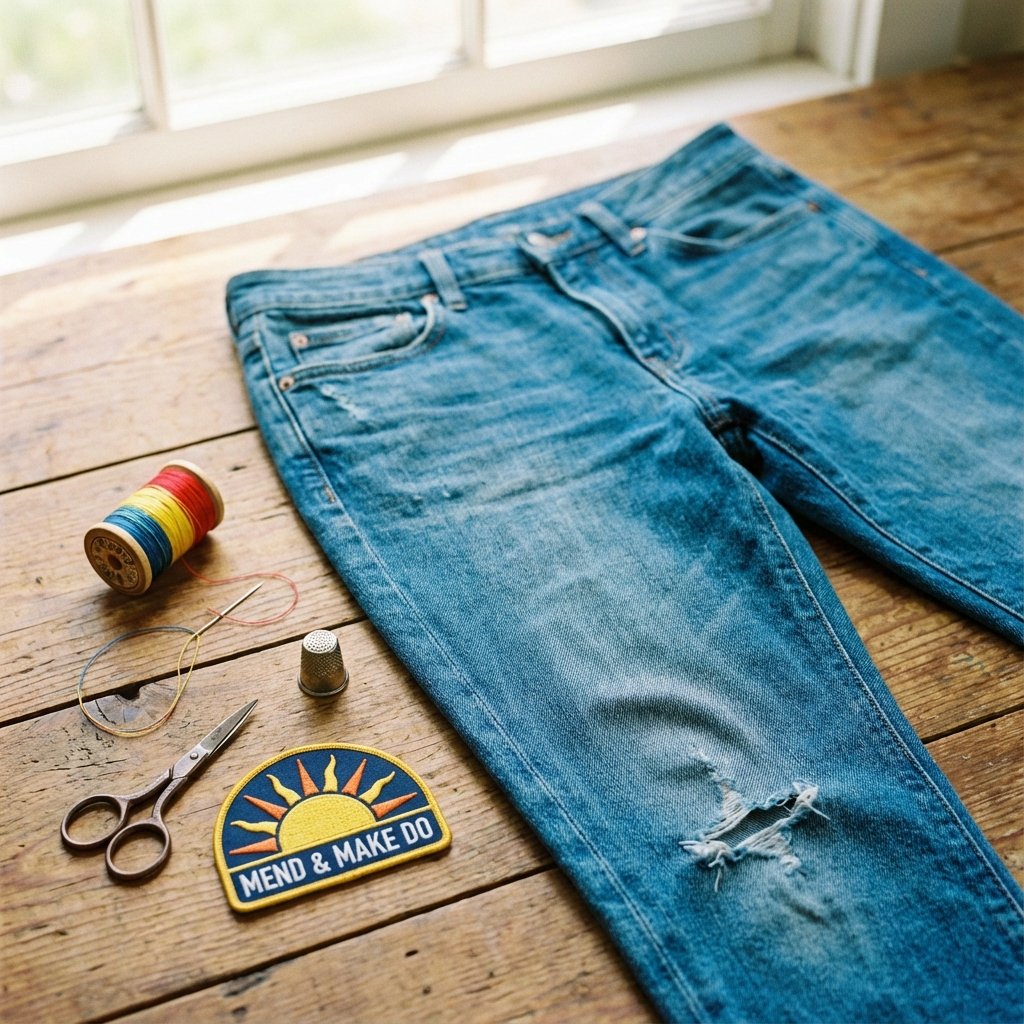
Hack #3: Turn Annoying Holes into a Style Statement
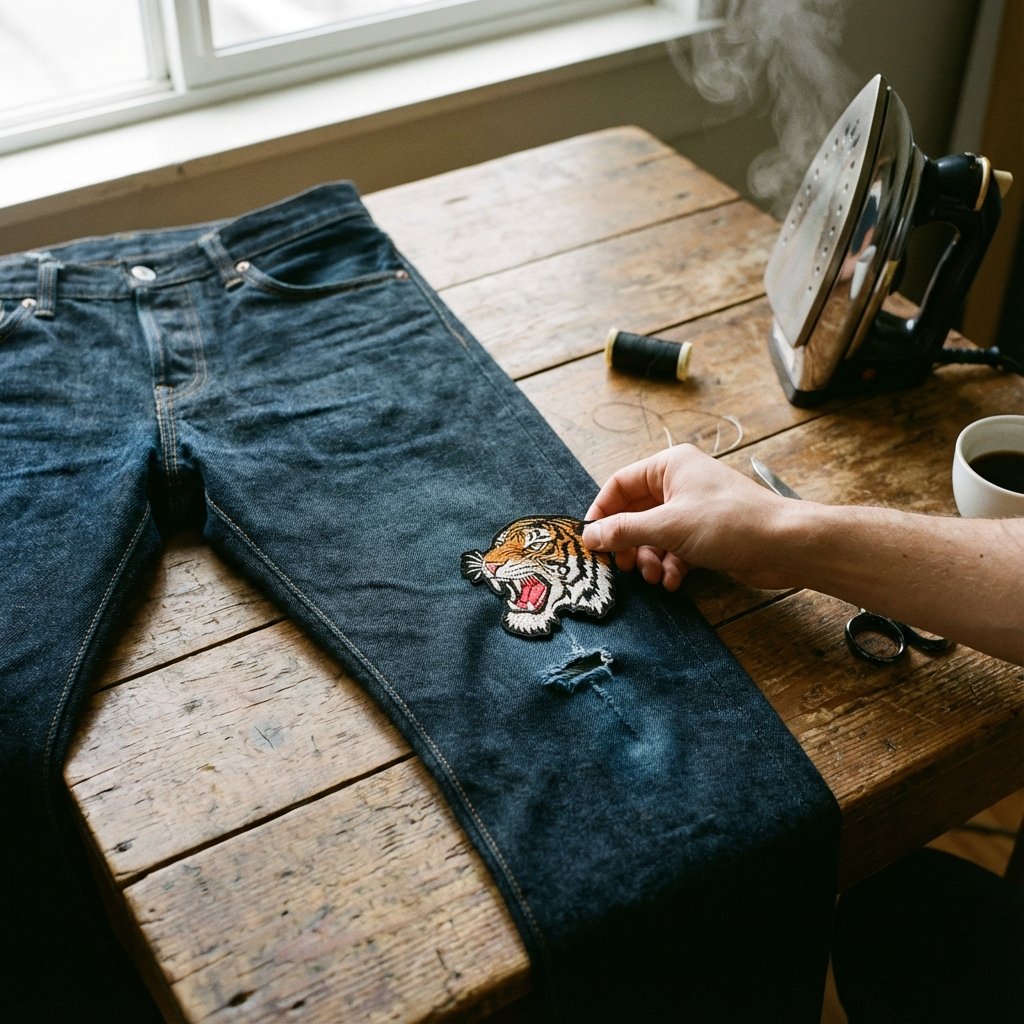
A small hole from a moth, a snag, or just wear-and-tear can condemn a perfectly good t-shirt or pair of jeans. Instead of tossing it, own it. This is your chance to add a custom touch that nobody else has. You can go for a subtle, nearly invisible mend or a loud-and-proud patch that screams personality. Either way, you’re saving an item from the landfill and turning a flaw into a feature.
What You’ll Need:
- For Patches: An iron-on patch or a scrap of fabric, an iron, and a thin cloth (like a bandana).
- For Darning: A needle, thread, and a darning egg or lightbulb (optional, but helpful).
The Step-by-Step Takedown (Iron-On Patch Method):
- Choose Your Patch: Find a patch that reflects your style. It could be a band logo, a cool geometric shape, or a simple piece of denim. Make sure it’s larger than the hole.
- Prep the Area: Lay your garment on a flat, heat-proof surface like an ironing board. Make sure the fabric around the hole is flat and clean.
- Heat It Up: Turn your iron to the setting recommended for your fabric (usually cotton/high heat for denim, lower for synthetics). Make sure the steam function is OFF.
- Position and Press: Place the patch over the hole, adhesive side down. Place a thin cloth over the patch to protect it. Press the hot iron firmly onto the patch for about 15-20 seconds. Don’t wiggle the iron around; just press.
- Flip and Repeat: Turn the garment inside out and press the iron on the backside of the patch area for another 15-20 seconds. This ensures the adhesive melts deep into the fibers.
- Cool Down: Let it cool completely before you test the bond. The adhesive sets as it cools. For extra security on high-wear areas like knees, you can add a few simple stitches around the edge of the patch.
Street-Smart Tip: For small holes in sweaters or t-shirts (darning), you’re essentially re-weaving the fabric. Use a matching thread to run a series of parallel stitches across the hole, then weave your needle over and under those stitches in the opposite direction until the hole is filled. It takes patience but makes for an incredibly strong and subtle repair.
Hack #4: The No-Cut Quick Hem for Awkwardly Long Pants

Buying pants off the rack is a gamble. More often than not, they’re too long, leading to frayed, dirty, and dangerous hems. A professional hem can cost $15-$25, sometimes more than you paid for the pants on sale! You can fix this in minutes without even cutting the fabric. This is perfect for kids’ pants they’ll grow into or for adjusting thrift-store finds. We’ll cover two methods: the super-quick fusible tape method and the sturdier hand-sewn blind hem.
What You’ll Need:
- For No-Sew: Fusible hemming tape, an iron, scissors, a measuring tape.
- For Sewing: A needle, matching thread, pins, a measuring tape, an iron.
The Step-by-Step Takedown (No-Sew Fusible Tape):
- Find Your Length: Put the pants on with the shoes you’ll most likely wear with them. Fold the cuff up to the desired length and use pins to hold it in place. Take the pants off carefully.
- Measure and Press: Lay the pants flat. Measure the cuff you pinned to ensure it’s even all the way around. Use your iron to press a sharp crease at this new hemline.
- Apply the Tape: Unfold the cuff. Cut a strip of fusible hemming tape to fit around the inside of the pant leg. Place the tape inside the crease you just ironed, with the paper backing (if any) facing up.
- Fuse It: Fold the hem back over the tape. Following the tape’s instructions, press the hot iron (no steam!) over the hem for 10-15 seconds. The heat melts the adhesive, bonding the fabrics. Work your way around the entire leg.
- Cool and Set: Let it cool completely. The bond is now set. This is a durable, machine-washable solution that takes almost no effort.
For a Sewn Finish: Use the blind hem stitch. After pressing your new hem, use a needle and thread to pick up just one or two threads from the outside of the pants, then take a larger stitch through the folded hem fabric on the inside. When done correctly, the stitches are nearly invisible from the outside and offer more durability than tape.
The Bottom Line: DIY Repair vs. Buying New

Talk is cheap, so let’s look at the hard numbers. The cost of replacing clothes adds up at a terrifying rate. A simple t-shirt is $20, a pair of jeans is $60, a decent sweater is $50. These ‘small’ purchases bleed your budget dry. A basic sewing kit, on the other hand, is a one-time investment that pays for itself after the very first repair. The skills you learn are free and last a lifetime. Look at this breakdown and see for yourself why tossing clothes is like tossing cash directly into the garbage.
| Item & Issue | Cost to Replace (Avg.) | Cost to Repair (DIY) | Your Savings |
|---|---|---|---|
| Jeans with a ripped knee | $60.00 | $2.00 (for a cool patch) | $58.00 |
| Blouse with a missing button | $35.00 | $0.25 (for a button & thread) | $34.75 |
| Pants with a hem that’s too long | $50.00 (plus tailoring if you bought new) | $1.00 (for hemming tape) | $49.00 |
| Sweater with a snag | $45.00 | $0.00 (uses existing tools) | $45.00 |
| Jacket with a split seam in the lining | $80.00 | $0.10 (for thread) | $79.90 |
| TOTALS | $270.00 | $3.35 | $266.65 |
That’s over $260 saved on just five items! Imagine applying this logic to your entire wardrobe over a year. The savings aren’t just numbers on a chart; they represent a vacation, a paid-off bill, or a boost to your emergency fund. This is what taking control of your finances looks like. It starts small, with a needle and thread.
Conclusion
There you have it—five simple, powerful hacks that put you back in the driver’s seat. No more throwing away your hard-earned money because of a busted seam or a runaway button. You now have the skills to fight back against disposable culture, one stitch at a time. This isn’t just about saving clothes; it’s about a mindset shift. It’s about seeing value where others see trash. It’s about the deep satisfaction of fixing something with your own two hands.
So next time you discover a flaw in your favorite garment, don’t despair. See it as a challenge. Grab that ‘ruined’ shirt from the donation pile, pick your hack, and give it a shot. What have you got to lose? Absolutely nothing. What do you have to gain? A fatter wallet, a more sustainable wardrobe, and the empowering knowledge that you can depend on yourself. Now go save something.