Don’t Throw It Away! How to Fix Shattered Makeup in 5 Minutes
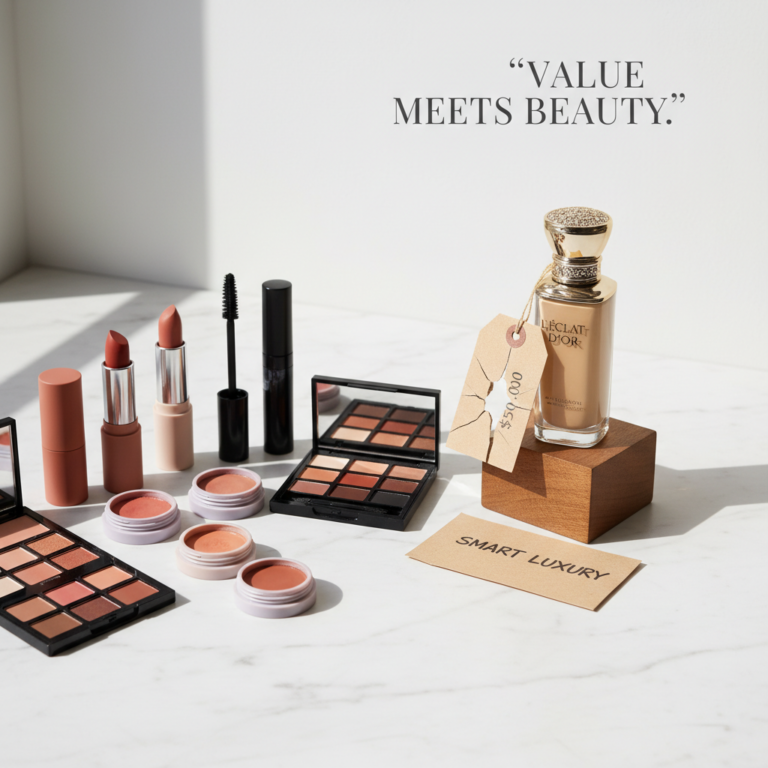
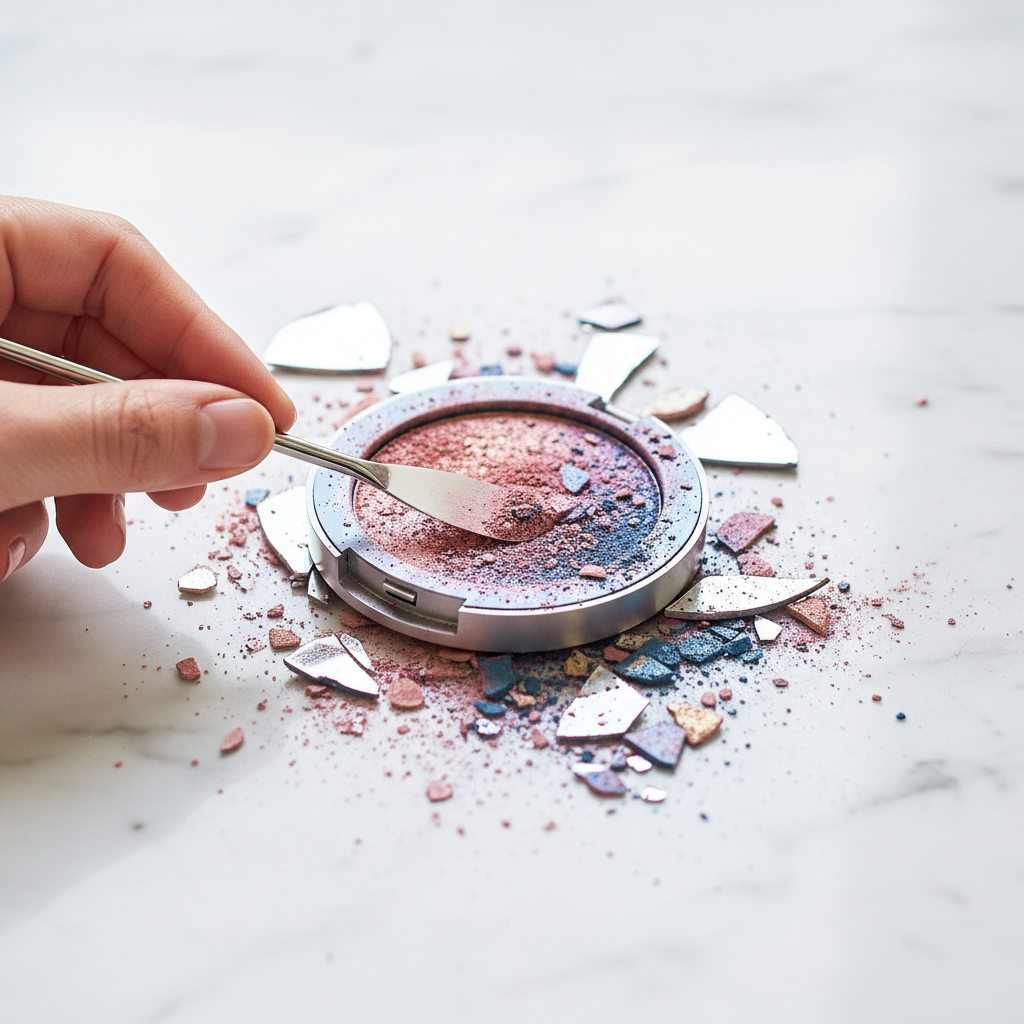
We’ve all been there. That slow-motion horror as your brand-new, $45 bronzer slips from your grasp. The sickening crack as it connects with the tile floor. Your wallet screams in agony. For most people, this is the end of the line. That compact gets tossed in the trash, and another chunk of your hard-earned cash is gone. But you’re not most people. You’re a frugal hacker, a budget-conscious boss who knows that throwing away a perfectly good product is like setting money on fire. This isn’t just about saving a broken blush; it’s about a mindset. It’s about refusing to play by the rules that say ‘broken’ means ‘useless.’ In the next five minutes, you’re going to learn a skill that will save you hundreds of dollars over your lifetime. Forget the frustration. It’s time to take control, turn that makeup tragedy into a financial triumph, and show the beauty industry you can’t be played. Let’s get to work.
The Gear You Need (Which You Probably Already Own)
Before you start thinking this is some complicated science experiment, let’s get one thing straight: you don’t need a fancy lab or expensive kits. The beauty of this hack is its simplicity. You’re a side hustler, a saver—your resources are your wits and the stuff you already have. This fix requires items so basic, they’re likely within arm’s reach right now. This isn’t about spending money to save money; it’s about using what you’ve got to keep your cash in your pocket.
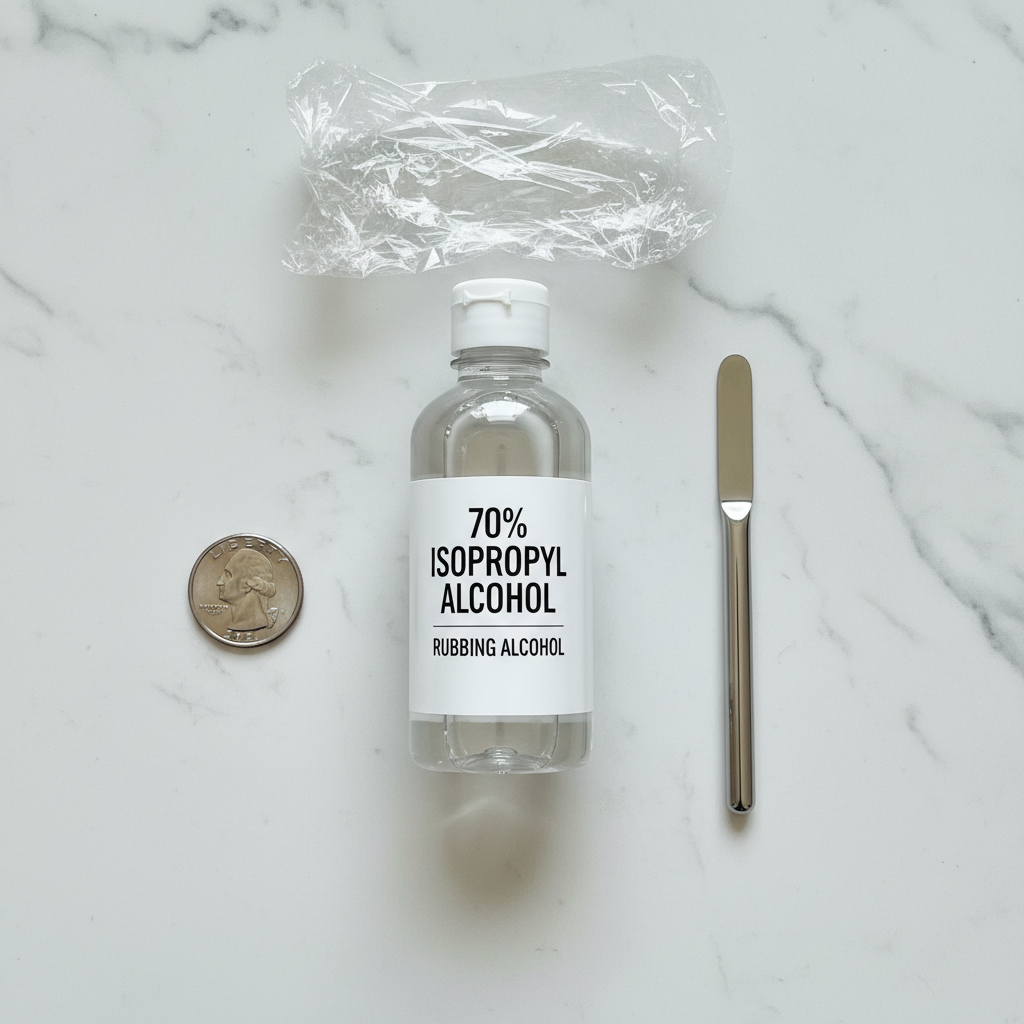
Your Simple Toolkit:
- Rubbing Alcohol: Look for 70% isopropyl alcohol. This is the magic ingredient. It acts as a binder and then completely evaporates, leaving your makeup sanitized and perfectly pressed. Don’t have it? A small bottle costs less than a buck at any drugstore—a tiny investment for massive savings.
- A Small, Clean Tool: You need something to crush the remaining chunks and mix the paste. A tiny makeup spatula, the back of a small spoon, a clean cuticle pusher, or even a toothpick will do the job. No need to buy anything special.
- Plastic Wrap or a Ziploc Bag: This is your no-mess barrier. It keeps your fingers and your pressing tool clean, ensuring a smooth, professional-looking finish.
- A Flat, Firm Pressing Tool: Find a coin that fits neatly inside your compact—a quarter or a nickel usually works perfectly. The flat bottom of a small spice jar or a vitamin bottle cap can also work wonders. The goal is even, firm pressure.
That’s it. No gimmicks, no ‘must-have’ gadgets. Just four simple items standing between you and a resurrected makeup product. Gather your gear; the rescue mission is about to begin.
The 5-Minute Fix: A Step-by-Step Breakdown
Alright, it’s go-time. Put on your favorite podcast or some pump-up music. This process is fast, satisfying, and will make you feel like a certified genius. Follow these steps exactly, and you’ll have a brand-new-looking product in minutes. No more makeup graveyards under your sink.
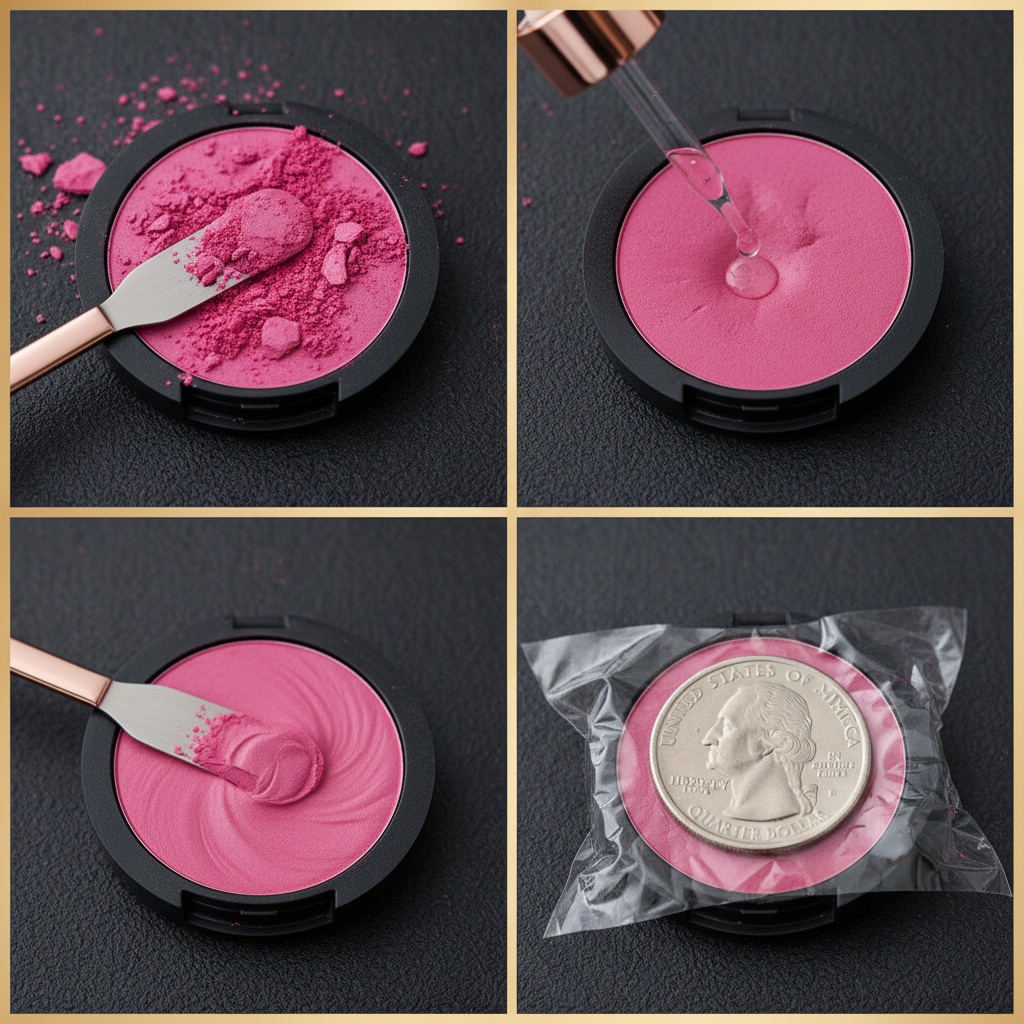
- Contain and Crush: Keep all the broken pieces, even the tiniest specks, inside the original compact. Use your small tool (like a toothpick or spatula) to carefully break down any remaining solid chunks. You need to crush everything into a fine, consistent powder. The finer the powder, the smoother your final product will be. This is the most crucial step for a flawless finish.
- Introduce the Binder: Now for the magic. Slowly add a few drops of the 70% isopropyl alcohol directly onto the powder. Don’t flood it! You want to add just enough to create a thick, paste-like consistency, similar to wet sand. Start with a small capful and add more drops as needed.
- Mix It Up: Use your tool to thoroughly mix the alcohol and powder together. Scrape the sides and make sure every bit of powder is damp. The mixture should be easy to spread but not watery. You’ll see it transform into a smooth, malleable paste.
- Smooth and Level: Once everything is mixed, use the flat side of your tool or your finger (covered in plastic wrap) to smooth the surface of the paste as evenly as possible within the compact. This sets the stage for the final press.
- The Perfect Press: Take your piece of plastic wrap and lay it flat over the top of the makeup paste. Now, take your pressing tool (the coin or bottle cap) and place it on top of the plastic wrap. Press down firmly and evenly. Apply consistent pressure across the entire surface. You may need to lift and reposition the coin a few times to cover the whole area. This step is what compacts the powder back into a solid, usable cake.
- Let It Cure: Carefully peel back the plastic wrap. You’ll see a perfectly smooth, solid surface. Now, the hard part: patience. Leave the compact open overnight (or for at least 4-6 hours) to allow every last bit of the alcohol to evaporate. You’ll know it’s ready when you can no longer smell the alcohol and the cake is completely dry to the touch.
Boom. You just took a shattered, useless product and made it brand new again. That’s not just a repair; that’s a power move.
The Cost Breakdown: DIY Fix vs. Buying New
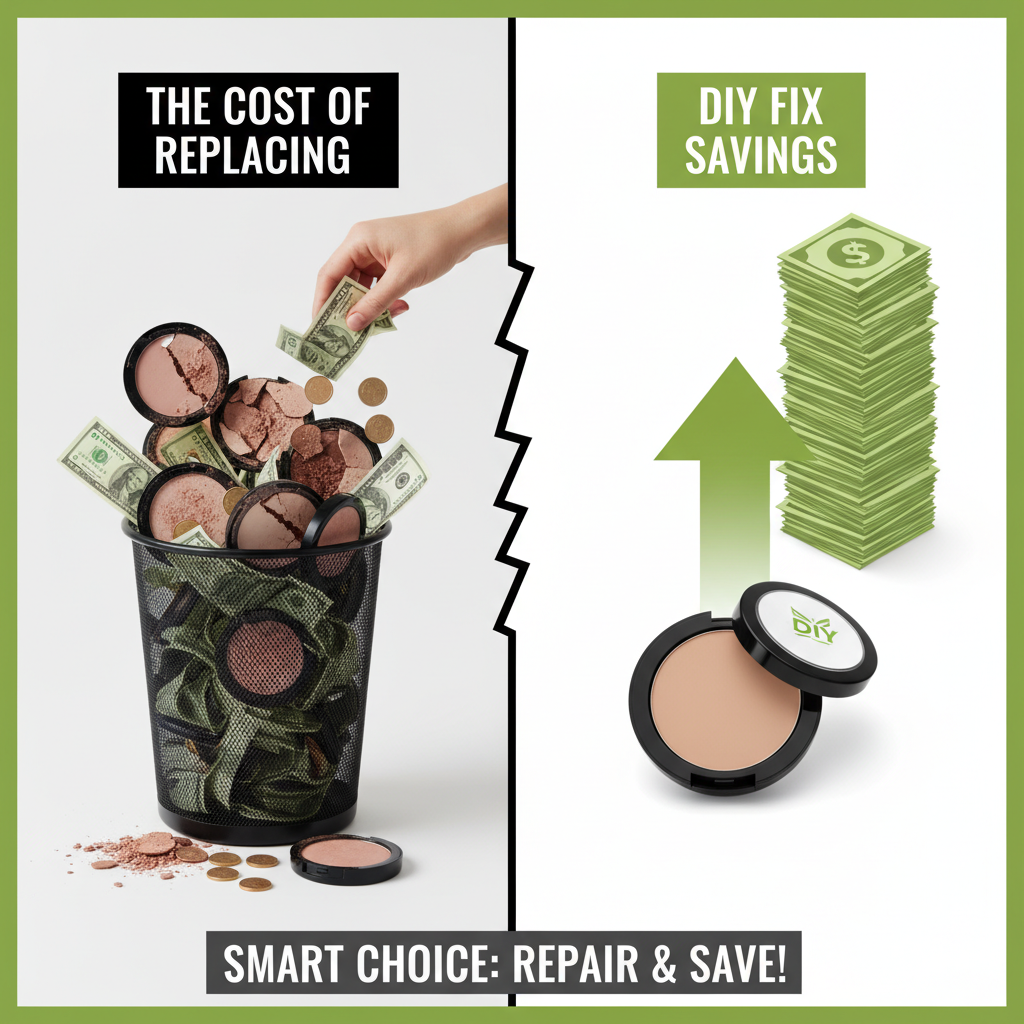
Let’s talk numbers. Feelings are great, but hard data is what empowers a true frugal hacker. Rescuing your makeup isn’t just a neat party trick; it’s a direct deposit into your savings account. When you look at the cost of replacing mid-range to high-end makeup, this five-minute fix becomes one of the highest ROI activities you can do. We’re talking about turning a few cents worth of rubbing alcohol into $20, $30, or even $50 of value. Don’t believe me? The math doesn’t lie.
| Item | Cost to Replace (Avg. Mid-Range Brand) | Cost of DIY Fix | Money Saved |
|---|---|---|---|
| Pressed Powder Foundation | $35.00 | ~$0.10 (for alcohol) | $34.90 |
| Powder Blush | $28.00 | ~$0.10 (for alcohol) | $27.90 |
| Bronzer | $30.00 | ~$0.10 (for alcohol) | $29.90 |
| Highlighter | $32.00 | ~$0.10 (for alcohol) | $31.90 |
| Single Eyeshadow | $22.00 | ~$0.05 (for alcohol) | $21.95 |
Seeing it in black and white changes the game, doesn’t it? If you drop just one blush and one powder foundation per year, you’re saving over $60 for ten minutes of work. That’s money that can go toward your debt snowball, your vacation fund, or your latest side hustle investment. Every dollar you save is a dollar you don’t have to earn. This is how you build wealth—not just by making more, but by being smarter with what you already have.
Pro-Level Hacks & Critical Warnings
You’ve mastered the basic repair. Now it’s time to level up. Different products and situations can require a slightly different approach. These pro-tips will help you handle anything from a multi-color eyeshadow palette to preventing future disasters. More importantly, we’ll cover the critical mistakes to avoid that could ruin your makeup or, worse, harm your skin.
Advanced Repair Techniques
- Multi-Color Palettes: This is the advanced course. If you shatter a palette with multiple colors, the key is surgical precision. Before crushing, use your clean tool to carefully scrape and separate the different color fragments into small, separate piles on a clean surface. Fix each color individually and carefully place it back into its designated pan before pressing. It takes more time, but it saves a $50 palette.
- Baked or Mineral Products: Baked powders (like some highlighters and blushes) are a bit different. They can sometimes be re-pressed, but they may lose their unique domed shape. The key is to use slightly less alcohol and press very gently to avoid creating a product that’s too hard.
- Preventing Future Breaks: The best fix is prevention. To make your powders more shatter-proof for travel, open the compact and place a flat cotton round directly on top of the powder before closing it. This extra cushion absorbs shock and can prevent a catastrophe in your makeup bag.
Critical Warning: What NOT To Do
DO NOT USE WATER. EVER. This is the biggest and most dangerous mistake people make. Water will not evaporate completely like alcohol will. The lingering moisture creates a breeding ground for bacteria, which you then press directly onto your face. This can lead to breakouts, rashes, or serious skin infections. Likewise, avoid using any other liquids like makeup setting spray or oils. Only 70% isopropyl alcohol is safe because it sanitizes and then vanishes completely.
Stick to the script, use the right materials, and you’ll be a makeup-fixing pro. Trying to cut corners is a rookie move that can cost you more in the long run—in ruined products and irritated skin.
Conclusion
You did it. You took what was broken and worthless and made it whole again. This little hack is about so much more than makeup. It’s a tangible symbol of a powerful, frugal mindset. It’s proof that with a little know-how and resourcefulness, you can outsmart the system designed to make you constantly buy more. Every time you open that compact you saved, it’s a reminder of your own power—the power to fix things, to save money, and to reject waste. You didn’t just save a $30 blush; you reinforced a habit of smart, empowered living. Now, what other ‘broken’ things in your life can you fix with a little ingenuity? The possibilities are endless when you’re a frugal hacker.