Trash to Treasure: 10 Chic Ways to Upcycle Glass Bottles into Decor
Look at your recycling bin. Go on, take a good look. What do you see? Probably a pile of empty wine bottles, beer bottles, and maybe a fancy kombucha container or two. Most people see trash. They see a chore to be dragged to the curb. But you’re not most people. You’re a hustler, a saver, a creator. And you’re about to see that pile of glass for what it really is: free material for high-end home decor. You’re literally tossing potential profit and style points in the trash every single week.
Big-box stores want you to spend $50 on a simple glass vase that cost them pennies to make. They’re banking on you not knowing the secrets. Well, class is in session. We’re about to turn that so-called ‘trash’ into treasure that not only makes your space look amazing but can also put some serious cash back in your pocket. Forget paying retail. It’s time to upcycle your way to a chic home and a fatter wallet. Let’s get to work.
The Prep Game: Turning Bottles into Blank Canvases
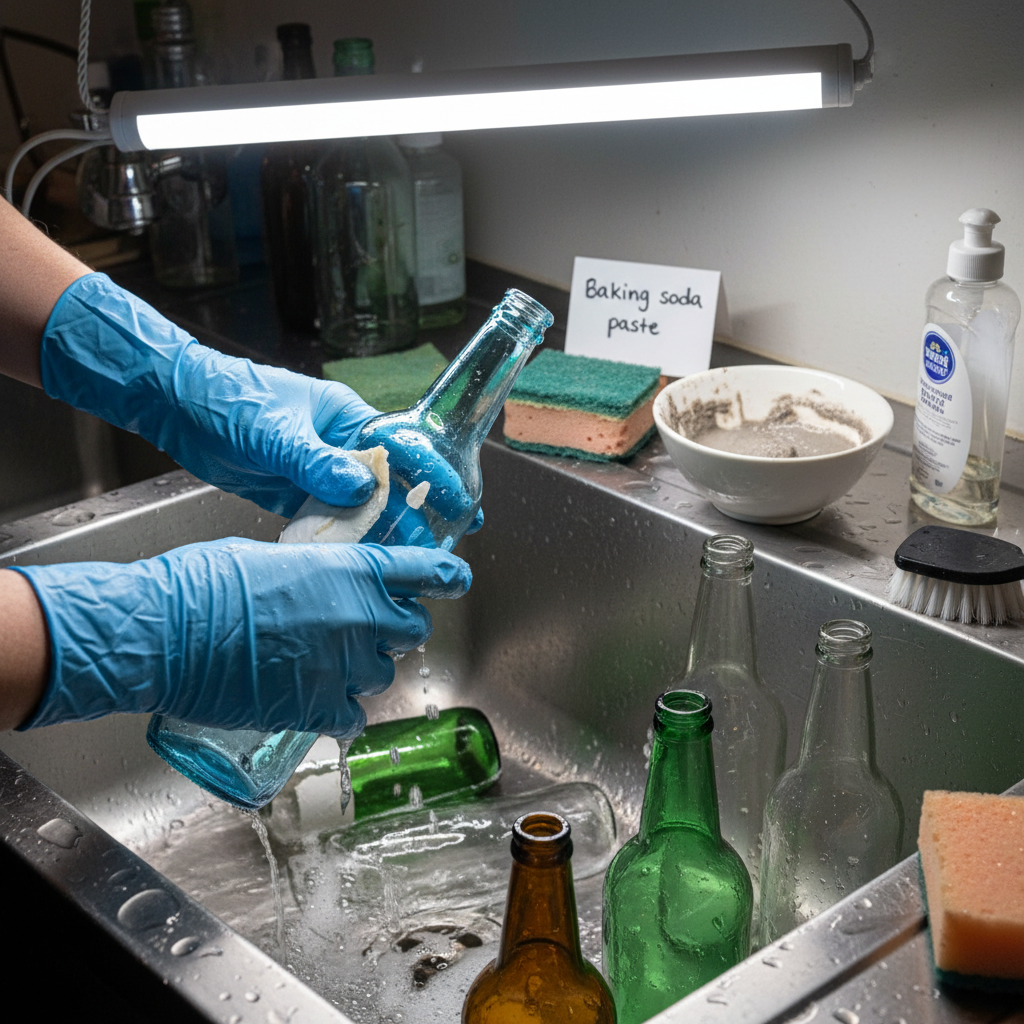
Before you can turn a bottle into a masterpiece, you have to prep your canvas. Don’t skip this part. A clean, label-free bottle is the foundation for a professional-looking product. Trying to paint over a sticky, half-peeled label is an amateur move, and we’re not about that life.
Step-by-Step Bottle Prep:
- The Soak: Fill a sink or bucket with hot, soapy water. The hotter, the better. Submerge your bottles and let them soak for at least an hour, or overnight for really stubborn labels. The heat and soap will start breaking down the adhesive.
- The Peel & Scrape: After a good soak, most labels will peel right off. For the ones that fight back, grab a razor blade scraper or an old credit card. Hold the blade at a low angle and carefully scrape away the paper pulp.
- Banish the Gunk: You’ll inevitably be left with a sticky residue. This is where the magic happens. Mix equal parts baking soda and cooking oil (any kind works) into a thick paste. Slather it all over the sticky areas and let it sit for 30 minutes. The oil breaks down the adhesive, and the baking soda acts as a gentle abrasive.
- The Final Scrub: Grab a steel wool pad or a rough sponge and scrub the paste away. The residue will come right off. Give the bottle one last wash with dish soap and water to remove any oily film, then let it air dry completely. Now you have a perfectly clean, pristine blank canvas ready for its transformation.
Safety First: If you plan on cutting bottles for projects later on, invest in a pair of cut-resistant gloves and safety glasses. Glass dust is no joke, and a slip can be nasty. Don’t risk a trip to the ER for a $10 pair of gloves.
The Bottom Line: DIY vs. Store-Bought
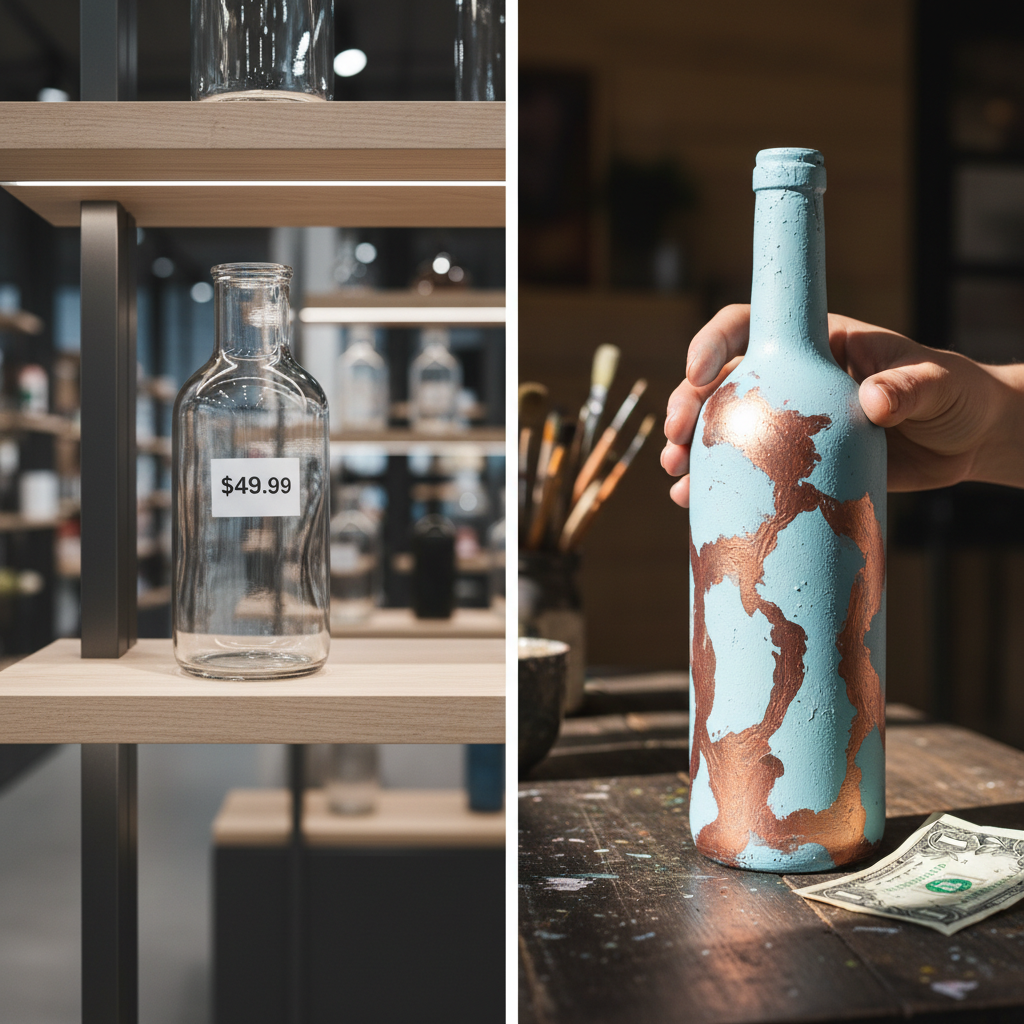
Still not convinced this is worth your time? Let’s talk numbers. The markup on simple home decor is insane. That vase you see at a boutique for $40? It’s just a shaped piece of glass. You have the raw materials right in your recycling bin. The only real cost to you is a few bucks for craft supplies and your time—which is an investment in your skills and your space.
Look at the cold, hard cash you’re saving. This isn’t about being cheap; it’s about being smart with your money and not paying a massive premium for someone else’s minimal effort.
| Item | Store-Bought Price | DIY Upcycled Cost | Your Savings |
|---|---|---|---|
| Simple Colored Glass Vase | $25 – $50 | Bottle (Free) + Spray Paint (~$1 per vase) = ~$1 | $24 – $49 |
| Hanging Planter | $30+ | Cut Bottle (Free) + Twine (~$0.50) = ~$0.50 | ~$29.50 |
| Custom Soap Dispenser | $18 – $35 | Bottle (Free) + Pump Top (~$3) = ~$3 | $15 – $32 |
| Trendy Bottle Lamp | $60 – $150+ | Bottle (Free) + Lamp Kit (~$15) = ~$15 | $45 – $135+ |
Level 1 Hacks: No-Cut, High-Impact Decor
Ready to start? These first few projects require zero glass cutting. They’re all about easy wins that look incredibly chic. Perfect for building your confidence and your decor collection.
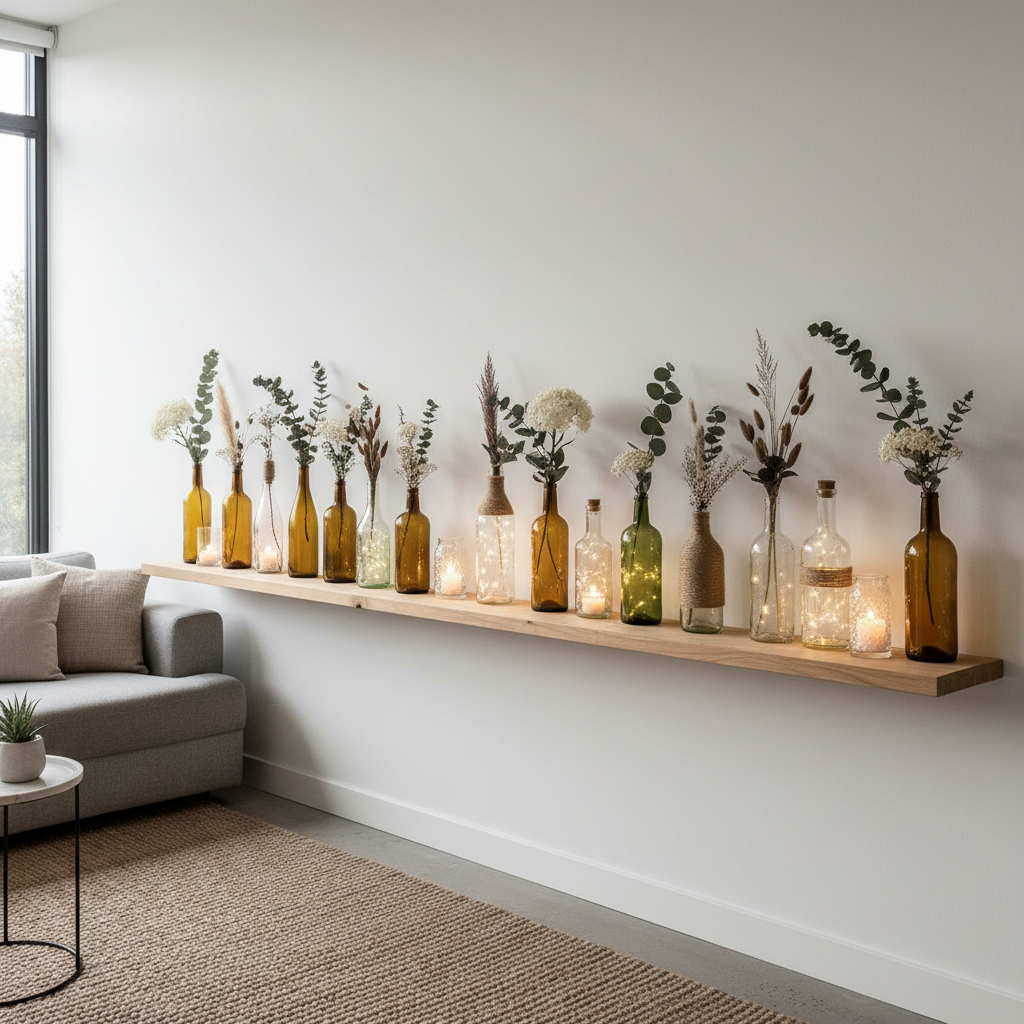
1. The Minimalist Single-Stem Vase
This is the easiest win in the book. Find a bottle with a cool shape—a Topo Chico, a unique wine bottle, anything with good lines. Clean it perfectly. That’s it. You’re done. Put a single flower or a sprig of eucalyptus in it. Group three of them together at different heights for a designer look that cost you exactly $0.
2. Twinkle Light Bottle Lanterns
This adds instant ambiance to any room, patio, or party. All you need is a clean bottle and a set of battery-powered LED ‘fairy lights’ with the battery pack on the cork. You can get these online for a few bucks.
- Make sure your bottle is bone dry inside.
- Carefully feed the string of lights into the bottle.
- Push the ‘cork’ battery pack into the opening.
- Flip the switch and enjoy the glow. Darker bottles (like green or amber wine bottles) create a moodier, more sophisticated light.
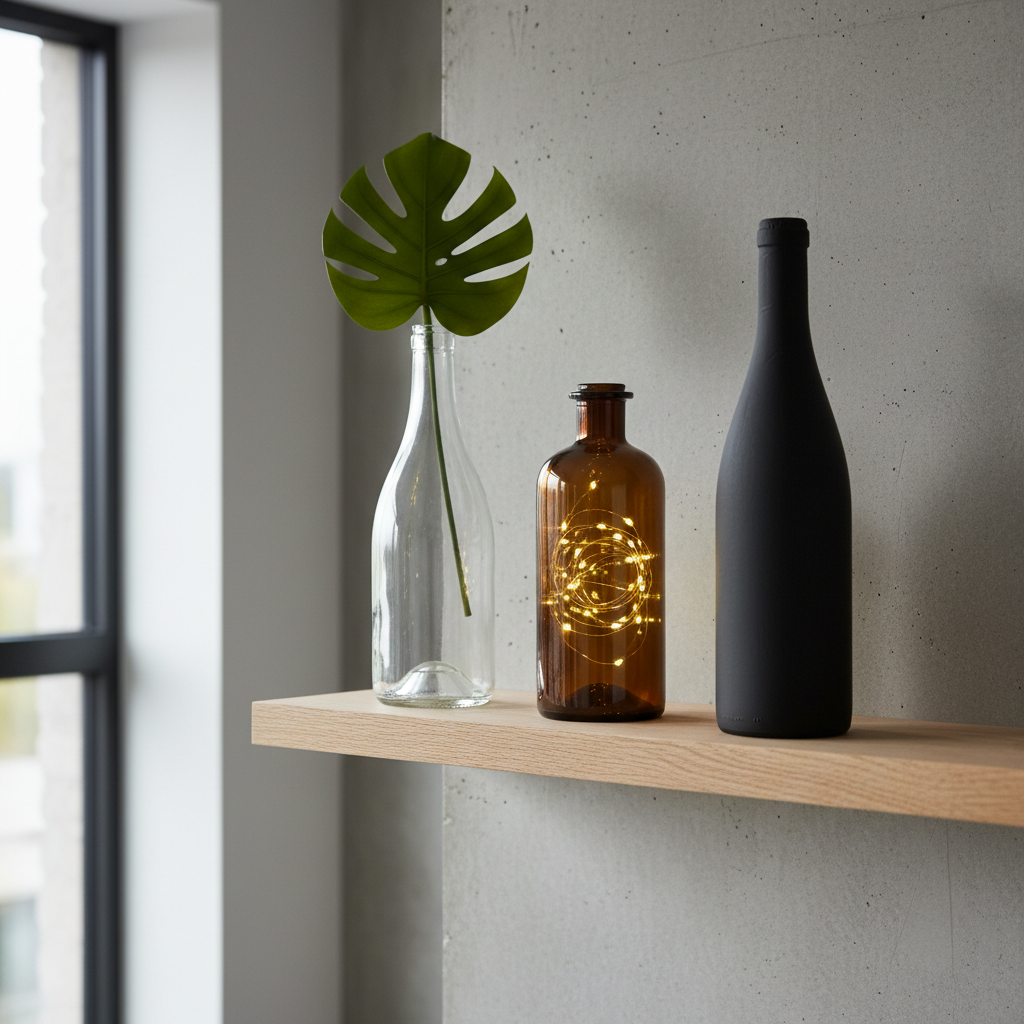
3. Painted & Textured Art Pieces
Turn a boring clear bottle into a piece of ceramic-looking art. The secret is paint with texture.
- Matte Finish: Get a can of matte or chalk spray paint in a neutral color like black, white, or terracotta. In a well-ventilated area, give the bottle a few light, even coats. Let it dry completely. The result is a high-end, modern ceramic look.
- Textured Effect: Mix a little baking soda or sand into some acrylic craft paint until it’s a thick, gritty consistency. Use a paintbrush to coat the bottle, creating a stucco or earthenware texture. It looks rustic, expensive, and completely custom.
4. The Chic Soap Dispenser
Upgrade your kitchen or bathroom sink instantly. Find a cool-looking liquor or olive oil bottle (Patron or fancy olive oil bottles work great). Clean it out thoroughly. Then, buy a soap pump dispenser top online—you can find them in stainless steel, black matte, or gold for a few dollars. Screw it on, fill it with your favorite soap, and you’ve got a custom dispenser that beats anything you can buy in a store.
Level 2 Upgrades: Cutting & Crafting
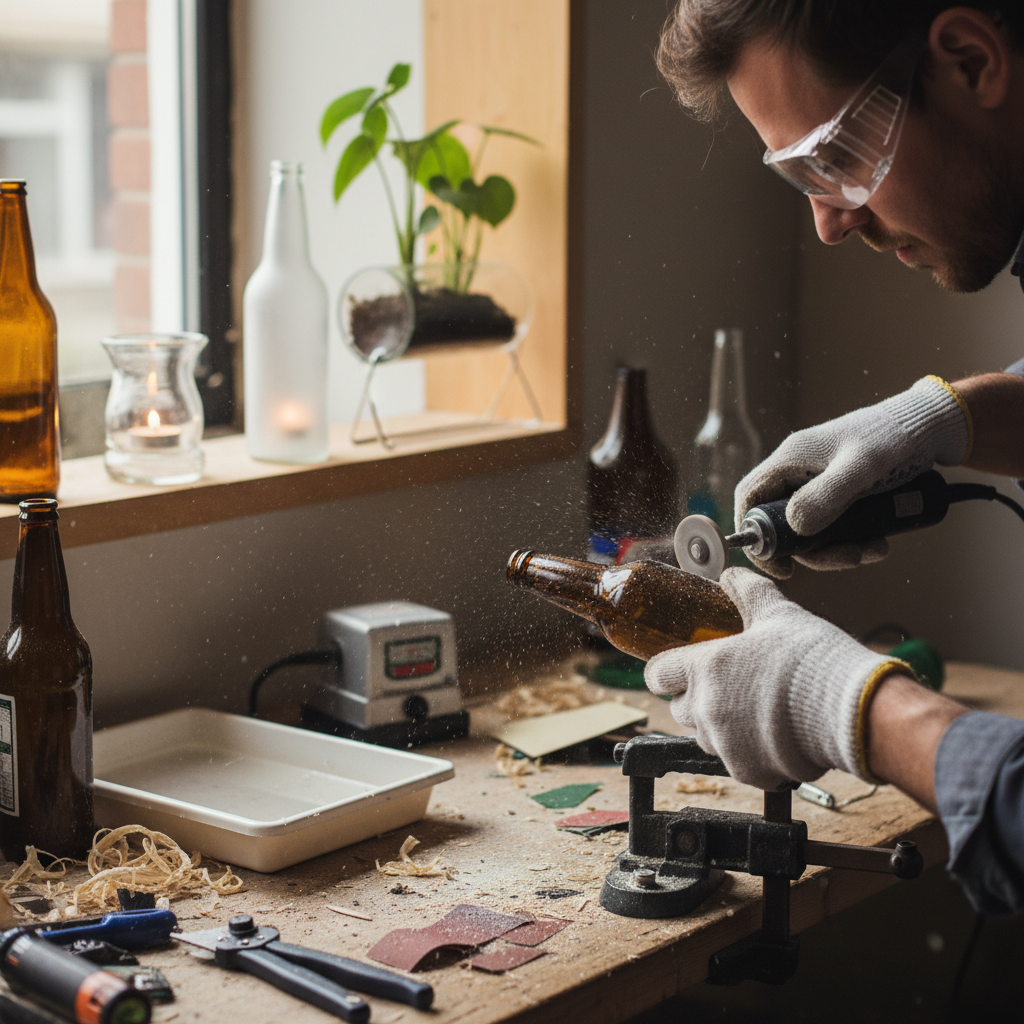
Okay, you’ve mastered the basics. Now it’s time to level up your skills. This means cutting glass. It sounds intimidating, but with the right tool and a little practice, it’s a total game-changer. Buy a glass bottle cutter kit online—they’re usually around $20 and come with everything you need. ALWAYS wear your safety glasses and gloves for these projects.
5. Sleek Drinking Glasses
Turn your favorite beer or soda bottles into a set of unique, sturdy drinking glasses. The key is a clean cut and smooth sanding.
- Use your bottle cutter to score a perfectly straight line around the bottle at your desired height.
- Apply thermal shock. Slowly pour boiling water over the score line, rotating the bottle. Immediately follow with cold water. The glass should snap cleanly along the line.
- This is the most important step: Sand the edge. The edge will be sharp. Use the sandpaper included in your kit (or a Dremel tool with a sanding bit). Start with a coarse grit and move to a fine grit, working until the edge is completely smooth and safe to drink from.
6. Modern Candle Holders & Hurricanes
Cut the bottom off a wine bottle to create a chic, open-ended hurricane lamp. Place it over a small pillar candle on a heat-safe dish. The glass protects the flame from drafts and casts a beautiful, colored glow. You can also cut the bottle lower down to create custom votive holders.
7. The Self-Watering Planter
This is a brilliant hack for plant lovers. Cut a wine bottle in half (about midway). Sand the cut edge. Invert the top half (the neck) and place it inside the bottom half. A piece of string or cotton wick should run from the soil in the top section down into the water reservoir in the bottom section. The plant will draw water up as it needs it. It’s smart, sustainable, and looks amazing.
The Side Hustle Angle: Turning Bottles into Bank
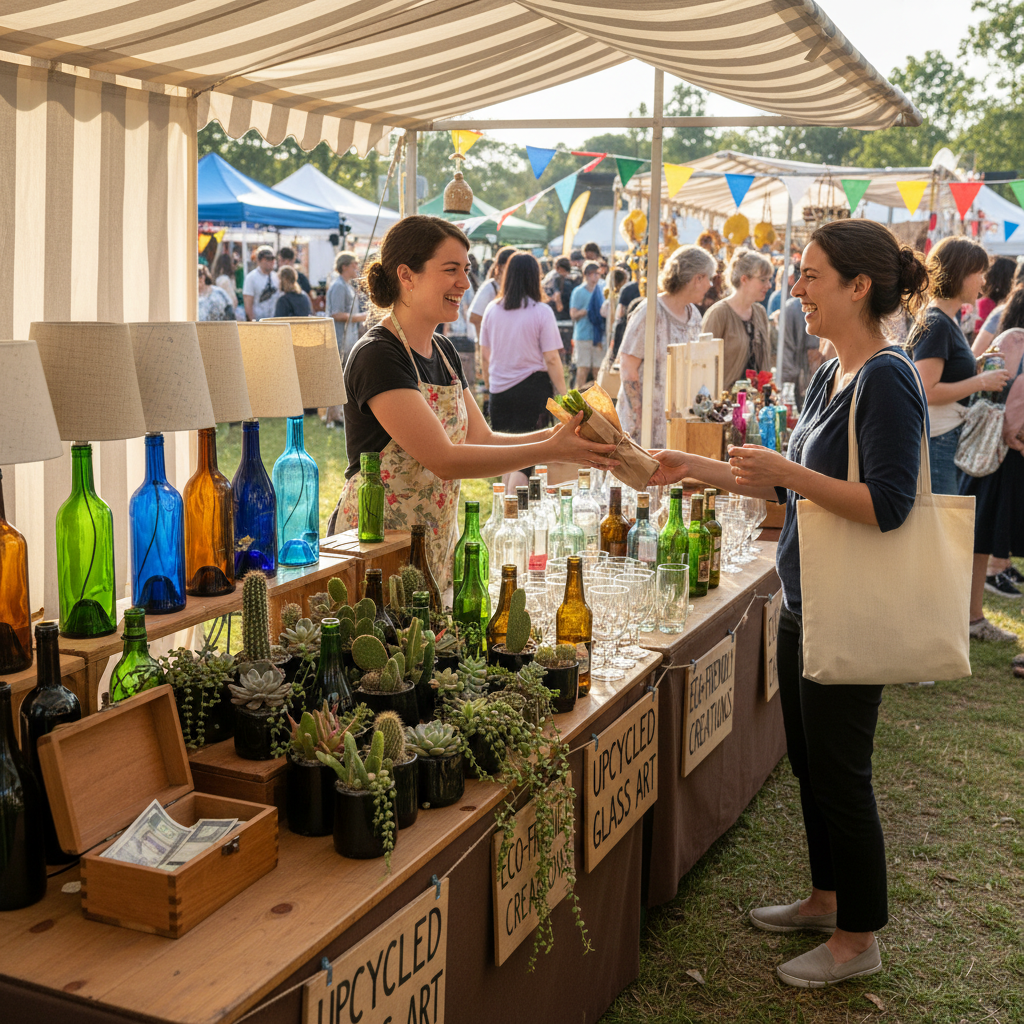
You’ve decorated your own space for pennies. Now it’s time to cash in. There’s a huge market for unique, handmade, and eco-friendly products. Your upcycled creations check all those boxes. This isn’t just a craft; it’s a potential business.
Where to Sell Your Wares:
- Etsy: The go-to marketplace for handmade goods. Your competition is high, but so is the customer base. The key is amazing photography and smart keywords (e.g., ‘upcycled wine bottle lamp,’ ‘eco-friendly decor’).
- Local Craft Fairs & Farmers Markets: People love to buy local. You can sell items for a higher price point here. Bundle items into sets (e.g., a set of 4 drinking glasses) for easy sales.
- Facebook Marketplace: Perfect for selling locally without the fees of a market stall. Great for larger items like lamps that are a pain to ship.
Pricing Your Work for Profit
Don’t just charge for materials. Your time, skill, and creativity have value. A good starting point is: (Cost of Materials x 3) + Your Hourly Rate = Price. If a lamp kit costs $15 and it takes you an hour to make at a $20/hour rate, you’re looking at a price of around $35. Check what similar items sell for on Etsy to make sure you’re in the right ballpark.
| Product | Estimated Cost to Make | Potential Selling Price | Potential Profit per Item |
|---|---|---|---|
| Set of 4 Drinking Glasses | ~$1 (for sandpaper) | $25 – $40 | ~$24 – $39 |
| Fairy Light Lantern | ~$3 (for lights) | $15 – $20 | ~$12 – $17 |
| Custom Bottle Lamp | ~$15 (for kit) | $40 – $75+ | ~$25 – $60+ |
| Self-Watering Planter | ~$0.50 (for wick) | $20 – $30 | ~$19.50 – $29.50 |
The Pro-Level Projects: The Ultimate Bottle Lamp & More
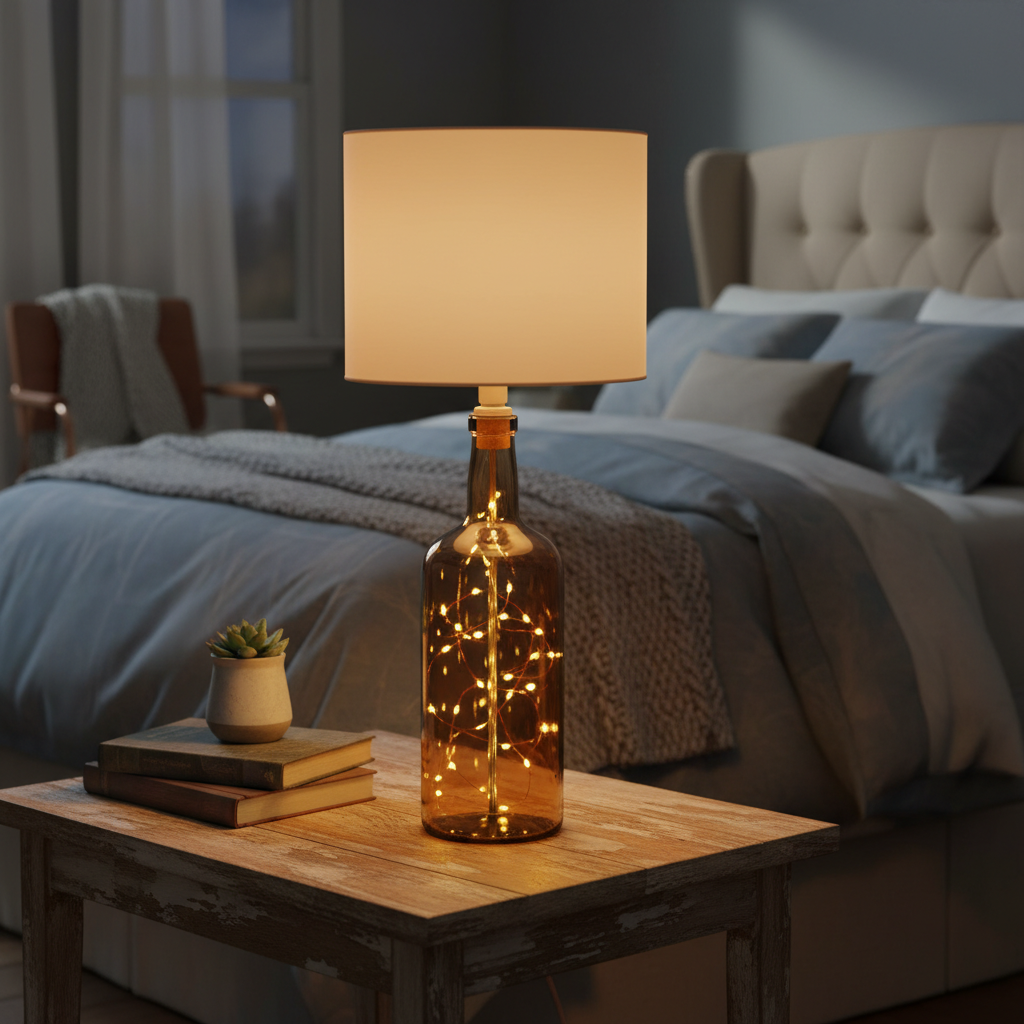
This is the grand finale, the project that gets the most ‘oohs’ and ‘aahs.’ Creating a bottle lamp is surprisingly straightforward and the payoff is huge, whether you’re keeping it or selling it.
8. The Classic Bottle Lamp
This project requires drilling a hole in the glass for the cord, which is easier than it sounds with the right bit.
- Get a Kit: Buy a ‘bottle lamp kit’ online. It comes with the socket, cord, and all the hardware.
- Drill the Hole: You’ll need a diamond-tipped drill bit for glass. Mark a spot near the bottom of the bottle for the cord to exit. Apply steady, light pressure and a little water to keep the bit cool. Let the drill do the work—don’t force it.
- Wire it Up: Feed the lamp cord through the hole you drilled and up through the neck of the bottle.
- Assemble the Socket: Follow the instructions in your kit to wire the cord to the socket. It’s usually just two screws. Make sure the power is off!
- Secure the Socket: The kit will have rubber stoppers or adapters to ensure the socket fits snugly in the bottle opening.
- Finish it Off: Add a harp, a lampshade, and a bulb. You just made a custom lamp for a fraction of the retail price.
9. The Hanging Pendant Light
Use the same skills but instead of a lamp on a table, create a hanging pendant light. This is perfect for a kitchen island or a reading nook. You’ll need a pendant light kit instead of a standard lamp kit. These look incredible when hung in a cluster of three using different colored bottles.
10. The Bottle Tree
A classic garden art piece. This one requires no cutting or wiring. Collect a dozen or so colorful bottles (cobalt blue is a favorite). Find a dead tree or a sturdy post with multiple ‘branches’ (or make one from rebar). Simply slide the bottles over the ends of the branches. The sun shining through the colored glass is stunning. It’s a zero-cost, high-impact piece of outdoor art.
Conclusion
That pile of glass in your recycling bin is a goldmine of potential. We’ve walked through 10 ways to transform it from trash into chic, valuable decor. You’ve learned how to save hundreds of dollars on items you’d otherwise buy at a massive markup, and more importantly, you’ve learned how to create a legitimate stream of income from something you used to throw away.
This is the essence of being street-smart with your resources. It’s about seeing value where others see waste. It’s about creativity, sustainability, and hustle. So the next time you finish a bottle of wine, don’t just toss it. Look at its shape, its color, its potential. Grab your tools, get creative, and start turning your trash into treasure. The only limit is your imagination.