Gross Brushes? The 50-Cent DIY Cleaner That Melts Makeup Off
Let’s be real. You spent good money on that makeup palette and that foundation. But if you’re applying it with brushes that look like a modern art experiment gone wrong, you’re wasting product and, worse, messing with your skin. We’ve all been there: staring at a cup of crusty, caked-on brushes, knowing we should clean them, but dreading the task. And those fancy, brand-name brush cleaners? They can cost $15 to $20 a bottle for what is essentially… soap. That’s not a smart hustle. That’s a ripoff. Forget that noise. Today, we’re taking back control of our beauty budget with a ridiculously effective, 2-ingredient DIY cleaner that costs less than $0.50 to make. This isn’t just about cleaning; it’s about being smarter with your cash so you can spend it on what really matters. Get ready to melt away that gunk and bank the savings.
The Real Cost of Dirty Brushes (It’s Not Just About Germs)
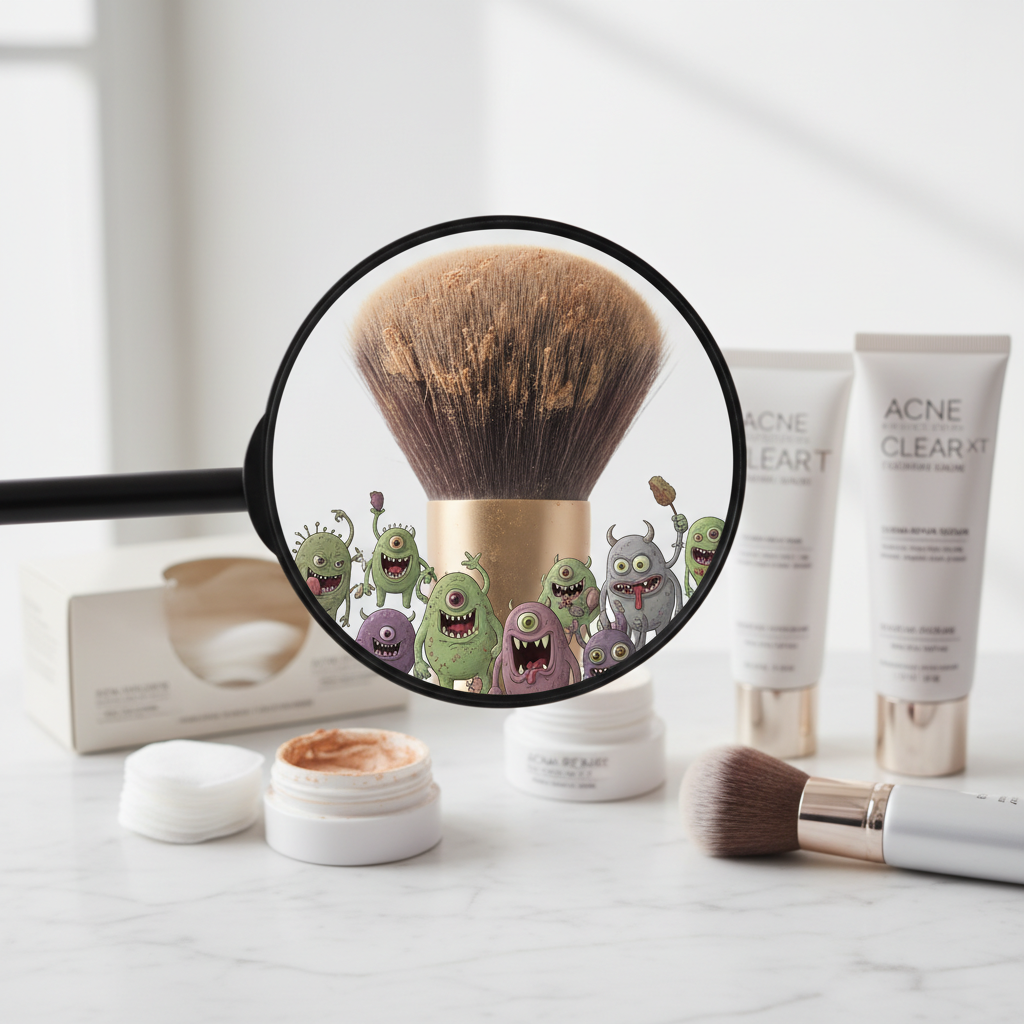
You think a dirty brush is just a little gross? Think again. It’s a silent budget killer and a saboteur of your entire look. Every time you dip that gunked-up brush into your expensive eyeshadow, you’re contaminating the whole pan with oils and old pigments, which can ruin the product over time. That’s money down the drain.
Then there’s the application. A dirty brush holds onto old colors, making your perfect beige look muddy. It can’t blend properly, leaving you with streaky foundation and patchy blush. You end up using more product to compensate, hitting pan way faster than you should. We’re talking about a cycle of waste that adds up.
And the biggest cost? Your skin. Dirty brushes are a five-star resort for bacteria, dead skin cells, and oil. Swirling that cocktail on your face every day is an open invitation for clogged pores, breakouts, and irritation. Suddenly, you’re spending money on acne treatments and concealers to fix a problem your brushes created. It’s time to break the cycle with a solution that costs pennies.
The 50-Cent Recipe: Your Arsenal Against Grime
Forget complicated formulas and expensive ingredients. This is the ultimate frugal hack, using stuff you probably already have in your kitchen. This two-part recipe is a game-changer because it tackles both oil-based and water-based makeup at the same time.
The Ingredients:
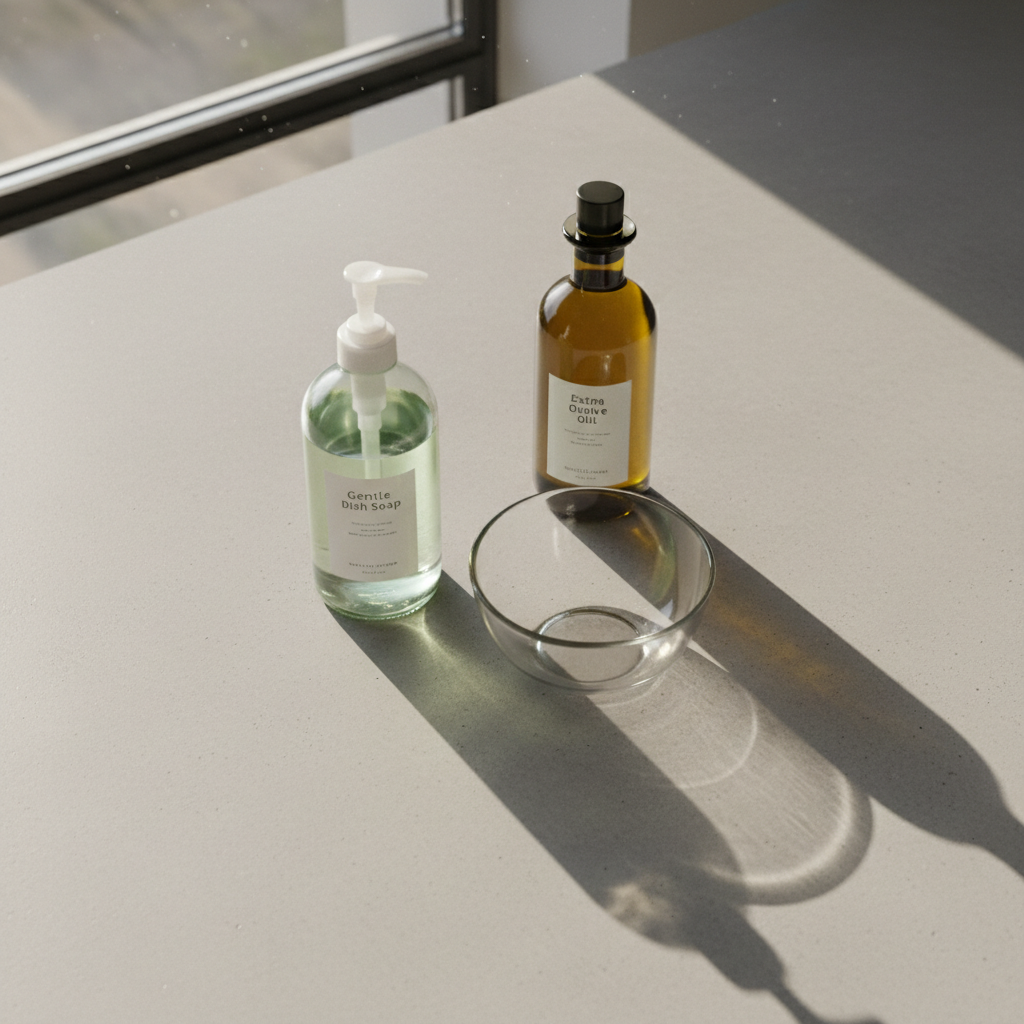
- Gentle Dish Soap: Any basic, gentle dish soap works. It’s designed to cut through grease and oil without harsh chemicals. This is your grime-buster.
- Olive Oil or Coconut Oil: This is the secret weapon. The oil helps break down and dissolve stubborn, waterproof, and long-wear makeup that soap alone can’t touch. It also conditions the bristles, keeping them soft.
The Golden Rule: Use a 2-to-1 ratio. Two parts dish soap to one part oil. That’s it. No need for exact measurements; just eyeball it. You’re cleaning brushes, not baking a cake.
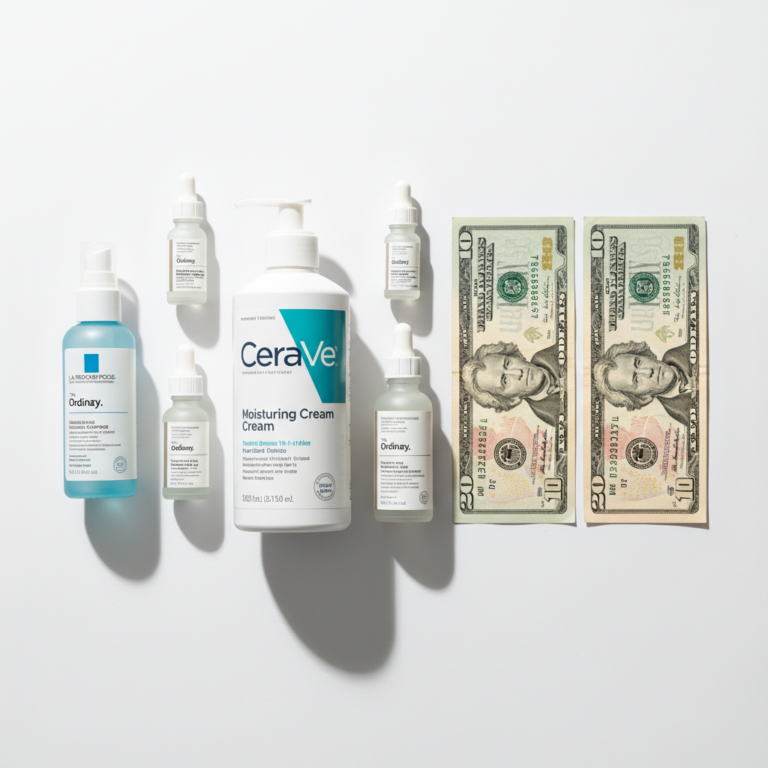
The Cost Breakdown: DIY vs. Store-Bought

Still not convinced? Let’s do the math. Numbers don’t lie, and the savings here are a no-brainer. We’re comparing the cost per ounce of our DIY solution against some popular brands. I’m using average prices for a standard bottle of dish soap (28 oz for $3.00) and a bottle of olive oil (16 oz for $5.00).
| Cleaner Type | Price per Bottle | Size (Ounces) | Price per Ounce |
|---|---|---|---|
| DIY Cleaner | ~$0.15 (for one cleaning) | N/A | ~$0.07 |
| Cinema Secrets Pro Cleaner | $24.00 | 8 oz | $3.00 |
| IT Cosmetics Brush Bath | $20.00 | 6.4 oz | $3.12 |
| Ecotools Makeup Brush Shampoo | $7.99 | 6 oz | $1.33 |
The verdict is crystal clear. You could clean your brushes hundreds of times for the price of one bottle of the fancy stuff. Saving over $2.00 per ounce is a massive win. Over a year, that’s easily $50-$100 back in your pocket, depending on how often you buy cleaners. That’s a new palette, a fancy dinner, or a boost to your savings account—all from a simple kitchen hack.
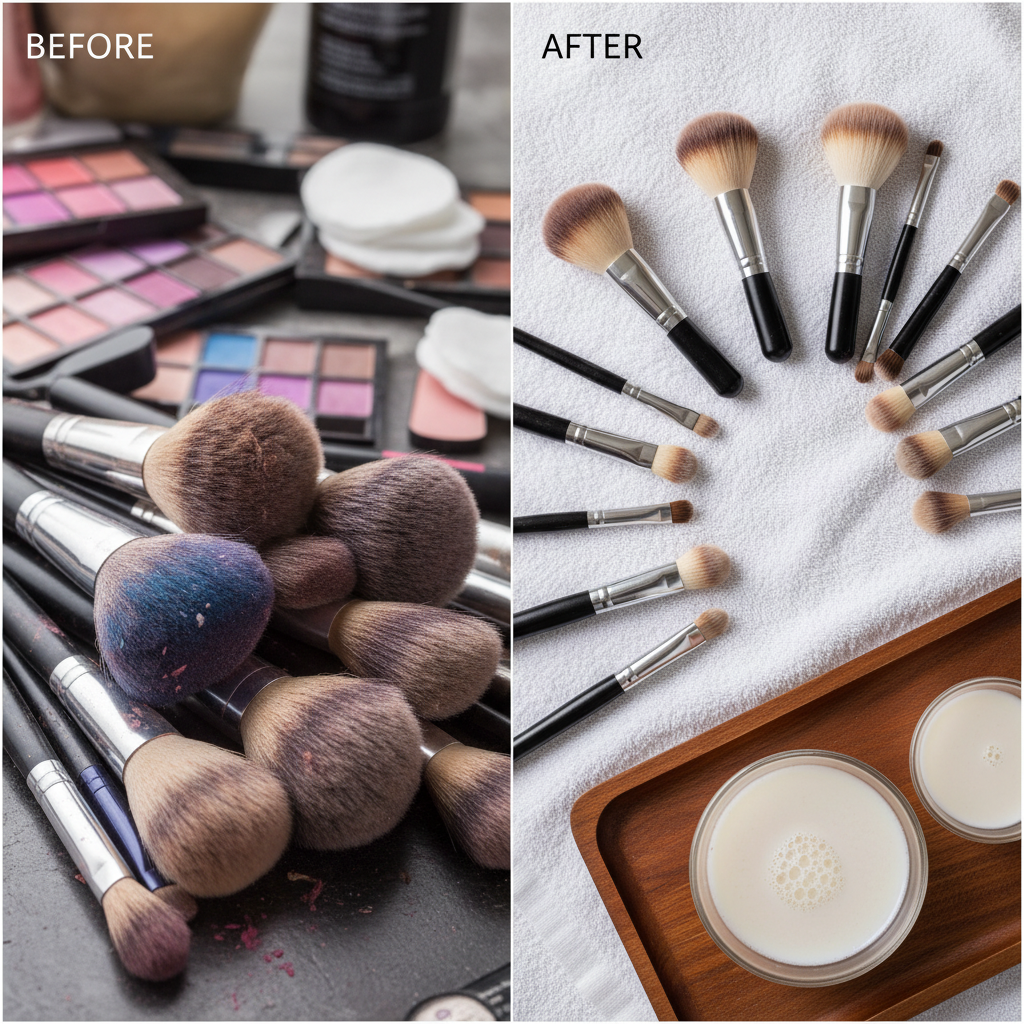
The Deep Clean Method: Step-by-Step to Pristine Bristles
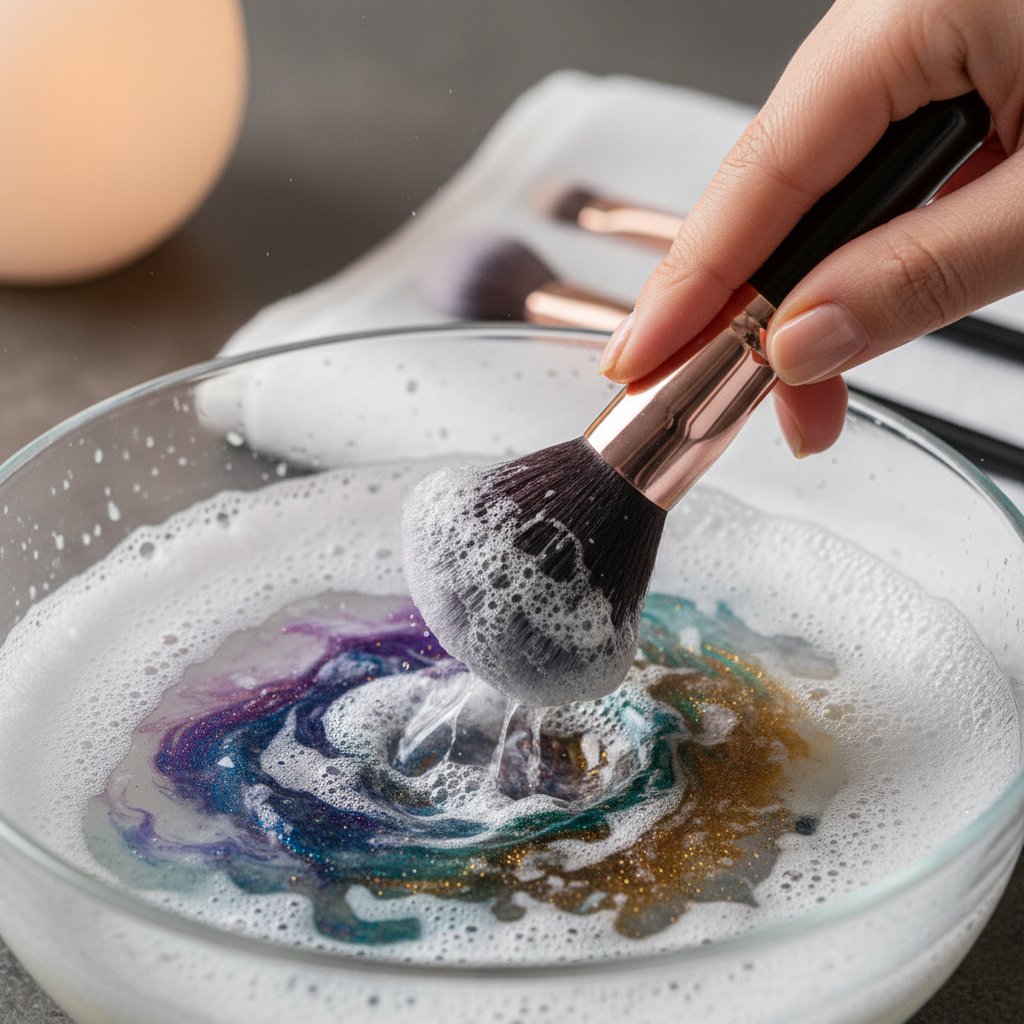
Alright, it’s time to get to work. This whole process takes less than 10 minutes. Put on a podcast and let’s get those brushes looking brand new.
- Mix Your Potion: Pour a small amount of your dish soap onto a clean plate or into a shallow bowl. Add about half that amount of your chosen oil right next to it. Don’t mix them together just yet.
- The First Pass (Oil): Take your dry, dirty brush and swirl the bristles into the oil first. You’ll see the foundation and concealer literally start to melt off. The oil breaks down those stubborn, caked-on products.
- The Second Pass (Soap): Now, swirl the same brush into the dish soap. This will emulsify the oil and soap, lifting all the gunk and pigment out of the bristles.
- Lather Up: Add a little lukewarm water to your palm or a silicone brush-cleaning mat. Gently swirl the brush to work up a lather. You’ll see the water turn murky with old makeup—it’s disgusting but incredibly satisfying. Never use hot water, as it can loosen the glue holding the bristles in place.
- Rinse Thoroughly: Rinse the brush under lukewarm running water, bristles pointing down. This is critical—pointing them up allows water to seep into the ferrule (the metal part), which will destroy your brush over time. Keep rinsing until the water runs completely clear.
- Squeeze and Reshape: Gently squeeze the excess water out of the bristles with your fingers, then reshape the brush head back to its original form.
- Dry Smart: Lay the brushes flat on a clean towel with the bristles hanging over the edge of the counter. This allows for 360-degree air circulation and prevents mildew. Never stand them up to dry in a cup!
Pro-Level Hacks to Keep Your Brushes Fresher, Longer
You’ve mastered the deep clean. Now let’s talk about making that clean last and extending the life of your tools. A little maintenance goes a long way.
Weekly Spot Cleaning
You don’t need to do a deep clean every single time. For a quick refresh between uses, especially for eyeshadow brushes, you can use a color-switching sponge. It’s a dry, coarse sponge in a tin that instantly removes powder pigment so you can switch from a dark color to a light one without muddying your look. Or, a quick spritz of rubbing alcohol on a paper towel and a gentle swirl of the brush works wonders to sanitize in a pinch.
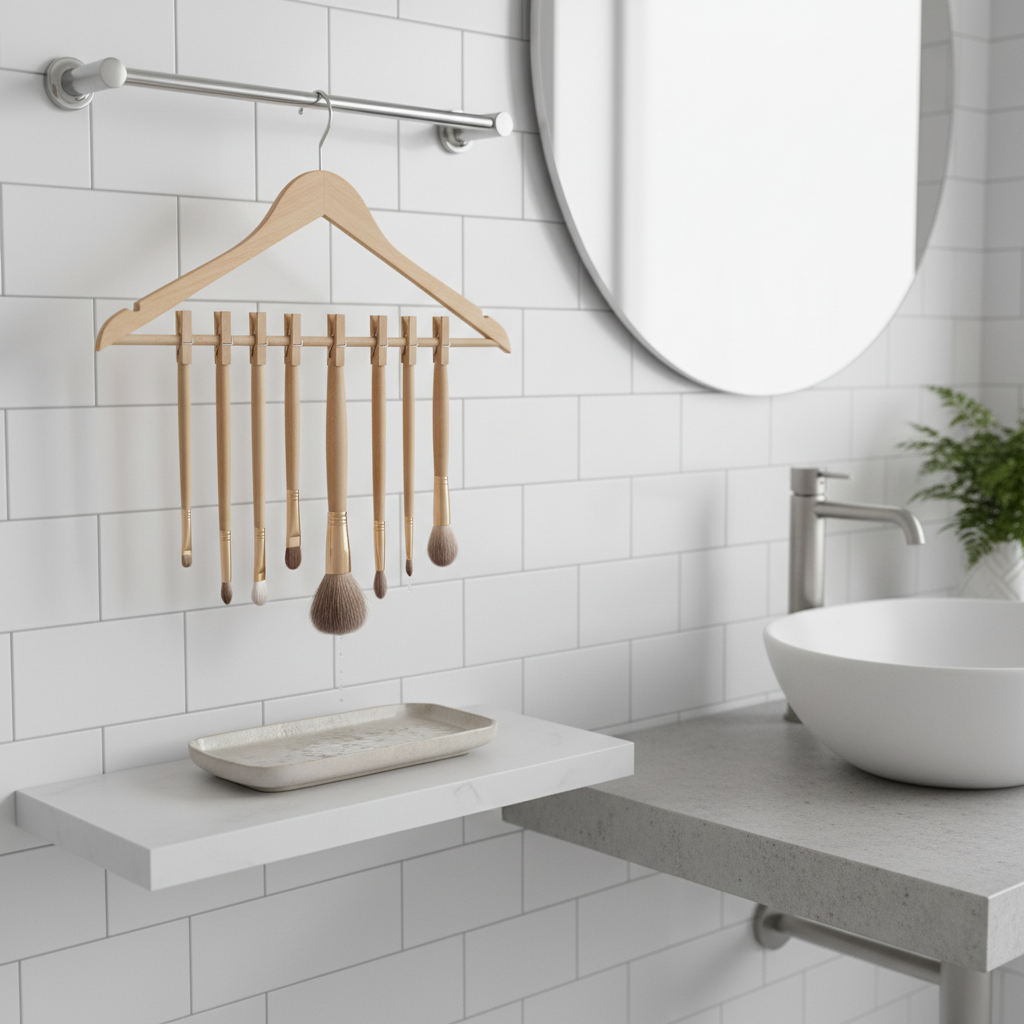
The ‘Hang Dry’ Method
To really level up your drying game, don’t just lay your brushes flat. Use hair ties or rubber bands to hang them upside down from a towel rack or a hanger. This is the absolute best way to ensure no water gets into the ferrule and that they dry perfectly in shape. There are fancy brush-drying racks you can buy, but this DIY method is free and just as effective.
Know Your Frequency
- Foundation & Concealer Brushes: These are used with liquid products and touch your skin daily. Clean them once a week, no excuses.
- Eyeshadow & Powder Brushes: These are less critical but should still be cleaned every 1-2 weeks.
- Sponges: A makeup sponge should be cleaned after every single use. They are porous and a prime breeding ground for bacteria.
Conclusion
There you have it. You’re now armed with a powerful, money-saving hack that puts you in control. No more shelling out $20 for fancy ‘brush shampoo.’ No more breakouts from dirty tools. And no more streaky makeup application. For the price of loose change, you’ve unlocked better skin, better makeup performance, and a fatter wallet. This is what being street-smart is all about: identifying a problem, ignoring the expensive marketing hype, and finding a simple, effective solution with what you already have. Now go clean those brushes and enjoy the satisfaction of a hustle well done.