5 Luxury Headboard Ideas You Can Build This Weekend for Under $50
Let’s get real for a second. You scroll through Pinterest, you see those gorgeous, hotel-worthy bedrooms, and you zero in on the headboard. It’s plush, it’s massive, it’s the statement piece that pulls the whole room together. Then you click the link. $800. $1,200. For a board with some fabric on it. That’s not just expensive; it’s a ripoff. That’s rent money. That’s a whole month of groceries. The home decor industry wants you to think that a luxury look costs luxury prices. We’re here to call BS on that.
Your space is your sanctuary, and you deserve to have it look and feel amazing without draining your bank account. This isn’t about settling for less. This is about being smarter. It’s about taking control and building the style you want with your own two hands. We’re talking five knockout, high-end headboard designs that look like they came from a fancy catalog but cost less than $50 to make. Forget waiting for a sale or going into debt for decor. This weekend, you’re becoming the designer, the builder, and the boss of your own bedroom makeover.
Your Under-$50 Arsenal: Tools & Materials You Actually Need
Before we dive into the projects, let’s talk gear. Don’t get intimidated by a tool list. This isn’t a master carpenter’s workshop; it’s the smart hustler’s toolkit. Most of this stuff you might already have collecting dust in a closet, or you can borrow it from a neighbor. The key is to source smart and spend practically nothing.
The Core Toolkit (Beg, Borrow, or Buy Cheap)
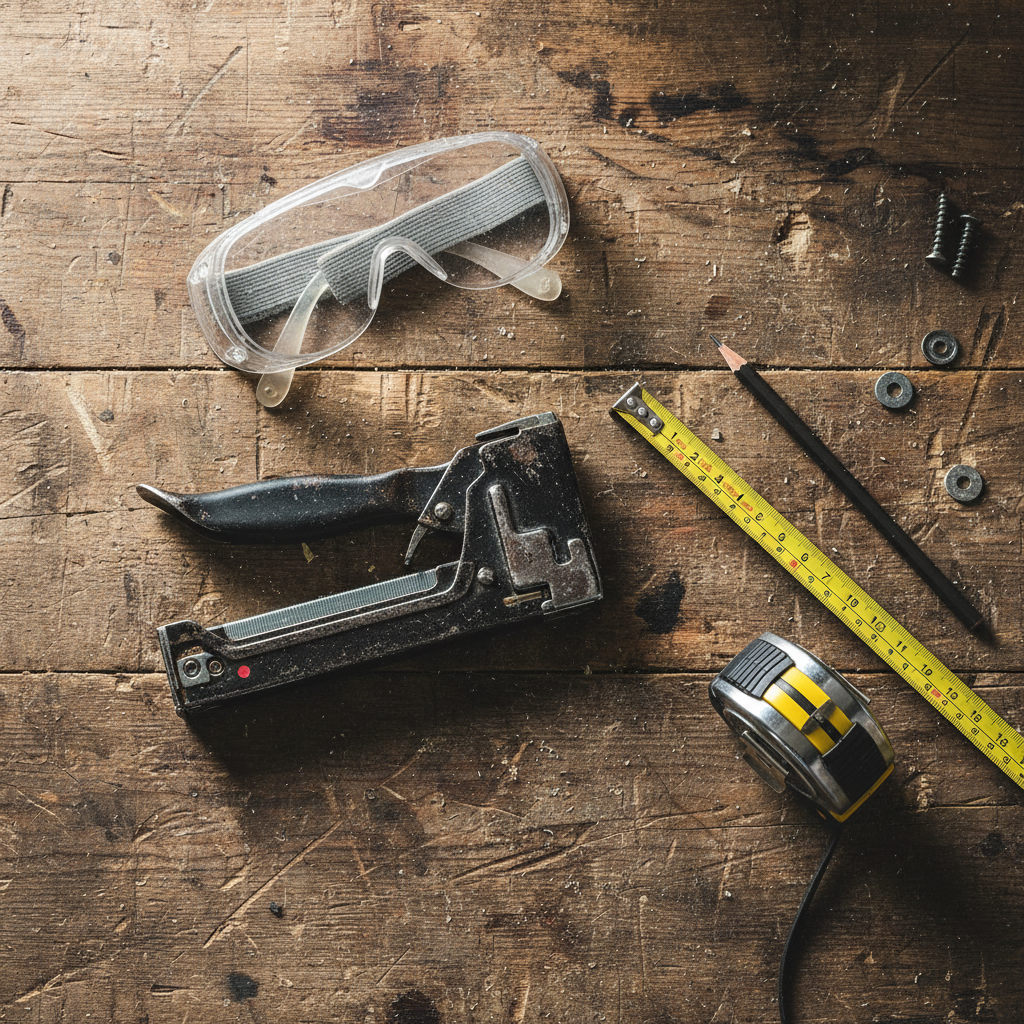
- Power Drill: This is your best friend for a few of these projects. A basic cordless one is all you need.
- Staple Gun: A heavy-duty manual staple gun is a must-have for any upholstery project. Get one. It’s cheap and you’ll use it forever.
- Measuring Tape & Level: Don’t eyeball it. Precision is what makes a DIY project look pro.
- Scissors or a Rotary Cutter: For cutting fabric cleanly. A rotary cutter and mat are great, but sharp scissors work just fine.
- Safety Goggles: Non-negotiable. Protect your eyes.
The Material Hustle: Where to Get Your Supplies for Less
The secret to keeping these projects under $50 is all in the sourcing. Think like a frugal hacker.
- Wood: Check the ‘cull lumber’ section at big box hardware stores like Home Depot or Lowe’s. It’s the slightly imperfect wood they sell for up to 70% off. For reclaimed wood, look at Facebook Marketplace for free pallets (make sure you know how to identify heat-treated ‘HT’ pallets, not chemical-treated ‘MB’ ones) or old fence posts.
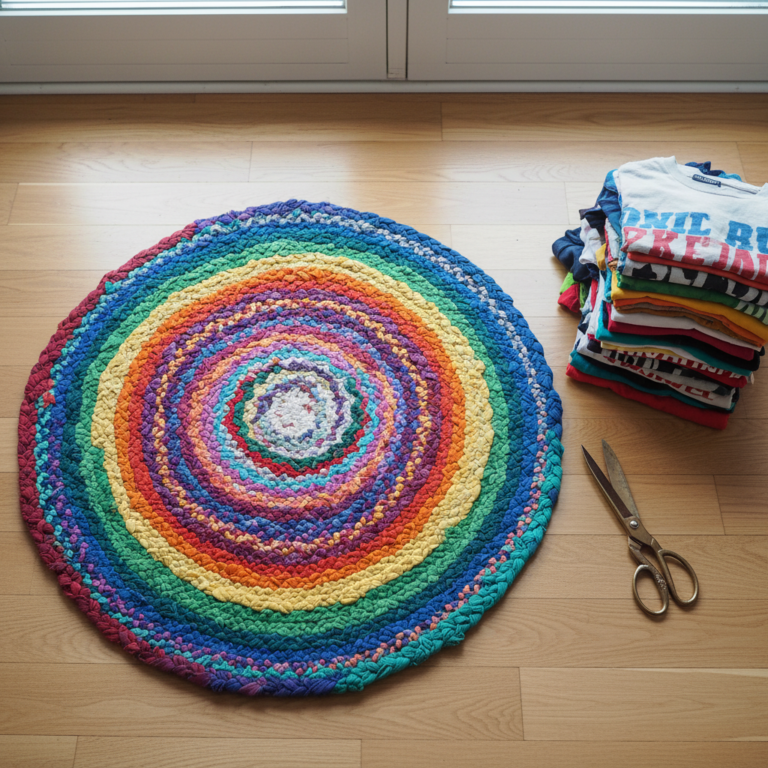
- Fabric: This is where you can score big. Hit up thrift stores for old curtains, tablecloths, or even large clothing items with great patterns. The remnant bin at fabric stores is another goldmine for heavily discounted, smaller pieces of high-end material.
- Padding/Foam: The most expensive part of an upholstered headboard. Hack it. Use an old foam mattress topper (ask around, people give these away!), layered blankets, or even cheap egg crate foam.
- Paint: Always check the ‘oops paint’ section at hardware stores. These are custom-mixed colors that customers returned, and they sell for a few bucks a can. You might find the perfect shade for a fraction of the price.
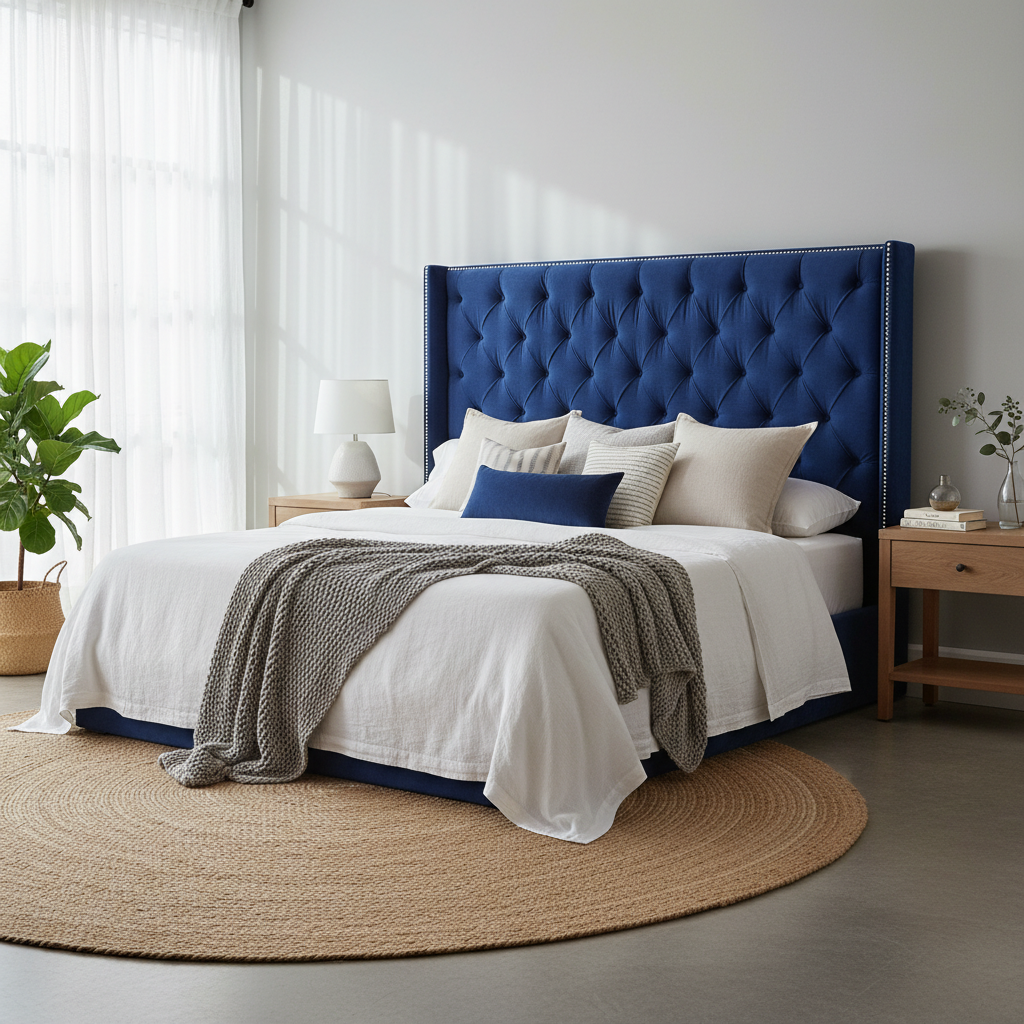
Project 1: The Classic Upholstered Headboard (Looks Like a Million Bucks)
This is the champ. The one that instantly makes any bedroom feel more expensive. It’s soft, it’s luxe, and it’s shockingly straightforward to build. You see these in boutique hotels and high-end catalogs for a fortune, but you’re about to build it for the cost of a few pizzas.
Step-by-Step Breakdown:
- Get Your Board: Start with a piece of thin plywood or OSB. Have the hardware store cut it to the width of your bed and your desired height (a good rule of thumb is 24-30 inches tall).
- Layer Up: Lay your board on the floor. Place your padding on top. This could be 2-inch upholstery foam, a folded-up old comforter, or a foam mattress topper. Trim it to the size of the board using a serrated knife or sharp scissors.
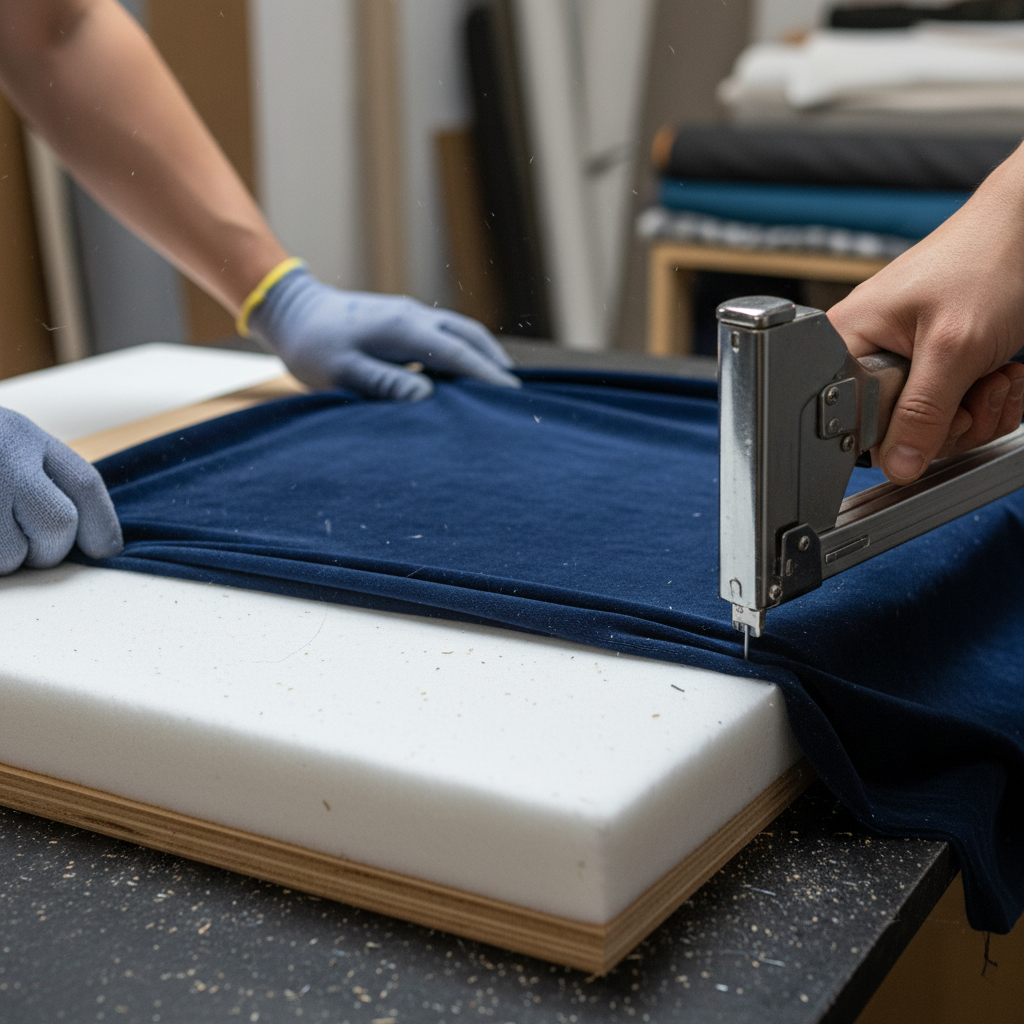
- Drape the Fabric: Lay your chosen fabric over the padding, ensuring it’s smooth and centered. Make sure you have at least 4-6 inches of extra fabric hanging over all sides of the board.
- The Staple Game: This is the crucial part. Start in the center of one of the long sides. Pull the fabric taut (but not so tight it warps the foam) around to the back of the board and fire one staple. Move to the opposite side, pull taut, and fire another staple. Do the same for the top and bottom centers. This anchors your fabric.
- Work Your Way Out: Continue stapling from the center towards the corners on all four sides, placing a staple every 2-3 inches. Keep pulling the fabric consistently tight as you go.
- Corner Like a Pro: Corners are like wrapping a present. Fold the fabric neatly and tightly. It might take a few tries to get a clean fold. Use plenty of staples to secure the corner folds on the back.
- Mount It: The easiest way to mount it is with a French cleat hanger, which you can buy as a kit for about $10. It ensures the headboard is secure and perfectly flush against the wall.
Cost Breakdown: DIY vs. Store-Bought
| Item | DIY Cost | Typical Store-Bought Price (Queen) |
|---|---|---|
| Plywood/OSB Board | $15 | $400 – $900+ |
| Foam Padding (Hacked) | $10 – $20 | |
| Fabric (Remnant/Thrifted) | $10 | |
| Staples & Hardware | $5 | |
| TOTAL | ~$40 |
Project 2: The Rustic Reclaimed Wood Headboard (Farmhouse Chic on a Dime)
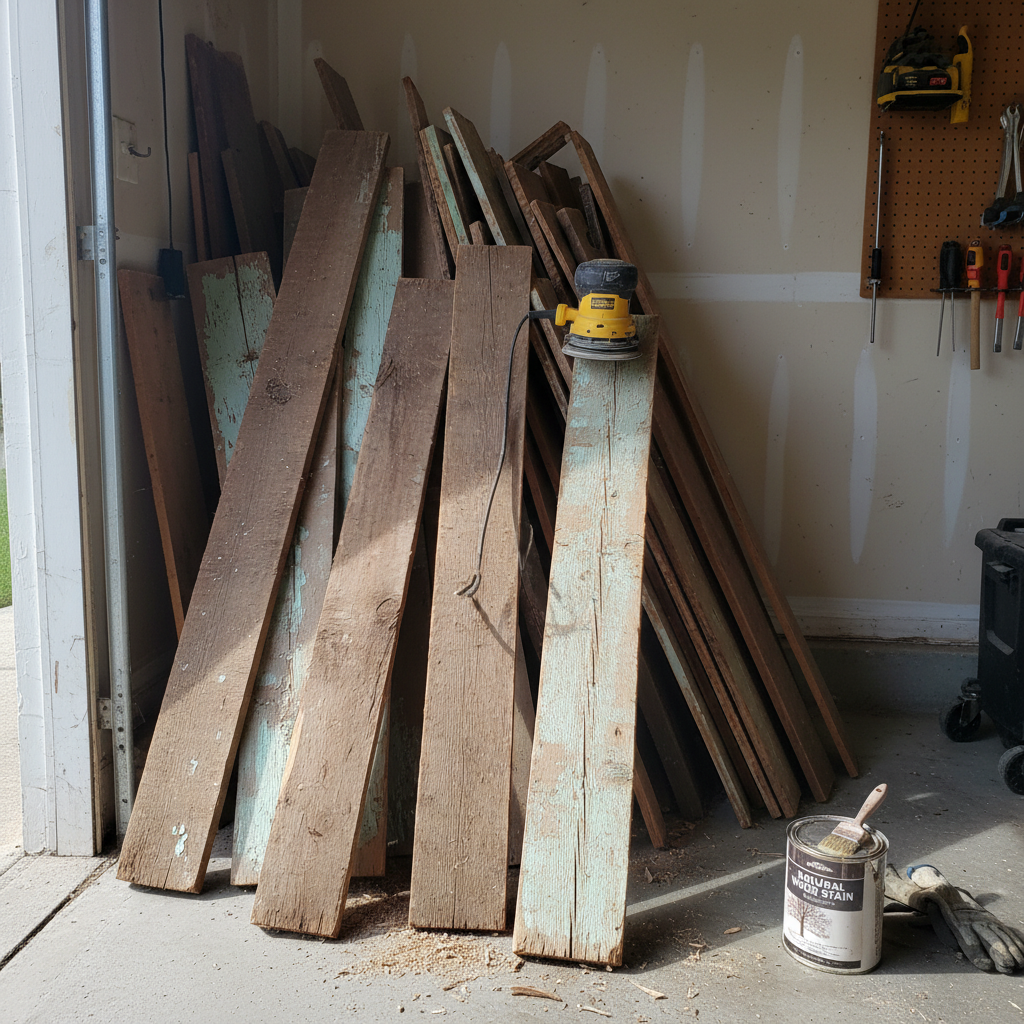
If you’re chasing that warm, rustic, modern farmhouse vibe, this is your project. It adds incredible texture and character to a room, and the best part is, the main material can be free. All it takes is a little bit of hunting and some elbow grease.
Scam Warning: Be smart about free pallets. Only use pallets stamped with “HT,” which means they were heat-treated, not chemically treated. Avoid any stamped with “MB” (Methyl Bromide), as those chemicals are toxic and have no place in your bedroom. Also, avoid any pallets that look stained from spills.
Step-by-Step Breakdown:
- Source & Prep Your Wood: Find your reclaimed wood—pallets, old fencing, or construction site scraps. Pry the boards apart carefully to avoid splitting. Scrub them down with soap and water and let them dry completely.
- Sand Everything: This is a must. You want a smooth, splinter-free finish. Use an orbital sander with medium-grit sandpaper (around 120) to smooth all surfaces, paying extra attention to the edges.
- Create the Backing: Cut two or three vertical support boards (1x3s work well) to your desired headboard height. Lay them on the floor.
- Assemble the Design: Arrange your sanded reclaimed boards horizontally across the vertical supports. Mix and match tones and textures for a more authentic look. Stagger the seams to create a random, natural pattern.
- Secure the Boards: Once you’re happy with the layout, attach each horizontal board to the vertical supports using wood glue and a couple of screws or nails per junction point.
- Finish or Seal: You can leave the wood raw for a natural look, apply a stain to even out the color, or use a matte polyurethane to seal it and make it easier to dust.
- Mount to the Wall: You can screw the vertical support beams directly into the wall studs for the most secure fit, or use heavy-duty D-ring hangers.
Project 3: The Painted ‘Faux’ Headboard (The Ultimate Budget Hack)
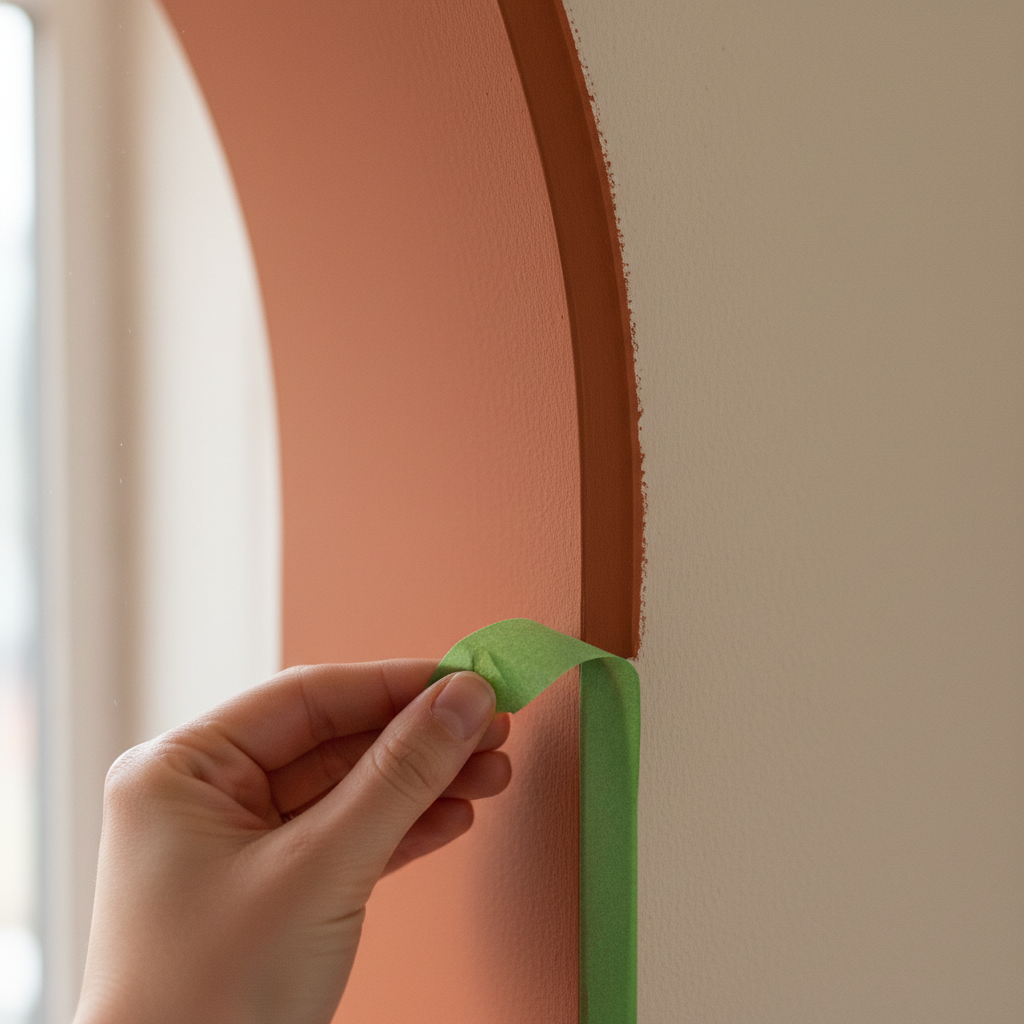
Okay, for the ultimate frugal hacker, it doesn’t get cheaper or easier than this. We’re talking maximum impact for minimum cost. A painted headboard creates a powerful architectural illusion with just a sample pot of paint and some tape. It’s perfect for small spaces, minimalist aesthetics, or anyone who just doesn’t want to build a thing.
Step-by-Step Breakdown:
- Design & Measure: Decide on your shape. A simple rectangle is classic. A half-circle or arch shape is super trendy and adds a soft, organic feel. Use a pencil and a level to lightly trace your desired shape on the wall behind your bed. For a perfect arch, tie a string to a pencil, tack the other end to the center point on the wall, and use it like a compass.
- Tape It Off: This is the most important step for a professional look. Use high-quality painter’s tape (like FrogTape) and press the edges down firmly to prevent bleeding. Take your time with this, especially on curves.
- Prime If Needed: If you’re painting a light color over a dark wall, a quick coat of primer will make your life much easier and your color truer.
- Get Painting: Using a small roller for the main area and a brush for cutting in near the tape, apply your paint. A small sample pot is often more than enough for a project this size, costing only $3-$5.
- The Second Coat: Let the first coat dry completely, then apply a second for a rich, even finish.
- The Big Reveal: Here’s the secret: pull the painter’s tape off while the second coat is still slightly wet. Pull it away from the painted area at a 45-degree angle. This gives you the crispest, cleanest line possible. Let it dry, push your bed back, and admire your work.
Style Ideas:
- Bold Color Block: Use a deep jewel tone like emerald green or navy blue for a dramatic, moody vibe.
- Earthy Arch: A warm terracotta or greige arch creates a calming, bohemian focal point.
- Two-Tone: Tape off a simple rectangle and paint it a few shades darker than your wall color for a subtle, sophisticated look.
Project 4: The Minimalist Plywood Pegboard (Functional & Modern)

This one is for the pragmatists, the minimalists, and anyone living in a small space. A plywood pegboard headboard isn’t just a headboard; it’s a vertical storage system. It looks clean, modern, and has that cool, Scandinavian workshop vibe. Plus, it’s endlessly customizable.
Step-by-Step Breakdown:
- Get the Plywood: Buy a sheet of quality plywood (birch is a great option for a smooth finish). Have it cut at the hardware store to the width of your bed and desired height.
- Sand it Smooth: Even good plywood needs sanding. Use fine-grit sandpaper (220-grit) to get all surfaces and edges silky smooth. Wipe away all the dust with a tack cloth or damp rag.
- Create Your Grid: This requires precision. Use a measuring tape and a straight edge to mark out a grid for your peg holes. A 6-inch by 6-inch grid is a good standard. Use a pencil to mark an ‘X’ at each intersection.
- Drill the Holes: Pick a drill bit that matches the diameter of the wooden dowels you’ll be using for pegs (e.g., a 1-inch Forstner bit for a 1-inch dowel). For perfectly straight holes, a drill press is ideal, but you can do it with a hand drill if you’re careful. Use a piece of tape on your drill bit to mark the depth so you don’t drill all the way through. Drill a hole at each ‘X’ you marked.
- Sand Again: Lightly sand the front and back of the board again to clean up any splintering around the drilled holes.
- Seal It (Optional but Recommended): Apply a coat or two of clear matte polyurethane to protect the wood and make it easy to clean.
- Mount and Customize: Mount the pegboard to the wall using a French cleat or by screwing it directly into wall studs. Cut your wooden dowels into 6-inch lengths for pegs. Add small wooden shelves, hang lights, or clip on reading lamps. The possibilities are endless.
Project 5: The Boho Fabric Hanging (Zero Power Tools Needed)
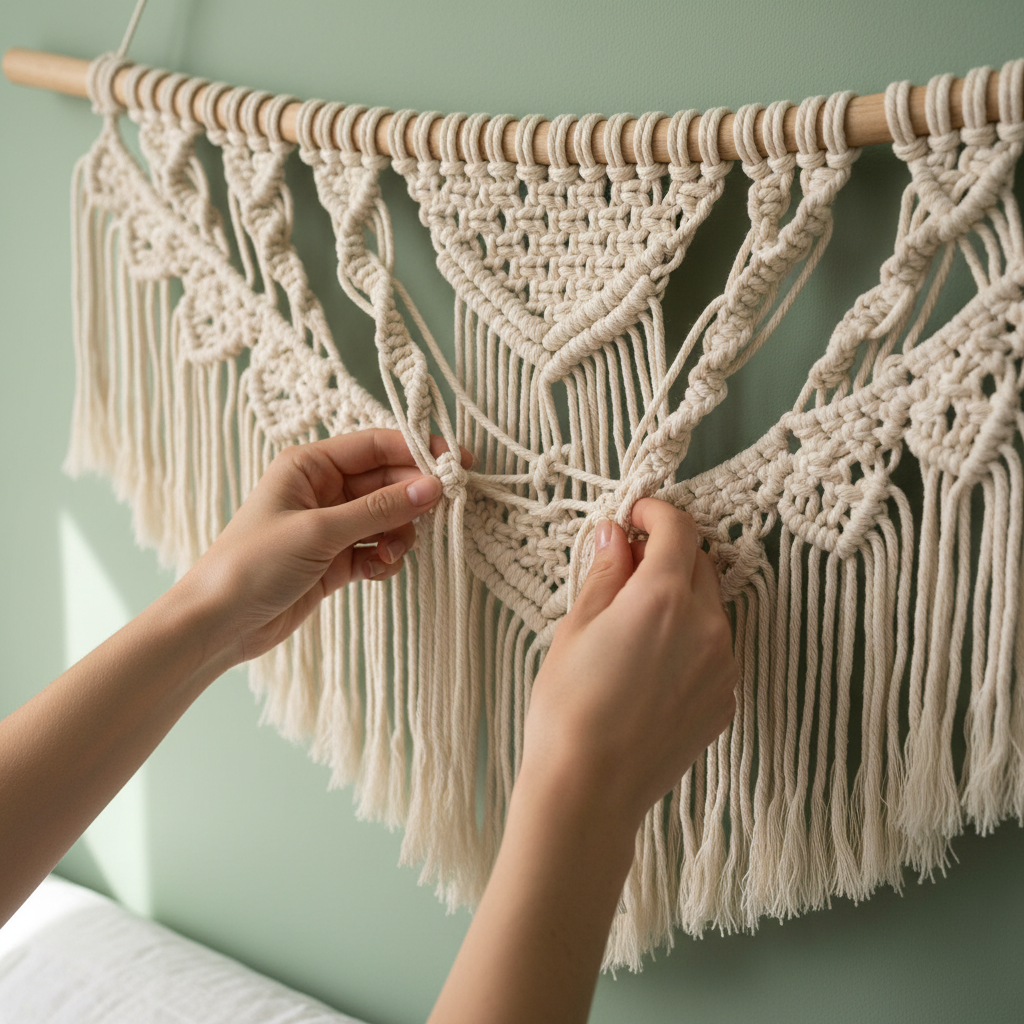
Want a huge dose of texture, pattern, and personality with almost zero effort? This is your move. It’s less of a ‘build’ and more of an ‘assembly.’ If you can hang a curtain, you can do this. It’s the perfect solution for renters or anyone who wants a dramatic change without commitment.
Step-by-Step Breakdown:
- Find Your Centerpiece: The hunt is half the fun. You’re looking for a large piece of fabric with great texture or pattern. Think outside the box:
- A vintage rug or runner (make sure it’s clean!)
- A macrame wall hanging
- A beautiful shower curtain (yes, really – they’re cheap and come in amazing designs)
- A lightweight blanket or throw
- A fabric wall tapestry
- Get Your Hardware: All you need is a simple curtain rod or a wooden dowel that’s slightly wider than your chosen fabric. You’ll also need the corresponding brackets to mount it to the wall. A simple black metal or wooden dowel rod keeps the look clean and lets the fabric be the star.
- Prep the Fabric: If your fabric doesn’t already have a rod pocket, you have a few options. You can fold over the top edge and use iron-on hem tape to create a no-sew pocket. Or, for a more rustic look, you can buy curtain clips that clamp onto the fabric and have rings that slide onto the rod.
- Hang It Up: Install the curtain rod brackets on the wall above your bed, using a level to make sure they’re straight. Slide your fabric onto the rod, place the rod in the brackets, and you’re done. Seriously. It’s that easy.
Sourcing Hotspots:
- Thrift Stores: The absolute best place for vintage textiles, curtains, and blankets.
- Discount Stores: Think HomeGoods, TJ Maxx, or Marshalls for discounted rugs and throws.
- Online Marketplaces: Society6 and Etsy are great for unique tapestries, but for a budget version, check out Amazon or even Shein for surprisingly stylish and cheap options.
Conclusion
There you have it. Five different paths to a bedroom that feels intentional, stylish, and expensive—all for less than the cost of a night out. You don’t need a huge budget or a workshop full of fancy tools to create a space you love. What you need is a little creativity and the confidence to just go for it. You’ve seen the cost breakdowns, you’ve got the step-by-step plans. The only thing left to do is pick the style that screams ‘you’ and dedicate a few hours this weekend. Stop pinning and start doing. Your dream bedroom is waiting, and you have the power, and the plan, to build it yourself. Go get it done.