Lower Energy Bills: DIY No-Sew Blackout Curtains for Beginners
Listen up. Your windows are probably robbing you blind. In the summer, they’re letting the scorching sun bake your place, forcing your AC to work overtime. In the winter, they’re leaking precious heat, sending your heating bill through the roof. It’s a constant battle, and you’re paying for it every single month. But what if you could fight back with nothing more than some fabric, an iron, and a little bit of hustle? Forget spending hundreds on custom drapes or flimsy store-bought options. We’re talking about a ridiculously easy, no-sew DIY project that puts you in control. This isn’t just about making curtains; it’s about making a smart financial move. It’s about insulating your home, slashing your energy costs, and keeping that money where it belongs: in your pocket. This guide is your step-by-step playbook for creating effective, stylish blackout curtains, even if you’ve never touched a craft project in your life.
The Real Deal: Why Your Windows Are Money Pits
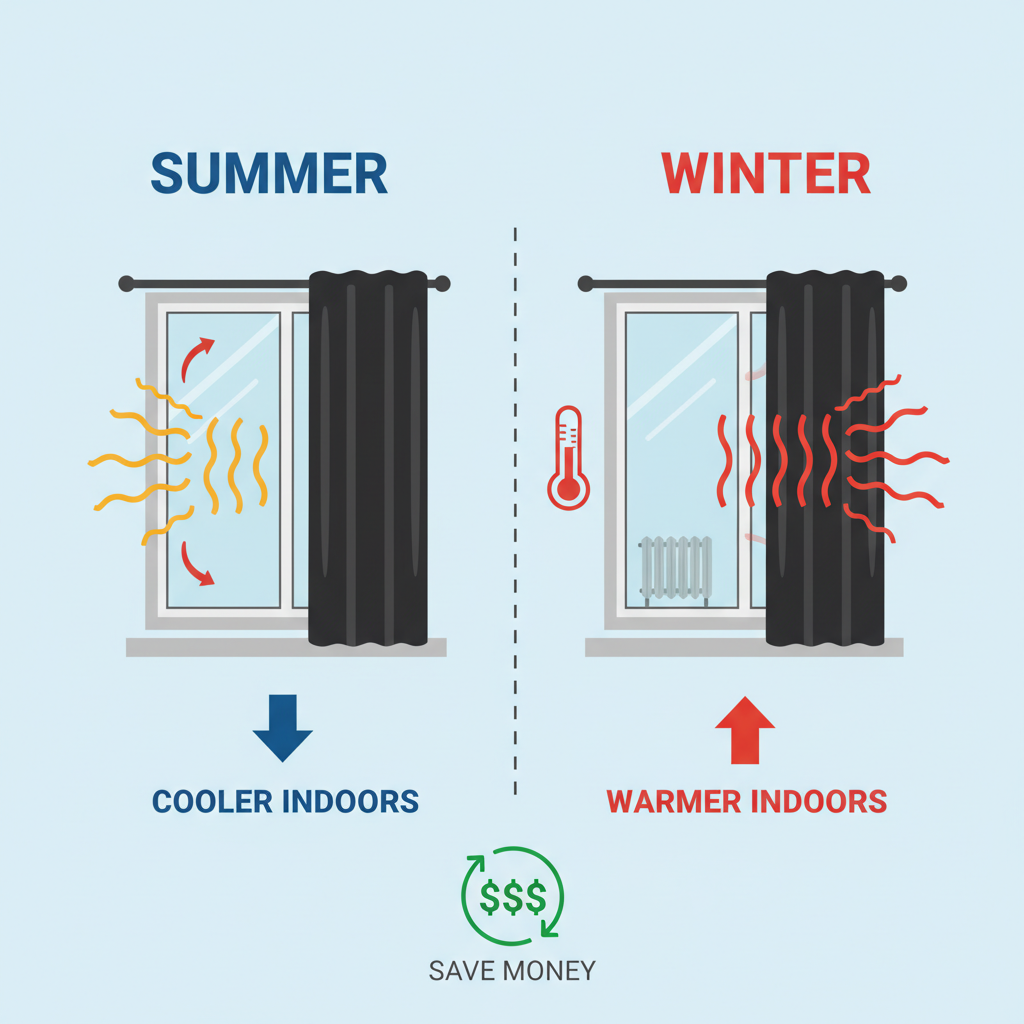
Let’s get straight to it. Uncovered windows are like open doors for energy transfer. The U.S. Department of Energy estimates that around 30% of a home’s heating energy is lost through windows, and a staggering 76% of sunlight that falls on standard double-pane windows enters to become heat. Think about that. You’re paying to cool air that’s immediately being heated up by the sun, or paying to heat air that’s seeping out into the cold. It’s a losing game.
Blackout curtains are your secret weapon. They’re not just for blocking light so you can sleep in. A good blackout curtain creates a thermal barrier. The dense, layered fabric acts as an insulator, reflecting solar heat away from your home in the summer and trapping your heated air inside during the winter. This isn’t just a minor improvement; it’s a strategic defense against energy waste. Taking an afternoon to complete this project isn’t just a ‘nice to have’—it’s an investment that pays you back every single month on your utility bills. It’s about shifting from being a passive bill-payer to an active money-saver.
Your Arsenal: Gearing Up Without Going Broke
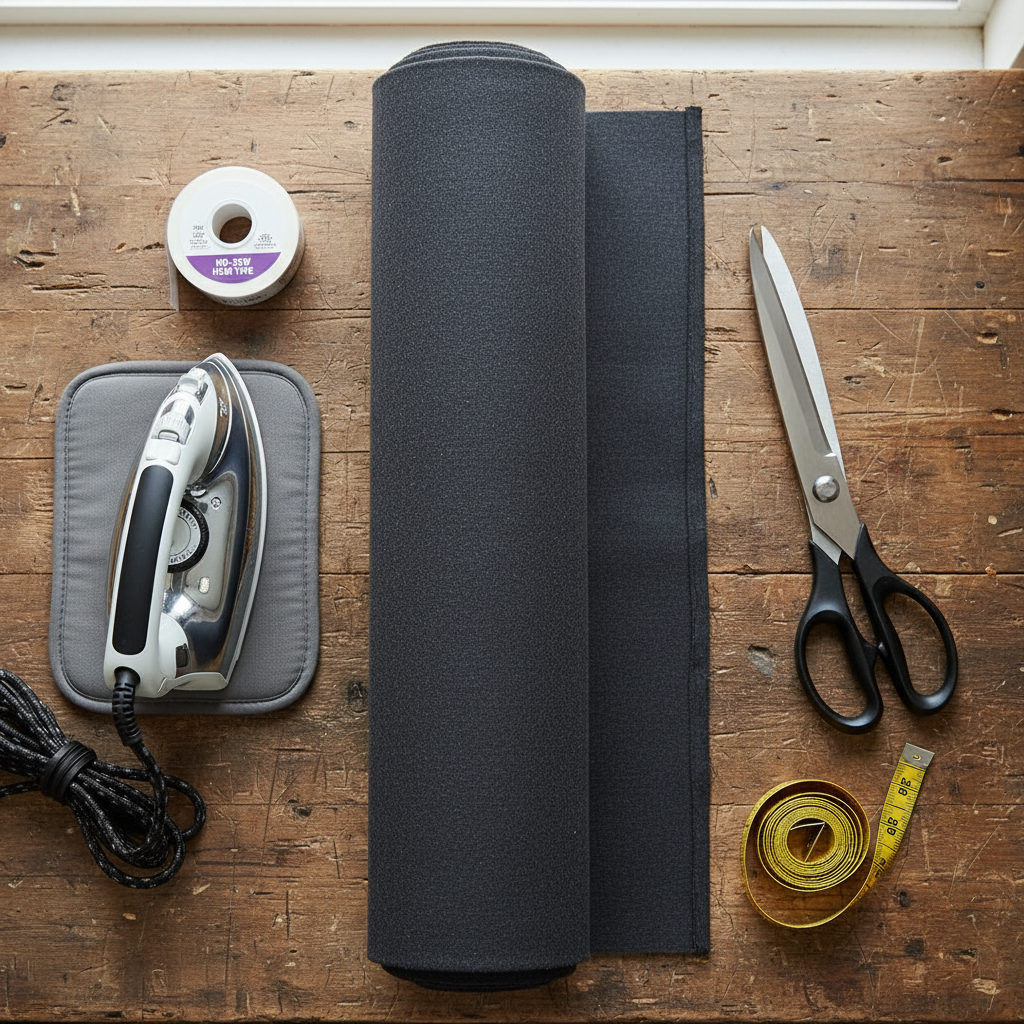
Before you get started, you need to assemble your tools. But we’re not about spending a fortune to save a fortune. Here’s the lean and mean list of what you need, plus some street-smart tips for sourcing it on the cheap.
The Must-Haves:
- Blackout Fabric: This is the workhorse. Look for ‘3-pass’ or ‘4-pass’ lining for the best thermal and light-blocking properties.
- Decorative Fabric (Optional): If you want your curtains to have a specific color or pattern facing the room, grab a second fabric of your choice.
- Fusible Bonding Web: This is the magic. Brands like Heat’n Bond or Stitch Witchery are your no-sew best friends. Get the heavy-duty version.
- Sharp Fabric Scissors: Don’t try this with your kitchen shears. A good pair of scissors makes all the difference.
- Measuring Tape: The golden rule applies: measure twice, cut once.
- An Iron and Ironing Board: Your heat tool for activating the fusible web.
- Curtain Rod & Curtain Ring Clips: The easiest way to hang your new curtains without sewing a rod pocket.
Frugal Sourcing Secrets:
Don’t just walk into a fabric store and pay full price. That’s amateur hour. Check the remnant bin first—you can often find high-quality blackout fabric for up to 75% off if you only need enough for one or two windows. For your decorative layer, think outside the box. Flat bed sheets from a thrift store or clearance aisle can make for amazing and cheap curtain fabric. Always check for online coupons for big-box craft stores like Jo-Ann or Michael’s before you even leave the house. A 20% off coupon can make a big dent in your total cost.
The Bottom Line: DIY vs. Store-Bought Smackdown

Okay, let’s talk numbers. Is this project actually worth your time? Seeing the raw data will make you a believer. We priced out the materials for one standard window (approx. 40″ x 60″) versus buying a comparable pre-made thermal blackout curtain from a popular big-box store. The results speak for themselves.
| Item | DIY Project Cost (Estimated) | Store-Bought Cost (Mid-Range) |
|---|---|---|
| Blackout Fabric (2.5 yards @ $8/yd) | $20.00 | Single Panel: $45.00 Total for Two: $90.00 |
| Fusible Bonding Web | $5.00 | |
| Curtain Ring Clips (14-pack) | $10.00 | |
| Optional: Decorative Fabric (2.5 yards @ $6/yd) | $15.00 | |
| TOTAL (Without Decorative Fabric) | $35.00 | $90.00 |
| TOTAL (With Decorative Fabric) | $50.00 | $90.00 |
| IMMEDIATE SAVINGS | $40 – $55 | $0 |
As you can see, you’re saving at least $40 per window right out of the gate, and that’s not even counting the long-term energy savings. If you have 4 windows to cover, you’re looking at an instant savings of $160-$220. That’s a car payment, a big grocery haul, or a serious boost to your savings account, all for an afternoon’s work.
The Step-by-Step Hustle: Your No-Sew Curtain Blueprint
Ready to build your money-saving machine? Here’s the simple, no-fluff guide to getting it done. No confusing jargon, no complicated techniques. Just follow the plan.
- Measure Everything: First, measure the width and height of your window frame. For width, add 4-6 inches on each side so the curtain fully covers the window and blocks side light. For height, decide where your rod will go (usually 4-6 inches above the frame) and measure down to where you want the curtain to end (usually just below the sill or to the floor). Write these final dimensions down.
- Cut Your Fabric: Lay your blackout fabric flat. Add 4 inches to your final height measurement and 4 inches to your final width measurement. This extra fabric is for your hems. For example, if your final dimension is 48″ wide by 65″ long, you’ll cut a piece that is 52″ x 69″. Carefully cut your fabric. If you’re using a decorative layer, cut it to the exact same size.
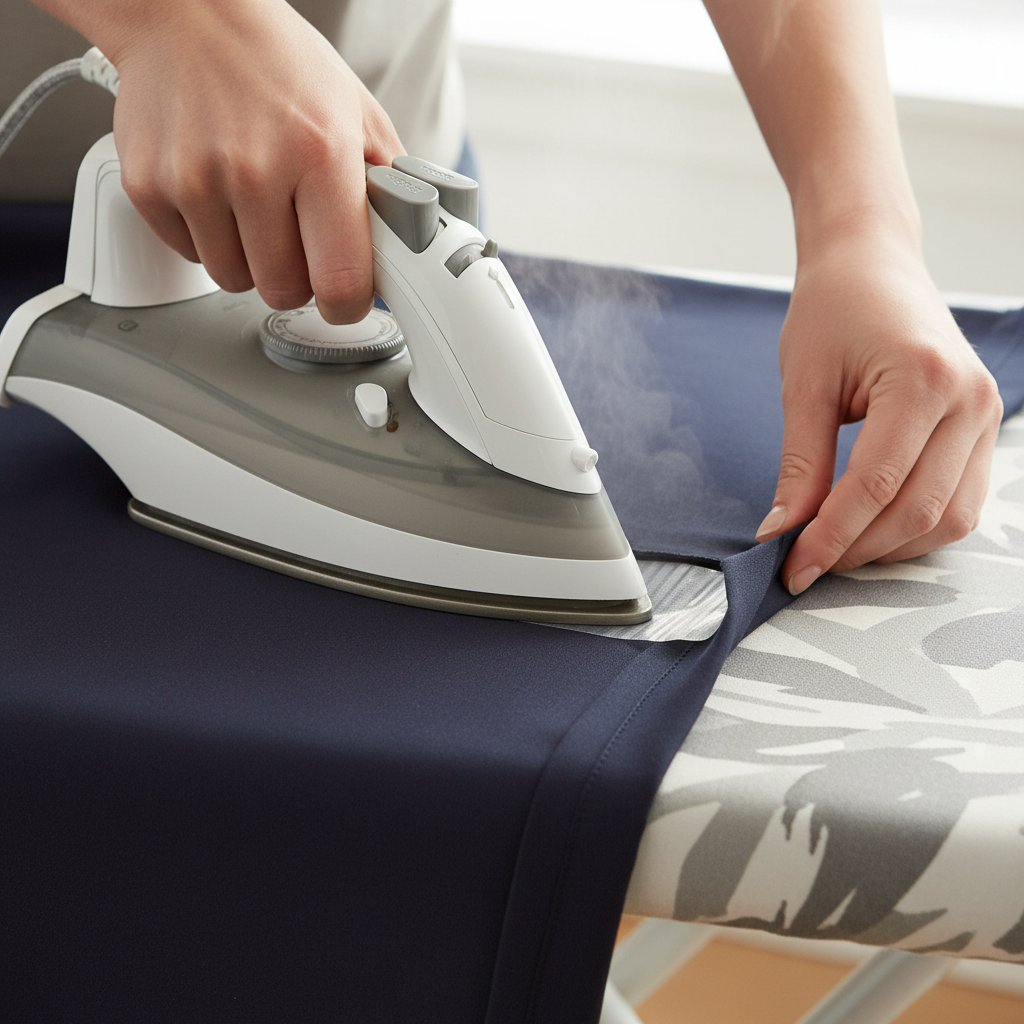
- Create the Hems: This is where the no-sew magic happens. Place your fabric face down. Fold one edge over by 2 inches and press it flat with your iron. Open the fold, lay a strip of fusible bonding web inside the crease, and fold it back over. Now, press firmly with your hot iron according to the web’s package directions. The heat will melt the adhesive and create a permanent, clean hem. Repeat this process for all four sides of your blackout fabric (and your decorative fabric, if using).
- Bond the Layers (If Applicable): If you used a second fabric, lay your blackout panel down, and place your decorative panel on top, face up. Smooth out any wrinkles. Carefully place strips of fusible web around the very edges, between the two layers of fabric. Press with your iron to bond them together into one solid, heavy-duty panel.
- Hang ‘Em High: Install your curtain rod according to its instructions. Now, take your curtain ring clips and space them out evenly along the top hem of your finished curtain panel, about 4-6 inches apart. Slide the rings onto the curtain rod. That’s it. You’re done. Step back and admire your work.
The Payoff: Cashing In on Your Comfort
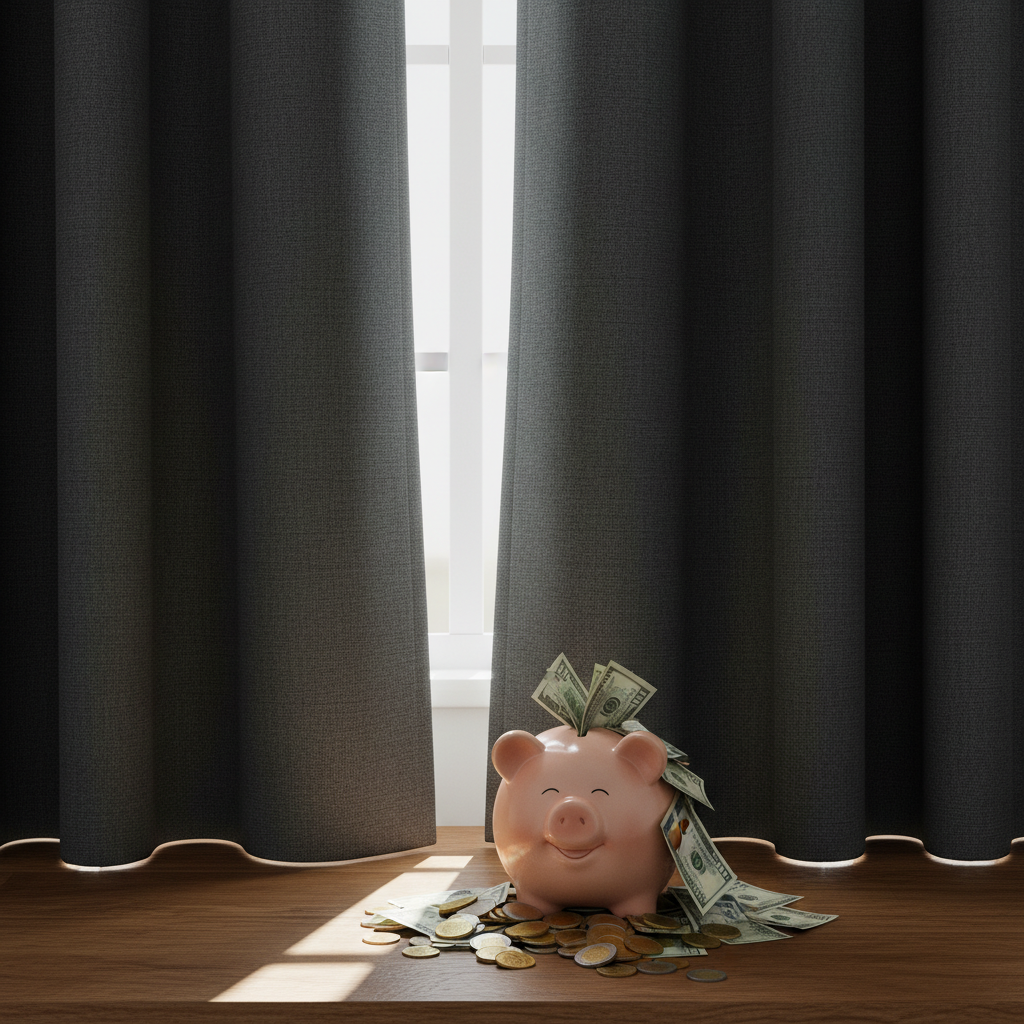
The project is done, but the benefits are just getting started. This isn’t just about a one-time savings on decor; it’s about creating a recurring dividend that pays you every month. According to the Department of Energy, curtains can reduce heat gain in the summer by up to 33% by blocking direct sunlight. In the winter, they can reduce heat loss by up to 10%.
Let’s Do the Math:
Let’s say your average summer electric bill is $200, with half of that going to your AC. That’s $100 in cooling costs. A 30% reduction in heat gain could realistically translate to a 15-20% savings on that cooling portion. Let’s be conservative and say 15%.
$100 (cooling cost) x 0.15 (15% savings) = $15 saved per month.
Over a 4-month hot season, that’s $60 back in your pocket. Add in winter savings, and you could easily be looking at $100-$150 in annual savings from insulating just a few key windows. Your initial investment of $35 on materials for one window could pay for itself in a single season. That’s what we call a smart hustle.
Conclusion
You did it. You took a common household expense and tackled it head-on. You didn’t just buy a solution; you built one. With your new no-sew blackout curtains, you’ve added style to your room, created a more comfortable living space, and, most importantly, you’ve plugged a major energy leak that was draining your bank account. This is what frugal living is all about: identifying the problem, finding a smarter and cheaper way to solve it, and empowering yourself with the skills to make it happen. Now, every time you look at those curtains, you’ll see more than just window coverings—you’ll see proof that you have the power to control your finances and build a more secure future, one smart project at a time.